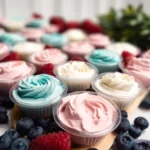
Ingredients
For the Crunchy Granola Crust:
-
Rolled Oats or Granola: 1 ½ cups. You can use your favorite store-bought granola for convenience and flavor. For a homemade, healthier crust, use old-fashioned rolled oats. For a gluten-free version, ensure your oats or granola are certified gluten-free.
-
Melted Coconut Oil or Butter: ¼ cup (55g). This acts as the binder, holding the crust together when it freezes. Unsalted butter can be used for a richer flavor, while coconut oil keeps it dairy-free.
-
Maple Syrup or Honey: 2 tablespoons. This adds a touch of sweetness and also helps bind the crust ingredients. Use maple syrup for a vegan-friendly option.
-
Optional additions: 1 tablespoon of chia seeds or ground flax seeds for an extra boost of fiber and omega-3s. A pinch of cinnamon can also add a lovely warmth.
For the Creamy Yogurt Filling:
-
Plain Greek Yogurt: 3 cups. This is the star of the show. Full-fat (5% or whole milk) Greek yogurt is highly recommended. Its high fat and protein content and lower water content result in a much creamier, less icy frozen texture. Plain, unsweetened yogurt allows you to control the sweetness and flavor.
-
Maple Syrup or Honey: ¼ cup to ⅓ cup, or to taste. Frozen treats taste less sweet than their room-temperature counterparts, so make sure the mixture is slightly sweeter than you’d normally prefer. Adjust the amount based on your preference.
-
Pure Vanilla Extract: 1 ½ teaspoons. This enhances the flavor of the yogurt and gives it a classic, dessert-like quality.
-
A pinch of Salt: Just a tiny pinch helps to balance the sweetness and bring out the other flavors.
For the Fruit Toppings & Variations:
This is where you can let your creativity shine!
-
Fresh Berries: 1 cup of mixed fresh berries, such as blueberries, sliced strawberries, raspberries, or blackberries.
-
Tropical Fruits: Diced mango, pineapple, kiwi, or passionfruit pulp.
-
Other Ideas:
-
Thinly sliced peaches or plums.
-
A swirl of peanut butter, almond butter, or seed butter.
-
A swirl of fruit jam or compote.
-
Mini chocolate chips or cacao nibs.
-
Toasted coconut flakes.
-
A sprinkle of chopped nuts or seeds (pecans, walnuts, pistachios, pumpkin seeds).
-
Instructions
Stage 1: Prepare the Muffin Tin
-
Line the Tin: Place 12 silicone or paper liners in a standard-sized muffin tin. Silicone liners are highly recommended as they make removing the frozen cups incredibly easy and are reusable. If using paper liners, choose a high-quality, greaseproof variety to minimize sticking.
Stage 2: Make and Form the Crust
-
Combine Dry Ingredients: In a medium bowl, add the granola or rolled oats. If you are using any optional additions like chia seeds, flax seeds, or cinnamon, stir them in now.
-
Add Wet Ingredients: Pour the melted coconut oil (or butter) and the maple syrup (or honey) over the dry ingredients.
-
Mix Thoroughly: Stir with a spatula or spoon until all the oats or granola are evenly coated and the mixture is slightly sticky and clumpy.
-
Press into Liners: Spoon approximately 1 to 1.5 tablespoons of the crust mixture into the bottom of each prepared muffin liner. Use the back of the spoon or your fingers to press the mixture down firmly and evenly, creating a compact base layer. A flat-bottomed shot glass or spice jar works perfectly for this task.
-
Pre-Freeze the Crust: Place the muffin tin in the freezer for 10-15 minutes while you prepare the yogurt filling. This helps the crust set up and prevents it from mixing with the yogurt layer.
Stage 3: Create the Yogurt Filling
-
Combine Ingredients: In a large bowl, combine the Greek yogurt, your desired amount of maple syrup or honey, the vanilla extract, and a tiny pinch of salt.
-
Whisk Until Smooth: Whisk everything together until the mixture is completely smooth, creamy, and uniform in consistency. Make sure there are no lumps of yogurt or streaks of sweetener.
-
Taste and Adjust: Taste the mixture. It should be pleasantly sweet. Remember, the sweetness will be slightly muted once frozen, so it’s better for it to be a touch sweeter than you think it needs to be. Add more sweetener if desired.
Stage 4: Assemble and Freeze the Cups
-
Fill the Cups: Remove the muffin tin with the chilled crusts from the freezer. Spoon or pour the yogurt filling evenly over each crust, filling each liner almost to the top. Use a small spatula to smooth the tops.
-
Add Toppings: Now for the fun part. Gently press your desired toppings into the surface of the yogurt. You can arrange berries in a pattern, add a swirl of nut butter with a toothpick, or simply sprinkle on chocolate chips and coconut flakes.
-
Freeze Until Solid: Carefully place the entire muffin tin back into the freezer. Let the cups freeze until they are completely solid. This will take at least 4 hours, but for the best results, freeze them overnight.
Stage 5: Unmolding and Storing
-
Remove from Tin: Once fully frozen, remove the muffin tin from the freezer. Gently pull on the edges of the liners to release the cups. If they are difficult to remove, let the tin sit at room temperature for 3-5 minutes to soften just slightly.
-
Store for Later: Enjoy a cup immediately! Transfer the remaining frozen yogurt cups to a freezer-safe airtight container or a large zip-top bag. It’s a good idea to place a small piece of parchment paper between layers to prevent them from sticking together. They can be stored in the freezer for up to 1 month.
Nutrition
- Serving Size: one normal portion
- Calories: 150-220