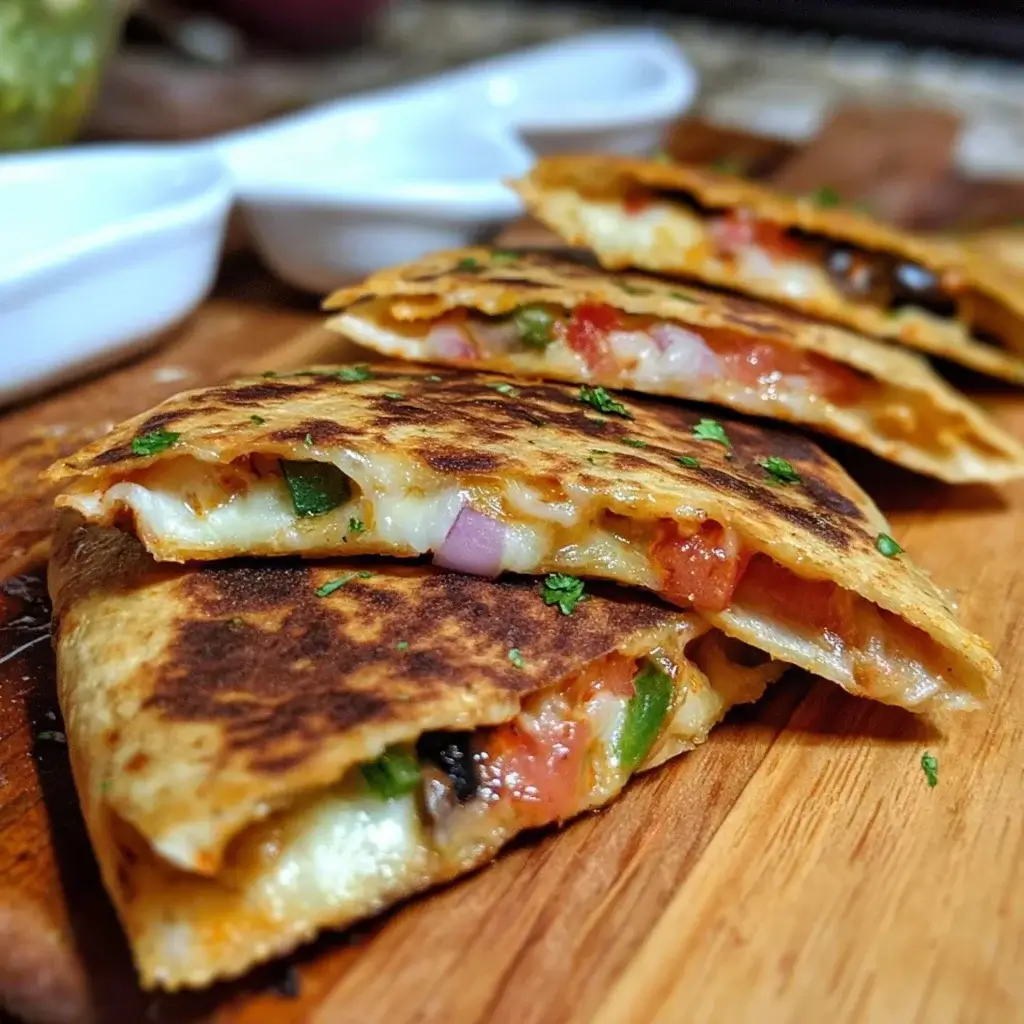

There are some culinary creations so brilliantly simple, you wonder how you ever lived without them. The Pizzadilla is one of those masterpieces. I stumbled upon this hybrid marvel on a frantic Tuesday night, a scenario familiar to any parent. The kids were chanting for pizza, my husband was craving Mexican, and I was craving a simple, one-pan meal that wouldn’t leave my kitchen in a state of disaster. With a pack of tortillas in the pantry and some leftover pizza toppings in the fridge, a lightbulb went off. What if a quesadilla and a pizza had a delicious baby? The result was an instant, roaring success. The sizzle of the buttery tortilla, the glorious “cheese pull” revealing a core of zesty marinara and pepperoni, the sheer speed of it all—it was magic. The kids were thrilled, my husband was satisfied, and I was a weeknight hero. The Pizzadilla is now a permanent fixture in our meal rotation, our go-to for movie nights, quick lunches, and satisfying late-night snacks. It’s the ultimate food hack that delivers all the comforting, cheesy joy of a pizza with the crispy, convenient form of a quesadilla.
This recipe is the perfected version of that first frantic experiment. It’s a guide to creating a perfectly sealed, non-soggy, incredibly flavorful Pizzadilla every single time. It’s more than just slapping sauce and cheese in a tortilla; it’s about the right heat, the proper layering, and the little details that elevate it from a simple snack to a truly crave-worthy meal. Prepare to discover your new favorite way to eat pizza.
The Ultimate Pizzadilla: Complete Ingredients
The beauty of the Pizzadilla lies in its simplicity and adaptability. This ingredient list covers the classic pepperoni version, but consider it a blank canvas for your favorite pizza creations.
Core Components (for 4 Pizzadillas):
- Flour Tortillas: 8 large (10-inch “burrito size”) tortillas. Flour tortillas are essential here; they are pliable, crisp up beautifully, and create the perfect “crust.”
- Butter or Olive Oil: 2-3 tablespoons, for pan-frying. Butter provides a richer flavor and beautiful browning, while olive oil offers a slightly lighter, crispier finish. A combination works wonderfully.
The “Pizza” Filling:
- Pizza Sauce or Marinara: 1 cup. Use a thick, good-quality sauce. A watery sauce is the number one enemy of a crispy Pizzadilla.
- Low-Moisture Mozzarella Cheese: 3 cups, shredded. This is crucial. Fresh mozzarella contains too much water and will make your tortillas soggy. Pre-shredded, low-moisture mozzarella is the key to that perfect, stringy cheese pull without the extra liquid.
- Pepperoni Slices: 1 cup (about 64 slices). The classic choice. Use your favorite kind, whether it’s the small, thick-cut ones that curl into “grease cups” or larger, deli-style slices.
Optional but Recommended for Serving:
- Extra Marinara Sauce, for dipping
- Ranch Dressing, for dipping
- Garlic Butter, for dipping or brushing on top
- Red Pepper Flakes
- Dried Oregano
Step-by-Step Instructions for Pizzadilla Perfection
Follow these steps carefully, paying close attention to the layering and cooking temperature. This is the secret to a Pizzadilla that’s crispy on the outside and perfectly melted on the inside.
Step 1: Prepare Your Workstation (Mise en Place)
- Gather Your Ingredients: Before you even think about turning on the stove, get everything ready. Set out your tortillas. Put your pizza sauce, shredded mozzarella, and pepperoni slices in separate bowls. This will make the assembly process quick and mess-free.
- Preheat Your Pan: Place a large non-stick skillet or a well-seasoned cast-iron pan over medium-low heat. It’s tempting to crank the heat up to speed things along, but this is the fast track to a burnt tortilla with a cold center. Low and slow is the secret.
Step 2: The Art of Assembly
This layering technique is designed to create a seal and prevent sogginess.
- Lay the Base: Place one flour tortilla flat on your work surface or a large plate.
- The Sauce Barrier: Spoon about 2-3 tablespoons of pizza sauce onto the center of the tortilla. Spread it out into an even layer, but be sure to leave a ½-inch border around the entire edge of the tortilla. This clean border is essential for a good seal.
- The First Layer of Cheese: Sprinkle about ¼ cup of the shredded mozzarella cheese evenly over the sauce.
- Add Your Toppings: Arrange a layer of pepperoni slices (about 16 slices) over the cheese. This is where you would add any other cooked toppings you desire (see FAQ for ideas).
- The “Cheese Glue”: Sprinkle another generous layer of mozzarella (about ½ cup) over the top of the pepperoni. This top layer of cheese is the most important part of the assembly. It will melt and act as the “glue” that binds the top tortilla to the fillings, creating a sealed pocket of goodness.
- Place the Lid: Top with a second flour tortilla and press down gently to flatten it slightly and help seal the edges.
Step 3: Cooking to Golden-Brown Crispy Perfection
- Butter the Pan: Add about 1 teaspoon of butter or a drizzle of olive oil to your preheated pan, swirling it to coat the bottom.
- Cook the First Side: Carefully slide the assembled Pizzadilla into the hot pan. Cook for 3-5 minutes on the first side. The heat should be gentle enough that the tortilla turns a beautiful, even golden-brown without any burnt spots, giving the cheese inside ample time to start melting. You can gently press down on the top with a spatula occasionally.
- The Flip: This can be the trickiest part. For the most foolproof method, slide the Pizzadilla out of the pan and onto a large plate. Add another teaspoon of butter to the pan. Place another plate on top of the Pizzadilla, hold the two plates together firmly, and flip them over. Then, slide the Pizzadilla back into the pan, uncooked-side down.
- Cook the Second Side: Cook for another 3-5 minutes, until the second side is equally golden-brown and crispy, and you can see that the cheese inside is fully melted and gooey.
- Repeat: Transfer the cooked Pizzadilla to a cutting board and repeat the process with the remaining ingredients.
Step 4: Rest and Serve
- Let It Rest: Just like a real pizza or a good steak, let the Pizzadilla rest on the cutting board for 1-2 minutes before slicing. This allows the molten cheese to set up slightly, so it doesn’t all ooze out the second you cut into it.
- Slice and Enjoy: Use a pizza cutter or a large, sharp knife to slice the Pizzadilla into 4 or 6 wedges. Serve immediately with your favorite dipping sauces.
Nutrition Facts
- Servings: This recipe makes 4 large Pizzadillas.
- Calories Per Serving: Approximately 600-700 calories per (one) classic pepperoni and cheese Pizzadilla.
Disclaimer: The nutritional information is an estimate and will vary widely based on the specific brands of tortillas, cheese, and sauce used, as well as the type and quantity of toppings and the amount of butter or oil used for frying.
Preparation Time
This is one of the fastest hot meals you can make, perfect for any time crunch.
- Prep Time: 5 minutes
- Cook Time: 8-10 minutes per Pizzadilla
- Total Time: Approximately 15 minutes for your first one, with subsequent ones being made while the others are eaten!
How to Serve Your Pizzadillas
Serving a Pizzadilla is all about embracing its dual identity. It’s part pizza, part quesadilla, so the serving options should reflect that!
The Dipping Sauce Station (Essential):
Set up a variety of small bowls with different dipping sauces for a fun, interactive experience.
- Classic Marinara: A small bowl of warm pizza sauce is a must-have.
- Cool Ranch Dressing: The cool, herby creaminess of ranch is the perfect counterpoint to the savory, greasy pepperoni.
- Melted Garlic Butter: Melt butter with a pinch of garlic powder and dried parsley for an insanely decadent dip reminiscent of pizza crust dippers.
- Spicy Aioli: Mix mayonnaise with sriracha and a squeeze of lime for a creamy, spicy kick.
- Pesto: A vibrant basil pesto adds a fresh, gourmet touch.
Perfect Side Dishes:
While a Pizzadilla is a meal in itself, these sides round it out nicely.
- Simple Italian Salad: A crisp salad of romaine, cherry tomatoes, and cucumber with a light vinaigrette helps cut through the richness.
- Veggie Sticks: Celery, carrot, and bell pepper sticks with ranch dip are a light and crunchy companion.
- Seasoned French Fries: Lean into the comfort food angle with a side of crispy fries.
- Caprese Skewers: Cherry tomatoes, small mozzarella balls, and fresh basil leaves on a skewer, drizzled with balsamic glaze.
5 Additional Tips for Pizzadilla Mastery
- Master the Heat Management: The single most common mistake is using heat that’s too high. A burnt tortilla with unmelted cheese is a tragedy. Start your pan on medium-low and be patient. You want the heat to slowly penetrate the layers, melting everything into a gooey center while gently crisping the exterior to a perfect golden-brown.
- The Mayo Trick for an Unbelievably Crispy Crust: For the ultimate crispy, golden, flavorful crust, try this pro-level hack. Instead of butter or oil in the pan, spread a very thin layer of mayonnaise on the outside of both tortillas before cooking. The oil and egg in the mayo create an incredibly even, brown, and shatteringly crisp crust. It sounds weird, but trust me, it’s a game-changer.
- Pre-Cook Your Toppings: The cooking time for a Pizzadilla is very short. This is not enough time to cook raw ingredients. If you want to add toppings like sausage, bacon, mushrooms, onions, or bell peppers, they must be fully cooked before being added to the assembly. Also, pat them dry with a paper towel to remove excess moisture and grease.
- Build It in the Pan: For an even easier, one-step assembly, place the bottom tortilla directly into the preheated, buttered pan. Build and layer your Pizzadilla right there. This heats the bottom tortilla while you assemble, giving you a head start on the melting process. Then, simply place the top tortilla on and proceed to the flip.
- Don’t Go Overboard with Sauce: It’s tempting to load up on sauce, but this is the primary cause of the dreaded “soggy-dilla.” A thin, even layer is all you need for that classic pizza flavor. Remember, you can (and should!) serve extra sauce on the side for dipping.
Frequently Asked Questions (FAQ)
1. Can I make Pizzadillas in an air fryer or oven?
Absolutely! Both methods are great, especially for making multiple at once.
- Air Fryer Method: Assemble the Pizzadilla as directed. Lightly spray the outside of the tortillas with cooking spray. Preheat your air fryer to 375°F (190°C). Cook for 6-8 minutes, carefully flipping halfway through, until golden and crispy.
- Oven Method: Preheat your oven to 425°F (220°C). Assemble your Pizzadillas and place them on a large baking sheet. You can either brush the tops with melted butter or spray with cooking spray. Bake for 8-12 minutes, flipping once halfway through, until the tortillas are crispy and the cheese is completely melted.
2. What are the best cheeses to use for a Pizzadilla?
Low-moisture, pre-shredded mozzarella is king for its meltability and classic pizza flavor. However, you can create amazing flavor combinations by mixing cheeses. Provolone adds a sharper, slightly tangy flavor that’s fantastic. A blend of mozzarella and cheddar gives it a classic American twist. A sprinkle of Parmesan on top of the mozzarella adds a nutty, salty bite.
3. My Pizzadilla fell apart when I flipped it. What went wrong?
This usually happens for two reasons. First, you might have overstuffed it. Too much filling makes the structure unstable. Second, you may have forgotten the crucial “cheese glue” step—the layer of cheese on top of the fillings that melts and adheres the top tortilla. Without it, there’s nothing holding the lid on.
4. Can I use corn tortillas instead of flour?
You can, but the result will be very different. Corn tortillas are less pliable and have a more distinct, grainy texture. They will create a crunchier, more tostada-like result rather than the soft-yet-crispy crust of a traditional Pizzadilla. If you use them, you may want to warm them slightly first to make them more flexible for assembly.
5. What are some other great topping combinations?
The possibilities are endless! Think of your favorite pizza and deconstruct it.
- The Supreme: Cooked Italian sausage, pepperoni, sautéed green peppers, onions, and mushrooms.
- Hawaiian: Diced Canadian bacon and pineapple chunks (pat the pineapple very dry!).
- BBQ Chicken: Use BBQ sauce instead of marinara, and fill with cooked, shredded chicken, sliced red onion, and a mix of mozzarella and cheddar.
- Veggie Lover’s: Sautéed mushrooms, spinach (squeezed very dry), roasted red peppers, and black olives.
Pizzadillas Recipe
Ingredients
Core Components (for 4 Pizzadillas):
-
Flour Tortillas: 8 large (10-inch “burrito size”) tortillas. Flour tortillas are essential here; they are pliable, crisp up beautifully, and create the perfect “crust.”
-
Butter or Olive Oil: 2-3 tablespoons, for pan-frying. Butter provides a richer flavor and beautiful browning, while olive oil offers a slightly lighter, crispier finish. A combination works wonderfully.
The “Pizza” Filling:
-
Pizza Sauce or Marinara: 1 cup. Use a thick, good-quality sauce. A watery sauce is the number one enemy of a crispy Pizzadilla.
-
Low-Moisture Mozzarella Cheese: 3 cups, shredded. This is crucial. Fresh mozzarella contains too much water and will make your tortillas soggy. Pre-shredded, low-moisture mozzarella is the key to that perfect, stringy cheese pull without the extra liquid.
-
Pepperoni Slices: 1 cup (about 64 slices). The classic choice. Use your favorite kind, whether it’s the small, thick-cut ones that curl into “grease cups” or larger, deli-style slices.
Optional but Recommended for Serving:
-
Extra Marinara Sauce, for dipping
-
Ranch Dressing, for dipping
-
Garlic Butter, for dipping or brushing on top
-
Red Pepper Flakes
-
Dried Oregano
Instructions
Step 1: Prepare Your Workstation (Mise en Place)
-
Gather Your Ingredients: Before you even think about turning on the stove, get everything ready. Set out your tortillas. Put your pizza sauce, shredded mozzarella, and pepperoni slices in separate bowls. This will make the assembly process quick and mess-free.
-
Preheat Your Pan: Place a large non-stick skillet or a well-seasoned cast-iron pan over medium-low heat. It’s tempting to crank the heat up to speed things along, but this is the fast track to a burnt tortilla with a cold center. Low and slow is the secret.
Step 2: The Art of Assembly
This layering technique is designed to create a seal and prevent sogginess.
-
Lay the Base: Place one flour tortilla flat on your work surface or a large plate.
-
The Sauce Barrier: Spoon about 2-3 tablespoons of pizza sauce onto the center of the tortilla. Spread it out into an even layer, but be sure to leave a ½-inch border around the entire edge of the tortilla. This clean border is essential for a good seal.
-
The First Layer of Cheese: Sprinkle about ¼ cup of the shredded mozzarella cheese evenly over the sauce.
-
Add Your Toppings: Arrange a layer of pepperoni slices (about 16 slices) over the cheese. This is where you would add any other cooked toppings you desire (see FAQ for ideas).
-
The “Cheese Glue”: Sprinkle another generous layer of mozzarella (about ½ cup) over the top of the pepperoni. This top layer of cheese is the most important part of the assembly. It will melt and act as the “glue” that binds the top tortilla to the fillings, creating a sealed pocket of goodness.
-
Place the Lid: Top with a second flour tortilla and press down gently to flatten it slightly and help seal the edges.
Step 3: Cooking to Golden-Brown Crispy Perfection
-
Butter the Pan: Add about 1 teaspoon of butter or a drizzle of olive oil to your preheated pan, swirling it to coat the bottom.
-
Cook the First Side: Carefully slide the assembled Pizzadilla into the hot pan. Cook for 3-5 minutes on the first side. The heat should be gentle enough that the tortilla turns a beautiful, even golden-brown without any burnt spots, giving the cheese inside ample time to start melting. You can gently press down on the top with a spatula occasionally.
-
The Flip: This can be the trickiest part. For the most foolproof method, slide the Pizzadilla out of the pan and onto a large plate. Add another teaspoon of butter to the pan. Place another plate on top of the Pizzadilla, hold the two plates together firmly, and flip them over. Then, slide the Pizzadilla back into the pan, uncooked-side down.
-
Cook the Second Side: Cook for another 3-5 minutes, until the second side is equally golden-brown and crispy, and you can see that the cheese inside is fully melted and gooey.
-
Repeat: Transfer the cooked Pizzadilla to a cutting board and repeat the process with the remaining ingredients.
Step 4: Rest and Serve
-
Let It Rest: Just like a real pizza or a good steak, let the Pizzadilla rest on the cutting board for 1-2 minutes before slicing. This allows the molten cheese to set up slightly, so it doesn’t all ooze out the second you cut into it.
-
Slice and Enjoy: Use a pizza cutter or a large, sharp knife to slice the Pizzadilla into 4 or 6 wedges. Serve immediately with your favorite dipping sauces
Nutrition
- Serving Size: one normal portion
- Calories: 600-700