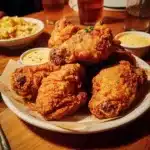
Ingredients
-
- Whole Chicken: 1 (about 3.5 – 4 lbs), cut into 8 or 9 pieces (2 breasts, 2 thighs, 2 drumsticks, 2 wings, and optionally the back, or buy pre-cut bone-in, skin-on chicken pieces). Using a whole chicken ensures a variety of textures and flavors. Bone-in, skin-on is non-negotiable for true fried chicken.
-
- Buttermilk: 2 cups. This is crucial for tenderizing the chicken and helping the flour coating adhere. Full-fat buttermilk is preferred.
-
- Hot Sauce (e.g., Tabasco or Frank’s RedHot): 1-2 tablespoons (optional, but adds a subtle tang and depth, not necessarily overt heat). Mama always added a dash!
-
- Salt: 1 tablespoon, for the brine.
-
- Black Pepper: 1 teaspoon, freshly ground, for the brine.
For the Seasoned Flour Dredge (The Crispy Coat):
-
- All-Purpose Flour: 2.5 cups. The backbone of our crispy crust.
-
- Cornstarch: 1/2 cup. This is a key ingredient for achieving an extra-crispy texture that stays crispy longer.
-
- Salt: 2 tablespoons (or to taste – remember the brine also has salt). Kosher salt is excellent here.
-
- Black Pepper: 1 tablespoon, freshly ground. Don’t skimp on the pepper.
-
- Paprika: 2 teaspoons (sweet or smoked). Adds color and a mild, sweet, or smoky flavor.
-
- Garlic Powder: 1 teaspoon. For a savory, aromatic undertone.
-
- Onion Powder: 1 teaspoon. Complements the garlic powder beautifully.
-
- Cayenne Pepper: 1/2 teaspoon (optional, or adjust to your heat preference). Adds a gentle warmth.
For Frying (The Golden Magic):
-
- Frying Oil: Approximately 4-6 cups (such as peanut oil, vegetable oil, canola oil, or shortening/lard). The amount will depend on the size of your frying vessel. Peanut oil has a high smoke point and neutral flavor, making it a popular choice. Lard or shortening imparts a traditional, rich flavor. Mama often used a combination.
-
- Important Note: You’ll need enough oil to come about halfway up the sides of the chicken pieces when they are in the pan, or enough for them to float if deep frying.
-
- Frying Oil: Approximately 4-6 cups (such as peanut oil, vegetable oil, canola oil, or shortening/lard). The amount will depend on the size of your frying vessel. Peanut oil has a high smoke point and neutral flavor, making it a popular choice. Lard or shortening imparts a traditional, rich flavor. Mama often used a combination.
Instructions
Phase 1: Brining the Chicken (Building Flavor & Tenderness) – Minimum 4 hours, ideally overnight
-
- Prepare the Chicken: If you’ve bought a whole chicken, cut it into 8 or 9 pieces (2 breast halves, 2 thighs, 2 drumsticks, 2 wings, and optionally, the back cut into pieces for flavor or reserved for stock). Pat the chicken pieces dry with paper towels.
-
- Make the Buttermilk Brine: In a large bowl, whisk together the buttermilk, 1 tablespoon of salt, 1 teaspoon of black pepper, and the optional hot sauce until well combined.
-
- Brine the Chicken: Add the chicken pieces to the buttermilk brine, ensuring each piece is fully submerged. If necessary, add a little more buttermilk. Cover the bowl tightly with plastic wrap.
-
- Refrigerate: Place the brining chicken in the refrigerator for at least 4 hours, but preferably overnight (up to 24 hours). The longer it brines, the more tender and flavorful it will be. This step is crucial for juicy results.
Phase 2: Dredging the Chicken (Creating the Crispy Crust) – About 30 minutes before frying
-
- Prepare the Dredging Station: In a large shallow dish (like a pie plate or a casserole dish) or a large, sturdy ziplock bag, whisk together the all-purpose flour, cornstarch, 2 tablespoons of salt, 1 tablespoon of black pepper, paprika, garlic powder, onion powder, and optional cayenne pepper until thoroughly combined. This is your seasoned flour dredge.
-
- Remove Chicken from Brine: Take the chicken pieces out of the buttermilk brine one at a time, allowing any excess buttermilk to drip off. Do not rinse the chicken. The buttermilk clinging to the chicken will help the flour adhere. Place the chicken pieces on a separate plate or wire rack.
-
- First Dredge: Working with one piece of chicken at a time, place it in the seasoned flour mixture. Turn to coat all sides thoroughly, pressing the flour gently onto the chicken to help it stick. Shake off any excess flour.
-
- Optional “Wet” Step for Thicker Crust (Mama’s Trick): For an even thicker, shaggier crust, you can briefly dip the flour-coated chicken piece back into the remaining buttermilk brine (or a separate small bowl of buttermilk if your brine is too depleted), then immediately dredge it again in the seasoned flour. This double dredge creates more nooks and crannies for ultimate crispiness.
-
- Rest the Coated Chicken: Place the coated chicken pieces on a clean wire rack set over a baking sheet. Let the chicken sit at room temperature for at least 20-30 minutes before frying. This resting period allows the coating to hydrate and adhere better to the chicken, preventing it from falling off during frying. The coating will look slightly pasty – this is good!
Phase 3: Frying the Chicken (Achieving Golden Perfection)
-
- Prepare for Frying: Set up your wire rack over a baking sheet near the stove for draining the cooked chicken.
-
- Heat the Oil: Pour your chosen frying oil into your heavy-bottomed skillet or Dutch oven to a depth of about 1 to 1.5 inches (enough so the chicken will be about halfway submerged, or fully submerged if you’re truly deep-frying in a larger vessel). Attach a deep-fry thermometer to the side of the pan, ensuring the tip is submerged in oil but not touching the bottom. Heat the oil over medium-high heat until it reaches 325-350°F (160-175°C). Mama often used a “test” piece of bread or a pinch of flour – if it sizzled vigorously and turned golden quickly, the oil was ready, but a thermometer is more precise.
-
- Fry in Batches: Carefully place a few pieces of chicken into the hot oil using tongs, skin-side down first if pan-frying. Do NOT overcrowd the pan! Overcrowding will lower the oil temperature significantly, resulting in greasy, unevenly cooked chicken. Leave ample space between pieces. You’ll likely need to fry in 2-3 batches depending on the size of your pan and chicken pieces.
-
- Maintain Oil Temperature: Adjust the heat as needed to maintain a consistent oil temperature between 300-325°F (150-160°C) once the chicken is added. If the oil gets too hot, the crust will burn before the chicken is cooked through. If it’s too cool, the chicken will absorb too much oil and become greasy.
-
- Cook and Turn:
-
- For pan-frying (oil halfway up): Fry for about 6-8 minutes on the first side, until the crust is a deep golden brown and crispy. Using tongs, carefully flip the chicken pieces and cook for another 6-8 minutes on the second side.
-
- Larger pieces like breasts and thighs will take longer than smaller pieces like wings. Breasts may take 10-12 minutes per side, while wings might be done in 5-6 minutes per side.
-
- Cook and Turn:
-
- Check for Doneness: The chicken is cooked through when the internal temperature reaches 165°F (74°C) in the thickest part of each piece (avoiding the bone). The juices should run clear when pierced with a knife. The crust should be beautifully golden brown and very crispy.
-
- Drain and Season Immediately: As each batch of chicken is cooked, remove it from the oil using tongs, allowing any excess oil to drip back into the pan. Immediately place the chicken on the prepared wire rack to drain. While the chicken is still hot, sprinkle it lightly with a tiny pinch more salt if desired (Mama always did this!). This helps the final seasoning stick.
-
- Repeat with Remaining Chicken: Allow the oil to return to 325-350°F before adding the next batch of chicken. Skim out any loose bits of browned coating from the oil between batches using a fine-mesh sieve to prevent them from burning and imparting a bitter taste to subsequent batches.
Nutrition
- Serving Size: one normal portion
- Calories: 350-500