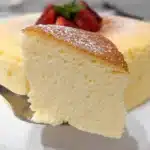
Ingredients
For the Cream Cheese Batter:
This is the foundation of your cheesecake, providing the signature tangy flavor and creamy base.
-
Cream Cheese: 250g (about 8.8 oz) – Use full-fat, block-style cream cheese, not the whipped or spreadable kind. The quality of your cream cheese directly impacts the final flavor and richness. Bring it to room temperature for smooth, lump-free mixing.
-
Unsalted Butter: 60g (about 4 tablespoons) – This adds richness and moisture. Again, using it at room temperature will help it incorporate seamlessly.
-
Whole Milk: 100ml (about 6.75 tablespoons or 1/3 cup + 1 tbsp) – Provides necessary liquid and contributes to the soft, creamy texture. Full-fat milk is recommended.
-
Large Egg Yolks: 6 – These are the heart of the custard base, providing richness, color, and structure. Separate your eggs while they are cold, as the yolks are less likely to break, but let the yolks come to room temperature before using.
-
Cake Flour: 60g (about 1/2 cup) – Cake flour has a lower protein content than all-purpose flour, which is crucial for achieving the ultra-fine, tender crumb characteristic of this cake.
-
Cornstarch: 20g (about 2.5 tablespoons) – Cornstarch helps stabilize the cake, giving it a bit more structure and preventing it from being too delicate to handle. It also contributes to the velvety texture.
-
Vanilla Extract: 1 teaspoon – A high-quality vanilla extract enhances the subtle flavors of the cream cheese and egg.
-
Salt: 1/4 teaspoon – A small amount of salt is essential to balance the sweetness and bring out all the other flavors.
For the Meringue:
The meringue is the soul of the cheesecake, responsible for its incredible lightness, volume, and that famous jiggle.
-
Large Egg Whites: 6 – The whites from the same eggs as the yolks. Ensure they are at room temperature and that there is absolutely no trace of yolk in them, as any fat will prevent the whites from whipping to their full volume.
-
Granulated Sugar: 130g (about 2/3 cup) – Provides sweetness and, more importantly, stabilizes the egg whites, creating a strong and glossy meringue.
-
Cream of Tartar: 1/4 teaspoon – This is an acid that helps stabilize the egg whites, making them easier to whip and less likely to collapse. You can substitute it with an equal amount of lemon juice if needed.
Instructions
Step 1: Preparation is Everything
-
Prepare Your Pan: Take an 8-inch (20cm) round cake pan that is at least 3 inches (7.5cm) tall. To create a seamless liner, cut a long strip of parchment paper that is tall enough to extend about 1-2 inches above the rim of the pan. Lightly grease the inside of the pan with butter and press this parchment strip against the sides. Cut a round piece of parchment to fit the bottom of the pan and place it inside. The parchment sling makes it easy to lift the delicate cake out later.
-
Waterproof Your Pan: The cake will be baked in a water bath (bain-marie), so it’s critical to prevent water from seeping into your pan. Take a large, wide sheet of heavy-duty aluminum foil (or two sheets of regular foil) and carefully wrap the outside of the cake pan, ensuring there are no tears. The foil should come up the sides of the pan. This is a crucial step to avoid a soggy bottom.
-
Preheat Your Oven: Position a rack in the lower third of your oven. Place a larger roasting pan (big enough to hold your 8-inch cake pan) on the rack. Preheat your oven to a high temperature of 400°F (200°C). We will lower this temperature later.
Step 2: Creating the Cream Cheese Batter
-
Melt the Base: In a medium-sized, heatproof bowl set over a saucepan of simmering water (a double boiler), combine the room-temperature cream cheese, butter, and milk. Whisk constantly but gently until the mixture is completely melted, smooth, and lump-free. It should look like a silky, pale-yellow sauce. Remove the bowl from the heat and let it cool slightly for about 5-10 minutes.
-
Incorporate the Yolks: Once the cream cheese mixture has cooled down a bit (so it doesn’t scramble the eggs), whisk in the 6 egg yolks, vanilla extract, and salt until fully combined. The mixture should be smooth and homogenous.
-
Sift in the Dry Ingredients: Place a fine-mesh sieve over the bowl and sift the cake flour and cornstarch directly into the cream cheese mixture. Sifting is non-negotiable; it aerates the flour and removes lumps, which is essential for a smooth texture. Gently whisk until the flour is just combined. Be careful not to overmix at this stage. Scrape down the sides of the bowl and set the batter aside.
Step 3: Whipping the Perfect Meringue
-
Start Whipping: In a large, impeccably clean, and dry mixing bowl (glass or metal is best), place your 6 room-temperature egg whites and the cream of tartar. Using an electric hand mixer or a stand mixer with the whisk attachment, begin whipping on medium-low speed until the whites become foamy and opaque.
-
Add Sugar Gradually: Once foamy, increase the mixer speed to medium-high. Start adding the granulated sugar, one tablespoon at a time, while the mixer is running. This slow addition allows the sugar to dissolve properly and creates a stable, strong meringue.
-
Whip to Soft Peaks: Continue whipping until the meringue is glossy, thick, and has reached the soft peak stage. This is the most critical part of the recipe. To check, lift the whisk out of the meringue. The peak that forms should hold its shape but the tip should gently curl over, like a soft bird’s beak. If you overwhip to stiff peaks (where the peak stands straight up), the cake is more likely to rise too quickly and then crack and collapse. A soft peak meringue provides lift while remaining flexible.
Step 4: Folding the Batter and Meringue
-
Lighten the Batter: Take about one-third of your finished meringue and add it to the bowl of cream cheese batter. Use a spatula to fold it in gently. This first addition is for “sacrificing” – its purpose is to lighten the dense cheese batter, making it easier to incorporate the rest of the meringue without deflating it.
-
Fold in the Rest: Pour the lightened cheese batter into the remaining meringue in the large bowl. Now, using a large spatula, carefully fold the two mixtures together. Use a “cut and fold” motion: cut down through the center of the mixture with the spatula, scrape along the bottom of the bowl, and then fold it over the top. Rotate the bowl a quarter turn and repeat. Continue this gentle motion just until the batter is uniform in color and no white streaks of meringue remain. Be patient and deliberate to preserve as much air as possible.
Step 5: The Baking Process (Bain-Marie)
-
Fill the Pan: Pour the finished batter into your prepared and waterproofed cake pan. Tap the pan gently on the counter a few times to release any large air bubbles that may be trapped.
-
Set Up the Water Bath: Carefully place the cake pan inside the larger roasting pan that is already in your preheated oven. Pull the oven rack out slightly. Carefully pour boiling or very hot water into the larger roasting pan until it comes about 1-1.5 inches up the sides of your cake pan. Do not let any water splash into the batter.
-
Bake and Reduce Heat: Immediately close the oven door and reduce the oven temperature to 320°F (160°C). Bake for 25 minutes.
-
Second Bake: After 25 minutes, reduce the oven temperature again to 285°F (140°C) without opening the oven door. Continue to bake for another 55-60 minutes. The cake is done when the top is golden brown, and a wooden skewer inserted into the center comes out with a few moist crumbs attached (not wet batter). The cake will have risen significantly and should have a slight jiggle.
Step 6: The Crucial Cooling Process
-
Cool in the Oven: Once the baking time is complete, turn the oven off completely. Prop the oven door open slightly with a wooden spoon and let the cheesecake cool inside the oven for 1 hour. This slow, gradual cooling is the secret to preventing the cake from collapsing or shrinking dramatically.
-
Cool at Room Temperature: After an hour in the oven, carefully remove the cake pan from the water bath and place it on a wire rack. Let it cool to room temperature, which will take another 1-2 hours.
-
Chill: Once completely cool, cover the pan with plastic wrap and transfer it to the refrigerator. Chill for at least 4 hours, or preferably overnight. Chilling sets the cake’s structure and deepens its flavor. Do not attempt to slice it before it is fully chilled.
-
Unmold and Serve: When ready to serve, carefully remove the foil from the pan. Run a thin knife around the edge if needed, then gently lift the cake out using the parchment paper sling. Peel away the parchment and place the cake on a serving platter.
Nutrition
- Serving Size: one normal portion
- Calories: 280-330 kcal