Ingredients
Scale
-
- Fresh Jalapeño Peppers: 10-12 medium-sized fresh jalapeños. Look for firm, smooth-skinned peppers without blemishes.
-
- All-Purpose Flour: 1 ½ cups (about 180g), divided. This forms the base of our dry dredges.
-
- Cornmeal: ½ cup (about 60g) fine or medium-grind yellow cornmeal. This is crucial for adding that signature gritty crunch.
-
- Seasonings:
-
- 1 ½ teaspoons salt (adjust to taste, especially if using salted buttermilk)
-
- 1 teaspoon garlic powder
-
- 1 teaspoon onion powder
-
- ½ teaspoon smoked paprika (adds color and smoky depth)
-
- ¼ – ½ teaspoon cayenne pepper (optional, for extra heat)
-
- ½ teaspoon black pepper (freshly ground preferred)
-
- Seasonings:
-
- Eggs: 2 large eggs.
-
- Milk or Buttermilk: ½ cup (120ml). Buttermilk adds a pleasant tang that complements the jalapeños, but regular milk works fine.
-
- Frying Oil: Approximately 4-6 cups (1-1.5 liters) of neutral oil with a high smoke point. Vegetable, canola, peanut, or safflower oil are excellent choices. The exact amount depends on the size of your frying pot; you need enough for the jalapeños to float freely without touching the bottom (about 2-3 inches deep).
-
- Dipping Sauce (Essential!):
-
- Classic Ranch Dressing: Store-bought or homemade.
-
- Simple Creamy Cilantro-Lime Dip (Recipe Idea):
-
- ½ cup mayonnaise
-
- ½ cup sour cream or Greek yogurt
-
- ¼ cup chopped fresh cilantro
-
- 1 tablespoon lime juice
-
- 1 clove garlic, minced (or ¼ tsp garlic powder)
-
- Salt and pepper to taste
-
- Simple Creamy Cilantro-Lime Dip (Recipe Idea):
-
- Other options: Blue cheese dressing, spicy mayo (mayo + sriracha), avocado crema.
-
- Dipping Sauce (Essential!):
Instructions
Phase 1: Preparation (Mise en Place)
-
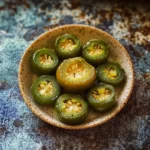
- Prepare Jalapeños: Put on gloves! Wash the jalapeños thoroughly. Slice them crosswise into uniform rings, about ¼-inch thick. Decide on your heat level: remove the seeds and white membranes for milder caps, or leave them intact for more heat. Discard the stems. Pat the jalapeño slices gently with paper towels to remove excess surface moisture – this helps the coating adhere better. Set aside.
-
- Set Up Dredging Stations: You’ll need three shallow dishes or pie plates large enough to hold the jalapeño rings comfortably.
-
- Dish 1 (First Dry Dredge): Combine ½ cup (60g) of the all-purpose flour with ½ teaspoon of salt and ¼ teaspoon of black pepper. Whisk briefly to combine.
-
- Dish 2 (Wet Batter): In the second dish, whisk together the 2 large eggs and the ½ cup of milk or buttermilk until smooth and well combined.
-
- Dish 3 (Final Crispy Coating): In the third dish, combine the remaining 1 cup (120g) of all-purpose flour, the ½ cup (60g) of cornmeal, the remaining 1 teaspoon of salt, 1 teaspoon garlic powder, 1 teaspoon onion powder, ½ teaspoon smoked paprika, ½ teaspoon black pepper, and the optional ¼ – ½ teaspoon cayenne pepper. Whisk thoroughly to ensure the seasonings and cornmeal are evenly distributed.
-
- Set Up Dredging Stations: You’ll need three shallow dishes or pie plates large enough to hold the jalapeño rings comfortably.
-
- Prepare Dipping Sauce: If making a homemade dipping sauce (like the Cilantro-Lime Dip suggested), prepare it now so the flavors have time to meld. Cover and refrigerate until ready to serve.
-
- Heat the Frying Oil: Pour the frying oil into a heavy-bottomed pot (like a Dutch oven or large saucepan) to a depth of at least 2-3 inches. Attach a deep-fry thermometer to the side of the pot, ensuring the tip is submerged in oil but not touching the bottom. Heat the oil over medium-high heat until it reaches a steady temperature of 350°F – 375°F (175°C – 190°C). Maintaining this temperature is crucial for crispy, non-greasy results. If you don’t have a thermometer, test the oil by dropping a tiny amount of batter into it. It should sizzle immediately and float to the top, turning golden in about 30-60 seconds. If it browns too quickly, the oil is too hot; if it sinks or bubbles lazily, it’s too cool.
-
- Prepare Landing Zone: Set up a wire rack over a baking sheet or line a large plate with paper towels. This is where the cooked bottle caps will drain.
Phase 2: Coating the Jalapeños
-
- Work in Batches: To avoid soggy coating, it’s best to coat the jalapeños just before frying them. Work with a manageable amount at a time (about 10-15 slices).
-
- First Dredge: Take a handful of jalapeño slices and toss them in the first dish (seasoned flour). Shake off any excess flour. This dry layer helps the wet batter stick.
-
- Wet Batter: Transfer the flour-dusted slices to the second dish (egg/milk mixture). Turn them over with a fork or tongs to ensure they are fully coated. Allow any excess batter to drip off for a second or two.
-
- Final Coating: Immediately transfer the wet slices to the third dish (cornmeal/flour mixture). Toss them gently but thoroughly, pressing the coating mixture onto the slices with your fingertips to ensure it adheres well all over. Make sure the entire surface and the inside ring are coated.
-
- Rest Briefly (Optional but Recommended): Place the coated jalapeño rings in a single layer on a plate or baking sheet. Letting them sit for 5-10 minutes before frying can help the coating set and adhere better during the frying process. Repeat coating process with remaining jalapeños as needed for your first frying batch.
Phase 3: Frying to Golden Perfection
-
- Fry in Batches: Once the oil is at the correct temperature (350°F – 375°F), carefully lower a single layer of coated jalapeño rings into the hot oil using a spider strainer or tongs. Do not overcrowd the pot! Frying too many at once will drastically lower the oil temperature, resulting in greasy, soggy bottle caps. Fry only enough so they can float freely without touching.
-
- Cook Until Golden: Fry for approximately 2-4 minutes per side, turning occasionally with the spider strainer or tongs for even browning. They should be a deep golden brown color and look crispy. The exact time will depend on the oil temperature and the thickness of your slices.
-
- Monitor Oil Temperature: Keep an eye on the thermometer throughout the frying process. Adjust the stove heat as needed to maintain the target temperature range. Allow the oil to return to temperature between batches.
-
- Drain: Once golden brown and crispy, carefully remove the jalapeño bottle caps from the hot oil using the spider strainer or tongs, allowing excess oil to drip back into the pot for a moment.
-
- Transfer to Rack/Paper Towels: Transfer the cooked bottle caps to the prepared wire rack or paper towel-lined plate to drain any remaining excess oil. A wire rack is generally preferred as it allows air to circulate underneath, keeping the bottom crispier.
-
- Season Immediately (Optional): If desired, sprinkle the hot bottle caps lightly with a little extra salt immediately after removing them from the oil.
-
- Repeat: Continue coating and frying the remaining jalapeño slices in batches, ensuring the oil returns to the proper temperature each time.
Phase 4: Serving
-
- Serve Hot: Jalapeño Bottle Caps are undeniably best served immediately while they are hot, crispy, and the cheese (if you imagined cheese, though this recipe doesn’t include it) or pepper interior is warm.
-
- Plate and Serve: Pile the hot, crispy bottle caps into a serving basket or bowl (lined with paper if desired) and serve alongside your chosen dipping sauce(s).
Nutrition
- Serving Size: one normal portion
- Calories: 300 - 450