

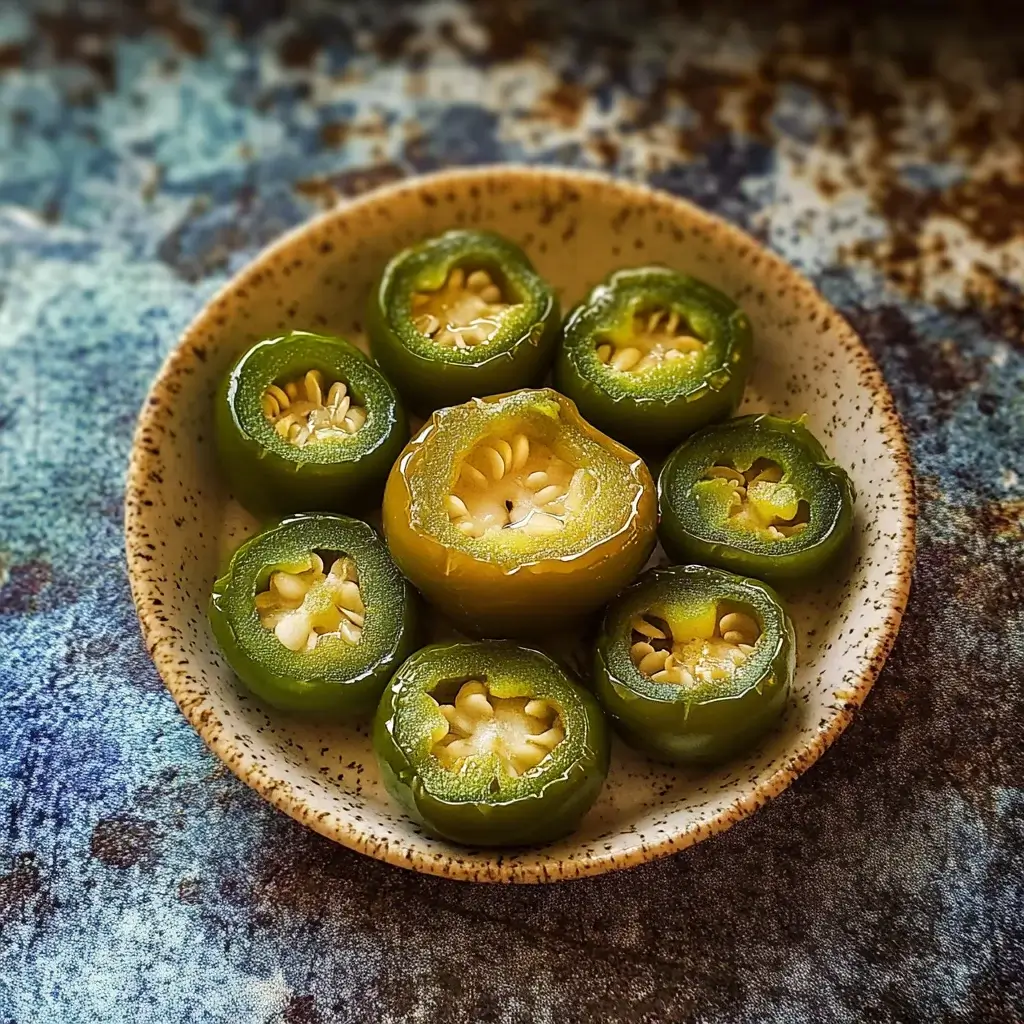

If there’s one appetizer that consistently disappears lightning-fast at any gathering I host, it’s these homemade Jalapeño Bottle Caps. The first time I encountered them wasn’t in my own kitchen, but at a local pub known for its slightly-too-loud music and surprisingly good bar food. They arrived piled high in a basket, radiating heat, golden brown and impossibly crispy. One bite, dipped generously in cool ranch dressing, and I was hooked. That fiery kick from the jalapeño, tempered just enough by the crunchy coating and the creamy dip – it was pure appetizer perfection. I knew immediately I had to recreate them at home. My initial attempts were okay, but getting that perfect balance of heat, crunch, and coating that actually stayed on took some trial and error. When I finally nailed this version, the reaction from my family and friends was immediate validation. They’re crunchy, zesty, undeniably addictive, and have just the right amount of heat to keep things interesting without overwhelming the palate (unless you want them to!). Forget the frozen bagged versions; making these fresh takes them to a whole new level. They’ve become our go-to for game days, movie nights, or anytime we crave something satisfyingly spicy and crunchy. Fair warning: make a double batch, because they will vanish quickly.
Ingredients for Crispy Jalapeño Bottle Caps
Gathering the right ingredients is the first step towards achieving that perfect crispy, spicy bite. This recipe uses common pantry staples alongside fresh jalapeños for maximum flavor and crunch. Quantities below yield a generous appetizer portion, roughly serving 4-6 people.
- Fresh Jalapeño Peppers: 10-12 medium-sized fresh jalapeños. Look for firm, smooth-skinned peppers without blemishes.
- All-Purpose Flour: 1 ½ cups (about 180g), divided. This forms the base of our dry dredges.
- Cornmeal: ½ cup (about 60g) fine or medium-grind yellow cornmeal. This is crucial for adding that signature gritty crunch.
- Seasonings:
- 1 ½ teaspoons salt (adjust to taste, especially if using salted buttermilk)
- 1 teaspoon garlic powder
- 1 teaspoon onion powder
- ½ teaspoon smoked paprika (adds color and smoky depth)
- ¼ – ½ teaspoon cayenne pepper (optional, for extra heat)
- ½ teaspoon black pepper (freshly ground preferred)
- Eggs: 2 large eggs.
- Milk or Buttermilk: ½ cup (120ml). Buttermilk adds a pleasant tang that complements the jalapeños, but regular milk works fine.
- Frying Oil: Approximately 4-6 cups (1-1.5 liters) of neutral oil with a high smoke point. Vegetable, canola, peanut, or safflower oil are excellent choices. The exact amount depends on the size of your frying pot; you need enough for the jalapeños to float freely without touching the bottom (about 2-3 inches deep).
- Dipping Sauce (Essential!):
- Classic Ranch Dressing: Store-bought or homemade.
- Simple Creamy Cilantro-Lime Dip (Recipe Idea):
- ½ cup mayonnaise
- ½ cup sour cream or Greek yogurt
- ¼ cup chopped fresh cilantro
- 1 tablespoon lime juice
- 1 clove garlic, minced (or ¼ tsp garlic powder)
- Salt and pepper to taste
- Other options: Blue cheese dressing, spicy mayo (mayo + sriracha), avocado crema.
Ingredient Notes & Variations:
- Jalapeño Prep: The heat level is controlled here. For milder “bottle caps,” carefully remove the white membranes and seeds before slicing. For maximum heat, leave them in! Wear gloves when handling jalapeños to avoid burning your skin or eyes. Slice into uniform rings, about ¼-inch thick. Thicker slices may require slightly longer frying.
- Flour: Standard all-purpose flour works best. You could experiment with gluten-free blends, but the texture might vary.
- Cornmeal: Don’t skip this! It provides a distinct textural element. If you only have coarse grind, it will work, but fine or medium is generally preferred for better coating. White cornmeal can also be used.
- Seasonings: Feel free to adjust! Add chili powder, cumin, or even a pinch of celery salt. If you like things very spicy, increase the cayenne or add finely minced habanero to the batter (with extreme caution!).
- Milk/Buttermilk: Buttermilk reacts slightly with the flour to create a tender interior and tangy flavor profile. If you don’t have buttermilk, you can make a quick substitute by adding ½ tablespoon of white vinegar or lemon juice to ½ cup of regular milk and letting it sit for 5 minutes.
- Oil Choice: Using an oil with a high smoke point prevents the oil from burning and imparting a bitter taste before the jalapeños are properly cooked and browned. Reusing oil is possible if filtered properly, but fresh oil yields the best results.
Step-by-Step Instructions
Follow these instructions carefully to achieve perfectly coated, crispy, golden brown Jalapeño Bottle Caps every time. Setting up your dredging station properly is key to a smooth process.
Phase 1: Preparation (Mise en Place)
- Prepare Jalapeños: Put on gloves! Wash the jalapeños thoroughly. Slice them crosswise into uniform rings, about ¼-inch thick. Decide on your heat level: remove the seeds and white membranes for milder caps, or leave them intact for more heat. Discard the stems. Pat the jalapeño slices gently with paper towels to remove excess surface moisture – this helps the coating adhere better. Set aside.
- Set Up Dredging Stations: You’ll need three shallow dishes or pie plates large enough to hold the jalapeño rings comfortably.
- Dish 1 (First Dry Dredge): Combine ½ cup (60g) of the all-purpose flour with ½ teaspoon of salt and ¼ teaspoon of black pepper. Whisk briefly to combine.
- Dish 2 (Wet Batter): In the second dish, whisk together the 2 large eggs and the ½ cup of milk or buttermilk until smooth and well combined.
- Dish 3 (Final Crispy Coating): In the third dish, combine the remaining 1 cup (120g) of all-purpose flour, the ½ cup (60g) of cornmeal, the remaining 1 teaspoon of salt, 1 teaspoon garlic powder, 1 teaspoon onion powder, ½ teaspoon smoked paprika, ½ teaspoon black pepper, and the optional ¼ – ½ teaspoon cayenne pepper. Whisk thoroughly to ensure the seasonings and cornmeal are evenly distributed.
- Prepare Dipping Sauce: If making a homemade dipping sauce (like the Cilantro-Lime Dip suggested), prepare it now so the flavors have time to meld. Cover and refrigerate until ready to serve.
- Heat the Frying Oil: Pour the frying oil into a heavy-bottomed pot (like a Dutch oven or large saucepan) to a depth of at least 2-3 inches. Attach a deep-fry thermometer to the side of the pot, ensuring the tip is submerged in oil but not touching the bottom. Heat the oil over medium-high heat until it reaches a steady temperature of 350°F – 375°F (175°C – 190°C). Maintaining this temperature is crucial for crispy, non-greasy results. If you don’t have a thermometer, test the oil by dropping a tiny amount of batter into it. It should sizzle immediately and float to the top, turning golden in about 30-60 seconds. If it browns too quickly, the oil is too hot; if it sinks or bubbles lazily, it’s too cool.
- Prepare Landing Zone: Set up a wire rack over a baking sheet or line a large plate with paper towels. This is where the cooked bottle caps will drain.
Phase 2: Coating the Jalapeños
- Work in Batches: To avoid soggy coating, it’s best to coat the jalapeños just before frying them. Work with a manageable amount at a time (about 10-15 slices).
- First Dredge: Take a handful of jalapeño slices and toss them in the first dish (seasoned flour). Shake off any excess flour. This dry layer helps the wet batter stick.
- Wet Batter: Transfer the flour-dusted slices to the second dish (egg/milk mixture). Turn them over with a fork or tongs to ensure they are fully coated. Allow any excess batter to drip off for a second or two.
- Final Coating: Immediately transfer the wet slices to the third dish (cornmeal/flour mixture). Toss them gently but thoroughly, pressing the coating mixture onto the slices with your fingertips to ensure it adheres well all over. Make sure the entire surface and the inside ring are coated.
- Rest Briefly (Optional but Recommended): Place the coated jalapeño rings in a single layer on a plate or baking sheet. Letting them sit for 5-10 minutes before frying can help the coating set and adhere better during the frying process. Repeat coating process with remaining jalapeños as needed for your first frying batch.
Phase 3: Frying to Golden Perfection
- Fry in Batches: Once the oil is at the correct temperature (350°F – 375°F), carefully lower a single layer of coated jalapeño rings into the hot oil using a spider strainer or tongs. Do not overcrowd the pot! Frying too many at once will drastically lower the oil temperature, resulting in greasy, soggy bottle caps. Fry only enough so they can float freely without touching.
- Cook Until Golden: Fry for approximately 2-4 minutes per side, turning occasionally with the spider strainer or tongs for even browning. They should be a deep golden brown color and look crispy. The exact time will depend on the oil temperature and the thickness of your slices.
- Monitor Oil Temperature: Keep an eye on the thermometer throughout the frying process. Adjust the stove heat as needed to maintain the target temperature range. Allow the oil to return to temperature between batches.
- Drain: Once golden brown and crispy, carefully remove the jalapeño bottle caps from the hot oil using the spider strainer or tongs, allowing excess oil to drip back into the pot for a moment.
- Transfer to Rack/Paper Towels: Transfer the cooked bottle caps to the prepared wire rack or paper towel-lined plate to drain any remaining excess oil. A wire rack is generally preferred as it allows air to circulate underneath, keeping the bottom crispier.
- Season Immediately (Optional): If desired, sprinkle the hot bottle caps lightly with a little extra salt immediately after removing them from the oil.
- Repeat: Continue coating and frying the remaining jalapeño slices in batches, ensuring the oil returns to the proper temperature each time.
Phase 4: Serving
- Serve Hot: Jalapeño Bottle Caps are undeniably best served immediately while they are hot, crispy, and the cheese (if you imagined cheese, though this recipe doesn’t include it) or pepper interior is warm.
- Plate and Serve: Pile the hot, crispy bottle caps into a serving basket or bowl (lined with paper if desired) and serve alongside your chosen dipping sauce(s).
Nutritional Information (Approximate)
Providing exact nutritional information for deep-fried foods is challenging due to variations in oil absorption, ingredient brands, and serving sizes. The following is an estimate per serving, assuming the recipe yields 5 servings and does not include the dipping sauce.
- Servings: Approximately 5 appetizer-sized servings.
- Calories Per Serving (Approximate): 300 – 450 calories.
Breakdown Factors:
- Oil Absorption: Deep frying inherently adds significant calories and fat. The amount absorbed depends on oil temperature, frying time, and coating thickness. Proper frying temperature (350-375°F) minimizes oil absorption.
- Coating: Flour, cornmeal, and eggs contribute carbohydrates, protein, and some calories.
- Jalapeños: Very low in calories, provide vitamins (especially C) and capsaicin.
- Dipping Sauce: Can add significant calories, fat, and sodium depending on the type and amount used (e.g., Ranch vs. a light yogurt dip).
Key Takeaway: Jalapeño Bottle Caps are an indulgent appetizer. While delicious, they are high in calories and fat due to the deep-frying process. Enjoy them in moderation as part of a balanced diet. Serving with lighter dipping sauces or plenty of fresh veggie sticks alongside can help balance the indulgence.
Preparation Time Breakdown
Understanding the time involved helps plan when to make these crowd-pleasers. While not overly complex, the multi-step process requires some dedicated time.
- Active Prep Time: 20 – 30 minutes (Slicing jalapeños – wear gloves!, setting up dredging stations, preparing dipping sauce).
- Coating Time: 10 – 15 minutes (Working in batches to coat the jalapeño slices). The optional resting time adds 5-10 minutes (inactive).
- Oil Heating Time: 10 – 15 minutes (Depending on your stove and pot).
- Frying Time (Active): 15 – 25 minutes (Frying in batches, typically 3-5 batches, 4-6 minutes per batch, plus time for oil to recover temperature).
- Total Active Time: Approximately 45 – 70 minutes.
- Total Time (Including Oil Heating & Resting): Approximately 60 – 90 minutes.
Key Takeaway: While the active frying takes time due to batch cooking, the overall process is manageable. Plan for about an hour to an hour and a half from starting prep to serving the first hot batch. The hands-on nature makes it a fun weekend or party cooking project.
How to Serve Your Jalapeño Bottle Caps
Serving these crispy delights correctly enhances the experience. Hot, crunchy, and paired with the right dip is the name of the game!
- Temperature is Key:
- Serve immediately after frying. They are at their absolute peak when piping hot and ultra-crispy. The texture degrades as they cool.
- Presentation:
- Basket or Bowl: Pile them high in a casual basket lined with food-safe paper (like parchment or checkered deli paper) for a classic pub feel. A simple bowl works too.
- Platter: Arrange them on a platter surrounding small bowls of dipping sauces.
- Dipping Sauces (Crucial!): Offer at least one, preferably two, contrasting cool and creamy dips to balance the heat:
- Cool & Creamy:
- Classic Ranch Dressing (the undisputed champion for many)
- Blue Cheese Dressing (offers a tangy funk)
- Avocado Crema or Guacamole-inspired dip
- Sour Cream or Greek Yogurt Dip (plain or seasoned)
- Creamy Cilantro-Lime Dip (as suggested in ingredients)
- Spicy Boost (Optional):
- Spicy Mayo (Sriracha Mayo, Chipotle Mayo)
- Queso Dip (though potentially overwhelming)
- Cool & Creamy:
- Beverage Pairings: Cold beverages complement the heat and richness:
- Beer: Cold lagers, pilsners, Pale Ales, or even IPAs cut through the richness and cool the palate.
- Wine: Crisp, acidic white wines like Sauvignon Blanc or Pinot Grigio. A dry sparkling wine can also work.
- Cocktails: Margaritas (classic pairing with jalapeño!), Ranch Water, or a simple Vodka Soda with lime.
- Non-Alcoholic: Cold Lemonade, Iced Tea, Sparkling Water with lime.
- Occasions: Perfect for:
- Game Day Spreads
- Casual Parties & Get-Togethers
- BBQ Sides or Appetizers
- Movie Nights
- As a starter for Tex-Mex or pub-style meals
- Garnish (Optional): A sprinkle of finely chopped fresh cilantro or parsley over the finished pile adds a touch of green freshness.
Remember, the goal is immediate consumption for maximum enjoyment of that addictive heat and crunch!
Additional Tips for Perfect Jalapeño Bottle Caps
Mastering homemade fried jalapeños comes down to a few key details. These tips will help you achieve restaurant-quality results every time.
- Control the Heat Level: Don’t underestimate the power of jalapeño membranes and seeds! For truly mild bottle caps suitable for sensitive palates, meticulously remove all white pith and seeds. For a noticeable but manageable kick, remove most but leave a little. For fiery caps, leave them intact. Additionally, a classic trick (though less common now) is to soak the raw jalapeño slices in milk or buttermilk for 30 minutes before patting dry and coating; this is believed to draw out some capsaicin, mellowing the heat. Always wear gloves during prep!
- Maximize Crispiness & Coating Adhesion: Several factors contribute to crunch:
- Pat Slices Dry: Excess moisture prevents the first flour layer from sticking, compromising the entire coating.
- Don’t Skip Steps: The flour -> egg -> final coating sequence is crucial. Each layer helps the next one adhere.
- Press Coating Firmly: Gently but firmly press the final cornmeal/flour mixture onto the wet batter to ensure it sticks well.
- Use Cornmeal: It provides a superior, grittier crunch compared to flour alone. Panko breadcrumbs can be partially substituted in the final dredge for a different kind of crispiness, but cornmeal is classic for “bottle caps.”
- Maintain Oil Temp: Frying below 350°F leads to oil absorption and sogginess. Frying too high burns the outside before the inside cooks. Use a thermometer!
- Don’t Overcrowd: This lowers oil temp dramatically. Fry in small batches.
- Drain Properly: Use a wire rack so air circulates, preventing the bottoms from steaming and getting soggy.
- Oil Temperature Management is Non-Negotiable: This is arguably the most critical factor in deep frying. Invest in a deep-fry thermometer. Keep the oil consistently between 350°F and 375°F (175°C – 190°C). Check the temperature frequently and adjust the heat source as needed. Allow the oil temperature to recover fully between batches (it will drop when you add the cooler food). This ensures the coating cooks quickly and seals, minimizing oil absorption and maximizing crispness.
- Safety First with Hot Oil: Always exercise caution when deep frying. Use a heavy-bottomed pot on a stable surface. Fill it no more than halfway with oil to prevent dangerous boil-overs. Lower food into the oil gently using tongs or a spider strainer to avoid splashing. Never leave hot oil unattended. Have a lid or baking sheet nearby to smother potential flames (NEVER use water on an oil fire). Let the oil cool completely before attempting to discard or store it.
- Best Served Fresh (Reheating Tips): Jalapeño Bottle Caps are truly best eaten within minutes of frying. They lose their signature crispness quickly. If you must reheat leftovers:
- Avoid the Microwave: This will make them irredeemably soggy and rubbery.
- Best Method: Air Fryer: Reheat at around 350-375°F for 3-5 minutes until heated through and re-crisped.
- Second Best: Oven/Toaster Oven: Spread in a single layer on a baking sheet and reheat at 375-400°F for 5-8 minutes, watching closely to prevent burning. They won’t be quite as good as fresh, but significantly better than microwaved. Making them fresh is always the superior choice.
By keeping these pro tips in mind, particularly regarding temperature control and coating techniques, you’ll be well on your way to frying up batches of perfectly crispy, addictive Jalapeño Bottle Caps.
Frequently Asked Questions (FAQ)
Here are answers to some common questions about making homemade Jalapeño Bottle Caps:
1. How can I make the Jalapeño Bottle Caps less spicy?
- Answer: You have several effective methods to control the heat:
- Remove Seeds and Membranes: This is the most crucial step. The white pith (membrane) and seeds contain most of the capsaicin, the compound responsible for the heat. Carefully scrape them out using a small spoon or paring knife (while wearing gloves!).
- Soak in Milk/Buttermilk: Soaking the raw jalapeño slices in milk or buttermilk for about 30 minutes before patting them dry and proceeding with the recipe is an old trick believed to help draw out some of the capsaicin, resulting in a milder flavor.
- Choose Milder Peppers: While jalapeños are standard, you could substitute naturally milder peppers like Anaheim peppers or even mini sweet peppers (though the flavor profile will change significantly). Banana peppers offer a tangy alternative with less heat.
- Rely on the Dip: Serve with an extra cooling and creamy dip like ranch or a simple sour cream dip to counteract the heat with each bite.
2. Can I make these in an air fryer or bake them instead of deep frying?
- Answer: Yes, you can adapt this recipe for baking or air frying, but be realistic about the results. They will not achieve the same level of deep, uniform crispiness and golden color as deep-fried versions.
- Air Fryer Method: Preheat your air fryer to 380°F-400°F (190°C-200°C). Follow the coating steps as written. Spray the coated jalapeño rings generously on both sides with cooking oil spray. Arrange in a single layer in the air fryer basket (work in batches, don’t overcrowd). Air fry for 8-12 minutes, flipping halfway through, until golden brown and crispy to your liking. They tend to be a bit drier than deep-fried.
- Baking Method: Preheat your oven to 425°F (220°C). Follow the coating steps. Place a wire rack inside a baking sheet and spray the rack with oil. Arrange the coated rings in a single layer on the oiled rack (this allows air circulation for crispier results). Spray the tops generously with cooking oil spray. Bake for 15-25 minutes, flipping once halfway, until golden and crispy. Baking generally yields the least crispy result compared to frying or air frying.
3. What’s the best oil to use for deep frying Jalapeño Bottle Caps?
- Answer: The best oils for deep frying have a high smoke point (the temperature at which the oil starts to break down and smoke) and a neutral flavor. Excellent choices include:
- Peanut Oil: High smoke point (around 450°F) and relatively neutral flavor. A classic choice for deep frying. (Be mindful of nut allergies).
- Canola Oil: High smoke point (around 400°F) and very neutral flavor. Widely available and affordable.
- Vegetable Oil (Soybean): Generally a blend with a reasonably high smoke point (around 400-450°F) and neutral taste.
- Safflower Oil: High smoke point (around 450-500°F) and clean flavor.
- Corn Oil: High smoke point (around 450°F), slightly more distinct flavor than canola.
- Avoid oils with low smoke points like extra virgin olive oil or unrefined oils, as they will burn and taste bitter at frying temperatures.
4. My coating keeps falling off! What am I doing wrong?
- Answer: This is a common frustration! Here are the likely culprits and solutions:
- Jalapeños Too Wet: Ensure you pat the raw jalapeño slices dry before starting the coating process. Moisture prevents the first flour layer from adhering.
- Skipping Dredging Steps: The three-step process (dry-wet-dry) is designed for maximum adhesion. Don’t skip any steps.
- Not Pressing Coating: Gently but firmly press the final dry coating mixture onto the wet batter to help it stick securely.
- Oil Temperature Too Low: If the oil isn’t hot enough, the coating takes too long to set and can absorb oil and fall off easily. Ensure oil is 350-375°F.
- Oil Temperature Too High: If the oil is excessively hot, the outside can cook and detach before the inner layers properly set.
- Overcrowding the Pot: This drastically lowers oil temperature, leading to the problems mentioned above. Fry in small batches.
- Agitating Too Much: Be gentle when lowering them into the oil and turning them. Excessive movement can dislodge the coating.
5. Can I use pickled jalapeños instead of fresh ones?
- Answer: Yes, you can use jarred, pickled jalapeño slices (“tamed” or regular heat) to make bottle caps. This is a popular shortcut and offers a different flavor profile – tangier and often less intensely spicy due to the pickling process. Crucially, you MUST drain them extremely well and pat them very thoroughly dry with paper towels before coating. Excess pickling brine will absolutely prevent the coating from sticking and can cause dangerous splattering in the hot oil. The texture might be slightly softer than using fresh jalapeños. Follow the same coating and frying procedure.
Jalapeño Bottle Caps recipe
Ingredients
-
- Fresh Jalapeño Peppers: 10-12 medium-sized fresh jalapeños. Look for firm, smooth-skinned peppers without blemishes.
-
- All-Purpose Flour: 1 ½ cups (about 180g), divided. This forms the base of our dry dredges.
-
- Cornmeal: ½ cup (about 60g) fine or medium-grind yellow cornmeal. This is crucial for adding that signature gritty crunch.
-
- Seasonings:
-
- 1 ½ teaspoons salt (adjust to taste, especially if using salted buttermilk)
-
- 1 teaspoon garlic powder
-
- 1 teaspoon onion powder
-
- ½ teaspoon smoked paprika (adds color and smoky depth)
-
- ¼ – ½ teaspoon cayenne pepper (optional, for extra heat)
-
- ½ teaspoon black pepper (freshly ground preferred)
-
- Seasonings:
-
- Eggs: 2 large eggs.
-
- Milk or Buttermilk: ½ cup (120ml). Buttermilk adds a pleasant tang that complements the jalapeños, but regular milk works fine.
-
- Frying Oil: Approximately 4-6 cups (1-1.5 liters) of neutral oil with a high smoke point. Vegetable, canola, peanut, or safflower oil are excellent choices. The exact amount depends on the size of your frying pot; you need enough for the jalapeños to float freely without touching the bottom (about 2-3 inches deep).
-
- Dipping Sauce (Essential!):
-
- Classic Ranch Dressing: Store-bought or homemade.
-
- Simple Creamy Cilantro-Lime Dip (Recipe Idea):
-
- ½ cup mayonnaise
-
- ½ cup sour cream or Greek yogurt
-
- ¼ cup chopped fresh cilantro
-
- 1 tablespoon lime juice
-
- 1 clove garlic, minced (or ¼ tsp garlic powder)
-
- Salt and pepper to taste
-
- Simple Creamy Cilantro-Lime Dip (Recipe Idea):
-
- Other options: Blue cheese dressing, spicy mayo (mayo + sriracha), avocado crema.
-
- Dipping Sauce (Essential!):
Instructions
Phase 1: Preparation (Mise en Place)
-
- Prepare Jalapeños: Put on gloves! Wash the jalapeños thoroughly. Slice them crosswise into uniform rings, about ¼-inch thick. Decide on your heat level: remove the seeds and white membranes for milder caps, or leave them intact for more heat. Discard the stems. Pat the jalapeño slices gently with paper towels to remove excess surface moisture – this helps the coating adhere better. Set aside.
-
- Set Up Dredging Stations: You’ll need three shallow dishes or pie plates large enough to hold the jalapeño rings comfortably.
-
- Dish 1 (First Dry Dredge): Combine ½ cup (60g) of the all-purpose flour with ½ teaspoon of salt and ¼ teaspoon of black pepper. Whisk briefly to combine.
-
- Dish 2 (Wet Batter): In the second dish, whisk together the 2 large eggs and the ½ cup of milk or buttermilk until smooth and well combined.
-
- Dish 3 (Final Crispy Coating): In the third dish, combine the remaining 1 cup (120g) of all-purpose flour, the ½ cup (60g) of cornmeal, the remaining 1 teaspoon of salt, 1 teaspoon garlic powder, 1 teaspoon onion powder, ½ teaspoon smoked paprika, ½ teaspoon black pepper, and the optional ¼ – ½ teaspoon cayenne pepper. Whisk thoroughly to ensure the seasonings and cornmeal are evenly distributed.
-
- Set Up Dredging Stations: You’ll need three shallow dishes or pie plates large enough to hold the jalapeño rings comfortably.
-
- Prepare Dipping Sauce: If making a homemade dipping sauce (like the Cilantro-Lime Dip suggested), prepare it now so the flavors have time to meld. Cover and refrigerate until ready to serve.
-
- Heat the Frying Oil: Pour the frying oil into a heavy-bottomed pot (like a Dutch oven or large saucepan) to a depth of at least 2-3 inches. Attach a deep-fry thermometer to the side of the pot, ensuring the tip is submerged in oil but not touching the bottom. Heat the oil over medium-high heat until it reaches a steady temperature of 350°F – 375°F (175°C – 190°C). Maintaining this temperature is crucial for crispy, non-greasy results. If you don’t have a thermometer, test the oil by dropping a tiny amount of batter into it. It should sizzle immediately and float to the top, turning golden in about 30-60 seconds. If it browns too quickly, the oil is too hot; if it sinks or bubbles lazily, it’s too cool.
-
- Prepare Landing Zone: Set up a wire rack over a baking sheet or line a large plate with paper towels. This is where the cooked bottle caps will drain.
Phase 2: Coating the Jalapeños
-
- Work in Batches: To avoid soggy coating, it’s best to coat the jalapeños just before frying them. Work with a manageable amount at a time (about 10-15 slices).
-
- First Dredge: Take a handful of jalapeño slices and toss them in the first dish (seasoned flour). Shake off any excess flour. This dry layer helps the wet batter stick.
-
- Wet Batter: Transfer the flour-dusted slices to the second dish (egg/milk mixture). Turn them over with a fork or tongs to ensure they are fully coated. Allow any excess batter to drip off for a second or two.
-
- Final Coating: Immediately transfer the wet slices to the third dish (cornmeal/flour mixture). Toss them gently but thoroughly, pressing the coating mixture onto the slices with your fingertips to ensure it adheres well all over. Make sure the entire surface and the inside ring are coated.
-
- Rest Briefly (Optional but Recommended): Place the coated jalapeño rings in a single layer on a plate or baking sheet. Letting them sit for 5-10 minutes before frying can help the coating set and adhere better during the frying process. Repeat coating process with remaining jalapeños as needed for your first frying batch.
Phase 3: Frying to Golden Perfection
-
- Fry in Batches: Once the oil is at the correct temperature (350°F – 375°F), carefully lower a single layer of coated jalapeño rings into the hot oil using a spider strainer or tongs. Do not overcrowd the pot! Frying too many at once will drastically lower the oil temperature, resulting in greasy, soggy bottle caps. Fry only enough so they can float freely without touching.
-
- Cook Until Golden: Fry for approximately 2-4 minutes per side, turning occasionally with the spider strainer or tongs for even browning. They should be a deep golden brown color and look crispy. The exact time will depend on the oil temperature and the thickness of your slices.
-
- Monitor Oil Temperature: Keep an eye on the thermometer throughout the frying process. Adjust the stove heat as needed to maintain the target temperature range. Allow the oil to return to temperature between batches.
-
- Drain: Once golden brown and crispy, carefully remove the jalapeño bottle caps from the hot oil using the spider strainer or tongs, allowing excess oil to drip back into the pot for a moment.
-
- Transfer to Rack/Paper Towels: Transfer the cooked bottle caps to the prepared wire rack or paper towel-lined plate to drain any remaining excess oil. A wire rack is generally preferred as it allows air to circulate underneath, keeping the bottom crispier.
-
- Season Immediately (Optional): If desired, sprinkle the hot bottle caps lightly with a little extra salt immediately after removing them from the oil.
-
- Repeat: Continue coating and frying the remaining jalapeño slices in batches, ensuring the oil returns to the proper temperature each time.
Phase 4: Serving
-
- Serve Hot: Jalapeño Bottle Caps are undeniably best served immediately while they are hot, crispy, and the cheese (if you imagined cheese, though this recipe doesn’t include it) or pepper interior is warm.
-
- Plate and Serve: Pile the hot, crispy bottle caps into a serving basket or bowl (lined with paper if desired) and serve alongside your chosen dipping sauce(s).
Nutrition
- Serving Size: one normal portion
- Calories: 300 – 450


