Ingredients
Scale
-
- For the Gluten-Free Graham Cracker Crust:
-
- 2 cups (approx. 220-240g) gluten-free graham cracker crumbs (from about 20–24 full gluten-free graham cracker sheets)
-
- ¼ cup (50g) granulated sugar (optional, depending on the sweetness of your graham crackers)
-
- ½ cup (113g or 1 stick) unsalted butter, melted
-
- For the Gluten-Free Graham Cracker Crust:
-
- For the Chocolate Layer:
-
- 1 ½ cups (255g) semi-sweet chocolate chips (or milk chocolate chips, or chopped chocolate bars, or a mix)
-
- Optional: ½ cup additional chocolate chips if you like an extra thick chocolate layer.
-
- For the Chocolate Layer:
- Alternatively: About 30-40 large marshmallows, can be cut in half if preferred for more even coverage.
- For the Marshmallow Topping:
-
- 1 bag (10 ounces or approx. 280g) mini marshmallows
- Alternatively: About 30-40 large marshmallows, can be cut in half if preferred for more even coverage.
-
- For the Marshmallow Topping:
-
- 1 bag (10 ounces or approx. 280g) mini marshmallows
- Alternatively: About 30-40 large marshmallows, can be cut in half if preferred for more even coverage.
-
- For the Marshmallow Topping:
-
- 1 bag (10 ounces or approx. 280g) mini marshmallows
- Alternatively: About 30-40 large marshmallows, can be cut in half if preferred for more even coverage.
-
- For the Marshmallow Topping:
-
- 1 bag (10 ounces or approx. 280g) mini marshmallows
- Alternatively: About 30-40 large marshmallows, can be cut in half if preferred for more even coverage.
-
Instructions
Step 1: Preheat Oven and Prepare Pan
-
- Preheat your oven to 350°F (175°C).
-
- Line a 9×13 inch baking pan with parchment paper, leaving an overhang on at least two opposite sides. This overhang will act as “handles” to easily lift the bars out of the pan once cooled, making slicing much neater. Lightly grease the parchment paper or spray with non-stick cooking spray if desired, though often not necessary with a buttery crust.
Step 2: Make the Gluten-Free Graham Cracker Crust
-
- Prepare Crumbs: If you don’t have pre-made gluten-free graham cracker crumbs, make them now. Place gluten-free graham cracker sheets into a food processor and pulse until they form fine crumbs. Alternatively, place them in a sturdy ziplock bag, seal it, and crush them with a rolling pin or the bottom of a heavy glass. You need 2 cups of crumbs.
-
- Combine Crust Ingredients: In a medium mixing bowl, combine the gluten-free graham cracker crumbs and the optional granulated sugar (use if your graham crackers are not very sweet or you prefer a sweeter crust).
-
- Add Butter: Pour the melted unsalted butter over the crumb mixture. Stir with a fork or spatula until all the crumbs are moistened and the mixture resembles wet sand.
-
- Press into Pan: Transfer the crumb mixture to the prepared 9×13 inch baking pan. Press the crumbs firmly and evenly into the bottom of the pan using the bottom of a measuring cup, a flat-bottomed glass, or your clean hands. Ensure an even layer.
-
- Pre-bake Crust (Optional but Recommended): For a crispier crust, pre-bake it for 8-10 minutes at 350°F (175°C), or until it’s lightly golden and fragrant. If you prefer a slightly softer crust, you can skip this pre-baking step.
Step 3: Add the Chocolate Layer
-
- Remove the pan from the oven if you pre-baked the crust.
-
- Sprinkle the chocolate chips (or chopped chocolate) evenly over the warm or unbaked crust. Spread them out to cover the entire surface.
Step 4: Add the Marshmallow Topping
-
- Scatter the mini marshmallows evenly over the chocolate layer, creating a generous, full blanket of marshmallows. If using large marshmallows, you can arrange them in neat rows or cut them in half horizontally for better coverage and easier melting. Try to cover the chocolate as completely as possible.
Step 5: Bake the Bars
-
- Return the pan to the preheated oven (or place it in if you didn’t pre-bake the crust).
-
- Bake for 12-18 minutes, or until the marshmallows are puffed up, soft, and beautifully golden brown on top. Keep a very close eye on them during the last few minutes, as marshmallows can go from perfectly toasted to burnt very quickly, especially under a broiler element if your oven has one on top. If they are browning too quickly before the chocolate is fully melted, you can loosely tent the pan with foil.
Step 6: Cool Completely (Crucial for Slicing!)
-
- Remove the pan from the oven and place it on a wire rack to cool completely. This is a very important step! The bars need to cool for at least 1-2 hours at room temperature, or even longer, for the chocolate to set and the marshmallows to firm up enough for clean slicing.
-
- For even neater slices, once mostly cool, you can chill the bars in the refrigerator for about 30-60 minutes before cutting.
Step 7: Slice and Serve
-
- Once the bars are completely cooled and set, use the parchment paper overhangs to carefully lift the entire slab out of the baking pan and onto a cutting board.
-
- Using a large, sharp knife, cut the slab into squares or rectangles. Wiping the knife clean with a damp, warm cloth between cuts can help make cleaner slices, especially if the marshmallow is still a bit sticky.
-
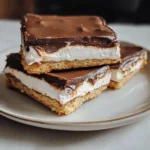
- Serve and enjoy your delicious homemade Gluten-Free S’mores Bars!
Nutrition
- Serving Size: one normal portion
- Calories: 180-250