

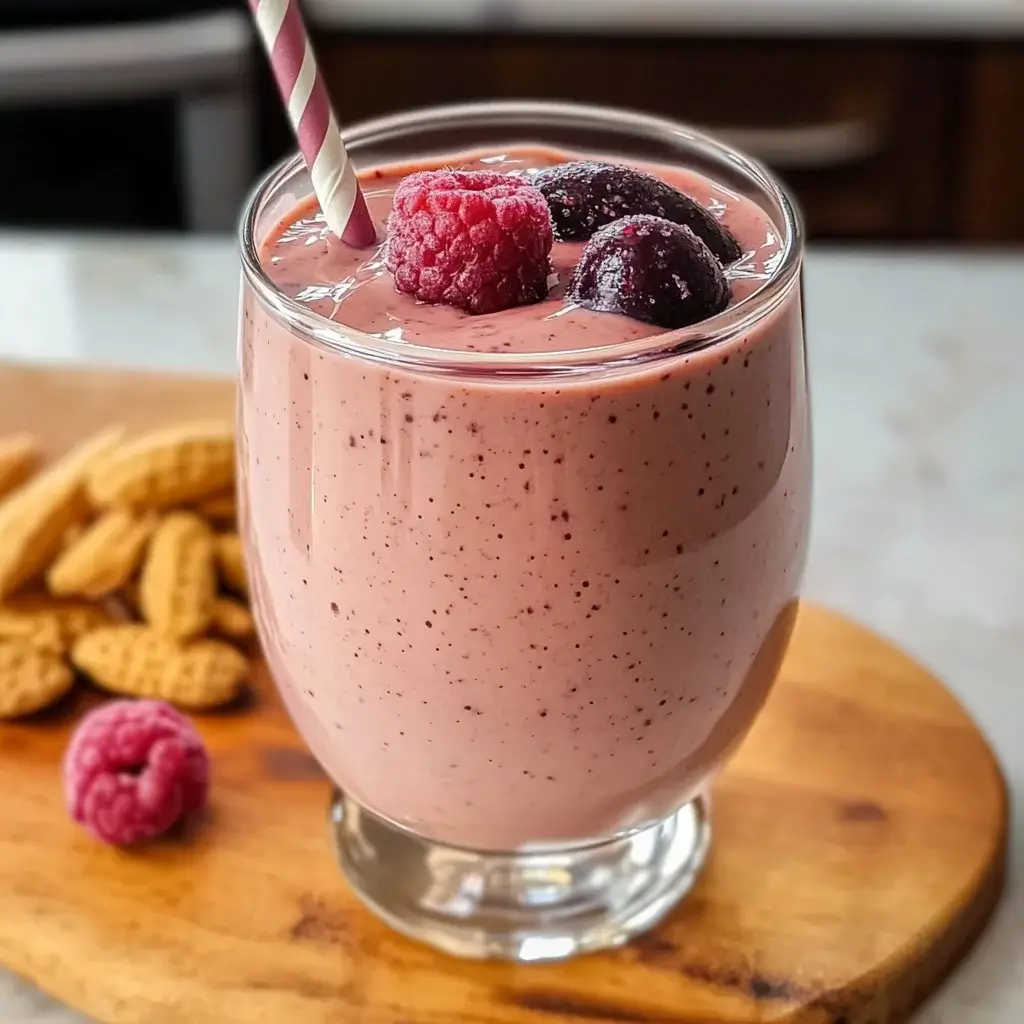

The classic peanut butter and jelly sandwich is more than just a lunchbox staple; it’s a time machine. One bite can transport you back to the school cafeteria, to summer picnics, to the simple, comforting flavors of childhood. I’ve always been chasing that perfect balance of salty, nutty, sweet, and fruity in more “grown-up” ways, but nothing ever quite hit the mark. That is, until I decided to stop fighting it and embrace the nostalgia head-on, but in a glass. My first attempt at a Peanut Butter and Jelly Smoothie was a revelation. I was worried it would be too sweet or heavy, but the result was a creamy, perfectly balanced, and surprisingly refreshing drink. The rich, savory flavor of the peanut butter grounded the bright, tangy sweetness of the strawberries, all smoothed out by a creamy base that made it feel utterly decadent. It instantly became my go-to breakfast, my favorite post-workout refuel, and the one “healthy” treat my kids will ask for by name. This smoothie isn’t just a blended drink; it’s pure, unadulterated comfort, bottled up and ready in five minutes.
Why a PB&J Smoothie is More Than Just Nostalgia
The magic of the Peanut Butter and Jelly Smoothie lies in its brilliant deception. It tastes like a wonderfully indulgent treat, but it’s secretly a nutritionally balanced powerhouse. This is where childhood cravings meet adult wellness goals, creating a harmony that’s hard to beat.
At its core, the flavor profile is a masterclass in balance. The peanut butter provides a deep, savory, nutty flavor and a dose of healthy monounsaturated fats and protein. This rich base is the perfect counterpart to the “jelly” component, typically made from frozen strawberries or mixed berries. The berries bring a bright, tangy sweetness and a touch of acidity that cuts through the richness of the peanut butter, preventing the smoothie from feeling heavy. They are also packed with fiber and powerful antioxidants.
When these two stars are blended with a creamy base like Greek yogurt or a banana, the transformation is complete. It becomes a satisfying, well-rounded meal in a glass that can keep you feeling full and energized for hours. It’s the perfect solution for a myriad of situations: a lightning-fast breakfast for chaotic mornings, a protein-packed recovery drink after a workout, a healthy and appealing snack for kids, or a satisfying answer to a late-night sweet craving. It’s the ultimate proof that you don’t have to sacrifice flavor for nutrition.
The Anatomy of the Perfect Peanut Butter and Jelly Smoothie: A Deep Dive into the Ingredients
The simplicity of this smoothie is one of its greatest strengths, but understanding the role of each component will allow you to perfect it to your exact taste. This isn’t just a recipe; it’s a formula for success.
The Peanut Butter: The Savory Soul
This is the grounding element of the smoothie. The type you choose matters.
- Best Choice: A natural, unsweetened peanut butter where the only ingredients are peanuts and salt. This gives you the purest nutty flavor and avoids the added sugars and hydrogenated oils found in many conventional brands.
- Creamy vs. Crunchy: Creamy is the standard choice for the smoothest possible texture. However, if you love texture and have a high-powered blender, crunchy peanut butter can leave tiny, pleasant flecks throughout the smoothie.
The “Jelly”: The Fruity Heart
This is where the bright, sweet, and tangy notes come from.
- The Classic: Frozen strawberries are the go-to choice for an authentic “strawberry jelly” flavor. Using frozen fruit is non-negotiable for a thick, frosty smoothie without using ice, which waters down the flavor.
- The Variations: Don’t be afraid to experiment! Frozen raspberries will give you a tarter, seedier (in a good way) experience reminiscent of raspberry jam. A frozen mixed berry blend (strawberries, raspberries, blueberries, blackberries) creates a complex, deep berry flavor akin to a mixed fruit preserve.
The Creamy Base: The Silky Body
This component turns the smoothie from a simple blended drink into a rich, milkshake-like experience.
- Greek Yogurt: This is a fantastic choice for adding a protein boost and a subtle tang that balances the sweetness. It also contributes to an incredibly creamy texture.
- Banana: Using half of a ripe, frozen banana is a secret weapon. It adds natural sweetness (reducing the need for other sweeteners), incredible creaminess, and a dose of potassium.
- Milk: This is your liquid, essential for getting everything to blend. Almond milk is a popular choice for its neutral flavor. Oat milk will make the smoothie even creamier, while regular dairy milk works perfectly well.
Complete Ingredients for the Ultimate PB&J Smoothie
This recipe is designed to be a perfectly balanced starting point. Feel free to adjust the components to your liking. This recipe yields 2 medium or 1 large, meal-sized smoothie.
- Frozen Strawberries: 1 ½ cups (or frozen mixed berries)
- Natural Peanut Butter: 2 tablespoons, creamy or crunchy
- Plain Greek Yogurt: ½ cup (optional, but recommended for creaminess and protein)
- Ripe Banana: ½, preferably frozen for extra thickness
- Milk of Choice: 1 cup (almond, oat, dairy, etc. Add more if needed for blending)
- Optional Add-ins:
- Honey or Maple Syrup: 1 teaspoon (only if your fruit isn’t very sweet)
- Chia Seeds or Flax Seeds: 1 tablespoon (for extra fiber and omega-3s)
- Vanilla Protein Powder: 1 scoop (to turn this into a serious post-workout meal)
Step-by-Step Instructions: From Blender to Bliss
For the smoothest results, the order in which you add ingredients to the blender matters. Following this method will help your blender work more efficiently.
Step 1: Layer the Liquids and Soft Ingredients
Pour the 1 cup of milk into the bottom of your blender canister. Add the Greek yogurt and the peanut butter. If you’re using a fresh (not frozen) banana, add it now. Placing liquids at the bottom helps create a vortex that pulls the frozen ingredients down into the blades.
Step 2: Add the Frozen Fruit
Add the frozen strawberries and the ½ frozen banana (if using) on top of the liquid and soft ingredients.
Step 3: Add Any Dry Ingredients
If you are using optional add-ins like chia seeds, flax seeds, or protein powder, sprinkle them on top of the frozen fruit.
Step 4: Blend Until Velvety Smooth
Secure the lid on your blender. Start on a low speed to break up the large frozen pieces, then gradually increase to high speed. Blend for 45-60 seconds, or until the smoothie is completely smooth and creamy, with a uniform, beautiful pinkish-purple color. If the blender is struggling, stop it and add another splash of milk to help things move.
Step 5: Taste and Serve
Give the smoothie a quick taste. If you feel it needs a touch more sweetness, add the optional honey or maple syrup and give it a final 5-second blend. Pour into a glass or two and serve immediately.
Nutrition Facts
Please be aware that these values are an estimate and will vary significantly based on your choice of milk, yogurt, peanut butter, and any optional add-ins like protein powder. This estimate is for one of two servings.
- Servings: 2
- Calories per serving: Approximately 350-450 kcal
Preparation and Blending Time
- Prep Time: 2 minutes
- Blend Time: 1-2 minutes
- Total Time: Under 5 minutes
How to Serve and Elevate Your Smoothie
While delicious straight from the blender, a few simple touches can make this smoothie feel like a gourmet café treat.
- The Classic Glass:
- Serve in a tall glass with a wide, reusable straw.
- For a fun visual, you can smear a thin layer of peanut butter on the inside of the glass before pouring the smoothie in.
- Gourmet Garnishes:
- Drizzle a little extra peanut butter (melt it slightly in the microwave for 10-15 seconds to make it easier to drizzle).
- Top with a sprinkle of chopped roasted peanuts for a fantastic crunch.
- Add a few fresh strawberry slices or whole berries.
- Sprinkle with granola or chia seeds.
- The Ultimate Smoothie Bowl:
- This is a perfect way to turn the smoothie into a hearty, sit-down meal.
- Make it extra thick: Reduce the milk to ½ – ¾ cup and make sure both your banana and strawberries are frozen. The goal is a consistency thick enough to eat with a spoon.
- Pour into a bowl: Spoon the thick smoothie into a shallow bowl.
- Arrange toppings: This is where you can get artistic. Arrange toppings in neat lines for a beautiful presentation. Fantastic options include:
- Fruit: Sliced fresh banana and strawberries.
- Crunch: Your favorite granola, chopped peanuts, cacao nibs, or toasted coconut flakes.
- Drizzle: A generous swirl of peanut butter and a drizzle of honey or berry jam.
5 Pro-Tips for the Perfect PB&J Smoothie Every Time
- Frozen Fruit is Essential: This is the most important rule for a thick, creamy smoothie. Using frozen strawberries and a frozen banana creates a frosty, milkshake-like texture without the need for ice, which dilutes the flavor and can make the smoothie watery.
- Use Natural Peanut Butter: For the best, most authentic flavor and health benefits, opt for natural peanut butter. The ingredient list should be simple: peanuts and maybe a little salt. This avoids unnecessary sugars and oils and lets the true nutty flavor shine through, creating a better balance with the sweet fruit.
- Master the Blender Loading Order: As mentioned in the instructions, always put your liquids in first, followed by soft ingredients like yogurt and peanut butter, and top with your frozen fruit and any dry powders. This simple technique prevents the blades from getting stuck and ensures a faster, smoother blend.
- Create Smoothie Packs for Ultra-Fast Mornings: This is a game-changer for meal prep. In individual freezer-safe bags, portion out the 1 ½ cups of frozen strawberries and the ½ frozen banana. You can even add your chia/flax seeds. In the morning, all you have to do is dump the contents of one bag into the blender, add your milk, yogurt, and peanut butter, and blend.
- Don’t Be Afraid to Adjust Consistency: A smoothie’s thickness is a matter of personal preference. If your smoothie is too thick for your liking or your blender is struggling, simply add a splash more milk and blend again. If it’s too thin, add a few more frozen strawberries or a couple of ice cubes to thicken it up instantly.
Frequently Asked Questions (FAQ)
1. Can I make this smoothie without a banana?
Yes, absolutely. The banana is primarily for creaminess and natural sweetness. To make it without a banana, you can increase the Greek yogurt to a full cup, or add ¼ of an avocado, which provides incredible creaminess with a neutral flavor. You may also need to add a teaspoon of honey or maple syrup to compensate for the lost sweetness.
2. How can I make this smoothie vegan and dairy-free?
This is very easy to adapt. Simply use a plant-based milk (almond, oat, or soy milk are all great choices) and swap the Greek yogurt for a dairy-free yogurt alternative (like coconut, soy, or almond-based yogurt). If you add protein powder, ensure it’s a plant-based version.
3. I have a peanut allergy. What can I use instead?
You can easily substitute the peanut butter with other nut or seed butters. Almond butter will create a slightly sweeter, milder flavor. Cashew butter will make the smoothie incredibly creamy. For a nut-free version, sunflower seed butter (SunButter) is a fantastic option that provides a similar savory, roasted flavor profile.
4. How can I make this smoothie lower in sugar?
To reduce the sugar content, you can make a few swaps. First, ensure your peanut butter is unsweetened. Second, you can substitute the banana with a fat source for creaminess, like ¼ of an avocado. Finally, use lower-sugar fruits like raspberries or blackberries instead of strawberries, and be mindful of your milk choice, opting for an unsweetened variety.
5. Can I make this smoothie ahead of time?
While a smoothie is always best enjoyed fresh, you can prepare it a few hours in advance. Store it in an airtight container (a mason jar with a lid works perfectly) in the refrigerator. It will likely separate, so be sure to shake or stir it vigorously before drinking. It will also lose its frosty thickness as the fruit thaws. The best method for making it ahead is to use the freezer pack tip mentioned above.
Peanut Butter and Jelly Smoothie recipe
Ingredients
- Frozen Strawberries: 1 ½ cups (or frozen mixed berries)
- Natural Peanut Butter: 2 tablespoons, creamy or crunchy
- Plain Greek Yogurt: ½ cup (optional, but recommended for creaminess and protein)
- Ripe Banana: ½, preferably frozen for extra thickness
- Milk of Choice: 1 cup (almond, oat, dairy, etc. Add more if needed for blending)
- Optional Add-ins:
- Honey or Maple Syrup: 1 teaspoon (only if your fruit isn’t very sweet)
- Chia Seeds or Flax Seeds: 1 tablespoon (for extra fiber and omega-3s)
- Vanilla Protein Powder: 1 scoop (to turn this into a serious post-workout meal)
Instructions
Step 1: Layer the Liquids and Soft Ingredients
Pour the 1 cup of milk into the bottom of your blender canister. Add the Greek yogurt and the peanut butter. If you’re using a fresh (not frozen) banana, add it now. Placing liquids at the bottom helps create a vortex that pulls the frozen ingredients down into the blades.
Step 2: Add the Frozen Fruit
Add the frozen strawberries and the ½ frozen banana (if using) on top of the liquid and soft ingredients.
Step 3: Add Any Dry Ingredients
If you are using optional add-ins like chia seeds, flax seeds, or protein powder, sprinkle them on top of the frozen fruit.
Step 4: Blend Until Velvety Smooth
Secure the lid on your blender. Start on a low speed to break up the large frozen pieces, then gradually increase to high speed. Blend for 45-60 seconds, or until the smoothie is completely smooth and creamy, with a uniform, beautiful pinkish-purple color. If the blender is struggling, stop it and add another splash of milk to help things move.
Step 5: Taste and Serve
Give the smoothie a quick taste. If you feel it needs a touch more sweetness, add the optional honey or maple syrup and give it a final 5-second blend. Pour into a glass or two and serve immediately.
Nutrition
- Serving Size: one normal portion
- Calories: 350-450 kcal


