
When it comes to breakfast, there’s something incredibly satisfying about creating your own homemade granola. The delightful crunch, the subtle sweetness, and the wholesome ingredients make it a favorite in my household. Recently, I decided to try a new recipe for homemade granola with dried fruits, and it was an absolute hit with my family. The combination of oats, nuts, and a variety of dried fruits creates a symphony of flavors and textures that is both healthy and delicious. This granola not only serves as a fantastic breakfast option but also as a convenient snack throughout the day. My family couldn’t get enough of it, and it has quickly become a staple in our kitchen. Let me take you through the process of making this delightful treat so you can enjoy it too.
Ingredients
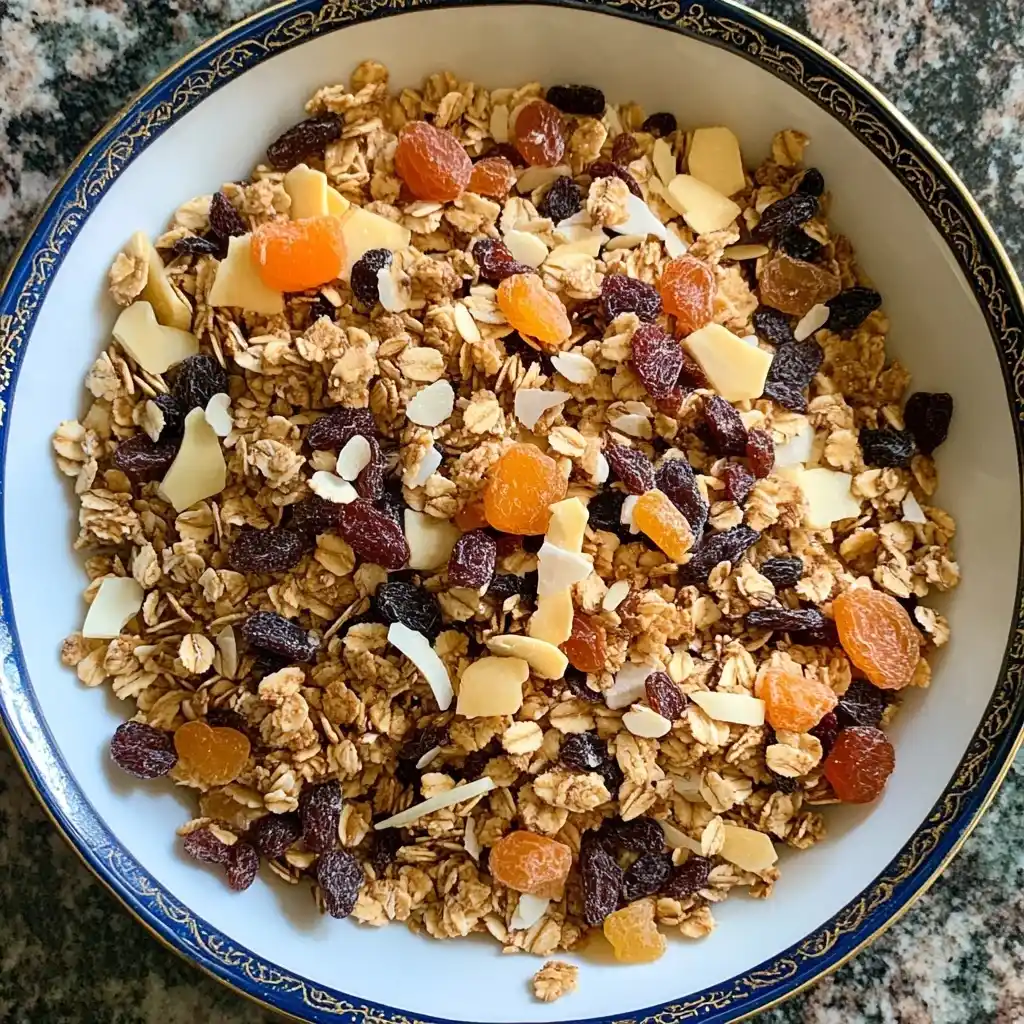
To make this homemade granola, you’ll need the following ingredients:
- 3 cups of rolled oats
- 1 cup of mixed nuts (such as almonds, walnuts, and pecans)
- 1 cup of dried fruits (such as cranberries, raisins, and apricots)
- 1/2 cup of honey or maple syrup
- 1/4 cup of coconut oil
- 1 teaspoon of vanilla extract
- 1/2 teaspoon of ground cinnamon
- 1/4 teaspoon of salt
Instructions
Making homemade granola is a simple and enjoyable process. Follow these steps to create your batch:
Step 1: Preheat your oven to 350°F (175°C). Line a baking sheet with parchment paper for easy cleanup.
Step 2: In a large mixing bowl, combine the rolled oats, mixed nuts, ground cinnamon, and salt. Stir the dry ingredients until they are evenly distributed.
Step 3: In a small saucepan, combine the honey (or maple syrup), coconut oil, and vanilla extract. Heat over low heat until the coconut oil is melted, and the ingredients are well combined.
Step 4: Pour the wet mixture over the dry ingredients. Stir until the oats and nuts are fully coated with the liquid mixture.
Step 5: Spread the mixture evenly over the prepared baking sheet. Bake for 20-25 minutes, stirring halfway through to ensure even toasting.
Step 6: Remove from the oven and let the granola cool completely. Once cooled, add the dried fruits and toss to combine.
Nutrition Facts
This recipe yields approximately 12 servings. Each serving contains around 250 calories, making it a nutritious option to start your day or enjoy as a snack.
Preparation Time
The preparation time for this homemade granola is about 10 minutes, and the baking time is 20-25 minutes, totaling approximately 35 minutes to get everything ready.
How to Serve
Homemade granola is not only delicious but also incredibly versatile, making it a fantastic addition to various meals and snacks throughout the day. Below are detailed suggestions on how to serve your homemade granola, enhancing your culinary experience and allowing you to enjoy its delightful crunch and flavor in multiple ways.
1. Sprinkle Over Yogurt for a Crunchy Topping
One of the simplest and most popular ways to enjoy granola is by sprinkling it over yogurt. This combination is not only satisfying but also offers a delightful contrast in texture. For a delicious parfait, layer your favorite yogurt—be it Greek, plant-based, or standard—at the bottom of a bowl or glass. Add a generous handful of granola on top, which adds a lovely crunch and nutty flavor. To elevate the experience, consider adding fresh fruits like berries, bananas, or peaches, and a drizzle of honey or maple syrup. This makes for a nutritious breakfast or a refreshing snack packed with protein, fiber, and healthy fats.
2. Serve with Milk or a Dairy-Free Alternative for a Quick Breakfast
Granola can serve as a quick and satisfying breakfast option when paired with milk or a dairy-free alternative such as almond, oat, or coconut milk. Pour a generous amount of granola into a bowl and add your choice of milk, letting the granola soak for a few minutes for optimal texture. This method not only brings out the flavors of the granola but also allows it to soften slightly while still retaining some crunch. For added nutrition, you can include sliced fruits, chia seeds, or a sprinkle of cinnamon to enhance the flavor profile.
3. Use as a Topping for Smoothie Bowls
Smoothie bowls have gained popularity for their vibrant colors and healthy ingredients, and homemade granola serves as a perfect topping for these creations. After blending your favorite fruits, vegetables, and liquids into a smooth, thick consistency, pour the smoothie into a bowl and artistically scatter granola on top. This adds not just crunch but also a contrast of flavors and nutrients. To make it even more visually appealing, you can add additional toppings like sliced fruits, nut butter, seeds, or even edible flowers, creating a beautiful and nutritious meal.
4. Enjoy as a Standalone Snack Straight from the Jar
Sometimes, the simplest way to enjoy granola is to eat it straight from the jar. This makes for a convenient and healthy snack that you can take on the go. Whether you’re at work, out hiking, or simply lounging at home, a handful of granola can provide a quick energy boost. For a more indulgent treat, try mixing it with dark chocolate chips, dried fruits, or nuts before storing it in an airtight container, creating your own trail mix. This is an excellent option for satisfying cravings in a healthier way without the need for additional preparation.
5. Incorporate Into Baked Goods Like Muffins or Bars for Added Texture
Homemade granola can be an excellent ingredient in various baked goods, adding both texture and flavor. Consider mixing granola into muffin batter for an extra crunch in each bite, or pressing it into the bottom of a baking dish as a crust for granola bars. You can also fold granola into cookie dough for added texture, making for a delightful surprise in each cookie. When incorporating granola into baked goods, you may want to adjust the sugar levels in the recipe, as granola often contains sweeteners. This not only enhances the taste but also makes your baked items more nutritious and filling.
Conclusion
The versatility of homemade granola allows you to explore a multitude of serving options that cater to different tastes and dietary needs. Whether you choose to enjoy it atop yogurt, mixed with milk, as a topping for smoothie bowls, as a quick snack, or incorporated into baked goods, homemade granola can enhance your meals and snacks in delightful ways. Get creative with your combinations and enjoy the wholesome goodness that homemade granola brings to your table!
Additional Tips
Creating your own granola is not just about following a recipe; it’s an opportunity to express your culinary creativity and cater to your personal taste preferences. Below are some comprehensive tips to elevate your granola-making experience:
Tip 1: Customize Your Ingredients
One of the most enjoyable aspects of making granola is the ability to tailor it to your taste. Start by experimenting with a variety of nuts, seeds, and spices.
- Nuts: Almonds, pecans, walnuts, and cashews each lend a unique flavor and texture. Consider toasting them lightly before adding them to your mixture to enhance their natural oils and flavor.
- Seeds: Flaxseeds, pumpkin seeds (pepitas), or sunflower seeds can add a nutritional boost as well as an interesting crunch.
- Spices: Don’t shy away from spices! Cinnamon, nutmeg, or even cardamom can transform the flavor profile of your granola. A dash of vanilla extract or almond extract can also add depth to the overall taste.
By mixing and matching these ingredients, you can create a granola that perfectly aligns with your preferences, whether you enjoy a nutty, sweet, or spicy flavor.
Tip 2: Enhance Crunchiness
For those who crave extra texture, consider adding shredded coconut or chia seeds to your granola mix.
- Shredded Coconut: Toasted shredded coconut can provide a chewy and crunchy element to your granola. It pairs beautifully with tropical flavors, making your granola feel like a vacation in a bowl.
- Chia Seeds: These tiny seeds not only add a delightful crunch but are also packed with omega-3 fatty acids and fiber. They absorb moisture, which can help bind the granola together while adding nutritional value.
Adding these ingredients just before baking can give your granola a delightful crunch that will keep you reaching for more.
Tip 3: Proper Storage for Freshness
To keep your granola fresh and crunchy, storage is key.
- Airtight Containers: Store your granola in an airtight glass jar or a high-quality plastic container to prevent moisture from seeping in. This will help maintain the crunchy texture and prevent it from becoming stale.
- Cool, Dark Place: Keep the container in a cool, dark place, such as a pantry or cupboard, away from direct sunlight. This will help preserve the flavor and freshness of your ingredients for a longer period.
If you notice any signs of staleness, consider toasting the granola lightly in the oven for a few minutes to revive its crunch.
Tip 4: Tailor the Sweetness
Granola can easily be adjusted to meet your preferred level of sweetness.
- Sweetener Variations: Instead of just honey or maple syrup, consider alternatives like agave nectar, brown sugar, or coconut sugar for different flavor notes. Each sweetener has its own unique taste and consistency, allowing you to customize the sweetness of your granola.
- Sugar-Free Options: For those looking to reduce sugar intake, try using mashed ripe bananas or unsweetened applesauce as natural sweeteners. They will add moisture while complementing the oats and nuts.
Taste-test your mixture before baking to find the perfect balance of sweetness for your palate.
Tip 5: Share the Love with Homemade Gifts
Making granola can also be a wonderful way to connect with friends and family.
- Double Batch: If you love your granola, consider preparing a double batch. This not only ensures you have enough to enjoy yourself but also provides an opportunity to share.
- Gift Jars: Package your homemade granola in decorative jars or bags and tie them with a ribbon for a thoughtful gift. You can even include a personalized label or a small note with serving suggestions to make it even more special.
Homemade granola makes for a delightful gift for various occasions, such as holidays, housewarming parties, or as a “just because” treat for someone special.
By incorporating these additional tips into your granola-making routine, you can create a truly personalized and enjoyable experience that results in delicious, crunchy granola every time. Happy granola-making!
FAQ Section
Q: Can I use quick oats instead of rolled oats?
A: While you can use quick oats as a substitute for rolled oats in granola recipes, it’s important to understand the differences in their texture and cooking properties. Quick oats are processed to cook faster, which means they are cut into smaller pieces and steamed for a longer time. This results in a softer, mushier texture when baked, which can lead to a granola that lacks the desired crunch and chewiness that rolled oats provide. Rolled oats, on the other hand, are steamed and then flattened, allowing them to retain their shape and texture during baking. This difference is significant when it comes to granola, as rolled oats create clusters that are more satisfying to eat. If you’re in a pinch and only have quick oats on hand, consider using them but be prepared for a different texture than you might expect from traditional granola.
Q: How long does homemade granola last?
A: When stored properly, homemade granola can maintain its freshness and flavor for up to two weeks at room temperature. To maximize its shelf life, it’s crucial to store the granola in an airtight container, as exposure to air can lead to staleness and loss of crunch. For longer storage, consider keeping your granola in the refrigerator, where it can last for up to a month, or even freezing it for up to three months. If you choose to freeze your granola, make sure it is in a freezer-safe container, and when you’re ready to use it, allow it to thaw at room temperature. Always check for any signs of spoilage, such as off smells or mold, before consuming, especially if the granola has been stored for an extended period.
Q: Can I add chocolate chips to this granola?
A: Yes, chocolate chips can be a delightful addition to your granola, providing a sweet contrast to the nutty and savory flavors. However, timing is key to achieving the best results. To prevent the chocolate chips from melting into the granola and losing their shape, it’s best to add them after the granola has been baked and cooled. This way, the chocolate chips will retain their form and provide a delicious burst of flavor with each bite. You can also experiment with different types of chocolate chips, such as dark, milk, or even white chocolate, depending on your preference. For an extra twist, consider incorporating chocolate-covered nuts or cacao nibs for an added layer of flavor and texture.
Q: Is there a way to make this granola gluten-free?
A: Absolutely! Making gluten-free granola is quite simple and can be easily achieved by selecting the right ingredients. The key is to use oats that are certified gluten-free, as regular oats may be processed in facilities that also handle gluten-containing grains, leading to cross-contamination. Most brands now offer gluten-free oats, ensuring that you can enjoy your granola without worry. Additionally, since granola is often made with naturally gluten-free ingredients such as nuts, seeds, and dried fruits, you can rest assured that you can create a delicious and safe snack. Always double-check the labels of any additional ingredients like sweeteners or flavorings to ensure they are gluten-free as well.
Q: Can I use fresh fruits instead of dried fruits?
A: While fresh fruits can certainly add a burst of flavor and nutrition to your granola, they can also introduce moisture that may significantly alter the final texture of the dish. Granola is typically characterized by its crunchy, toasted texture, which is best achieved with dried fruits. Dried fruits like raisins, cranberries, or apricots are dehydrated, allowing them to blend seamlessly into the granola without affecting its crunch. If you prefer to use fresh fruits, consider using them as a topping after the granola has been prepared. This way, you can enjoy the freshness and juiciness of seasonal fruits without compromising the texture of your homemade granola. Fresh fruits like berries, sliced bananas, or stone fruits can enhance your granola experience when added just before serving, offering a delightful contrast to the crunchy clusters.