

Indulging in a chocolate bar is one of life’s simple pleasures. But what if you could elevate that experience by crafting your own homemade chocolate bars? Not only is this a fun and creative activity, but it also allows you to tailor each bar to your own taste preferences. In this article, we’ll guide you through the process of making delectable homemade chocolate bars, complete with unique toppings like mint Oreo cookies, crispy turkey bacon, and freeze-dried fruits. So let’s dive into this delightful culinary adventure!
Ingredients
Creating your own chocolate bars is all about customization. Start with a base of your favorite chocolate and add delicious toppings to create a unique treat. Here’s what you’ll need:
- 15 oz chocolate (your choice: dark, milk, or white)
- 5 mint Oreo cookies, crushed
- 3 strips turkey bacon, diced, cooked, and crispy
- Sea salt, to taste
- 1 waffle cone, crushed + sprinkles
- Handful of freeze-dried strawberries and blueberries
- 4 chocolate molds
Instructions
Crafting these mouthwatering chocolate bars is a straightforward process that even beginners can master. Just follow these steps:
- Preheat Oven: Heat your oven to 350°F (175°C). Arrange the turkey bacon on a cooling rack placed over a baking sheet. Sprinkle with brown sugar and bake for 15 minutes. Flip, add more brown sugar, and bake for an additional 15 minutes. Let the bacon cool, then chop it into small pieces.
- Melt Chocolate: Place a heat-proof bowl over a pot of simmering water. Add the chocolate and stir until completely melted. Once melted, remove from heat but keep the bowl over the pot to prevent the chocolate from hardening.
- Prepare Molds: Wipe the bowl to remove any condensation. Pour the melted chocolate into the molds, leveling the surface with a spatula to ensure even distribution.
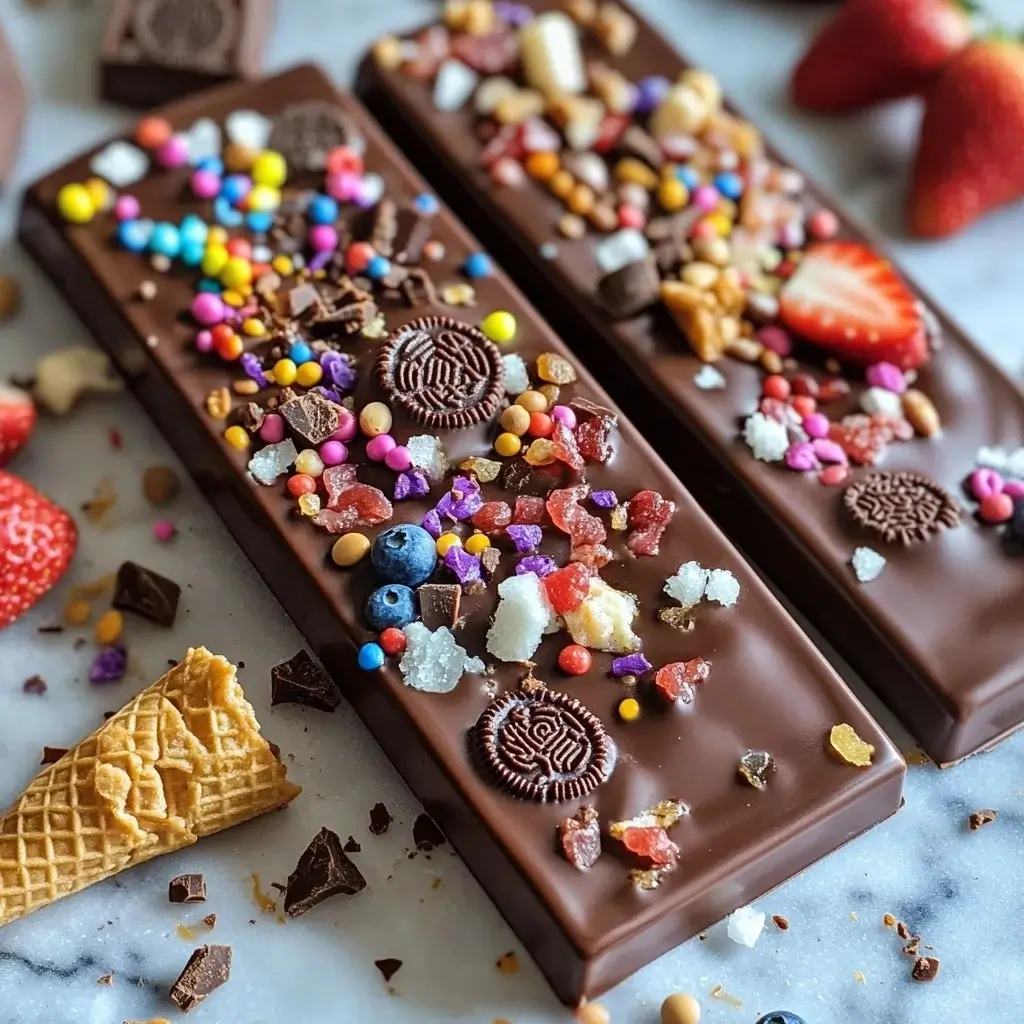
- Add Toppings: Sprinkle the crushed mint Oreos, chopped turkey bacon, waffle cone pieces, freeze-dried strawberries, blueberries, and a pinch of sea salt over the chocolate in the molds.
- Set Bars: Let the chocolate sit at room temperature for about 15 minutes, then transfer to the refrigerator for 20 minutes until fully hardened.
- Unmold and Wrap: Carefully remove the bars from the molds. If desired, wrap each bar in parchment paper or foil for storage. Enjoy your homemade creation!
Nutrition Facts
The nutritional content of your homemade chocolate bars will vary depending on the type of chocolate and the quantity of toppings you use. Here’s a general idea of what you might expect:
- Calories: Approximately 150-200 calories per bar
- Fat: 10-15 grams
- Carbohydrates: 18-25 grams
- Protein: 2-4 grams
Keep in mind that these are rough estimates, and the actual values can differ based on your specific ingredient choices.
How to Serve Homemade Chocolate Bars
Homemade chocolate bars are not just a culinary delight; they are also incredibly versatile and can be served in a multitude of delightful ways. Each method of serving can enhance the experience of enjoying your creations, making them perfect for various occasions. Below are some comprehensive ideas on how to serve homemade chocolate bars:
As a Snack
Homemade chocolate bars make a perfect snack option, whether you’re indulging on a quiet afternoon or sharing with friends. Their rich flavor and satisfying texture can satisfy sweet cravings without needing elaborate preparation. To elevate the snacking experience, consider the following tips:
- Portion Control: Cut the chocolate bars into bite-sized pieces for easy snacking. This not only makes them more shareable but also allows you to enjoy them in moderation.
- Flavor Variations: Experiment with different flavor profiles by adding ingredients like sea salt, chili flakes, or flavored extracts (e.g., orange or mint) to your chocolate bars. This can create a unique snacking experience for you and your guests.
- Presentation: Place the chocolate pieces in decorative bowls or on a wooden cutting board for an aesthetically pleasing display. This can elevate the overall experience, making it feel more special.
With Coffee or Tea
Pairing your homemade chocolate bars with a warm beverage can turn an ordinary treat into a comforting indulgence. The rich flavors of chocolate complement various types of coffee and tea beautifully. Here’s how to create the perfect pairing:
- Coffee Pairings: Dark chocolate bars pair wonderfully with rich, bold coffee varieties like espresso or French roast. Milk chocolate, on the other hand, harmonizes well with lighter roasts and flavored coffees, such as hazelnut or vanilla.
- Tea Pairings: For tea lovers, herbal teas like chamomile or peppermint can provide a refreshing contrast to the sweetness of chocolate. Black teas, especially those with robust flavors like Earl Grey or Chai, can also enhance the chocolate experience.
- Serving Suggestions: Create a small tasting flight by serving different types of chocolate bars with a selection of coffees or teas. This not only encourages exploration of flavors but also makes for a delightful social activity.
Dessert Platter
Incorporating homemade chocolate bars into a dessert platter can create a stunning centerpiece for any gathering. Here’s how to create an impressive dessert spread:
- Complementary Items: Include a variety of fruits, such as strawberries, raspberries, or banana slices, which can enhance the chocolate flavor and provide freshness. Nuts like almonds, walnuts, or pecans can add crunch and contrast.
- Additional Confections: Consider adding other homemade treats, such as cookies, brownies, or fudge, to the platter. This variety ensures there’s something for everyone and can encourage guests to mix and match their favorites.
- Themed Presentation: Use seasonal themes to inspire your dessert platter. For instance, during the holidays, you might decorate the platter with festive garnishes like mint leaves or edible flowers. This attention to detail can make your dessert spread even more appealing.
Gift Giving
Homemade chocolate bars make for thoughtful and heartfelt gifts that convey care and creativity. Consider these ideas for presenting your chocolate bars as gifts:
- Elegant Wrapping: Use decorative paper, fabric, or even recycled materials to wrap your chocolate bars beautifully. Adding ribbons or twine can give a rustic touch that makes the gift feel more personal.
- Personalized Notes: Include a handwritten note or a recipe card that describes the flavors or ingredients used in your chocolate bars. This not only adds a personal touch but also shares your passion for chocolate-making with the recipient.
- Themed Gift Baskets: Create a gift basket that includes your homemade chocolate bars along with complementary items such as coffee, tea, or gourmet snacks. This curated approach can make for a delightful and indulgent gift that your loved ones will appreciate.
By utilizing these serving suggestions, you can enhance the enjoyment of your homemade chocolate bars, whether you’re indulging solo or sharing with others. Each method allows you to showcase your culinary creations while creating memorable experiences around them.
Additional Tips
Creating your own chocolate bars at home can be a delightful and rewarding experience. To ensure that your homemade treats turn out perfectly, consider the following comprehensive tips:
Choose High-Quality Chocolate
The foundation of any great chocolate bar is, unsurprisingly, the chocolate itself. When selecting chocolate for your homemade bars, aim for high-quality options with a high cocoa percentage. Look for chocolate that lists cocoa mass, cocoa butter, and sugar as the primary ingredients, and avoid products with excessive additives or artificial flavors. Dark chocolate (70% cocoa or higher) offers a rich, intense flavor that pairs well with a variety of toppings, while milk chocolate provides a creamier taste that appeals to those with a sweeter palate. If you’re feeling adventurous, consider using single-origin chocolate to bring unique flavor profiles to your bars, as the origin of the cacao beans can greatly influence the taste.
Experiment with Flavors
Don’t be afraid to unleash your creativity when it comes to flavor combinations. One of the joys of making your own chocolate bars is the opportunity to customize them to your liking. Here are some ideas to inspire your experiments:
- Nuts: Almonds, hazelnuts, walnuts, or pecans add a satisfying crunch and nutty flavor. Consider toasting the nuts lightly before adding them to enhance their flavor.
- Dried Fruits: Dried cherries, apricots, or cranberries can bring a sweet and chewy texture that contrasts beautifully with chocolate. Choose fruits that are not overly sugary to maintain a balanced flavor.
- Spices and Herbs: Elevate your chocolate bars by incorporating spices like cinnamon, cardamom, or even chili flakes for a hint of heat. Fresh herbs like mint or basil can also provide a refreshing twist.
- Coconut Flakes: Unsweetened coconut flakes can add a tropical flair and a chewy texture to your chocolate bars, making them both visually appealing and delicious.
- Sea Salt: A sprinkle of flaky sea salt can enhance the sweetness of chocolate and create a delightful contrast, adding depth to the overall flavor.
Use a Silicone Mold
Silicone molds are a game changer when it comes to creating homemade chocolate bars. Their flexibility allows for easy demolding, reducing the risk of breaking or damaging your bars. When selecting a mold, consider one that has a variety of shapes and sizes to make your chocolate bars unique and visually appealing. Additionally, silicone molds are often non-stick, which means you can enjoy a smoother finish on your chocolate surfaces. For added flair, you might even consider using molds with fun designs or patterns that can elevate your chocolate presentation.
Store Properly
Proper storage is key to maintaining the quality of your homemade chocolate bars. Chocolate can be sensitive to temperature and humidity, so it’s essential to store your creations in a cool, dry place. Ideally, keep them in an airtight container to prevent moisture and odors from affecting their taste and texture. If you live in a particularly warm climate, consider refrigerating your chocolate bars to prevent melting. However, be cautious with refrigeration, as it can sometimes cause chocolate to develop a “bloom” — a whitish coating that occurs when cocoa butter rises to the surface. To avoid this, let your chocolate bars come to room temperature before serving, allowing them to regain their smooth, glossy finish. If you plan to store your chocolate for an extended period, consider wrapping each bar individually in parchment paper before placing them in an airtight container to preserve freshness.
By incorporating these tips into your chocolate-making process, you can create delicious, customized bars that are not only a feast for the taste buds but also a treat for the eyes. Enjoy the journey of experimenting with flavors and techniques, and share your creations with friends and family for a truly delightful experience.
FAQs
1. Can I use different types of chocolate?
Absolutely! You can use any type of chocolate you prefer, whether it’s dark, milk, white, or even a combination.
2. How long do homemade chocolate bars last?
When stored properly in a cool, dry place, your homemade chocolate bars can last for up to two weeks.
3. Can I make these bars without bacon?
Yes, you can omit the turkey bacon if you prefer a vegetarian option or if bacon isn’t to your taste.
4. What other toppings can I use?
The possibilities are endless! Consider adding nuts, seeds, dried coconut, chili flakes, or even caramel bits for added flavor and texture.
Conclusion
Making homemade chocolate bars is not only a delightful culinary adventure but also a fulfilling way to express your creativity and personalize your treats. The process of crafting your own chocolate bars opens the door to a world of flavors, textures, and combinations that store-bought chocolates simply can’t match. By following the step-by-step guidance provided in this article, you can master the art of chocolate-making and create delicious, customized bars that cater to your tastes and those of your loved ones.
One of the most enjoyable aspects of making chocolate bars at home is the endless scope for experimentation. You can start with a basic recipe and then modify it by adding your favorite ingredients, such as nuts, dried fruits, spices, or even a sprinkle of sea salt for that perfect contrast. The ability to control the quality and type of ingredients not only enhances the overall flavor but also allows you to cater to dietary preferences—whether you’re crafting vegan, gluten-free, or sugar-free options. This personalization ensures that your chocolate bars can be tailored to meet the needs and tastes of anyone who might indulge in them.
Moreover, the process of chocolate-making can be a wonderful bonding activity. Invite friends or family to join you in the kitchen, and turn the endeavor into a fun, shared experience. You can host a chocolate bar-making party where everyone can bring their unique ideas to the table, fostering a sense of camaraderie as you all work together to create tasty masterpieces. This not only makes for an enjoyable afternoon but also creates lasting memories that go beyond just the chocolate bars themselves.
When it comes to presentation, homemade chocolate bars offer an opportunity to showcase your artistic flair. Consider using unique molds to create interesting shapes or decorate your bars with colorful toppings, such as edible glitter or vibrant sprinkles. Thoughtful packaging can also elevate your chocolate bars into stunning gifts. Whether it’s for birthdays, holidays, or just as a token of appreciation, wrapping your creations in beautifully designed boxes or eco-friendly packaging adds a personal touch that will surely impress the recipient.
Finally, the satisfaction derived from enjoying a homemade treat cannot be overstated. Each bite of your chocolate bar is a culmination of your efforts, creativity, and choices—reflecting your personal taste and style. The joy of crafting something from scratch and then indulging in the results is a rewarding experience that brings a sense of accomplishment. Every bite is a reminder of the time and care you invested in creating a product that not only tastes good but also embodies your creativity and passion for chocolate.
In conclusion, embracing the joy of crafting your own chocolate delights allows you to explore a fun, flavorful, and fulfilling culinary journey. With each homemade chocolate bar, you can relish the sweet satisfaction of sharing your unique creations with family and friends, ensuring that every occasion is marked with a touch of sweetness. So gather your ingredients, unleash your creativity, and enjoy the delectable rewards of your homemade chocolate adventure! 🍫
Print
Homemade Chocolate Bars Recipe: A Delicious DIY Guide
Ingredients
- 15 oz chocolate (your choice: dark, milk, or white)
- 5 mint Oreo cookies, crushed
- 3 strips turkey bacon, diced, cooked, and crispy
- Sea salt, to taste
- 1 waffle cone, crushed + sprinkles
- Handful of freeze-dried strawberries and blueberries
- 4 chocolate molds
Instructions
- Preheat Oven: Heat your oven to 350°F (175°C). Arrange the turkey bacon on a cooling rack placed over a baking sheet. Sprinkle with brown sugar and bake for 15 minutes. Flip, add more brown sugar, and bake for an additional 15 minutes. Let the bacon cool, then chop it into small pieces.
- Melt Chocolate: Place a heat-proof bowl over a pot of simmering water. Add the chocolate and stir until completely melted. Once melted, remove from heat but keep the bowl over the pot to prevent the chocolate from hardening.
- Prepare Molds: Wipe the bowl to remove any condensation. Pour the melted chocolate into the molds, leveling the surface with a spatula to ensure even distribution.
- Add Toppings: Sprinkle the crushed mint Oreos, chopped turkey bacon, waffle cone pieces, freeze-dried strawberries, blueberries, and a pinch of sea salt over the chocolate in the molds.
- Set Bars: Let the chocolate sit at room temperature for about 15 minutes, then transfer to the refrigerator for 20 minutes until fully hardened.
- Unmold and Wrap: Carefully remove the bars from the molds. If desired, wrap each bar in parchment paper or foil for storage. Enjoy your homemade creation!
Nutrition
- Serving Size: one normal portion
- Calories: Approximately 150-200 calories
- Fat: 10-15 grams
- Carbohydrates: 18-25 grams
- Protein: 2-4 grams


