
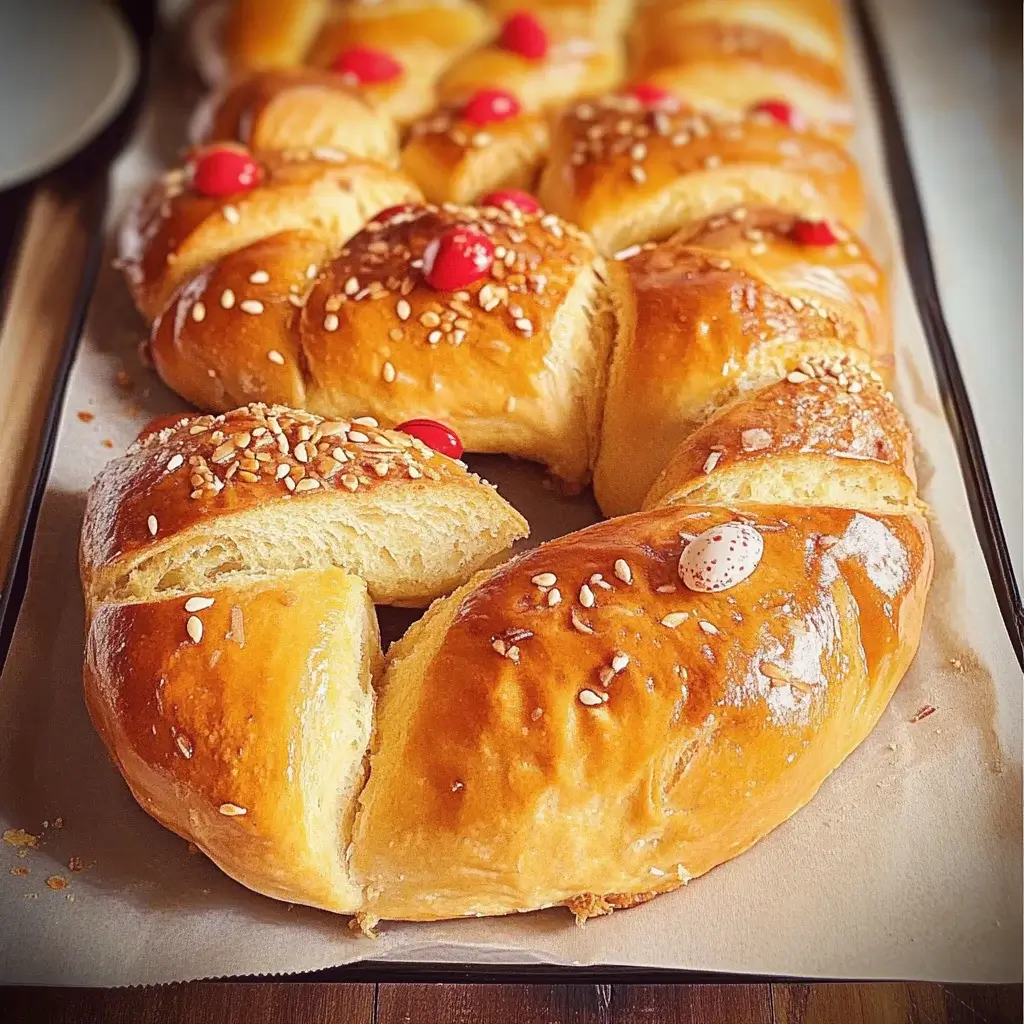

Easter in our family is synonymous with the rich aroma of Tsoureki filling our home. Growing up, my Yiayia’s (grandmother’s) kitchen transformed into a magical bakery in the weeks leading up to Pascha (Easter). The air was always thick with the sweet, spiced scent of mahlepi and mastic, mingling with the comforting warmth emanating from the oven. I remember being mesmerized by the process – the kneading, the braiding, the patient waiting for the dough to rise, and finally, the unveiling of these golden, glossy loaves, adorned with vibrant red eggs. Trying to recreate that magic in my own kitchen has been a journey of love and learning. There have been triumphs and a few…less successful attempts (let’s just say some loaves were more ‘rustic’ than others!). But each time, the familiar fragrance transports me back to Yiayia’s kitchen, and with every bite of this slightly sweet, incredibly fragrant bread, Easter feels truly complete. This isn’t just a recipe; it’s a taste of tradition, a slice of my heritage, and a symbol of the joy and celebration that Easter brings. If you’re looking to infuse your Easter with authentic Greek flavors and create a stunning centerpiece for your table, look no further than this Tsoureki recipe. It’s more than just bread; it’s a taste of Easter magic.
Ingredients for Authentic Greek Easter Bread (Tsoureki)
Creating authentic Greek Easter Bread, or Tsoureki, is a beautiful culinary journey that begins with selecting the right ingredients. Each component plays a vital role in achieving the unique flavor, texture, and aroma that define this special bread. Let’s explore each ingredient in detail, providing insights and tips for choosing the best for your Tsoureki:
For the Dough:
- 1 cup (240ml) lukewarm milk: Milk is the liquid base of our dough, contributing moisture, richness, and a softer texture to the final bread. Lukewarm milk, ideally between 100-110°F (38-43°C), is crucial for activating the yeast. Whole milk will result in a richer, more tender Tsoureki, but 2% milk can also be used. For a dairy-free option, you can substitute with plant-based milk like almond milk, soy milk, or oat milk, although these may slightly alter the texture and flavor profile. Ensure the milk is fresh and not overheated, as excessively hot milk can kill the yeast.
- 2 ¼ teaspoons (1 packet) active dry yeast: Yeast is the leavening agent that makes Tsoureki rise and become light and airy. Active dry yeast is readily available and works reliably. Ensure your yeast is fresh and within its expiration date for optimal rising power. If using instant yeast (also called rapid-rise yeast), you can skip the proofing step and add it directly to the dry ingredients. However, active dry yeast is traditionally used and contributes to the classic flavor development. Storing yeast in the refrigerator or freezer can prolong its shelf life.
- ½ cup (100g) granulated sugar, plus 1 teaspoon for proofing yeast: Sugar not only sweetens the Tsoureki but also feeds the yeast, aiding in its activation and contributing to the bread’s rise and browning. Granulated sugar is commonly used. The 1 teaspoon of sugar added to the lukewarm milk is specifically for proofing the yeast, ensuring it’s active and ready to leaven the dough. You can adjust the ½ cup sugar slightly based on your desired sweetness, but Tsoureki is traditionally subtly sweet, not overly sugary.
- 5 large eggs, lightly beaten: Eggs add richness, color, and structure to the Tsoureki dough. They contribute to the bread’s tender crumb and golden crust. Use large eggs for the recipe as specified. Lightly beating the eggs before adding them to the dough ensures they incorporate smoothly and evenly. Fresh, high-quality eggs will enhance the overall flavor and texture.
- ½ cup (1 stick/113g) unsalted butter, melted and cooled slightly: Butter adds flavor, richness, and tenderness to the Tsoureki. Unsalted butter is preferred to control the salt content of the bread. Melt the butter and allow it to cool slightly before adding it to the dough. Hot butter can cook the eggs and affect the yeast activity. Cooled, but still liquid, butter is ideal for incorporation.
- 1 teaspoon salt: Salt is essential for controlling yeast activity, enhancing flavor, and strengthening the gluten in the dough. It balances the sweetness and brings out the complex flavors of the other ingredients. Use regular table salt or fine sea salt.
- 6 cups (750g) all-purpose flour, plus more for dusting: All-purpose flour forms the structure of the Tsoureki. Use good quality all-purpose flour. The amount of flour may need to be adjusted slightly depending on humidity and the exact measurements of other ingredients. Start with 6 cups and add more gradually if the dough is too sticky, aiming for a soft, slightly sticky dough that is manageable to knead. Having extra flour on hand for dusting your work surface and hands during kneading and shaping is crucial to prevent the dough from sticking.
For the Signature Aromatics:
- 2 teaspoons mahlepi (mahlab) powder: Mahlepi is the secret ingredient that gives Tsoureki its distinctive, unique flavor. It is a spice made from the ground pits of St. Lucie cherries, offering a warm, slightly nutty, and subtly cherry-almond flavor. Mahlepi is essential for authentic Tsoureki. You can find it at Greek or Middle Eastern markets, specialty spice shops, or online. Ensure your mahlepi is fresh and fragrant for the best flavor.
- ½ teaspoon mastic (mastiha) gum, powdered: Mastic gum is another key aromatic ingredient that contributes to Tsoureki’s characteristic flavor and texture. Mastic is a resin from the mastic tree, offering a piney, slightly resinous, and unique flavor. It also acts as a dough enhancer, contributing to the bread’s elasticity and chewiness. Mastic gum needs to be powdered before use. You can powder it yourself by freezing the mastic gum pieces for about 30 minutes, then grinding them with a teaspoon of sugar in a spice grinder or mortar and pestle until finely powdered. Like mahlepi, mastic gum can be found at Greek or Middle Eastern markets, specialty food stores, or online.
For the Egg Wash and Decoration:
- 1 egg, beaten with 1 tablespoon milk: Egg wash gives the Tsoureki its beautiful glossy, golden-brown crust. Beat one egg with a tablespoon of milk to create a smooth, even egg wash.
- Sesame seeds or sliced almonds (optional, for topping): Sesame seeds or sliced almonds can be sprinkled on top of the Tsoureki before baking for added texture and visual appeal. These are optional but traditional toppings.
- Red dyed eggs (for decoration): Red dyed eggs are a symbolic and essential decoration for Greek Easter Bread. Traditionally, hard-boiled eggs are dyed red to symbolize the blood of Christ and are baked directly into the Tsoureki loaves or placed in the center after baking. Prepare your red dyed eggs in advance using your preferred method.
By carefully selecting high-quality and authentic ingredients, particularly the mahlepi and mastic, you are laying the foundation for creating truly exceptional and traditional Greek Easter Bread. These unique aromatics are what sets Tsoureki apart and makes it so special for Easter celebrations.
Instructions for Baking Traditional Greek Easter Bread (Tsoureki)
Now that you have gathered all your ingredients, let’s embark on the step-by-step process of baking authentic Greek Easter Bread, Tsoureki. Follow these instructions carefully to create beautiful, fragrant, and delicious loaves:
1. Proof the Yeast:
- In a large bowl, warm the milk to lukewarm (100-110°F/38-43°C). Use a thermometer to ensure the milk is at the correct temperature – too hot and it can kill the yeast, too cold and it won’t activate properly.
- Add 1 teaspoon of sugar and the active dry yeast to the warm milk. Sprinkle the yeast over the warm milk and sugar mixture.
- Gently stir and let it stand for 5-10 minutes, or until foamy. This process, called proofing, ensures that the yeast is active and viable. You should see a foamy or bubbly layer on top of the milk mixture, indicating that the yeast is working. If it doesn’t foam, your yeast may be old or inactive, and you should start with fresh yeast.
2. Combine Wet Ingredients and Aromatics:
- In a separate large bowl, whisk together the beaten eggs, remaining ½ cup sugar, melted and cooled butter, salt, mahlepi powder, and powdered mastic gum. Whisk until all ingredients are well combined and the sugar is mostly dissolved. The aromatics, mahlepi and mastic, should be evenly distributed throughout the wet mixture.
3. Gradually Add Dry Ingredients and Knead:
- Gradually add the flour to the wet ingredients, starting with about 4 cups. Add the flour in increments, mixing with a wooden spoon or dough hook attachment of a stand mixer on low speed.
- Continue adding flour, a little at a time, kneading until a soft, slightly sticky dough forms. As you add flour, the dough will come together. You may not need to use all 6 cups of flour, or you might need a little more, depending on humidity and flour consistency. The goal is to achieve a dough that is soft, slightly sticky to the touch, but manageable to knead.
- Knead the dough on a lightly floured surface for 8-10 minutes, or in a stand mixer with a dough hook for 6-8 minutes, until smooth and elastic. Kneading develops the gluten in the dough, which is essential for the bread’s structure and texture. The dough should become smooth, elastic, and springy. It will still be slightly sticky, but should pull away from the sides of the bowl or work surface as you knead.
4. First Rise (Bulk Fermentation):
- Place the dough in a lightly oiled large bowl, turning to coat all sides. This prevents the dough from drying out and sticking to the bowl as it rises.
- Cover the bowl with plastic wrap or a clean kitchen towel. Ensure the cover is airtight to create a warm, humid environment for rising.
- Let the dough rise in a warm place for 1 ½ – 2 hours, or until doubled in size. The rising time will depend on the warmth of your environment. A warm place (around 75-80°F/24-27°C) is ideal for yeast activity. The dough should roughly double in volume.
5. Punch Down Dough and Second Rise:
- Gently punch down the dough to release air bubbles. Punching down redistributes the yeast and prepares the dough for shaping.
- Divide the dough into 3-6 equal portions, depending on the desired size of your loaves. For larger loaves, divide into 3 portions. For smaller, individual loaves, divide into 6 or more.
- Shape each portion into a long rope, about 18-24 inches long. Gently roll and stretch each portion of dough into a rope shape.
- Braid 3 ropes together to form a loaf. To braid, pinch the ends of three ropes together at one end. Braid them together like hair, and pinch the ends together at the other end. Tuck the ends underneath the loaf for a neater appearance. You can also make individual braided rolls by braiding shorter ropes.
- Place the braided loaves on baking sheets lined with parchment paper. Parchment paper prevents sticking and makes it easier to transfer the baked loaves.
- Cover loosely with plastic wrap or a clean kitchen towel and let rise in a warm place for another 45-60 minutes, or until almost doubled in size. This second rise, called proofing, allows the shaped loaves to become light and airy before baking.
6. Preheat Oven and Prepare Egg Wash:
- Preheat oven to 350°F (175°C). Ensure your oven is preheated to the correct temperature for even baking.
- Prepare the egg wash by beating 1 egg with 1 tablespoon of milk. Whisk together until well combined.
7. Egg Wash and Bake:
- Gently brush the tops of the braided loaves with the egg wash. Brush evenly for a glossy, golden-brown crust.
- If desired, sprinkle with sesame seeds or sliced almonds. Add your chosen toppings after brushing with egg wash.
- If using red dyed eggs, gently press a red egg into the center of each loaf (optional, or add after baking). Traditionally, red eggs are baked into Tsoureki. If doing so, gently press them into the dough before baking. Alternatively, you can create indentations before the second rise to place the eggs after baking.
- Bake for 25-35 minutes, or until golden brown and the internal temperature reaches 200-210°F (93-99°C). Baking time will depend on the size of your loaves and your oven. The Tsoureki is done when it is golden brown and sounds hollow when tapped on the bottom. An instant-read thermometer inserted into the center should register 200-210°F.
8. Cool and Enjoy:
- Let the Tsoureki loaves cool on the baking sheets for a few minutes before transferring them to a wire rack to cool completely. Cooling on a wire rack prevents the bottom of the bread from becoming soggy.
- Once cooled, slice and serve. Tsoureki is delicious served warm or at room temperature.
Following these detailed instructions will guide you through each step of baking authentic and beautiful Greek Easter Bread (Tsoureki). Enjoy the process and the wonderful aroma filling your kitchen, and most importantly, savor the delicious taste of your homemade Tsoureki!
Nutrition Facts for Greek Easter Bread (Tsoureki)
Understanding the nutritional content of Greek Easter Bread (Tsoureki) can be helpful, especially if you are mindful of your dietary intake. Please note that these are approximate values and can vary based on specific ingredient brands, portion sizes, and minor recipe variations.
Servings: This recipe typically yields 3 medium-sized loaves or 6 smaller loaves. A serving size is generally considered to be 1 slice (about 1/8 of a medium loaf or 1/4 of a small loaf).
Approximate Nutrition Facts per Serving (1 slice, based on 24 servings total from 3 medium loaves):
- Calories: 200-250 calories (This can vary depending on slice thickness and specific ingredients.)
- Protein: 5-6 grams (Protein content comes primarily from eggs, milk, and flour.)
- Fat: 8-10 grams (Fat content is mainly from butter and eggs.)
- Saturated Fat: 5-7 grams (Saturated fat comes primarily from butter and eggs.)
- Carbohydrates: 30-35 grams (Carbohydrates are primarily from flour and sugar.)
- Sugar: 10-12 grams (Sugar content comes from added sugar and naturally occurring sugars in milk.)
- Fiber: 1-2 grams (Fiber content is relatively low, mainly from flour.)
- Sodium: 150-200 mg (Sodium content is from added salt and naturally occurring sodium in ingredients.)
- Cholesterol: 50-60 mg (Cholesterol content is from eggs and butter.)
Important Notes:
- Serving Size Matters: The nutritional values are per slice. Portion size significantly impacts calorie and macronutrient intake.
- Variations Impact Nutrition: Using different types of milk (e.g., skim vs. whole, dairy vs. plant-based), reducing sugar, or adding nuts/seeds as toppings will alter the nutritional profile.
- Enjoy in Moderation: Tsoureki is a festive treat to be enjoyed during special occasions like Easter. Like other enriched breads, it is calorie-dense and should be consumed in moderation as part of a balanced diet.
- Homemade vs. Store-Bought: Homemade Tsoureki allows for control over ingredients. Store-bought versions may have different nutritional profiles and potentially added preservatives or ingredients.
These nutritional facts are estimates to provide a general guideline. For more precise nutritional information, you can use online nutrition calculators and input the specific brands and quantities of ingredients you use in your recipe. Enjoy Tsoureki as a special Easter treat while being mindful of portion sizes and overall dietary balance.
Preparation Time for Greek Easter Bread (Tsoureki)
Baking Greek Easter Bread (Tsoureki) is a labor of love that requires time, especially for the dough to rise and for proper kneading and shaping. Here is a breakdown of the estimated preparation time:
Active Preparation Time: This is the time you will actively be working on the recipe, including mixing, kneading, shaping, and baking.
- Yeast Proofing & Wet Ingredients Mixing: 10-15 minutes. This includes warming milk, proofing yeast, whisking eggs, sugar, butter, salt, and aromatics.
- Dough Making & Kneading: 15-20 minutes. This includes gradually adding flour and kneading the dough (either by hand or with a stand mixer).
- Shaping and Braiding: 20-30 minutes. This includes punching down the dough, dividing it, shaping ropes, and braiding the loaves.
- Egg Wash and Decoration: 5-10 minutes. This includes preparing egg wash and brushing it on loaves, adding toppings and red eggs.
- Baking Time: 25-35 minutes. This is the time the Tsoureki loaves will be in the oven.
Total Active Preparation Time: Approximately 1 hour 15 minutes – 1 hour 50 minutes.
Inactive Time (Rising/Proofing): This is the time the dough spends rising and proofing, requiring minimal active involvement from you.
- First Rise (Bulk Fermentation): 1 ½ – 2 hours.
- Second Rise (Proofing Shaped Loaves): 45-60 minutes.
Total Inactive Time: Approximately 2 hours 15 minutes – 3 hours.
Total Time (Active Prep + Inactive Rising/Proofing): Approximately 3 hours 30 minutes – 4 hours 50 minutes.
Tips to Manage Preparation Time:
- Stand Mixer for Kneading: Using a stand mixer with a dough hook significantly reduces kneading time and effort.
- Warm Environment for Rising: Ensure a warm (but not hot) environment for dough rising to encourage efficient yeast activity and reduce rising time. A slightly warm oven (turned off), a warm spot in your kitchen, or a proofing drawer can help.
- Prepare Red Eggs Ahead: Dye your red eggs a day or two in advance to spread out the preparation tasks.
- Make Dough in Advance (with adjustments): You can make the dough a day ahead, let it complete its first rise in the refrigerator overnight, and then proceed with shaping and baking the next day. This requires adjusting rising times (cold proofing is slower).
Planning Ahead:
- Start Early: Begin baking Tsoureki in the morning or early afternoon if you plan to serve it later in the day, considering the total time involved.
- Weekend Baking Project: Tsoureki baking is often a weekend activity, allowing ample time for each step and enjoying the process.
While Tsoureki baking requires a significant time commitment, the active preparation time is manageable, and much of the time is spent waiting for the dough to rise. The reward is the incomparable aroma and flavor of homemade Greek Easter Bread, making it a worthwhile endeavor for Easter celebrations.
How to Serve Greek Easter Bread (Tsoureki)
Greek Easter Bread (Tsoureki) is a versatile and festive bread that can be served in various ways during Easter celebrations and beyond. Here are some delightful serving suggestions:
- Easter Brunch Centerpiece:
- Presentation: Place a beautiful braided Tsoureki loaf as the centerpiece of your Easter brunch table. Its golden crust and vibrant red eggs make it visually stunning.
- Slices: Slice the Tsoureki and arrange it on a platter alongside other brunch dishes.
- Red Eggs: Ensure the red eggs baked into the Tsoureki are prominently displayed, or place extra red eggs around the bread for decoration.
- With Easter Feast:
- Side Bread: Serve slices of Tsoureki as a side bread with your Easter feast, alongside roasted lamb, chicken, or other main dishes.
- Sweet Contrast: The slightly sweet flavor of Tsoureki provides a delightful contrast to savory Easter dishes.
- Breakfast or Snack:
- Toast with Butter or Honey: Enjoy toasted slices of Tsoureki for breakfast or a snack, spread with butter, honey, or Greek yogurt.
- Coffee or Tea: Pair with a cup of coffee, Greek coffee, or tea for a traditional Greek breakfast or afternoon treat.
- Dipping in Milk: In Greece, it’s common to dip Tsoureki in milk for breakfast.
- Dessert:
- Light Dessert: Tsoureki itself can be served as a light dessert after an Easter meal. Its subtle sweetness is satisfying without being overly heavy.
- Fruit and Cheese: Serve slices of Tsoureki with fresh fruit and a selection of cheeses for a simple and elegant dessert platter.
- Tsoureki French Toast: Transform leftover Tsoureki into decadent French toast for a special breakfast or brunch treat.
- Gift Giving:
- Homemade Gift: Tsoureki loaves make wonderful homemade gifts for family and friends during Easter. Wrap them in cellophane or decorative paper and tie with a ribbon.
- Easter Basket Addition: Include a small Tsoureki loaf or braided rolls in Easter baskets for a traditional and delicious treat.
- Serving Temperature:
- Warm: Tsoureki is delicious served slightly warm, especially freshly baked. Gently reheat slices in a low oven or microwave if desired.
- Room Temperature: It is also excellent served at room temperature.
- Cold (Less Common): While less traditional, some enjoy Tsoureki cold, especially the next day.
- Garnish and Accompaniments:
- Red Eggs: The red eggs themselves are a primary garnish and symbolic element.
- Sesame Seeds/Almonds: Toasted sesame seeds or sliced almonds add visual appeal and texture.
- Powdered Sugar (Optional): A light dusting of powdered sugar can add a touch of sweetness and elegance, though traditionally Tsoureki is not heavily sugared.
- Honey or Syrup (Optional): Serve with honey or syrup on the side for those who prefer extra sweetness.
By considering these serving suggestions, you can showcase your homemade Greek Easter Bread (Tsoureki) in a variety of ways, making it a cherished part of your Easter celebrations and a delightful treat to enjoy with family and friends.
Additional Tips for Baking Perfect Greek Easter Bread (Tsoureki)
To ensure your Greek Easter Bread (Tsoureki) turns out beautifully every time, here are five additional tips based on common bread-baking wisdom and specific nuances of this recipe:
- Use Fresh and Active Yeast: Yeast is the heart of any bread recipe, and using fresh, active yeast is crucial for successful Tsoureki baking. Always check the expiration date on your yeast package. Proof your yeast in lukewarm milk with sugar as instructed in the recipe. If it doesn’t become foamy within 5-10 minutes, it’s likely inactive, and you should use fresh yeast. Inactive yeast will result in a dough that doesn’t rise properly, leading to dense, heavy bread. Storing yeast in the refrigerator or freezer can help maintain its freshness for longer.
- Knead Dough Adequately for Gluten Development: Proper kneading is essential for developing the gluten in Tsoureki dough, which creates the bread’s characteristic elasticity, chewiness, and structure. Knead the dough for the recommended time (8-10 minutes by hand, 6-8 minutes in a stand mixer) until it becomes smooth and elastic. The dough should pass the “windowpane test” – you should be able to stretch a small piece of dough thinly enough to see light through it without it tearing. Adequate kneading ensures the bread will rise well, have a tender crumb, and hold its braided shape during baking.
- Control Dough Temperature for Optimal Rising: Yeast thrives in a warm environment. Maintain a consistent and moderately warm temperature (around 75-80°F/24-27°C) for both the first and second rise of your Tsoureki dough. Avoid excessively hot temperatures, which can kill the yeast, and overly cold temperatures, which will slow down rising significantly. A slightly warm oven (turned off), a warm spot in your kitchen away from drafts, or using a proofing box or setting on your oven can create ideal rising conditions. Consistent temperature promotes even and predictable rising, resulting in light and airy bread.
- Handle Dough Gently During Shaping and Braiding: Tsoureki dough is enriched and delicate. Handle it gently during shaping and braiding to avoid deflating it or tearing the gluten structure developed during kneading and rising. When dividing the dough, shaping ropes, and braiding, use gentle, deliberate movements. Avoid rough handling or excessive stretching, which can result in dense or unevenly textured bread. Gentle handling ensures the dough retains its airiness and braided shape beautifully.
- Bake to the Correct Internal Temperature: Baking Tsoureki to the correct internal temperature is crucial for ensuring it’s fully cooked through without being dry. Use an instant-read thermometer to check the internal temperature of the bread. Insert the thermometer into the center of a loaf; it should reach 200-210°F (93-99°C) when done. Baking to this temperature ensures the crumb is fully cooked and the bread has a pleasant texture. Avoid underbaking, which can result in gummy or doughy bread, and overbaking, which can lead to dry bread. Adjust baking time as needed based on your oven and loaf size, and rely on the internal temperature as the most accurate indicator of doneness.
By paying attention to these tips, particularly yeast activity, kneading, rising temperature, gentle handling, and baking to the correct internal temperature, you will significantly increase your chances of baking perfect Greek Easter Bread (Tsoureki) that is both beautiful and delicious, honoring this cherished Easter tradition.
FAQ Section for Greek Easter Bread (Tsoureki)
Here are five frequently asked questions about baking Greek Easter Bread (Tsoureki), along with detailed answers to help you troubleshoot and perfect your recipe:
Q1: My Tsoureki dough is not rising. What could be wrong?
A: There are several reasons why your Tsoureki dough might not be rising properly. Here are the most common culprits and how to address them:
- Inactive Yeast: The most frequent cause is inactive or old yeast. Ensure your yeast is fresh and within its expiration date. Always proof your yeast in lukewarm milk with sugar as instructed in the recipe. If it doesn’t become foamy within 5-10 minutes, discard it and use fresh yeast.
- Milk Temperature: Milk that is too hot (above 120°F/49°C) can kill yeast, while milk that is too cold (below 90°F/32°C) won’t activate it properly. Use a thermometer to ensure the milk is lukewarm, ideally between 100-110°F (38-43°C).
- Cold Environment: Yeast needs a warm environment to thrive. If your kitchen is cold, the dough will rise very slowly or not at all. Place the dough in a warm spot, such as a slightly warmed oven (turned off), near a radiator, or in a proofing drawer. Maintain a temperature around 75-80°F (24-27°C) for optimal rising.
- Too Much Salt or Sugar: While sugar feeds yeast in small amounts, excessive salt or sugar can inhibit yeast activity. Ensure you are using the correct measurements of salt and sugar as specified in the recipe.
- Insufficient Kneading: While less common, under-kneading can sometimes affect rising, as gluten development is needed to trap the gases produced by yeast. Ensure you knead the dough for the recommended time until it is smooth and elastic.
If your dough is not rising, first check your yeast by proofing a fresh batch. Then, ensure your rising environment is warm enough and that you have followed the ingredient measurements accurately. If all else fails and your dough hasn’t risen after a reasonable time (2-3 hours for the first rise), it’s best to start over with fresh yeast and carefully controlled conditions.
Q2: My Tsoureki is dense and heavy, not light and airy. What went wrong?
A: Dense and heavy Tsoureki is usually a result of issues with yeast activity, rising, or over-handling of the dough. Here are common reasons and solutions:
- Insufficient Rising: The most likely cause is under-proofing or under-rising. Ensure you allow the dough to rise fully for both the first and second rise, until it has doubled in size (first rise) or almost doubled (second rise). Use a warm environment to facilitate rising.
- Inactive Yeast: As mentioned in Q1, inactive yeast will lead to poor rising and dense bread. Ensure your yeast is fresh and active.
- Too Much Flour: Adding too much flour can make the dough dense. Measure flour accurately using the scoop and level method or, ideally, by weight. Add flour gradually while kneading, stopping when the dough is soft and slightly sticky, not dry and stiff.
- Over-Kneading (Less Likely but Possible): While under-kneading is more common, excessively vigorous kneading can sometimes toughen the gluten and result in a slightly denser bread. Knead for the recommended time until smooth and elastic, but avoid overworking the dough.
- Deflating Dough During Shaping: If you handle the dough too roughly during shaping and braiding, you can deflate it, releasing the air bubbles that contribute to lightness. Handle the dough gently during shaping and braiding.
To achieve light and airy Tsoureki, focus on using active yeast, ensuring proper and complete rising times in a warm environment, using the correct amount of flour, and handling the dough gently throughout the process.
Q3: My Tsoureki crust is browning too quickly, but the inside is not cooked. How can I fix this?
A: If your Tsoureki crust is browning too rapidly before the inside is fully cooked, here are a few techniques to prevent burning and ensure even baking:
- Reduce Oven Temperature: Lower your oven temperature by 25°F (15°C). This will slow down the browning of the crust and allow the inside to catch up and cook through.
- Tent with Foil: Tent the Tsoureki loaves loosely with aluminum foil partway through baking (after about 15-20 minutes, when the crust starts to get golden). This shields the top from direct heat and prevents further browning while allowing the inside to continue baking.
- Bake on Lower Rack (Optional): Placing the baking sheet on a lower rack in the oven can sometimes help to reduce top browning and promote more even baking.
- Check Internal Temperature: Always rely on an instant-read thermometer to check for doneness. The internal temperature should reach 200-210°F (93-99°C). If the crust is already nicely browned but the internal temperature is still low, use the foil tent and continue baking at a slightly lower temperature until done.
Preventing over-browning is about controlling the heat exposure to the crust. Lowering the oven temperature and using foil are the most effective methods to achieve a perfectly golden-brown crust and a fully cooked interior.
Q4: Can I make Tsoureki dough ahead of time and bake it later?
A: Yes, you can prepare Tsoureki dough ahead of time and bake it later, which can be helpful for managing your baking schedule. Here’s how:
- Cold Proofing (Overnight Rise in Refrigerator): After kneading the dough, place it in a lightly oiled bowl, cover tightly with plastic wrap, and refrigerate for overnight or up to 24 hours for its first rise. Cold proofing slows down yeast activity, allowing for a longer, slower rise which can enhance flavor development.
- Baking Day: The next day, remove the dough from the refrigerator and let it sit at room temperature for about 1-2 hours to warm up and resume rising. It may take longer to double in size after being refrigerated. Once it has warmed up and risen somewhat, proceed with punching down, shaping, second rise, and baking as instructed in the recipe.
- Shaping Ahead (Proof and Bake Later): You can also shape and braid the loaves after the first rise, place them on baking sheets, cover, and refrigerate for overnight proofing. The next day, let them sit at room temperature for about 1-2 hours to warm up and complete their second proof before baking.
Making dough ahead and cold proofing requires adjusting rising times and planning ahead, but it can be a convenient way to break up the baking process and manage your time, especially when preparing for Easter celebrations.
Q5: Can I freeze baked Tsoureki? How do I freeze and thaw it?
A: Yes, baked Tsoureki freezes very well, making it possible to prepare it in advance and enjoy it later. Here’s how to freeze and thaw Tsoureki properly:
- Cool Completely: Allow the baked Tsoureki loaves to cool completely to room temperature before freezing. Freezing warm bread can lead to condensation and texture changes.
- Wrap Tightly: Wrap each cooled loaf tightly in plastic wrap, ensuring there are no air pockets. Then, wrap again in aluminum foil or place in a freezer-safe zip-top bag, squeezing out as much air as possible. Proper wrapping is crucial to prevent freezer burn and maintain freshness.
- Freeze: Freeze for up to 2-3 months for best quality. While it may be safe to eat for longer, the texture and flavor may start to degrade over extended freezer storage.
- Thawing: To thaw frozen Tsoureki, remove it from the freezer and unwrap it. Let it thaw at room temperature for several hours, or overnight. You can also thaw it in a low oven (around 250°F/120°C) for about 15-20 minutes, or until warmed through.
- Reheating (Optional): After thawing, you can reheat the Tsoureki in a low oven (300°F/150°C) for 5-10 minutes to refresh its texture and warmth, if desired.
Freezing is a great way to preserve leftover Tsoureki or to prepare it ahead of Easter. When thawed and reheated properly, it will retain much of its original flavor and texture, allowing you to enjoy this delicious Easter bread even after the holiday.
These FAQs should address common questions and challenges you might encounter while baking Greek Easter Bread (Tsoureki), empowering you to create beautiful and delicious loaves for your Easter celebrations!
Print
Greek Easter Bread recipe
Ingredients
For the Dough:
-
- 1 cup (240ml) lukewarm milk: Milk is the liquid base of our dough, contributing moisture, richness, and a softer texture to the final bread. Lukewarm milk, ideally between 100-110°F (38-43°C), is crucial for activating the yeast. Whole milk will result in a richer, more tender Tsoureki, but 2% milk can also be used. For a dairy-free option, you can substitute with plant-based milk like almond milk, soy milk, or oat milk, although these may slightly alter the texture and flavor profile. Ensure the milk is fresh and not overheated, as excessively hot milk can kill the yeast.
-
- 2 ¼ teaspoons (1 packet) active dry yeast: Yeast is the leavening agent that makes Tsoureki rise and become light and airy. Active dry yeast is readily available and works reliably. Ensure your yeast is fresh and within its expiration date for optimal rising power. If using instant yeast (also called rapid-rise yeast), you can skip the proofing step and add it directly to the dry ingredients. However, active dry yeast is traditionally used and contributes to the classic flavor development. Storing yeast in the refrigerator or freezer can prolong its shelf life.
-
- ½ cup (100g) granulated sugar, plus 1 teaspoon for proofing yeast: Sugar not only sweetens the Tsoureki but also feeds the yeast, aiding in its activation and contributing to the bread’s rise and browning. Granulated sugar is commonly used. The 1 teaspoon of sugar added to the lukewarm milk is specifically for proofing the yeast, ensuring it’s active and ready to leaven the dough. You can adjust the ½ cup sugar slightly based on your desired sweetness, but Tsoureki is traditionally subtly sweet, not overly sugary.
-
- 5 large eggs, lightly beaten: Eggs add richness, color, and structure to the Tsoureki dough. They contribute to the bread’s tender crumb and golden crust. Use large eggs for the recipe as specified. Lightly beating the eggs before adding them to the dough ensures they incorporate smoothly and evenly. Fresh, high-quality eggs will enhance the overall flavor and texture.
-
- ½ cup (1 stick/113g) unsalted butter, melted and cooled slightly: Butter adds flavor, richness, and tenderness to the Tsoureki. Unsalted butter is preferred to control the salt content of the bread. Melt the butter and allow it to cool slightly before adding it to the dough. Hot butter can cook the eggs and affect the yeast activity. Cooled, but still liquid, butter is ideal for incorporation.
-
- 1 teaspoon salt: Salt is essential for controlling yeast activity, enhancing flavor, and strengthening the gluten in the dough. It balances the sweetness and brings out the complex flavors of the other ingredients. Use regular table salt or fine sea salt.
-
- 6 cups (750g) all-purpose flour, plus more for dusting: All-purpose flour forms the structure of the Tsoureki. Use good quality all-purpose flour. The amount of flour may need to be adjusted slightly depending on humidity and the exact measurements of other ingredients. Start with 6 cups and add more gradually if the dough is too sticky, aiming for a soft, slightly sticky dough that is manageable to knead. Having extra flour on hand for dusting your work surface and hands during kneading and shaping is crucial to prevent the dough from sticking.
For the Signature Aromatics:
-
- 2 teaspoons mahlepi (mahlab) powder: Mahlepi is the secret ingredient that gives Tsoureki its distinctive, unique flavor. It is a spice made from the ground pits of St. Lucie cherries, offering a warm, slightly nutty, and subtly cherry-almond flavor. Mahlepi is essential for authentic Tsoureki. You can find it at Greek or Middle Eastern markets, specialty spice shops, or online. Ensure your mahlepi is fresh and fragrant for the best flavor.
-
- ½ teaspoon mastic (mastiha) gum, powdered: Mastic gum is another key aromatic ingredient that contributes to Tsoureki’s characteristic flavor and texture. Mastic is a resin from the mastic tree, offering a piney, slightly resinous, and unique flavor. It also acts as a dough enhancer, contributing to the bread’s elasticity and chewiness. Mastic gum needs to be powdered before use. You can powder it yourself by freezing the mastic gum pieces for about 30 minutes, then grinding them with a teaspoon of sugar in a spice grinder or mortar and pestle until finely powdered. Like mahlepi, mastic gum can be found at Greek or Middle Eastern markets, specialty food stores, or online.
For the Egg Wash and Decoration:
-
- 1 egg, beaten with 1 tablespoon milk: Egg wash gives the Tsoureki its beautiful glossy, golden-brown crust. Beat one egg with a tablespoon of milk to create a smooth, even egg wash.
-
- Sesame seeds or sliced almonds (optional, for topping): Sesame seeds or sliced almonds can be sprinkled on top of the Tsoureki before baking for added texture and visual appeal. These are optional but traditional toppings.
-
- Red dyed eggs (for decoration): Red dyed eggs are a symbolic and essential decoration for Greek Easter Bread. Traditionally, hard-boiled eggs are dyed red to symbolize the blood of Christ and are baked directly into the Tsoureki loaves or placed in the center after baking. Prepare your red dyed eggs in advance using your preferred method.
Instructions
1. Proof the Yeast:
-
- In a large bowl, warm the milk to lukewarm (100-110°F/38-43°C). Use a thermometer to ensure the milk is at the correct temperature – too hot and it can kill the yeast, too cold and it won’t activate properly.
-
- Add 1 teaspoon of sugar and the active dry yeast to the warm milk. Sprinkle the yeast over the warm milk and sugar mixture.
-
- Gently stir and let it stand for 5-10 minutes, or until foamy. This process, called proofing, ensures that the yeast is active and viable. You should see a foamy or bubbly layer on top of the milk mixture, indicating that the yeast is working. If it doesn’t foam, your yeast may be old or inactive, and you should start with fresh yeast.
2. Combine Wet Ingredients and Aromatics:
-
- In a separate large bowl, whisk together the beaten eggs, remaining ½ cup sugar, melted and cooled butter, salt, mahlepi powder, and powdered mastic gum. Whisk until all ingredients are well combined and the sugar is mostly dissolved. The aromatics, mahlepi and mastic, should be evenly distributed throughout the wet mixture.
3. Gradually Add Dry Ingredients and Knead:
-
- Gradually add the flour to the wet ingredients, starting with about 4 cups. Add the flour in increments, mixing with a wooden spoon or dough hook attachment of a stand mixer on low speed.
-
- Continue adding flour, a little at a time, kneading until a soft, slightly sticky dough forms. As you add flour, the dough will come together. You may not need to use all 6 cups of flour, or you might need a little more, depending on humidity and flour consistency. The goal is to achieve a dough that is soft, slightly sticky to the touch, but manageable to knead.
-
- Knead the dough on a lightly floured surface for 8-10 minutes, or in a stand mixer with a dough hook for 6-8 minutes, until smooth and elastic. Kneading develops the gluten in the dough, which is essential for the bread’s structure and texture. The dough should become smooth, elastic, and springy. It will still be slightly sticky, but should pull away from the sides of the bowl or work surface as you knead.
4. First Rise (Bulk Fermentation):
-
- Place the dough in a lightly oiled large bowl, turning to coat all sides. This prevents the dough from drying out and sticking to the bowl as it rises.
-
- Cover the bowl with plastic wrap or a clean kitchen towel. Ensure the cover is airtight to create a warm, humid environment for rising.
-
- Let the dough rise in a warm place for 1 ½ – 2 hours, or until doubled in size. The rising time will depend on the warmth of your environment. A warm place (around 75-80°F/24-27°C) is ideal for yeast activity. The dough should roughly double in volume.
5. Punch Down Dough and Second Rise:
-
- Gently punch down the dough to release air bubbles. Punching down redistributes the yeast and prepares the dough for shaping.
-
- Divide the dough into 3-6 equal portions, depending on the desired size of your loaves. For larger loaves, divide into 3 portions. For smaller, individual loaves, divide into 6 or more.
-
- Shape each portion into a long rope, about 18-24 inches long. Gently roll and stretch each portion of dough into a rope shape.
-
- Braid 3 ropes together to form a loaf. To braid, pinch the ends of three ropes together at one end. Braid them together like hair, and pinch the ends together at the other end. Tuck the ends underneath the loaf for a neater appearance. You can also make individual braided rolls by braiding shorter ropes.
-
- Place the braided loaves on baking sheets lined with parchment paper. Parchment paper prevents sticking and makes it easier to transfer the baked loaves.
-
- Cover loosely with plastic wrap or a clean kitchen towel and let rise in a warm place for another 45-60 minutes, or until almost doubled in size. This second rise, called proofing, allows the shaped loaves to become light and airy before baking.
6. Preheat Oven and Prepare Egg Wash:
-
- Preheat oven to 350°F (175°C). Ensure your oven is preheated to the correct temperature for even baking.
-
- Prepare the egg wash by beating 1 egg with 1 tablespoon of milk. Whisk together until well combined.
7. Egg Wash and Bake:
-
- Gently brush the tops of the braided loaves with the egg wash. Brush evenly for a glossy, golden-brown crust.
-
- If desired, sprinkle with sesame seeds or sliced almonds. Add your chosen toppings after brushing with egg wash.
-
- If using red dyed eggs, gently press a red egg into the center of each loaf (optional, or add after baking). Traditionally, red eggs are baked into Tsoureki. If doing so, gently press them into the dough before baking. Alternatively, you can create indentations before the second rise to place the eggs after baking.
-
- Bake for 25-35 minutes, or until golden brown and the internal temperature reaches 200-210°F (93-99°C). Baking time will depend on the size of your loaves and your oven. The Tsoureki is done when it is golden brown and sounds hollow when tapped on the bottom. An instant-read thermometer inserted into the center should register 200-210°F.
8. Cool and Enjoy:
-
- Let the Tsoureki loaves cool on the baking sheets for a few minutes before transferring them to a wire rack to cool completely. Cooling on a wire rack prevents the bottom of the bread from becoming soggy.
-
- Once cooled, slice and serve. Tsoureki is delicious served warm or at room temperature.
Nutrition
- Serving Size: one normal portion
- Calories: 200-250
- Sugar: 10-12 grams
- Sodium: 150-200 mg
- Fat: 8-10 grams
- Saturated Fat: 5-7 grams
- Carbohydrates: 30-35 grams
- Fiber: 1-2 grams
- Protein: 5-6 grams
- Cholesterol: 50-60 mg


