
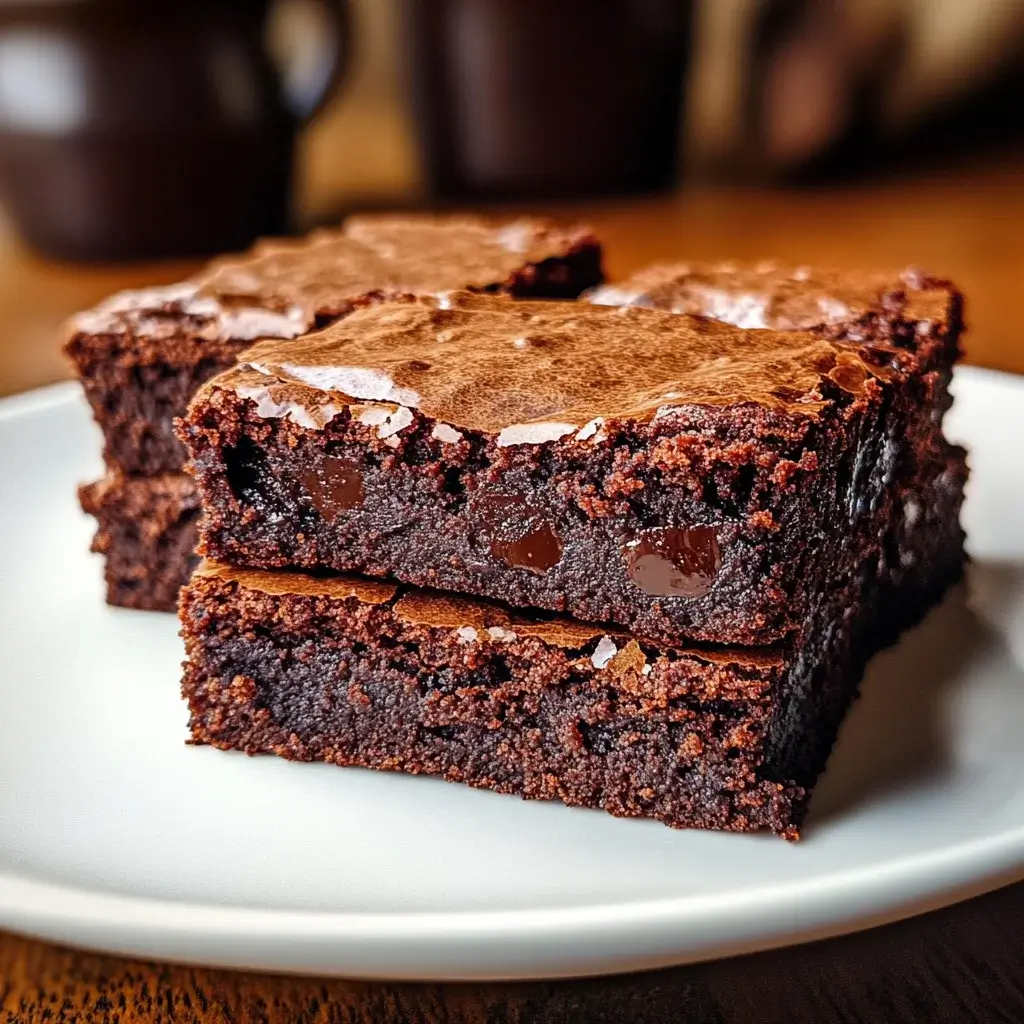

Baking brownies has always been a therapeutic ritual for me, a way to unwind and create something comforting and delicious. But Espresso Brownies? They are in a league of their own. The first time I made these, the aroma that filled my kitchen was simply intoxicating – rich chocolate mingling with the deep, roasted scent of espresso. And the taste? Utterly divine. Imagine a brownie that’s intensely fudgy, deeply chocolatey, with a subtle but unmistakable coffee kick that elevates the entire experience. They’re not just brownies; they’re a sophisticated indulgence, perfect for satisfying a serious chocolate craving or impressing guests at a dinner party. My family, who are self-proclaimed brownie aficionados, declared these the best brownies I’ve ever made. The espresso doesn’t overpower, but rather enhances the chocolate, creating a depth of flavor that’s both comforting and exciting. If you’re a chocolate lover, and especially if you appreciate the magic of coffee, you absolutely must try these Espresso Brownies. They are, quite simply, brownie perfection.
Ingredients: Gathering the Essentials for Decadent Espresso Brownies
The secret to truly exceptional Espresso Brownies lies in the quality and balance of the ingredients. Let’s break down each component, exploring their role and offering insights into choosing the best for your baking endeavor.
- Unsalted Butter: The foundation of richness and moisture! Butter is crucial for creating that signature fudgy texture in brownies and contributing to their overall flavor.
- Unsalted vs. Salted: Unsalted butter is preferred in baking because it allows you to control the total amount of salt in the recipe. Salted butter can vary in salt content between brands, which can affect the final flavor balance. Using unsalted butter ensures consistency and allows the other flavors, like chocolate and espresso, to shine.
- Quality Matters: Opt for high-quality unsalted butter, preferably European-style butter, if available. European butter generally has a higher fat content, which translates to richer flavor and a more tender brownie. However, any good-quality unsalted butter will work beautifully.
- Melting the Butter: The butter in this recipe is melted, which contributes to the fudgy texture. Melting butter before incorporating it into the batter creates a denser, chewier brownie compared to creaming butter and sugar, which results in a cakier texture.
- Bittersweet Chocolate: The heart of intense chocolate flavor! Bittersweet chocolate provides the deep, complex chocolate notes that are essential for Espresso Brownies.
- Percentage of Cacao: Look for bittersweet chocolate with a cacao percentage between 60% and 70%. This range strikes a perfect balance between bitterness and sweetness, allowing the chocolate flavor to be prominent without being overly intense or sugary.
- Chocolate Bars vs. Chocolate Chips: Using high-quality bittersweet chocolate bars, finely chopped, is highly recommended over chocolate chips. Chocolate bars generally melt more smoothly and have a richer, more nuanced flavor. Chocolate chips often contain stabilizers that can affect their melting properties and overall flavor.
- Dutch-Processed Cocoa Powder (Optional, for deeper chocolate): While bittersweet chocolate is the primary source of chocolate flavor, adding a bit of Dutch-processed cocoa powder can intensify the chocolate notes and deepen the color of the brownies. Dutch-processed cocoa powder is less acidic than natural cocoa powder, resulting in a smoother, less bitter chocolate flavor. If you choose to use cocoa powder, reduce the amount of bittersweet chocolate slightly to maintain balance.
- Granulated Sugar & Brown Sugar: The sweetness and moisture duo! A combination of granulated sugar and brown sugar contributes to the sweetness, moisture, and chewiness of the brownies.
- Granulated Sugar (White Sugar): Granulated sugar provides sweetness and helps to create a slightly crisp top crust on the brownies. It also helps to balance the bitterness of the bittersweet chocolate and espresso.
- Brown Sugar (Light or Dark): Brown sugar, especially dark brown sugar, adds moisture, chewiness, and a subtle molasses flavor that complements the chocolate and espresso beautifully. Light brown sugar can also be used, offering a slightly milder molasses note. The molasses in brown sugar is hygroscopic, meaning it attracts and retains moisture, contributing to the fudgy texture.
- Ratio of Sugars: The ratio of granulated sugar to brown sugar in this recipe is carefully balanced to achieve the desired texture and sweetness. Adjusting this ratio can impact the final result – more brown sugar will result in a chewier, moister brownie, while more granulated sugar will lead to a slightly crisper top and potentially drier brownie.
- Eggs: The binding and richness agents! Eggs play a crucial role in brownies, providing structure, richness, and moisture.
- Whole Eggs: This recipe uses whole eggs, including both the yolks and whites. Egg yolks contribute richness, fat, and emulsification, while egg whites provide structure and leavening.
- Room Temperature Eggs: Using room temperature eggs is generally recommended in baking as they emulsify more easily into the batter, resulting in a smoother and more cohesive mixture. If you forget to take your eggs out of the refrigerator ahead of time, you can quickly warm them by placing them in a bowl of warm water for 5-10 minutes.
- Incorporating Eggs: The eggs are typically whisked into the melted butter and sugar mixture. It’s important not to over-mix at this stage, as over-mixing can develop gluten and lead to tougher brownies. Mix just until the eggs are incorporated.
- Vanilla Extract: The flavor enhancer! Vanilla extract enhances the overall flavor profile of the brownies, adding warmth and depth and complementing both the chocolate and espresso.
- Pure Vanilla Extract: Use pure vanilla extract for the best flavor. Imitation vanilla extract can have a less complex and sometimes artificial taste.
- Vanilla Bean Paste (Optional, for intensified vanilla): For an even more intense vanilla flavor, you can substitute vanilla extract with vanilla bean paste. Vanilla bean paste contains vanilla bean seeds, which add a visual appeal and a more pronounced vanilla flavor. Use an equal amount of vanilla bean paste as vanilla extract.
- All-Purpose Flour: The structural component! Flour provides structure to the brownies, holding the batter together and creating the desired texture.
- Measuring Flour Correctly: Accurately measuring flour is essential in baking. Too much flour can result in dry, cakey brownies, while too little flour can lead to overly fudgy and potentially underbaked brownies. Use the “spoon and level” method for measuring flour: spoon flour into a measuring cup and level off the excess with a straight edge. Avoid scooping flour directly from the bag, as this can compact the flour and result in using too much.
- Unbleached vs. Bleached Flour: Unbleached all-purpose flour is generally preferred for brownies. Bleached flour has been treated to lighten its color and soften its texture, which is not necessary or desirable for brownies.
- Espresso Powder: The coffee kick! Espresso powder is the key ingredient that transforms regular brownies into Espresso Brownies, adding a deep, roasted coffee flavor that enhances the chocolate.
- Espresso Powder vs. Instant Coffee: Use espresso powder, not instant coffee granules. Espresso powder is made from finely ground, brewed espresso and has a much more concentrated and intense coffee flavor than instant coffee. Instant coffee granules will not provide the same robust coffee flavor.
- Quality of Espresso Powder: Use a good quality espresso powder for the best flavor. Look for brands that are known for their coffee quality.
- Bloom the Espresso Powder (Optional, for intensified flavor): To further enhance the espresso flavor, you can “bloom” the espresso powder. Before adding it to the batter, whisk the espresso powder with a tablespoon or two of hot water until it forms a paste. This process releases the coffee’s aroma and intensifies its flavor.
- Salt: The flavor balancer! Salt is a crucial ingredient in baking, even in sweet recipes. Salt enhances the sweetness of the sugar, balances the bitterness of the chocolate and espresso, and brings out the overall flavors of the brownies.
- Table Salt or Sea Salt: You can use either table salt or fine sea salt in this recipe. If using coarse sea salt, grind it finely before adding it to the batter.
- Optional Add-Ins (Nuts, Chocolate Chips, etc.): Customize your brownies! While Espresso Brownies are delicious on their own, you can add optional ingredients to customize them to your liking.
- Chopped Nuts (Walnuts, Pecans, Hazelnuts): Adding chopped nuts, such as walnuts, pecans, or hazelnuts, provides a textural contrast and nutty flavor. Toast the nuts lightly before adding them to the batter for enhanced flavor.
- Chocolate Chips or Chunks: Adding extra chocolate chips or chunks, such as semi-sweet, milk chocolate, or white chocolate, can create pockets of molten chocolate and add extra sweetness.
- Sea Salt Flakes (for topping): Sprinkling sea salt flakes on top of the baked brownies adds a beautiful visual appeal and a burst of salty flavor that complements the sweetness and chocolate.
Instructions: Baking Fudgy and Flavorful Espresso Brownies
Baking Espresso Brownies is a rewarding process, and following these step-by-step instructions will guide you to fudgy, intensely flavored perfection.
- Preheat Oven and Prepare Pan: Preheat your oven to 350°F (175°C). Grease and flour an 8×8 inch baking pan, or line it with parchment paper, leaving an overhang on the sides to easily lift the brownies out after baking. Parchment paper lining is highly recommended for easy removal and clean edges.
- Melt Butter and Chocolate: In a heatproof bowl set over a saucepan of simmering water (or in a microwave-safe bowl in short intervals), melt the unsalted butter and bittersweet chocolate together. Stir occasionally until smooth and completely melted. Remove from heat and let cool slightly. Be careful not to overheat the chocolate, as it can seize or burn. If using a microwave, melt in 30-second intervals, stirring after each interval, until just melted.
- Whisk Sugars and Eggs: In a separate large bowl, whisk together the granulated sugar and brown sugar until combined. Add the eggs one at a time, whisking well after each addition until the mixture is pale and slightly thickened. Whisking the eggs and sugars creates a slightly emulsified mixture that contributes to the brownie’s texture.
- Incorporate Melted Chocolate Mixture: Gradually pour the slightly cooled melted chocolate and butter mixture into the egg and sugar mixture, whisking constantly until just combined. Be careful not to overmix at this stage. The mixture should be smooth and glossy.
- Add Vanilla and Espresso Powder: Stir in the vanilla extract and espresso powder (or bloomed espresso powder paste, if using) until evenly incorporated. The espresso powder will dissolve into the batter.
- Combine Dry Ingredients: In a separate small bowl, whisk together the all-purpose flour and salt.
- Gradually Add Dry Ingredients to Wet Ingredients: Gradually add the dry ingredients (flour and salt) to the wet ingredients (chocolate mixture), mixing with a spatula or wooden spoon just until combined. Be careful not to overmix – overmixing can develop gluten and result in tough brownies. Mix until just a few streaks of flour remain, then stop mixing.
- Fold in Optional Add-Ins (if using): If using any optional add-ins like chopped nuts or chocolate chips, gently fold them into the batter until evenly distributed.
- Pour Batter into Prepared Pan: Pour the brownie batter into the prepared baking pan and spread evenly with a spatula.
- Bake: Bake in the preheated oven for 25-30 minutes, or until a toothpick inserted into the center comes out with moist crumbs attached (for fudgy brownies) or mostly clean (for slightly cakier brownies). The baking time may vary depending on your oven and the desired level of fudginess. Start checking for doneness around 25 minutes.
- Cool Completely: Remove the brownies from the oven and let them cool completely in the pan on a wire rack before cutting. Cooling completely is crucial for fudgy brownies, as they continue to set as they cool. For cleaner cuts, chill the brownies in the refrigerator for 30-60 minutes before slicing.
- Cut and Serve: Once cooled, lift the brownies out of the pan using the parchment paper overhang (if used). Cut into squares and serve. For clean cuts, use a sharp knife and wipe it clean between slices.
Nutrition Facts: Indulging Responsibly in Espresso Brownies
Espresso Brownies are undeniably a decadent treat, and understanding their nutritional profile can help you enjoy them mindfully. The following nutrition information is an estimate per brownie square (assuming 16 brownies are cut from an 8×8 inch pan) and can vary based on specific ingredients and portion sizes.
Serving Size: 1 Brownie Square (approximately 1/16th of an 8×8 inch pan)
Approximate Nutritional Values per Serving:
- Calories: 250-350 calories (depending on ingredients and size)
- Protein: 3-5 grams
- Fat: 15-20 grams
- Saturated Fat: 8-12 grams
- Unsaturated Fat: 5-8 grams (primarily from butter and chocolate)
- Carbohydrates: 30-40 grams
- Fiber: 1-2 grams
- Sugar: 20-25 grams (primarily added sugars)
- Sodium: 50-100 mg
- Caffeine: 10-20 mg (approximately, depending on espresso powder used)
Key Nutritional Considerations:
- Calorie Density: Espresso Brownies are calorie-dense due to their high fat and sugar content. Portion control is important for mindful indulgence.
- Sugar Content: Brownies are a dessert and are high in added sugars. Enjoy them as an occasional treat rather than an everyday snack.
- Fat Content: The fat content comes primarily from butter and chocolate, which include saturated fats. While some fats are necessary for a balanced diet, moderation is key.
- Protein and Fiber: Brownies provide a small amount of protein and fiber, but they are not significant sources of these nutrients.
- Caffeine Content: Espresso Brownies contain a small amount of caffeine from the espresso powder. While the caffeine content is relatively low compared to a cup of coffee, it’s worth noting for those sensitive to caffeine.
Making Healthier Choices (Modifications):
While Espresso Brownies are inherently a treat, you can make some modifications to slightly improve their nutritional profile:
- Reduce Sugar: You can slightly reduce the amount of sugar in the recipe (by about 10-20%) without significantly affecting the texture.
- Use Darker Chocolate (Higher Cacao Percentage): Using bittersweet chocolate with a higher cacao percentage (e.g., 70% or higher) can reduce the sugar content slightly and increase the antioxidant content.
- Add Nuts: Adding nuts like walnuts or pecans provides healthy fats, protein, and fiber, which can help balance the nutritional profile slightly.
- Portion Control: Enjoy smaller brownie squares to manage calorie and sugar intake.
It’s important to remember that Espresso Brownies are a dessert to be enjoyed in moderation as part of a balanced diet. Being aware of their nutritional content allows you to make informed choices and savor them responsibly.
Preparation Time: From Pantry to Oven in Minutes
Espresso Brownies are not only incredibly delicious but also relatively quick to prepare, making them perfect for satisfying sudden chocolate cravings or whipping up a treat for guests.
Total Preparation Time: Approximately 45-55 minutes
Breakdown of Time:
- Prep Time (Measuring Ingredients, Chopping Chocolate): 15-20 minutes
- Gathering and measuring all ingredients.
- Chopping bittersweet chocolate (if using chocolate bars).
- Preparing baking pan.
- Active Cooking Time (Melting Chocolate, Mixing Batter): 15-20 minutes
- Melting butter and chocolate.
- Whisking sugars and eggs.
- Combining wet and dry ingredients.
- Folding in optional add-ins.
- Baking Time: 25-30 minutes
- Cooling Time: At least 30 minutes (ideally longer for fudgy brownies)
Why they are relatively quick:
- One-Bowl Mixing (mostly): While there are a few steps, the batter comes together relatively quickly, and you can minimize dishes by using the same bowl for melting chocolate and mixing wet ingredients.
- No Creaming Butter and Sugar: The melted butter method eliminates the need for creaming butter and sugar, which can be a more time-consuming step in some baking recipes.
- Straightforward Baking: The baking process is simple and requires minimal monitoring.
Tips for Speeding Up Preparation:
- Melt Chocolate in Microwave: Melting chocolate in the microwave is faster than using a double boiler. Melt in short intervals (30 seconds), stirring after each interval, to prevent burning.
- Pre-chop Chocolate (if using bars): If using chocolate bars, chop them in advance to save time during the active mixing process.
- Organize Ingredients: Having all ingredients measured and ready to go (“mise en place”) before you start mixing will streamline the process and make it faster.
While the total time includes cooling time, the active hands-on time for preparing Espresso Brownies is relatively short, making them a great option for a homemade dessert without spending hours in the kitchen.
How to Serve Espresso Brownies: Elevating the Brownie Experience
Espresso Brownies are delicious on their own, but with a few thoughtful serving suggestions, you can elevate the brownie experience and make them even more irresistible.
Serving Styles:
- Warm with Vanilla Ice Cream: The classic and irresistible pairing! Serve warm Espresso Brownies with a scoop of high-quality vanilla ice cream. The warmth of the brownie melts the ice cream, creating a delightful contrast of textures and temperatures.
- With Whipped Cream and Berries: Top brownies with a dollop of freshly whipped cream and a scattering of fresh berries like raspberries, strawberries, or blueberries. The whipped cream adds lightness and creaminess, while the berries provide a touch of tartness and freshness.
- Drizzled with Chocolate Sauce or Caramel Sauce: Enhance the chocolate intensity with a drizzle of warm chocolate sauce or add a contrasting sweetness with caramel sauce.
- With a Sprinkle of Sea Salt Flakes: A simple yet elegant touch! Sprinkle sea salt flakes on top of the brownies for a burst of salty flavor that complements the sweetness and chocolate.
- Espresso Brownie Sundae: Create an Espresso Brownie Sundae by layering brownie pieces with vanilla ice cream, chocolate sauce, whipped cream, chopped nuts, and a cherry on top.
- Alongside a Cup of Coffee or Espresso: For the ultimate coffee lover’s indulgence, serve Espresso Brownies alongside a cup of freshly brewed coffee or espresso. The coffee will complement and enhance the espresso notes in the brownies.
- As Part of a Dessert Platter: Include Espresso Brownies as part of a dessert platter with other treats like cookies, fruit, and cheeses for a variety of flavors and textures.
Serving Occasions:
- Dessert for Dinner Parties: Espresso Brownies are sophisticated enough to serve as dessert at dinner parties or special occasions.
- Weekend Treat: Bake a batch of Espresso Brownies for a delicious weekend treat to enjoy with family or friends.
- Holiday Dessert: Espresso Brownies are a welcome addition to holiday dessert tables.
- Potlucks and Gatherings: Brownies are always a crowd-pleaser and easy to transport to potlucks and gatherings.
- Afternoon Snack with Coffee: Enjoy a brownie square as a delightful afternoon snack with a cup of coffee or tea.
Presentation Tips:
- Dust with Powdered Sugar: Dusting brownie squares with powdered sugar adds a simple yet elegant visual appeal.
- Arrange on a Platter: Arrange brownie squares neatly on a platter for an attractive presentation.
- Garnish with Chocolate Shavings or Curls: Garnish with chocolate shavings or curls for an extra touch of chocolate elegance.
- Serve on Dessert Plates: Serve individual brownie portions on dessert plates for a more formal presentation.
By considering these serving suggestions and presentation tips, you can transform simple Espresso Brownies into a truly special and memorable dessert experience.
Additional Tips for Baking the Best Espresso Brownies
Want to ensure your Espresso Brownies are consistently perfect, fudgy, and bursting with flavor? Here are five additional tips to elevate your brownie baking game:
- Don’t Overbake! The key to fudgy brownies is to avoid overbaking. Overbaked brownies will be dry and cakey. Bake just until a toothpick inserted into the center comes out with moist crumbs attached (for fudgy brownies) or mostly clean (for slightly cakier brownies). The center should still look slightly soft and underbaked when you remove them from the oven, as they will continue to set as they cool.
- Use Parchment Paper for Easy Removal: Lining your baking pan with parchment paper, with an overhang on the sides, is highly recommended for easy brownie removal and clean edges. Once the brownies are completely cooled, you can simply lift them out of the pan using the parchment paper overhang, making cutting and serving much easier.
- Chill Before Cutting for Clean Slices: For clean, neat brownie slices, chill the brownies in the refrigerator for 30-60 minutes (or even longer) before cutting. Chilling firms up the brownies, making them easier to slice cleanly. Use a sharp knife and wipe it clean with a damp cloth between slices for the best results.
- Bloom the Espresso Powder for Enhanced Flavor: To intensify the espresso flavor, “bloom” the espresso powder before adding it to the batter. Whisk the espresso powder with a tablespoon or two of hot water until it forms a paste. This process releases the coffee’s aroma and enhances its flavor. Add this espresso paste to the batter as directed in the recipe.
- Experiment with Chocolate Percentages: While bittersweet chocolate (60-70% cacao) is recommended for this recipe, you can experiment with different percentages of bittersweet or even semi-sweet chocolate to adjust the level of bitterness and sweetness to your preference. Using a higher percentage of cacao (e.g., 70-80%) will result in a more intense and less sweet brownie.
By incorporating these additional tips into your baking process, you’ll be well on your way to consistently baking truly exceptional Espresso Brownies that are fudgy, flavorful, and sure to impress.
Frequently Asked Questions (FAQ) About Espresso Brownies
Here are some frequently asked questions about Espresso Brownies to help you bake with confidence and troubleshoot any potential issues:
Q1: Can I use instant coffee instead of espresso powder?
A: While you can use instant coffee in a pinch, espresso powder is highly recommended for Espresso Brownies. Espresso powder is made from finely ground, brewed espresso and has a much more concentrated and intense coffee flavor than instant coffee granules. Instant coffee will provide a milder coffee flavor and may not deliver the same robust espresso kick that espresso powder provides. For the best Espresso Brownies, use espresso powder.
Q2: Can I make these brownies gluten-free?
A: Yes, you can make Espresso Brownies gluten-free by substituting the all-purpose flour with a gluten-free all-purpose flour blend. Look for a gluten-free blend that is designed for baking and contains a mix of flours like rice flour, tapioca starch, and potato starch. Follow the recipe instructions as written, substituting the gluten-free flour blend for the all-purpose flour. Gluten-free brownies may have a slightly different texture, but they can still be delicious.
Q3: Can I double the recipe?
A: Yes, you can easily double this Espresso Brownie recipe. To double the recipe, simply double all the ingredient quantities and bake in a 9×13 inch baking pan. You may need to increase the baking time slightly, by about 5-10 minutes, but start checking for doneness around the original baking time and adjust as needed.
Q4: How do I store Espresso Brownies?
A: Store Espresso Brownies in an airtight container at room temperature for up to 3-4 days, or in the refrigerator for up to a week. Storing them at room temperature will keep them fudgier, while refrigerating them will make them firmer. You can also freeze Espresso Brownies for longer storage. Wrap individual brownie squares tightly in plastic wrap and place them in a freezer-safe bag or container. Frozen brownies can be stored for up to 2-3 months. Thaw frozen brownies at room temperature before serving.
Q5: Why are my brownies cakey instead of fudgy?
A: Cakey brownies instead of fudgy brownies can be caused by a few factors: overmixing the batter, adding too much flour, or overbaking. Avoid overmixing the batter – mix just until the ingredients are combined. Measure flour accurately using the “spoon and level” method. Don’t overbake the brownies – bake just until a toothpick inserted into the center comes out with moist crumbs attached. Fudgy brownies are slightly underbaked compared to cakey brownies.
Print
Espresso Brownies recipe
Ingredients
- Unsalted Butter: The foundation of richness and moisture! Butter is crucial for creating that signature fudgy texture in brownies and contributing to their overall flavor.
- Unsalted vs. Salted: Unsalted butter is preferred in baking because it allows you to control the total amount of salt in the recipe. Salted butter can vary in salt content between brands, which can affect the final flavor balance. Using unsalted butter ensures consistency and allows the other flavors, like chocolate and espresso, to shine.
- Quality Matters: Opt for high-quality unsalted butter, preferably European-style butter, if available. European butter generally has a higher fat content, which translates to richer flavor and a more tender brownie. However, any good-quality unsalted butter will work beautifully.
- Melting the Butter: The butter in this recipe is melted, which contributes to the fudgy texture. Melting butter before incorporating it into the batter creates a denser, chewier brownie compared to creaming butter and sugar, which results in a cakier texture.
- Bittersweet Chocolate: The heart of intense chocolate flavor! Bittersweet chocolate provides the deep, complex chocolate notes that are essential for Espresso Brownies.
- Percentage of Cacao: Look for bittersweet chocolate with a cacao percentage between 60% and 70%. This range strikes a perfect balance between bitterness and sweetness, allowing the chocolate flavor to be prominent without being overly intense or sugary.
- Chocolate Bars vs. Chocolate Chips: Using high-quality bittersweet chocolate bars, finely chopped, is highly recommended over chocolate chips. Chocolate bars generally melt more smoothly and have a richer, more nuanced flavor. Chocolate chips often contain stabilizers that can affect their melting properties and overall flavor.
- Dutch-Processed Cocoa Powder (Optional, for deeper chocolate): While bittersweet chocolate is the primary source of chocolate flavor, adding a bit of Dutch-processed cocoa powder can intensify the chocolate notes and deepen the color of the brownies. Dutch-processed cocoa powder is less acidic than natural cocoa powder, resulting in a smoother, less bitter chocolate flavor. If you choose to use cocoa powder, reduce the amount of bittersweet chocolate slightly to maintain balance.
- Granulated Sugar & Brown Sugar: The sweetness and moisture duo! A combination of granulated sugar and brown sugar contributes to the sweetness, moisture, and chewiness of the brownies.
- Granulated Sugar (White Sugar): Granulated sugar provides sweetness and helps to create a slightly crisp top crust on the brownies. It also helps to balance the bitterness of the bittersweet chocolate and espresso.
- Brown Sugar (Light or Dark): Brown sugar, especially dark brown sugar, adds moisture, chewiness, and a subtle molasses flavor that complements the chocolate and espresso beautifully. Light brown sugar can also be used, offering a slightly milder molasses note. The molasses in brown sugar is hygroscopic, meaning it attracts and retains moisture, contributing to the fudgy texture.
- Ratio of Sugars: The ratio of granulated sugar to brown sugar in this recipe is carefully balanced to achieve the desired texture and sweetness. Adjusting this ratio can impact the final result – more brown sugar will result in a chewier, moister brownie, while more granulated sugar will lead to a slightly crisper top and potentially drier brownie.
- Eggs: The binding and richness agents! Eggs play a crucial role in brownies, providing structure, richness, and moisture.
- Whole Eggs: This recipe uses whole eggs, including both the yolks and whites. Egg yolks contribute richness, fat, and emulsification, while egg whites provide structure and leavening.
- Room Temperature Eggs: Using room temperature eggs is generally recommended in baking as they emulsify more easily into the batter, resulting in a smoother and more cohesive mixture. If you forget to take your eggs out of the refrigerator ahead of time, you can quickly warm them by placing them in a bowl of warm water for 5-10 minutes.
- Incorporating Eggs: The eggs are typically whisked into the melted butter and sugar mixture. It’s important not to over-mix at this stage, as over-mixing can develop gluten and lead to tougher brownies. Mix just until the eggs are incorporated.
- Vanilla Extract: The flavor enhancer! Vanilla extract enhances the overall flavor profile of the brownies, adding warmth and depth and complementing both the chocolate and espresso.
- Pure Vanilla Extract: Use pure vanilla extract for the best flavor. Imitation vanilla extract can have a less complex and sometimes artificial taste.
- Vanilla Bean Paste (Optional, for intensified vanilla): For an even more intense vanilla flavor, you can substitute vanilla extract with vanilla bean paste. Vanilla bean paste contains vanilla bean seeds, which add a visual appeal and a more pronounced vanilla flavor. Use an equal amount of vanilla bean paste as vanilla extract.
- All-Purpose Flour: The structural component! Flour provides structure to the brownies, holding the batter together and creating the desired texture.
- Measuring Flour Correctly: Accurately measuring flour is essential in baking. Too much flour can result in dry, cakey brownies, while too little flour can lead to overly fudgy and potentially underbaked brownies. Use the “spoon and level” method for measuring flour: spoon flour into a measuring cup and level off the excess with a straight edge. Avoid scooping flour directly from the bag, as this can compact the flour and result in using too much.
- Unbleached vs. Bleached Flour: Unbleached all-purpose flour is generally preferred for brownies. Bleached flour has been treated to lighten its color and soften its texture, which is not necessary or desirable for brownies.
- Espresso Powder: The coffee kick! Espresso powder is the key ingredient that transforms regular brownies into Espresso Brownies, adding a deep, roasted coffee flavor that enhances the chocolate.
- Espresso Powder vs. Instant Coffee: Use espresso powder, not instant coffee granules. Espresso powder is made from finely ground, brewed espresso and has a much more concentrated and intense coffee flavor than instant coffee. Instant coffee granules will not provide the same robust coffee flavor.
- Quality of Espresso Powder: Use a good quality espresso powder for the best flavor. Look for brands that are known for their coffee quality.
- Bloom the Espresso Powder (Optional, for intensified flavor): To further enhance the espresso flavor, you can “bloom” the espresso powder. Before adding it to the batter, whisk the espresso powder with a tablespoon or two of hot water until it forms a paste. This process releases the coffee’s aroma and intensifies its flavor.
- Salt: The flavor balancer! Salt is a crucial ingredient in baking, even in sweet recipes. Salt enhances the sweetness of the sugar, balances the bitterness of the chocolate and espresso, and brings out the overall flavors of the brownies.
- Table Salt or Sea Salt: You can use either table salt or fine sea salt in this recipe. If using coarse sea salt, grind it finely before adding it to the batter.
- Optional Add-Ins (Nuts, Chocolate Chips, etc.): Customize your brownies! While Espresso Brownies are delicious on their own, you can add optional ingredients to customize them to your liking.
- Chopped Nuts (Walnuts, Pecans, Hazelnuts): Adding chopped nuts, such as walnuts, pecans, or hazelnuts, provides a textural contrast and nutty flavor. Toast the nuts lightly before adding them to the batter for enhanced flavor.
- Chocolate Chips or Chunks: Adding extra chocolate chips or chunks, such as semi-sweet, milk chocolate, or white chocolate, can create pockets of molten chocolate and add extra sweetness.
- Sea Salt Flakes (for topping): Sprinkling sea salt flakes on top of the baked brownies adds a beautiful visual appeal and a burst of salty flavor that complements the sweetness and chocolate.
Instructions
- Preheat Oven and Prepare Pan: Preheat your oven to 350°F (175°C). Grease and flour an 8×8 inch baking pan, or line it with parchment paper, leaving an overhang on the sides to easily lift the brownies out after baking. Parchment paper lining is highly recommended for easy removal and clean edges.
- Melt Butter and Chocolate: In a heatproof bowl set over a saucepan of simmering water (or in a microwave-safe bowl in short intervals), melt the unsalted butter and bittersweet chocolate together. Stir occasionally until smooth and completely melted. Remove from heat and let cool slightly. Be careful not to overheat the chocolate, as it can seize or burn. If using a microwave, melt in 30-second intervals, stirring after each interval, until just melted.
- Whisk Sugars and Eggs: In a separate large bowl, whisk together the granulated sugar and brown sugar until combined. Add the eggs one at a time, whisking well after each addition until the mixture is pale and slightly thickened. Whisking the eggs and sugars creates a slightly emulsified mixture that contributes to the brownie’s texture.
- Incorporate Melted Chocolate Mixture: Gradually pour the slightly cooled melted chocolate and butter mixture into the egg and sugar mixture, whisking constantly until just combined. Be careful not to overmix at this stage. The mixture should be smooth and glossy.
- Add Vanilla and Espresso Powder: Stir in the vanilla extract and espresso powder (or bloomed espresso powder paste, if using) until evenly incorporated. The espresso powder will dissolve into the batter.
- Combine Dry Ingredients: In a separate small bowl, whisk together the all-purpose flour and salt.
- Gradually Add Dry Ingredients to Wet Ingredients: Gradually add the dry ingredients (flour and salt) to the wet ingredients (chocolate mixture), mixing with a spatula or wooden spoon just until combined. Be careful not to overmix – overmixing can develop gluten and result in tough brownies. Mix until just a few streaks of flour remain, then stop mixing.
- Fold in Optional Add-Ins (if using): If using any optional add-ins like chopped nuts or chocolate chips, gently fold them into the batter until evenly distributed.
- Pour Batter into Prepared Pan: Pour the brownie batter into the prepared baking pan and spread evenly with a spatula.
- Bake: Bake in the preheated oven for 25-30 minutes, or until a toothpick inserted into the center comes out with moist crumbs attached (for fudgy brownies) or mostly clean (for slightly cakier brownies). The baking time may vary depending on your oven and the desired level of fudginess. Start checking for doneness around 25 minutes.
- Cool Completely: Remove the brownies from the oven and let them cool completely in the pan on a wire rack before cutting. Cooling completely is crucial for fudgy brownies, as they continue to set as they cool. For cleaner cuts, chill the brownies in the refrigerator for 30-60 minutes before slicing.
- Cut and Serve: Once cooled, lift the brownies out of the pan using the parchment paper overhang (if used). Cut into squares and serve. For clean cuts, use a sharp knife and wipe it clean between slices.
Nutrition
- Serving Size: one normal portion
- Calories: 250-350
- Sugar: 20-25 grams
- Sodium: 50-100 mg
- Fat: 15-20 grams
- Saturated Fat: 8-12 grams
- Unsaturated Fat: 5-8 grams
- Carbohydrates: 30-40 grams
- Fiber: 1-2 grams
- Protein: 3-5 grams


