Thoughts(experimental)
Auto
Expand to view model thoughtschevron_rightThoughts(experimental)
Auto
Expand to view model thoughtschevron_right
The first time I made this Biscoff Icebox Cake, it was an act born not of inspiration, but of pure desperation. We were caught in the suffocating grip of a mid-July heatwave, the kind where the air feels thick and the sun beats down with relentless intensity. A family potluck, an event usually met with enthusiasm, was looming on the calendar like a threat. The mere thought of turning on my oven, of voluntarily adding even a single degree of heat to our already sweltering home, was simply unbearable. I was determined to find a dessert solution that was impressive, delicious, and required absolutely no baking. My search led me down a rabbit hole of no-bake recipes, and that’s when I rediscovered the concept of the icebox cake.
That same afternoon, while navigating the chilly aisles of the grocery store—a brief respite from the heat—I had a moment of serendipity. My eyes landed on a familiar red package: Lotus Biscoff cookies. The taste of those crisp, caramelized biscuits from Belgium instantly flooded my memory. A lightbulb went off, a jolt of genuine culinary excitement. What if I married the old-fashioned, simple genius of the icebox cake with the sophisticated, spiced flavor of Biscoff? I grabbed several packs of the cookies, a jar of the sinfully delicious Biscoff cookie butter spread—a substance so good it feels like it should be illegal—and the requisite dairy for the filling. I had a hunch this could be good, but I had no earthly idea I was on the verge of creating our family’s most demanded, most celebrated, and most rapidly disappearing dessert.
That evening, in the relative cool of the night, I assembled my creation. I layered the iconic spiced cookies with a cream cheese filling I’d whipped up, tucked it into a loaf pan, shrouded it in plastic wrap, and slid it into the cold sanctuary of the refrigerator with a silent prayer. The next day at the potluck, surrounded by a colorful spread of summer salads and grilled meats, I unveiled my humble-looking loaf cake with a degree of trepidation. It lacked the polished perfection of a frosted layer cake or the glossy sheen of a fruit pie. It looked… simple. Rustic, even.
But then, the magic happened. My brother-in-law, a man whose culinary opinions are as strong as his coffee, took the first bite. A profound silence fell over him. His eyes widened almost comically. “What,” he finally managed to say, his voice hushed with reverence, “is this?” His spoon was already diving back in for a second, larger portion. His reaction created a ripple effect. Soon, a small crowd had formed around the dessert table, drawn in by the murmurs of approval. The cake, my simple no-bake experiment, vanished in less than ten minutes. It was a potluck phenomenon. My own children, who typically reserve their dessert enthusiasm for things that are intensely chocolatey, were suddenly my biggest fans, begging me to make it again for their birthdays, for Christmas, for a random Tuesday. The true beauty of this cake lies in that quiet, overnight transformation in the refrigerator, where humble cookies and cream alchemize into something utterly sublime: a sophisticated, decadent cake with soft, yielding layers and an intoxicating spiced caramel flavor that haunts you in the most pleasant way possible. It’s the ultimate culinary illusion—a dessert that tastes like you slaved away in a hot kitchen for hours but comes together with less than 30 minutes of active work. It was my little secret, and now, it can be yours too.
What Exactly Is a Biscoff Icebox Cake? A Delicious History
Before we delve into the recipe’s specifics, let’s take a moment to appreciate the heritage behind this seemingly modern dessert. The “icebox cake” is a classic American innovation, a testament to culinary ingenuity that emerged in the 1920s. Its rise to popularity ran parallel to the advent of the electric refrigerator, or “icebox,” in middle-class homes. Suddenly, the ability to keep things cold for extended periods was no longer a luxury, and a whole new world of desserts opened up. Food companies were quick to capitalize on this. Nabisco, for instance, famously printed a recipe on the box of its Chocolate Wafers for what would become the iconic “Nabisco Famous Chocolate Wafer Icebox Cake,” a simple layering of the wafers and whipped cream. The concept was brilliant: the cookies or wafers absorb moisture from the creamy filling, undergoing a magical metamorphosis from crisp to tender, creating a cake-like structure without any baking.
Our recipe takes this classic American concept and gives it a distinctly European flair by building it around Biscoff. Biscoff cookies are a specific brand name for speculoos, a type of spiced shortcrust biscuit with deep roots in the Low Countries, particularly Belgium and the Netherlands. Traditionally, these cookies were baked to celebrate St. Nicholas’s Day on December 5th and 6th. Their unique, unforgettable flavor comes from a carefully guarded blend of spices, typically including cinnamon, nutmeg, cloves, ginger, and cardamom, combined with the deep, slightly bitter notes of caramelized sugar.
The second key component, Biscoff cookie butter spread, has its own charmingly modern origin story. It was invented in 2007 by Els Scheppers, a culinary enthusiast competing on a Belgian television show called De Bedenkers (“The Inventors”). Her brilliant idea was to take the beloved speculoos cookies and transform them into a creamy, spreadable treat. Her invention was a national sensation, and she went on to partner with Lotus Bakeries to commercialize the product we now know and love as Biscoff spread. This recipe, therefore, is a beautiful fusion: a classic American no-bake technique built upon a foundation of traditional European flavors. It’s a dessert with a story, and a taste that lives up to it.
Complete with the ingredients amount: An Ingredient Deep Dive
To create this showstopper, you’ll need a curated list of high-quality ingredients. In a recipe this simple, every component plays a starring role, so quality truly matters.
- For the Rich Cream Cheese Filling:
- 2 cups (480ml) cold heavy whipping cream: The backbone of the filling’s texture. Ensure you use “heavy cream” or “heavy whipping cream,” which has a milk fat content of at least 36%. This high fat content is essential for whipping the cream into stable, stiff peaks that will hold their shape. “Whipping cream” has a slightly lower fat content (30-35%) and won’t create as rich or stable a filling.
- 16 ounces (452g) full-fat, brick-style cream cheese, softened to room temperature: This provides the filling’s structure, richness, and a crucial tangy counterpoint to the sweetness. It is vital to use the full-fat, brick-style variety, not the whipped or reduced-fat kind sold in tubs. The tub varieties have a higher water content and added air, which will result in a runny, unstable filling.
- 1 cup (250g) creamy Biscoff cookie butter spread: This is the heart and soul of the flavor. Use the creamy version for a silky-smooth filling. You can find it in most major supermarkets, often in the peanut butter aisle or near the international foods.
- ¾ cup (90g) powdered sugar, sifted: Also known as confectioners’ sugar, this sweetens the filling and helps stabilize the cream cheese. Sifting it before use is a non-negotiable step to remove any small clumps and ensure a perfectly smooth texture.
- 2 teaspoons pure vanilla extract: Vanilla enhances all the other flavors in the dessert. Use pure vanilla extract, not imitation vanilla, for a richer, more complex flavor profile.
- ¼ teaspoon fine sea salt: A small amount of salt is a secret weapon in desserts. It doesn’t make the filling salty; instead, it sharpens and brightens all the other flavors, particularly the sweet and spiced notes.
- For Assembly and Garnish:
- 2 packages (8.8 ounces / 250g each) Lotus Biscoff cookies: You’ll need approximately 50-60 cookies in total. This is the one ingredient where substitution will fundamentally change the dessert, so try to find the real thing.
- Optional: ½ cup milk or brewed coffee, for dipping: This is a matter of preference. Dipping creates a softer, more Tiramisu-like cake. Not dipping results in a slightly firmer cake where the cookie layers are a bit more defined.
- ½ cup (125g) creamy Biscoff cookie butter spread: For the irresistible drip topping.
- A handful of extra Biscoff cookies: For crushing and sprinkling on top for a final flourish of texture and flavor.
Instructions: A Masterclass in No-Bake Technique
Follow these detailed steps, paying attention to the “why” behind each action, to assemble a flawless Biscoff Icebox Cake.
Part 1: Preparing the Luscious Cream Filling
- Whip the Cream – The Science of Stiff Peaks: In a large mixing bowl that has been chilled in the freezer for 10-15 minutes, pour in the very cold heavy whipping cream. Chilling the bowl and beaters helps the fat globules in the cream solidify, allowing them to whip up faster and form a more stable structure. Using an electric hand mixer or a stand mixer with the whisk attachment, begin beating on low speed and gradually increase to medium-high. You are essentially forcing air into the cream while the fat molecules create a network to trap those air bubbles. You’ll see it progress from frothy to soft peaks (the peak slumps over when you lift the beaters) to finally, stiff peaks. This is the crucial stage: the cream will be thick, and when you lift the beaters, the peak that forms will hold its shape proudly without drooping. Stop immediately at this point. Overbeating will cause the fat network to break, and the cream will turn grainy and eventually separate into butter and buttermilk. Place the bowl of perfectly whipped cream in the refrigerator.
- Combine the Base: In a separate large bowl, place your room-temperature cream cheese. The importance of it being softened cannot be overstated; it’s about proper emulsification. Beating the cold cream cheese will result in a lumpy, unpleasant texture. Beat the softened cream cheese on medium speed for about a minute until it is completely smooth, with no visible lumps.
- Add the Flavor: To the smooth cream cheese, add the 1 cup of Biscoff cookie butter spread, the sifted powdered sugar, vanilla extract, and salt. Continue to beat on medium speed, scraping down the sides and bottom of the bowl frequently with a rubber spatula. Mix until the mixture is entirely homogenous and has a silky, uniform appearance.
- Fold It All Together – The Art of Lightness: Retrieve your chilled whipped cream. The goal now is to combine the two mixtures without deflating the air you just whipped into the cream. Add about one-third of the whipped cream to the cream cheese base. Using a large spatula, gently fold it in. Do this by cutting down through the center of the mixture, scraping along the bottom of the bowl, and bringing that mixture up and over the top. Give the bowl a quarter turn and repeat. This lightens the dense cream cheese base, making it easier to incorporate the rest of the cream. Add the remaining whipped cream in two more additions, folding gently but efficiently until no white streaks remain. The final filling should be thick, airy, and hold its shape on a spatula.
Part 2: Assembling the Layers
- Prepare the Pan: Line a 9×5 inch loaf pan with two overlapping pieces of plastic wrap, ensuring there is a generous overhang on all sides. These plastic “handles” are your ticket to effortlessly removing the cake later.
- The First Layer: Spread a thin layer (just a few tablespoons) of the cream filling on the bottom of the pan. This acts as a mortar, securing your foundation of cookies.
- Layer the Cookies: Arrange a single, flat layer of Biscoff cookies over the cream. Be a puzzle master: break cookies as needed to fit snugly into every nook and cranny. For that extra-soft texture, quickly dip each cookie in milk or cooled coffee (don’t soak!).
- Layer the Cream: Gently spoon about a quarter of the cream filling over the cookies. An offset spatula is the perfect tool for spreading it into a smooth, even layer that reaches all the corners. You could also transfer the filling to a piping bag for ultimate precision and perfectly even layers.
- Repeat: Continue this meditative process of alternating cookie and cream layers. You should achieve 4 to 5 layers of cookies, ending with a final, generous layer of cream on top.
Part 3: The Magic of Chilling: More Than Just Cooling
- Cover and Chill: Fold the plastic wrap overhang to snugly cover the top of the cake.
- Refrigerate: Place the pan in the refrigerator for a minimum of 8 hours. For transcendent results, let it chill overnight (12-24 hours). This step is the heart of the recipe. During this time, osmosis is at work. The cookies slowly draw moisture from the cream filling, causing their starches and proteins to soften and swell. Simultaneously, the flavors of the spiced cookies and the tangy cream meld and mature, creating a cohesive flavor profile that is far greater than the sum of its parts.
Part 4: Garnishing and Serving
- Unmold the Cake: Once fully chilled and set, open the plastic wrap. Using the overhangs as handles, lift the cake straight up and out of the pan. Place it on your serving platter and gently peel away the plastic wrap.
- Prepare the Topping: In a microwave-safe bowl, melt the remaining ½ cup of Biscoff spread in 15-second intervals, stirring between each, until it’s smooth and pourable.
- Decorate: Drizzle the melted spread over the top, encouraging it to drip tantalizingly down the sides.
- Final Touch: Crush a few extra cookies—in a zip-top bag with a rolling pin for a rustic, varied texture, or in a food processor for fine crumbs—and sprinkle them over the top.
- Slice and Serve: Use a long, sharp knife. For pristine slices, dip the blade in hot water and wipe it clean between each cut. This prevents the cream from dragging and smearing the layers.
Nutrition Facts (Servings and calories per serving)
This is an indulgent dessert, best enjoyed mindfully. The following nutritional information is an estimate, as it can vary based on specific brands and serving sizes.
- Servings: 10 generous slices
- Calories per serving: Approximately 450-550 calories
Preparation time
- Active Preparation Time: 25 minutes
- Chilling Time: 8-12 hours, or overnight
- Total Time: 8 hours 25 minutes to 12 hours 25 minutes
How to Serve: Presentation and Pairings
This cake is a star on its own, but the right presentation and pairings can turn it into a truly memorable event.
- Presentation:
- The Classic Slice: Serve thick slices to proudly display the beautiful, distinct layers.
- Stencil Art: Place a paper doily or other stencil on top of the cake before the final dusting of crushed cookies. Remove the stencil to reveal an elegant pattern.
- Garnish with Herbs: A single mint sprig next to each slice adds a touch of green that makes the brown and cream colors pop.
- Pairings:
- Whipped Cream: A cloud of freshly whipped, unsweetened cream next to a slice cuts the richness beautifully.
- Fruit Compote: A warm, tart cherry or raspberry compote provides a perfect temperature and flavor contrast.
- Coffee & Tea: A strong espresso, a creamy latte, or a robust black tea like an English Breakfast are classic, can’t-miss pairings.
- Dessert Wines & Spirits: For an adult-only affair, pair a slice with a glass of Tawny Port, a sweet Riesling, or even a small snifter of brandy. The malty notes of a good stout beer would also be a surprisingly delicious match for the cake’s caramel flavors.
Additional tips: A Troubleshooting and Pro-Tip Guide
Here are five tips to help you troubleshoot common issues and elevate your cake from great to sublime.
- Temperature is Everything: We’ve discussed it, but it bears repeating. For the filling, your cream cheese must be at room temperature for smoothness, and your heavy cream must be cold for volume. There is no negotiating with the laws of food science on this one.
- Don’t Rush the Chill: Impatience is the enemy of the icebox cake. If you cut into it too soon, you’ll have crunchy cookies and cream. It will taste fine, but it won’t be the transcendent, cake-like experience you’re after. Trust the process and give it the time it needs.
- Fixing a Sliding Cake: If you slice your cake and the layers seem to slide, it’s likely the filling was a bit too soft or the cake needed more chilling time. To salvage it for serving, pop the whole cake into the freezer for 30-45 minutes before slicing. This will firm everything up beautifully.
- Embrace Customization: Think of this recipe as a template. Add a teaspoon of cinnamon to the cream filling to amp up the spice. Sprinkle a layer of finely chopped pecans or toffee bits between the cookie layers for crunch. Swirl in a bit of salted caramel. Make it your own.
- Clean Slices, Every Time: The hot knife trick is the gold standard. Have a tall glass of hot water and a roll of paper towels handy. Dip the knife, wipe it dry, make one clean cut. Repeat. It seems fussy, but the payoff is a professional-looking slice that will make you proud.
FAQ section
Here are answers to some of the most frequently asked questions about this decadent dessert.
- Q: Can I make this dessert ahead of time?
- A: Yes, this is one of the best make-ahead desserts imaginable! It must be made at least 8 hours ahead, but it’s arguably even better after a full 24 hours. The flavors deepen, and the texture becomes perfect. It will keep, covered, in the refrigerator for up to 3 days.
- Q: My filling seems a little runny. What did I do wrong?
- A: A runny filling is almost always due to one of two culprits: your heavy cream was not whipped to stiff peaks, or you overmixed when folding the whipped cream into the base, deflating all the air. Ensure your cream holds a stiff peak, and always fold with a gentle hand.
- Q: Can I make this in a different shaped pan?
- A: Absolutely! A 9×5 loaf pan gives you traditional slices, but an 8×8 or 9×9 square pan is fantastic for a more Tiramisu-style presentation served in squares. You could also assemble it in a round springform pan (you’ll get a stunning round cake) or even in individual glass tumblers or trifle dishes for elegant single servings.
- Q: Can I make this dessert vegan?
- A: Yes, this recipe adapts very well to a vegan version! Lotus Biscoff cookies and spread are vegan in most regions (always check the label). Use a high-quality vegan brick-style cream cheese (like Kite Hill or Miyoko’s Kitchen) and replace the heavy cream with a full-fat, chilled coconut cream (use only the thick cream from the top of the can) or a commercial vegan whipping cream. The results are spectacular.
- Q: What is the best way to crush the cookies for the garnish?
- A: It depends on the texture you want. For a varied, rustic crumble with both fine dust and small pieces, place the cookies in a zip-top bag and gently crush them with a rolling pin or the bottom of a heavy pan. For a uniform, fine crumb, pulse them a few times in a food processor.
A New Family Tradition
The Biscoff Icebox Cake is more than just a recipe; it’s a testament to the idea that the most memorable dishes don’t always require the most complex techniques or the most time spent in a hot kitchen. Its charm lies in its magnificent simplicity, its show-stopping flavor that belies its easy preparation, and its remarkable versatility. It’s a dessert for all seasons—cool and refreshing in the summer, cozy and spiced in the winter. It’s the perfect answer for potlucks, birthdays, or any day that needs a touch of something special. I encourage you to try it, to play with it, and to share it. You may just find that this simple, no-bake wonder becomes your family’s most requested dessert, too.
Print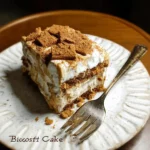
Biscoff Icebox Cake recipe
Ingredients
-
For the Rich Cream Cheese Filling:
-
2 cups (480ml) cold heavy whipping cream: The backbone of the filling’s texture. Ensure you use “heavy cream” or “heavy whipping cream,” which has a milk fat content of at least 36%. This high fat content is essential for whipping the cream into stable, stiff peaks that will hold their shape. “Whipping cream” has a slightly lower fat content (30-35%) and won’t create as rich or stable a filling.
-
16 ounces (452g) full-fat, brick-style cream cheese, softened to room temperature: This provides the filling’s structure, richness, and a crucial tangy counterpoint to the sweetness. It is vital to use the full-fat, brick-style variety, not the whipped or reduced-fat kind sold in tubs. The tub varieties have a higher water content and added air, which will result in a runny, unstable filling.
-
1 cup (250g) creamy Biscoff cookie butter spread: This is the heart and soul of the flavor. Use the creamy version for a silky-smooth filling. You can find it in most major supermarkets, often in the peanut butter aisle or near the international foods.
-
¾ cup (90g) powdered sugar, sifted: Also known as confectioners’ sugar, this sweetens the filling and helps stabilize the cream cheese. Sifting it before use is a non-negotiable step to remove any small clumps and ensure a perfectly smooth texture.
-
2 teaspoons pure vanilla extract: Vanilla enhances all the other flavors in the dessert. Use pure vanilla extract, not imitation vanilla, for a richer, more complex flavor profile.
-
¼ teaspoon fine sea salt: A small amount of salt is a secret weapon in desserts. It doesn’t make the filling salty; instead, it sharpens and brightens all the other flavors, particularly the sweet and spiced notes.
-
-
For Assembly and Garnish:
-
2 packages (8.8 ounces / 250g each) Lotus Biscoff cookies: You’ll need approximately 50-60 cookies in total. This is the one ingredient where substitution will fundamentally change the dessert, so try to find the real thing.
-
Optional: ½ cup milk or brewed coffee, for dipping: This is a matter of preference. Dipping creates a softer, more Tiramisu-like cake. Not dipping results in a slightly firmer cake where the cookie layers are a bit more defined.
-
½ cup (125g) creamy Biscoff cookie butter spread: For the irresistible drip topping.
-
A handful of extra Biscoff cookies: For crushing and sprinkling on top for a final flourish of texture and flavor.
-
Instructions
Part 1: Preparing the Luscious Cream Filling
-
Whip the Cream – The Science of Stiff Peaks: In a large mixing bowl that has been chilled in the freezer for 10-15 minutes, pour in the very cold heavy whipping cream. Chilling the bowl and beaters helps the fat globules in the cream solidify, allowing them to whip up faster and form a more stable structure. Using an electric hand mixer or a stand mixer with the whisk attachment, begin beating on low speed and gradually increase to medium-high. You are essentially forcing air into the cream while the fat molecules create a network to trap those air bubbles. You’ll see it progress from frothy to soft peaks (the peak slumps over when you lift the beaters) to finally, stiff peaks. This is the crucial stage: the cream will be thick, and when you lift the beaters, the peak that forms will hold its shape proudly without drooping. Stop immediately at this point. Overbeating will cause the fat network to break, and the cream will turn grainy and eventually separate into butter and buttermilk. Place the bowl of perfectly whipped cream in the refrigerator.
-
Combine the Base: In a separate large bowl, place your room-temperature cream cheese. The importance of it being softened cannot be overstated; it’s about proper emulsification. Beating the cold cream cheese will result in a lumpy, unpleasant texture. Beat the softened cream cheese on medium speed for about a minute until it is completely smooth, with no visible lumps.
-
Add the Flavor: To the smooth cream cheese, add the 1 cup of Biscoff cookie butter spread, the sifted powdered sugar, vanilla extract, and salt. Continue to beat on medium speed, scraping down the sides and bottom of the bowl frequently with a rubber spatula. Mix until the mixture is entirely homogenous and has a silky, uniform appearance.
-
Fold It All Together – The Art of Lightness: Retrieve your chilled whipped cream. The goal now is to combine the two mixtures without deflating the air you just whipped into the cream. Add about one-third of the whipped cream to the cream cheese base. Using a large spatula, gently fold it in. Do this by cutting down through the center of the mixture, scraping along the bottom of the bowl, and bringing that mixture up and over the top. Give the bowl a quarter turn and repeat. This lightens the dense cream cheese base, making it easier to incorporate the rest of the cream. Add the remaining whipped cream in two more additions, folding gently but efficiently until no white streaks remain. The final filling should be thick, airy, and hold its shape on a spatula.
Part 2: Assembling the Layers
-
Prepare the Pan: Line a 9×5 inch loaf pan with two overlapping pieces of plastic wrap, ensuring there is a generous overhang on all sides. These plastic “handles” are your ticket to effortlessly removing the cake later.
-
The First Layer: Spread a thin layer (just a few tablespoons) of the cream filling on the bottom of the pan. This acts as a mortar, securing your foundation of cookies.
-
Layer the Cookies: Arrange a single, flat layer of Biscoff cookies over the cream. Be a puzzle master: break cookies as needed to fit snugly into every nook and cranny. For that extra-soft texture, quickly dip each cookie in milk or cooled coffee (don’t soak!).
-
Layer the Cream: Gently spoon about a quarter of the cream filling over the cookies. An offset spatula is the perfect tool for spreading it into a smooth, even layer that reaches all the corners. You could also transfer the filling to a piping bag for ultimate precision and perfectly even layers.
-
Repeat: Continue this meditative process of alternating cookie and cream layers. You should achieve 4 to 5 layers of cookies, ending with a final, generous layer of cream on top.
Part 3: The Magic of Chilling: More Than Just Cooling
-
Cover and Chill: Fold the plastic wrap overhang to snugly cover the top of the cake.
-
Refrigerate: Place the pan in the refrigerator for a minimum of 8 hours. For transcendent results, let it chill overnight (12-24 hours). This step is the heart of the recipe. During this time, osmosis is at work. The cookies slowly draw moisture from the cream filling, causing their starches and proteins to soften and swell. Simultaneously, the flavors of the spiced cookies and the tangy cream meld and mature, creating a cohesive flavor profile that is far greater than the sum of its parts.
Part 4: Garnishing and Serving
-
Unmold the Cake: Once fully chilled and set, open the plastic wrap. Using the overhangs as handles, lift the cake straight up and out of the pan. Place it on your serving platter and gently peel away the plastic wrap.
-
Prepare the Topping: In a microwave-safe bowl, melt the remaining ½ cup of Biscoff spread in 15-second intervals, stirring between each, until it’s smooth and pourable.
-
Decorate: Drizzle the melted spread over the top, encouraging it to drip tantalizingly down the sides.
-
Final Touch: Crush a few extra cookies—in a zip-top bag with a rolling pin for a rustic, varied texture, or in a food processor for fine crumbs—and sprinkle them over the top.
-
Slice and Serve: Use a long, sharp knife. For pristine slices, dip the blade in hot water and wipe it clean between each cut. This prevents the cream from dragging and smearing the layers.
Nutrition
- Serving Size: one normal portion
- Calories: 450-550