
There’s a specific moment each year when summer officially gives way to fall. It’s not a date on the calendar, but a feeling in the air—a crispness that bites at your nose in the morning, the scent of woodsmoke from a distant chimney, the rustle of the first dry leaves skittering across the pavement. For me, that feeling is intrinsically linked to the flavor of apple cider. And for years, the pinnacle of that flavor was a warm, greasy, sugar-dusted donut from a local apple orchard. I loved them, but the thought of dealing with a huge pot of bubbling, splattering hot oil in my own kitchen was always a non-starter. That’s why perfecting this recipe for Baked Apple Cider Donuts felt like cracking a secret code.
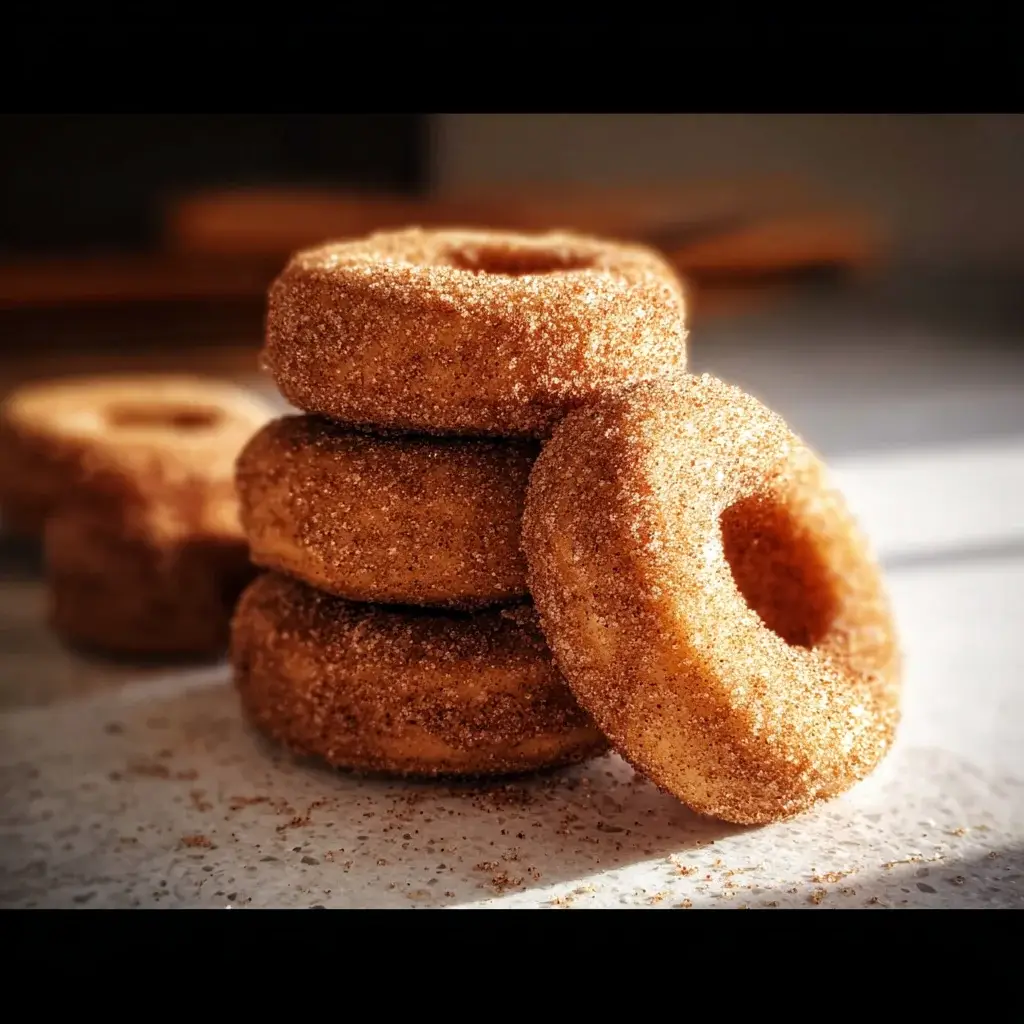
The first time I pulled a pan of these from my oven, my entire house was enveloped in the most glorious autumn perfume imaginable—warm cinnamon, spicy nutmeg, and the sweet, tangy aroma of concentrated apple cider. They were beautiful, with perfectly rounded tops and a gorgeous golden-brown hue. But the real magic happened at the first bite. Instead of being heavy and greasy, the donut was impossibly light, tender, and cakey, with a moist crumb that melted in my mouth. The flavor was explosive—pure, unadulterated fall. My family devoured the entire batch in what felt like seconds, their fingers sparkling with cinnamon-sugar. These donuts have become our official signal that autumn has arrived. They deliver all the nostalgic comfort of the orchard original, but with a wholesome, simple, and mess-free method that makes them achievable any day of the week.
Why You’ll Fall in Love with Baked Apple Cider Donuts
Before we get to the recipe, let’s talk about why this baked version isn’t just a “healthy alternative,” but a spectacular donut in its own right. While fried donuts have their own unique charm, the baked method offers a host of benefits that make this recipe a true keeper.
- So Much Easier and Cleaner: Let’s be honest: deep-frying is a production. It involves a large quantity of oil, temperature regulation, splatters, and the lingering smell of a fry shack. Baking, on the other hand, is as simple as making muffins. You mix a batter, pipe it into a pan, and bake. The cleanup is minimal, and the process is infinitely less intimidating.
- A Lighter, More Tender Texture: Because these donuts are baked like a cake, they have a wonderfully soft, moist, and tender crumb. They aren’t dense or heavy in your stomach. This lighter texture allows the delicate spices and tangy apple cider flavor to shine through in a way that can sometimes be overshadowed by the oiliness of a fried donut.
- Intense, Concentrated Fall Flavor: The secret to this recipe is the apple cider reduction. By simmering down the cider, we boil off the excess water and are left with a thick, syrupy concentrate that is bursting with pure apple essence. This ensures that the apple flavor is front-and-center in every single bite, not just a subtle background note.
- A Healthier Indulgence: By skipping the deep-frying, we eliminate a significant amount of fat and calories, making these a treat you can feel a little better about enjoying. It’s a way to satisfy that quintessential autumn craving without the guilt.
- Perfectly Uniform and Beautiful: Using a donut pan and piping the batter in ensures that every single donut is perfectly shaped and uniform. They look as good as they taste, making them perfect for sharing, gifting, or showing off on your social media feed.
The Key to Flavor: Understanding the Ingredients
The magic of this recipe lies in the synergy of a few key ingredients. Understanding their role will help you achieve the best possible result.
- The Apple Cider Reduction: This is the most important step for flavor. You cannot substitute this with regular apple cider straight from the jug. Simmering one and a half cups of cider down to just a half cup creates a powerful, concentrated syrup that infuses the entire donut with a deep, tangy apple flavor. Use a good quality, fresh-pressed apple cider for the best results, not sparkling cider or apple juice.
- The Spices: The classic trio of cinnamon, nutmeg, and allspice is what gives these donuts their signature “fall” aroma and taste. Don’t be shy with them! If you have a pre-made apple pie spice blend, you can use that in place of the individual spices.
- Buttermilk: The acidity in buttermilk reacts with the baking soda and baking powder to create an incredibly tender, light, and fluffy crumb. It also adds a subtle tang that complements the sweetness of the apple cider. If you don’t have buttermilk, a DIY version is a perfect substitute (see FAQ).
- Melted Butter: Using melted butter (instead of creaming softened butter) contributes to a dense, moist, and fudgy texture, which is exactly what you want in a cake donut. It also makes the batter incredibly easy to mix by hand.
- The Topping: The final touch is a dip in melted butter followed by a generous roll in cinnamon-sugar. The butter helps the sugar mixture adhere to the donut and adds an extra layer of richness, while the crunchy cinnamon-sugar provides a perfect textural contrast to the soft cake donut.
Complete Ingredient List
For the Baked Apple Cider Donuts:
- 1 ½ cups (360ml) fresh apple cider
- 2 cups (250g) all-purpose flour
- 1 ½ teaspoons baking powder
- ½ teaspoon baking soda
- 1 teaspoon ground cinnamon
- ½ teaspoon ground nutmeg
- ¼ teaspoon ground allspice
- ½ teaspoon fine sea salt
- 2 large eggs, at room temperature
- ⅔ cup (145g) packed light brown sugar
- ½ cup (120ml) buttermilk, at room temperature
- ½ cup (113g or 1 stick) unsalted butter, melted and slightly cooled
For the Cinnamon-Sugar Topping:
- ½ cup (113g or 1 stick) unsalted butter, melted
- ¾ cup (150g) granulated sugar
- 1 ½ teaspoons ground cinnamon
Step-by-Step Instructions for Donut Perfection
This recipe is straightforward and rewarding. Follow these steps for a flawless batch of autumn bliss.
Step 1: Make the Apple Cider Reduction
Pour the 1 ½ cups of apple cider into a small saucepan. Bring to a boil over medium-high heat, then reduce the heat to maintain a steady simmer. Let the cider simmer, uncovered, for about 15-20 minutes, or until it has reduced in volume to approximately ½ cup. It will be slightly thicker and more syrupy. Set it aside to cool down while you prepare the rest of the ingredients. This step is crucial and cannot be skipped.
Step 2: Preheat and Prepare Your Pan
Preheat your oven to 350°F (175°C). Generously grease a standard 6-cavity or 12-cavity donut pan with non-stick baking spray or softened butter. Even if your pan is non-stick, this step is vital to ensure the donuts release cleanly. Use a paper towel to make sure every part of the cavities, including the center spindle, is coated.
Step 3: Combine the Dry Ingredients
In a large bowl, whisk together the all-purpose flour, baking powder, baking soda, ground cinnamon, nutmeg, allspice, and salt. Whisking thoroughly not only combines the ingredients but also aerates the flour, much like sifting.
Step 4: Combine the Wet Ingredients
In a separate medium bowl, whisk the two large eggs until they are pale and slightly frothy. Whisk in the packed light brown sugar until it is fully incorporated. Then, whisk in the buttermilk, the melted butter, and the cooled apple cider reduction until the mixture is smooth.
Step 5: Mix the Batter
Pour the wet ingredients into the bowl containing the dry ingredients. Use a rubber spatula to gently fold the ingredients together until they are just combined. It’s very important not to overmix! A few small lumps in the batter are perfectly fine. Overmixing develops the gluten in the flour and will result in tough, dense donuts instead of light, tender ones.
Step 6: Fill the Donut Pan
This step can be messy if done with a spoon. For perfectly shaped donuts and easy filling, transfer the batter to a large piping bag or a large zip-top plastic bag. Snip off a corner of the bag (about a ½-inch opening). Carefully pipe the batter into each cavity of the prepared donut pan, filling them about ¾ of the way full. Do not overfill them, as they will rise during baking.
Step 7: Bake to Golden Perfection
Place the donut pan in the preheated oven and bake for 12-15 minutes. The donuts are done when they are golden brown and a wooden skewer or toothpick inserted into the center of a donut comes out clean with no wet batter attached. The tops should also spring back lightly when touched.
Step 8: Cool and Coat
Let the donuts cool in the pan for 5 minutes. This allows them to set up slightly so they won’t break when you remove them. After 5 minutes, carefully invert the pan onto a wire cooling rack. The donuts should fall right out.
While the donuts are still warm, prepare the topping. In a shallow bowl, place the ½ cup of melted butter. In a separate shallow bowl, whisk together the granulated sugar and the 1 ½ teaspoons of cinnamon.
Working one at a time, dip the entire warm donut into the melted butter, ensuring it’s fully coated. Let any excess butter drip off, then immediately transfer the donut to the cinnamon-sugar mixture. Toss it gently to coat all sides generously. Place the finished donut back on the wire rack. Repeat with the remaining donuts.
Nutrition Facts
- Servings: 12 donuts
- Calories per serving: Approximately 280-320 calories (This is an estimate and can vary based on the specific brands of ingredients used).
Preparation and Cook Time
- Prep Time (including reduction): 25 minutes
- Bake Time: 12-15 minutes
- Total Time: Approximately 40 minutes
How to Serve and Enjoy Your Donuts
These donuts are at their absolute peak when served warm, shortly after being coated in their cinnamon-sugar blanket.
- Straight From the Rack:
- The best way to enjoy them is right away, when the cake is soft and the buttery, sugary coating is fresh and crunchy.
- With a Hot Beverage:
- Pair a warm donut with a steaming mug of coffee for a perfect morning treat.
- Lean into the theme and serve them with a cup of hot, spiced apple cider or a creamy pumpkin spice latte.
- A simple glass of cold milk is also a classic and delightful companion.
- As a Decadent Dessert:
- Serve a warm donut à la mode with a scoop of high-quality vanilla bean or salted caramel ice cream.
- Drizzle a warm donut with a bit of salted caramel sauce for an extra layer of indulgence.
- Topping Variations:
- Apple Cider Glaze: For a sweeter, glazed donut, skip the butter and cinnamon-sugar. Instead, whisk together 1 cup of powdered sugar with 2-3 tablespoons of your leftover apple cider reduction until you have a thick but pourable glaze. Dip the tops of the cooled donuts into the glaze.
- Maple Glaze: Whisk together 1 cup of powdered sugar, 2 tablespoons of pure maple syrup, and 1-2 tablespoons of milk. Dip the tops of the cooled donuts into this glaze. A sprinkle of chopped toasted pecans on top is a fantastic addition.
Additional Tips for Donut Success
- Don’t Overfill the Pan: It’s tempting to fill the donut cavities to the top, but this will cause the batter to overflow and you’ll lose the classic donut hole and shape. Filling them no more than three-quarters full is the perfect amount for a beautifully risen donut.
- Measure Your Flour Correctly: The most common cause of dry baked goods is accidentally adding too much flour. Instead of scooping your measuring cup directly into the flour bag (which compacts it), use the “spoon and level” method. Use a spoon to fluff up the flour in its container, then spoon it into your measuring cup until it’s overflowing. Use the back of a knife to level it off.
- Coat the Donuts While They’re Warm: Don’t wait for the donuts to cool completely before dipping them in the butter and sugar. The warmth helps the donut absorb a little of the butter and makes the cinnamon-sugar mixture stick much more effectively, creating that signature crunchy crust.
- No Piping Bag? No Problem! If you don’t have a piping bag, the zip-top bag trick is a lifesaver. It gives you precise control and is far easier and cleaner than trying to spoon the sticky batter into the narrow cavities.
- Don’t Rush the Cider Reduction: The concentrated apple cider is the soul of this recipe. Make sure it has truly reduced by at least half. If you are unsure, you can pour it into a liquid measuring cup to check the volume. Rushing this step will result in a donut with a very mild, barely-there apple flavor.
Frequently Asked Questions (FAQ)
Q1: Can I make these donuts without a donut pan?
A: Yes, you can! While you won’t get the classic donut shape, you can bake this batter in a standard muffin tin. Grease the muffin tin well and fill each cup about two-thirds full. Bake for 15-18 minutes, or until a skewer comes out clean. You’ll have delicious “donut muffins” that you can still coat in butter and cinnamon-sugar.
Q2: I don’t have buttermilk. Is there a substitute?
A: Absolutely. You can easily make a DIY buttermilk substitute. For this recipe, pour ½ cup of regular milk (whole or 2% works best) into a liquid measuring cup. Add ½ tablespoon of lemon juice or white vinegar to the milk. Let it sit for 5-10 minutes. The milk will curdle slightly and thicken, and it’s now ready to use in the recipe.
Q3: Can I make these donuts ahead of time? How do I store them?
A: These donuts are best enjoyed on the day they are made. However, you can store leftovers in an airtight container at room temperature for up to 2 days. Be aware that the cinnamon-sugar coating may become slightly moist and less crunchy over time as it absorbs moisture from the donut. Reheating a donut in the microwave for 10-15 seconds can help revive its softness.
Q4: Can I use apple juice instead of apple cider?
A: It’s not recommended. Apple cider is typically unfiltered and unpasteurized (or minimally processed), giving it a much more complex, tangy, and robust apple flavor. Apple juice is filtered and sweeter, and it won’t provide the same depth of flavor, even when reduced. For the best, most authentic taste, stick with fresh apple cider.
Q5: Can I fry this batter instead of baking it?
A: No, this batter is specifically formulated for baking. It is much thinner and more cake-like than a traditional yeast or cake donut batter designed for frying. Attempting to fry this batter would likely result in it disintegrating in the hot oil. For baking, this formulation is perfect.

Baked Apple Cider Donuts recipe
Ingredients
For the Baked Apple Cider Donuts:
-
1 ½ cups (360ml) fresh apple cider
-
2 cups (250g) all-purpose flour
-
1 ½ teaspoons baking powder
-
½ teaspoon baking soda
-
1 teaspoon ground cinnamon
-
½ teaspoon ground nutmeg
-
¼ teaspoon ground allspice
-
½ teaspoon fine sea salt
-
2 large eggs, at room temperature
-
⅔ cup (145g) packed light brown sugar
-
½ cup (120ml) buttermilk, at room temperature
-
½ cup (113g or 1 stick) unsalted butter, melted and slightly cooled
For the Cinnamon-Sugar Topping:
-
½ cup (113g or 1 stick) unsalted butter, melted
-
¾ cup (150g) granulated sugar
-
1 ½ teaspoons ground cinnamon
Instructions
Step 1: Make the Apple Cider Reduction
Pour the 1 ½ cups of apple cider into a small saucepan. Bring to a boil over medium-high heat, then reduce the heat to maintain a steady simmer. Let the cider simmer, uncovered, for about 15-20 minutes, or until it has reduced in volume to approximately ½ cup. It will be slightly thicker and more syrupy. Set it aside to cool down while you prepare the rest of the ingredients. This step is crucial and cannot be skipped.
Step 2: Preheat and Prepare Your Pan
Preheat your oven to 350°F (175°C). Generously grease a standard 6-cavity or 12-cavity donut pan with non-stick baking spray or softened butter. Even if your pan is non-stick, this step is vital to ensure the donuts release cleanly. Use a paper towel to make sure every part of the cavities, including the center spindle, is coated.
Step 3: Combine the Dry Ingredients
In a large bowl, whisk together the all-purpose flour, baking powder, baking soda, ground cinnamon, nutmeg, allspice, and salt. Whisking thoroughly not only combines the ingredients but also aerates the flour, much like sifting.
Step 4: Combine the Wet Ingredients
In a separate medium bowl, whisk the two large eggs until they are pale and slightly frothy. Whisk in the packed light brown sugar until it is fully incorporated. Then, whisk in the buttermilk, the melted butter, and the cooled apple cider reduction until the mixture is smooth.
Step 5: Mix the Batter
Pour the wet ingredients into the bowl containing the dry ingredients. Use a rubber spatula to gently fold the ingredients together until they are just combined. It’s very important not to overmix! A few small lumps in the batter are perfectly fine. Overmixing develops the gluten in the flour and will result in tough, dense donuts instead of light, tender ones.
Step 6: Fill the Donut Pan
This step can be messy if done with a spoon. For perfectly shaped donuts and easy filling, transfer the batter to a large piping bag or a large zip-top plastic bag. Snip off a corner of the bag (about a ½-inch opening). Carefully pipe the batter into each cavity of the prepared donut pan, filling them about ¾ of the way full. Do not overfill them, as they will rise during baking.
Step 7: Bake to Golden Perfection
Place the donut pan in the preheated oven and bake for 12-15 minutes. The donuts are done when they are golden brown and a wooden skewer or toothpick inserted into the center of a donut comes out clean with no wet batter attached. The tops should also spring back lightly when touched.
Step 8: Cool and Coat
Let the donuts cool in the pan for 5 minutes. This allows them to set up slightly so they won’t break when you remove them. After 5 minutes, carefully invert the pan onto a wire cooling rack. The donuts should fall right out.
While the donuts are still warm, prepare the topping. In a shallow bowl, place the ½ cup of melted butter. In a separate shallow bowl, whisk together the granulated sugar and the 1 ½ teaspoons of cinnamon.
Working one at a time, dip the entire warm donut into the melted butter, ensuring it’s fully coated. Let any excess butter drip off, then immediately transfer the donut to the cinnamon-sugar mixture. Toss it gently to coat all sides generously. Place the finished donut back on the wire rack. Repeat with the remaining donuts.
Nutrition
- Serving Size: one normal portion
- Calories: 280-320