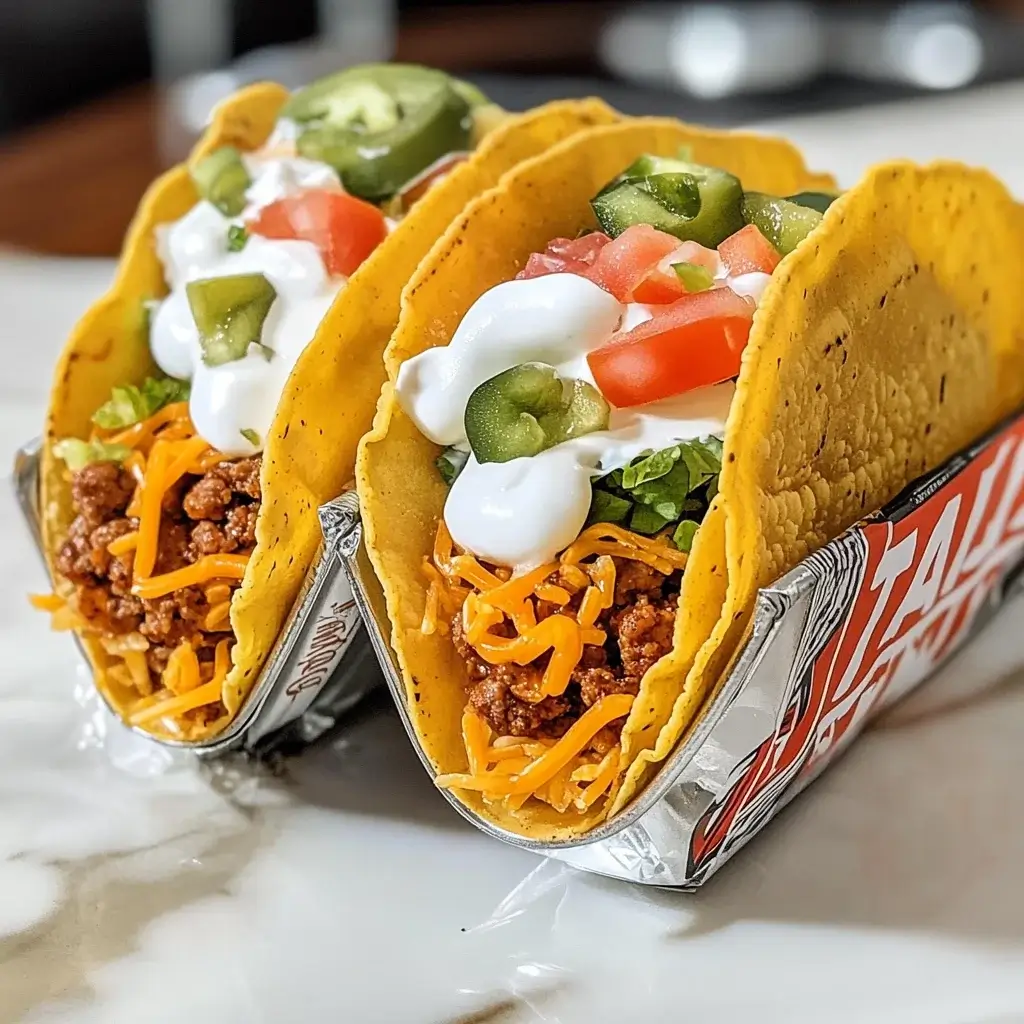

I’ll never forget the first time I encountered Walking Tacos. It was at my nephew’s chaotic but utterly delightful outdoor birthday party. Amidst the squeals of children and the buzz of happy parents, there was a station that seemed to be drawing the biggest crowd. Instead of paper plates, everyone was gleefully clutching bags of Fritos and Doritos, transforming them into personalized taco masterpieces. My inner foodie was intrigued, and my practical mom-brain was immediately impressed by the genius simplicity and minimal cleanup. I built my own, loading a bag of Nacho Cheese Doritos with savory taco meat, crisp lettuce, juicy tomatoes, a generous dollop of sour cream, and a sprinkle of sharp cheddar. That first crunchy, savory, perfectly customized bite was a revelation! It was fun, it was interactive, and it was ridiculously delicious. Since then, Walking Tacos have become a staple for our family gatherings, game days, camping trips, and even super-casual weeknight dinners when I want maximum fun with minimal fuss. The kids adore the novelty, and the adults appreciate the effortless deliciousness. It’s more than just a meal; it’s an experience!
The Ultimate Guide to Fun and Flavor: Walking Tacos!
Walking Tacos, sometimes affectionately known as “Tacos in a Bag” or a close cousin to the “Frito Pie,” are the epitome of casual, crowd-pleasing party food. Imagine all the deliciousness of a taco – seasoned meat, fresh toppings, and crunchy goodness – all conveniently contained within a single-serving chip bag. No plates required, minimal cleanup, and maximum customization make this a winning recipe for any gathering, from birthday parties and tailgates to camping adventures and easy family dinners. This comprehensive guide will walk you through everything you need to know to create an unforgettable Walking Taco bar that will have your guests raving.
Ingredients for Your Walking Taco Fiesta (Serves 8-10)
The beauty of Walking Tacos lies in their adaptability. These quantities are a great starting point, but feel free to adjust based on your crowd size and topping preferences.
For the Base (The “Walking” Part):
- 8-10 individual, single-serving bags of chips (approx. 1-2 oz each). Popular choices include:
- Fritos (Original corn chips – the classic!)
- Doritos (Nacho Cheese, Cool Ranch, Spicy Sweet Chili)
- Corn Tortilla Chips (restaurant style, lightly crushed)
- Consider offering a variety for guests to choose from.
For the Savory Taco Meat Filling:
- 2 lbs lean ground beef (80/20 or 90/10 recommended)
- 2 tablespoons olive oil or vegetable oil
- 1 large yellow onion, finely chopped
- 2-3 cloves garlic, minced
- 2 packets (approx. 1 oz each) store-bought taco seasoning OR use 4-5 tablespoons homemade taco seasoning (see tip below for a quick homemade blend)
- 1 cup water or beef broth
- Salt and freshly ground black pepper, to taste
For the Toppings Bar (The “Taco” Part – Offer a Variety!):
- Cheeses:
- 2-3 cups shredded cheddar cheese (sharp or mild)
- 2 cups shredded Monterey Jack cheese or a Mexican blend
- Optional: Crumbled cotija cheese or queso fresco for an authentic touch
- Fresh & Cool:
- 3 cups shredded iceberg or romaine lettuce
- 2 cups diced ripe tomatoes (Roma tomatoes work well as they are less watery)
- 1 cup finely chopped red or white onion (or thinly sliced green onions)
- Creams & Salsas:
- 1.5 – 2 cups sour cream or plain Greek yogurt
- 2 cups salsa (mild, medium, or hot – offer a choice! Pico de Gallo is excellent)
- 1 cup guacamole (store-bought or homemade)
- Optional: Salsa verde, queso dip (warmed)
- Pickled & Punchy:
- 1/2 cup sliced jalapeños (fresh or pickled)
- 1/2 cup sliced black olives
- Optional: Pickled red onions, pickled carrots
- Herbs & Finishers:
- 1/2 cup chopped fresh cilantro
- Lime wedges, for squeezing
Utensils:
- Forks or sporks (essential!)
- Plenty of napkins
Step-by-Step Instructions: Assembling Your Delicious Walking Tacos
The process is simple: cook the meat, prep the toppings, and let everyone build their own bag of deliciousness!
1. Prepare the Taco Meat Filling:
* Heat the olive oil or vegetable oil in a large skillet or Dutch oven over medium-high heat.
* Add the finely chopped onion and cook for 5-7 minutes, or until softened and translucent.
* Add the minced garlic and cook for another minute until fragrant, stirring constantly to prevent burning.
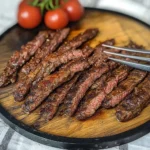
* Add the ground beef to the skillet. Cook, breaking it apart with a spoon, until it’s thoroughly browned and no pink remains (about 8-10 minutes).
* Drain off any excess fat from the skillet. This is important for a less greasy filling.
* Return the skillet to the heat. Stir in the taco seasoning (store-bought packet or homemade blend). Cook for 1-2 minutes, stirring, to toast the spices and coat the meat.
* Pour in the water or beef broth. Bring the mixture to a simmer.
* Reduce the heat to low, cover, and let it simmer for 15-20 minutes, stirring occasionally. This allows the flavors to meld and the sauce to thicken slightly. If it becomes too dry, add a little more water or broth.
* Taste and adjust seasoning with salt and pepper if needed. Keep the meat warm until ready to serve (a slow cooker on the “warm” setting is perfect for this if making ahead or serving over a longer period).
2. Prepare the Toppings Bar:
* While the meat is simmering, prepare all your chosen toppings.
* Wash and chop/shred the lettuce.
* Dice the tomatoes and onions.
* Shred the cheeses (if not using pre-shredded).
* Chop the cilantro.
* Arrange all toppings in individual bowls or a compartmentalized serving tray. Make it look inviting and colorful!
* Ensure salsas, sour cream, and guacamole are in easily accessible bowls with serving spoons.
3. Assemble the Walking Tacos (The Fun Part!):
* This is where your guests become the chefs! Instruct them on the process:
1. Choose Your Chip Bag: Select a single-serving bag of their favorite chips.
2. Crush Lightly (Optional but Recommended): Gently crush the chips inside the bag with their hands to break them into slightly smaller, more manageable pieces. Don’t pulverize them!
3. Open the Bag: Carefully cut open the top of the chip bag lengthwise (like a boat) with scissors, or if preferred, open it from the side. The lengthwise cut provides a wider opening for easier filling and eating.
4. Layer in the Goodness:
* Start with a generous scoop (or two) of the warm taco meat directly into the chip bag, on top of the crushed chips.
* Next, layer on their desired toppings: cheese, lettuce, tomatoes, onions, salsa, sour cream, guacamole, jalapeños, olives, cilantro, etc. Encourage them to be creative!
5. Grab a Fork (or Spork!) and Dig In: Mix everything gently with a fork or spork and enjoy immediately while the chips are still crunchy and the meat is warm.
Nutrition Facts (Approximate)
- Servings: This recipe, as outlined, will yield approximately 8-10 Walking Tacos.
- Calories per serving (per bag): This is highly variable and depends heavily on the type of chips chosen, the amount of meat, and the quantity and type of toppings added. A rough estimate could range from 350-650 calories per Walking Taco.
- Chip Base: A 1-2 oz bag of Fritos or Doritos typically ranges from 160-320 calories.
- Taco Meat: Approximately 150-200 calories per 1/4 – 1/3 cup serving.
- Toppings: Cheese, sour cream, and guacamole will add more calories and fat than lettuce, tomatoes, and salsa.
Considerations for a typical Walking Taco:
- Fritos (1 oz bag, approx. 160 cal) + 1/3 cup taco meat (approx. 170 cal) + 1/4 cup cheese (approx. 110 cal) + 2 tbsp sour cream (approx. 60 cal) + lettuce/tomato/salsa (approx. 20 cal) = ~520 calories.
It’s best to view Walking Tacos as a fun, customizable treat. If calorie counting is a concern, guests can opt for smaller chip bags, lean heavily on vegetable toppings, and use cheese and creamy sauces sparingly.
Preparation & Assembly Time
Walking Tacos are relatively quick to put together, especially if you have helpers for topping prep!
- Preparation Time (Taco Meat & Toppings): 30-45 minutes (includes chopping vegetables, browning meat, simmering).
- Assembly Time (Per Bag): 1-2 minutes per person (this is the interactive part for guests).
- Total Time (from start to first Walking Taco ready): Approximately 45 minutes to 1 hour.
If you prep toppings and cook the meat in advance, the “day-of” effort is minimal, focusing only on reheating the meat and setting up the bar.
How to Serve Your Amazing Walking Tacos
The serving style is integral to the Walking Taco experience. Here’s how to make it seamless and fun:
- Set Up a “Walking Taco Bar”:
- Arrange the components buffet-style on a long table or kitchen island.
- Start with the Chip Bags: Place the assortment of individual chip bags at the beginning of the line. Include scissors for easy opening if needed.
- Next, the Warm Taco Meat: Keep the seasoned meat warm in a slow cooker set to “low” or “warm,” or in a chafing dish. Provide a sturdy serving spoon.
- Follow with the Toppings: Arrange all your prepared toppings in an inviting, organized manner. Group similar items together (e.g., cheeses, fresh veggies, salsas). Ensure each topping has its own serving spoon or tongs to prevent cross-contamination and keep things tidy.
- End with Utensils and Napkins: Place a stack of forks (or sporks, which are ideal!) and plenty of napkins at the end of the line.
- Instruct Your Guests:
- A small, cute sign explaining the “How-To” of building a Walking Taco can be helpful and add to the fun, especially if some guests are new to the concept.
- Example: “Welcome to the Walking Taco Bar! 1. Grab a chip bag. 2. Crush chips gently. 3. Open bag wide. 4. Load with taco meat & your favorite toppings. 5. Enjoy!”
- Perfect for Any Casual Occasion:
- Parties: Birthday parties (kids and adults!), Super Bowl parties, graduation parties.
- Outdoor Events: Tailgating, picnics, camping trips, BBQs.
- Easy Dinners: A fun and interactive weeknight meal that gets everyone involved.
- The Cleanup Dream:
- One of the biggest appeals is the minimal cleanup! Guests eat directly from the bag, which then becomes its own disposable container. You’ll mainly have serving bowls and spoons from the topping bar to wash.
- Don’t Forget Drinks:
- Offer complementary beverages like lemonade, iced tea, sodas, beer for adults, or even agua frescas for an authentic touch.
Additional Tips for Walking Taco Success
Elevate your Walking Taco experience with these handy tips:
- Chip Choice Matters: Offer a variety of chips to cater to different tastes. Fritos are classic and sturdy. Doritos (Nacho Cheese or Cool Ranch) add extra flavor. Consider the sturdiness of the bag and the chip itself – you don’t want them to disintegrate too quickly once the toppings are added.
- Smart Bag Preparation: Using scissors to cut the bag open lengthwise (like a boat) provides a wider opening than just tearing the top, making it easier to add ingredients and eat. Encourage guests to roll down the edges of the bag as they eat to make it more manageable.
- Meat Variations for All:
- Leaner Options: Ground turkey or ground chicken can be substituted for ground beef.
- Vegetarian/Vegan: Use seasoned lentils, black beans, crumbled plant-based meat alternatives, or a hearty mix of sautéed mushrooms and peppers. Ensure other toppings cater to dietary needs (vegan cheese, dairy-free sour cream).
- Other Flavors: Consider chili (for a “Chili Cheese Frito Pie” vibe) or even shredded BBQ chicken or pork for a different twist.
- Keep the Meat Warm: If serving over an extended period, a slow cooker set to “warm” or “low” is your best friend for keeping the taco meat at a safe and appetizing temperature. Stir it occasionally.
- Mind the Mess (A Little!): Walking Tacos are inherently a bit messy, which is part of their charm! However, advise guests not to overfill their bags, as this increases the spill risk. Have plenty of napkins on hand. For very young children, you might consider transferring their creation to a bowl after a few initial “bag bites” to minimize accidents.
Frequently Asked Questions (FAQ) About Walking Tacos
Here are answers to some common questions about making and enjoying Walking Tacos:
- Q: What are the best types of chips for Walking Tacos?
- A: Fritos (original corn chips) are the traditional choice and hold up well. Doritos (Nacho Cheese, Cool Ranch, Spicy Nacho) are also extremely popular for their built-in flavor. Thicker, restaurant-style tortilla chips can work if you crush them into a bag, but individual serving bags of Fritos or Doritos are most common and convenient.
- Q: Can I make a healthier version of Walking Tacos?
- A: Yes! To make them healthier:
- Choose baked chips or a lower-fat chip option.
- Use lean ground turkey, ground chicken, or a plant-based protein.
- Load up on fresh vegetable toppings like lettuce, tomatoes, onions, and bell peppers.
- Opt for salsa and guacamole as primary “sauces” and use sour cream and cheese more sparingly or choose low-fat versions.
- Plain Greek yogurt is a great high-protein substitute for sour cream.
- A: Yes! To make them healthier:
- Q: Can I prepare components of Walking Tacos ahead of time?
- A: Absolutely! This is highly recommended for easier party hosting.
- Taco Meat: Cook the meat filling a day or two in advance, cool it completely, and store it in an airtight container in the refrigerator. Reheat thoroughly on the stovetop or in a slow cooker before serving.
- Toppings: Most vegetables (lettuce, tomatoes, onions) can be chopped a day ahead and stored in separate airtight containers in the fridge. Grate cheese in advance. Guacamole is best made closer to serving time to prevent browning, or use a store-bought version.
- A: Absolutely! This is highly recommended for easier party hosting.
- Q: Besides ground beef, what other fillings work well in Walking Tacos?
- A: Many fillings are delicious! Consider:
- Shredded chicken (cooked with taco seasoning or salsa)
- Ground turkey or pork
- Chili (beef or vegetarian)
- Seasoned black beans or lentils (for a vegetarian option)
- Pulled pork with a BBQ or spicy flavor profile
- Even seasoned, crumbled tofu or tempeh for vegan guests.
- A: Many fillings are delicious! Consider:
- Q: Are Walking Tacos very messy to eat? Any tips to minimize spills?
- A: They can be a bit messy, but that’s part of the fun! To minimize spills:
- Don’t overfill the chip bags.
- Crush the chips slightly before adding toppings so they are in smaller, more manageable pieces.
- Use scissors to cut the bag open wider along the side rather than just the top.
- Encourage guests to use a fork or spork.
- Provide plenty of napkins!
- For younger children, consider transferring the contents to a bowl after they’ve enjoyed the novelty of eating from the bag for a bit.
- A: They can be a bit messy, but that’s part of the fun! To minimize spills:
Walking Tacos are more than just a meal; they’re an interactive, customizable, and utterly enjoyable food experience. Perfect for gatherings of all sizes, they promise delicious flavors, minimal fuss, and a whole lot of fun. So grab your chip bags, gather your favorite toppings, and get ready to host a Walking Taco fiesta that everyone will be talking about!
Print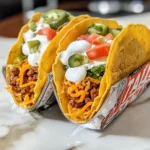
Walking Tacos Recipe
Ingredients
For the Base (The “Walking” Part):
-
- 8-10 individual, single-serving bags of chips (approx. 1-2 oz each). Popular choices include:
-
- Fritos (Original corn chips – the classic!)
-
- Doritos (Nacho Cheese, Cool Ranch, Spicy Sweet Chili)
-
- Corn Tortilla Chips (restaurant style, lightly crushed)
-
- Consider offering a variety for guests to choose from.
-
- 8-10 individual, single-serving bags of chips (approx. 1-2 oz each). Popular choices include:
For the Savory Taco Meat Filling:
-
- 2 lbs lean ground beef (80/20 or 90/10 recommended)
-
- 2 tablespoons olive oil or vegetable oil
-
- 1 large yellow onion, finely chopped
-
- 2–3 cloves garlic, minced
-
- 2 packets (approx. 1 oz each) store-bought taco seasoning OR use 4-5 tablespoons homemade taco seasoning (see tip below for a quick homemade blend)
-
- 1 cup water or beef broth
-
- Salt and freshly ground black pepper, to taste
For the Toppings Bar (The “Taco” Part – Offer a Variety!):
-
- Cheeses:
-
- 2–3 cups shredded cheddar cheese (sharp or mild)
-
- 2 cups shredded Monterey Jack cheese or a Mexican blend
-
- Optional: Crumbled cotija cheese or queso fresco for an authentic touch
-
- Cheeses:
-
- Fresh & Cool:
-
- 3 cups shredded iceberg or romaine lettuce
-
- 2 cups diced ripe tomatoes (Roma tomatoes work well as they are less watery)
-
- 1 cup finely chopped red or white onion (or thinly sliced green onions)
-
- Fresh & Cool:
-
- Creams & Salsas:
-
- 1.5 – 2 cups sour cream or plain Greek yogurt
-
- 2 cups salsa (mild, medium, or hot – offer a choice! Pico de Gallo is excellent)
-
- 1 cup guacamole (store-bought or homemade)
-
- Optional: Salsa verde, queso dip (warmed)
-
- Creams & Salsas:
-
- Pickled & Punchy:
-
- 1/2 cup sliced jalapeños (fresh or pickled)
-
- 1/2 cup sliced black olives
-
- Optional: Pickled red onions, pickled carrots
-
- Pickled & Punchy:
-
- Herbs & Finishers:
-
- 1/2 cup chopped fresh cilantro
-
- Lime wedges, for squeezing
-
- Herbs & Finishers:
Instructions
1. Prepare the Taco Meat Filling:
* Heat the olive oil or vegetable oil in a large skillet or Dutch oven over medium-high heat.
* Add the finely chopped onion and cook for 5-7 minutes, or until softened and translucent.
* Add the minced garlic and cook for another minute until fragrant, stirring constantly to prevent burning.
* Add the ground beef to the skillet. Cook, breaking it apart with a spoon, until it’s thoroughly browned and no pink remains (about 8-10 minutes).
* Drain off any excess fat from the skillet. This is important for a less greasy filling.
* Return the skillet to the heat. Stir in the taco seasoning (store-bought packet or homemade blend). Cook for 1-2 minutes, stirring, to toast the spices and coat the meat.
* Pour in the water or beef broth. Bring the mixture to a simmer.
* Reduce the heat to low, cover, and let it simmer for 15-20 minutes, stirring occasionally. This allows the flavors to meld and the sauce to thicken slightly. If it becomes too dry, add a little more water or broth.
* Taste and adjust seasoning with salt and pepper if needed. Keep the meat warm until ready to serve (a slow cooker on the “warm” setting is perfect for this if making ahead or serving over a longer period).
2. Prepare the Toppings Bar:
* While the meat is simmering, prepare all your chosen toppings.
* Wash and chop/shred the lettuce.
* Dice the tomatoes and onions.
* Shred the cheeses (if not using pre-shredded).
* Chop the cilantro.
* Arrange all toppings in individual bowls or a compartmentalized serving tray. Make it look inviting and colorful!
* Ensure salsas, sour cream, and guacamole are in easily accessible bowls with serving spoons.
3. Assemble the Walking Tacos (The Fun Part!):
* This is where your guests become the chefs! Instruct them on the process:
1. Choose Your Chip Bag: Select a single-serving bag of their favorite chips.
2. Crush Lightly (Optional but Recommended): Gently crush the chips inside the bag with their hands to break them into slightly smaller, more manageable pieces. Don’t pulverize them!
3. Open the Bag: Carefully cut open the top of the chip bag lengthwise (like a boat) with scissors, or if preferred, open it from the side. The lengthwise cut provides a wider opening for easier filling and eating.
4. Layer in the Goodness:
* Start with a generous scoop (or two) of the warm taco meat directly into the chip bag, on top of the crushed chips.
* Next, layer on their desired toppings: cheese, lettuce, tomatoes, onions, salsa, sour cream, guacamole, jalapeños, olives, cilantro, etc. Encourage them to be creative!
5. Grab a Fork (or Spork!) and Dig In: Mix everything gently with a fork or spork and enjoy immediately while the chips are still crunchy and the meat is warm.
Nutrition
- Serving Size: one normal portion
- Calories: 350-650