

There are certain desserts that are more than just a sweet treat; they are an experience. Crème brûlée, for me, has always been one of those. The ritual of tapping the glassy, caramelized sugar with the back of a spoon, the satisfying crackle as it gives way, and the first spoonful of cool, velvety custard beneath is pure, unadulterated magic. For years, the classic vanilla bean version was my gold standard. That is, until a deep-seated love for another culinary delight—creamy, fragrant Thai iced tea—sparked a wild idea. What if I could infuse that complex, spiced, and floral tea flavor into the rich custard of a crème brûlée? The first attempt was a revelation. The moment the torch caramelized the sugar, the air filled not just with the scent of burnt sugar, but with the aromatic notes of star anise and cardamom from the tea. The first bite was everything I had hoped for and more. The familiar, luxurious texture of the custard was there, but the flavor was a vibrant, exotic dance of sweet, spiced tea and rich cream. When I served it to my family, the initial silence was followed by a chorus of “wows.” It has since become my signature dessert, the one I make when I truly want to impress, a sophisticated and unexpected twist on a classic that never fails to leave everyone spellbound.
Why You’ll Fall in Love with This Thai Tea Crème Brûlée
This recipe is a showstopper, a conversation starter, and a dessert that feels incredibly luxurious, yet is surprisingly achievable for the home cook. It bridges the gap between the familiar comfort of a classic French dessert and the exciting, aromatic world of Southeast Asian flavors.
- A Unique and Unforgettable Flavor Fusion: This is not your average dessert. The Thai tea infuses the cream with a complex bouquet of flavors—warm star anise, spicy cardamom, a hint of tamarind, and the robust foundation of black tea. This aromatic profile, combined with the sweet, creamy custard and the bittersweet caramelized sugar, creates a multi-layered taste experience that is absolutely captivating.
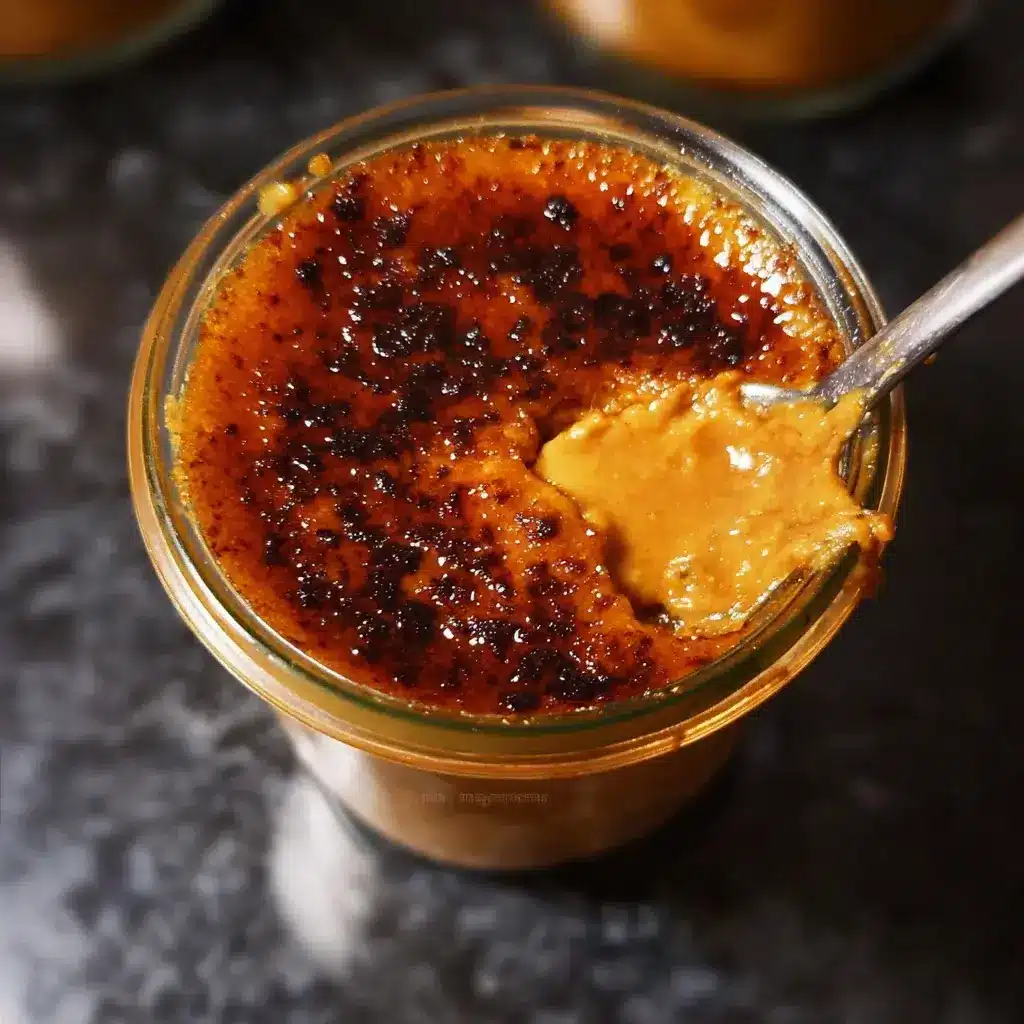
- The Ultimate Textural Masterpiece: The soul of a great crème brûlée is its contrast in textures, and this recipe delivers in spades. You get the iconic, brittle “crack” of the torched sugar crust, which shatters into shards over the impossibly smooth, silky, and decadent custard. It’s a sensory delight that is both satisfying and incredibly elegant.
- Looks Like a Five-Star Restaurant Dessert: Despite its straightforward preparation, the final result is stunning. Serving individual ramekins with a perfectly burnished, glassy top looks incredibly professional and sophisticated. It’s the perfect dessert to cap off a special dinner party or celebrate a milestone, guaranteeing a “wow” from your guests.
- Perfect for Making Ahead: This is a dream dessert for entertaining. The custards can be prepared, baked, and chilled a full two to three days in advance. All that’s left to do just before serving is to sprinkle on the sugar and torch the tops. This last-minute bit of culinary theatre is not only easy but also adds to the excitement of the dessert experience.
- Surprisingly Simple Ingredients: While the flavor is complex, the ingredient list is short and composed of pantry and refrigerator staples: cream, sugar, egg yolks, and the special Thai tea mix. There are no overly complicated or hard-to-find components, making this exotic dessert accessible to everyone.
Deconstructing the Magic: The Core Ingredients
With a recipe this refined, the quality and specific type of each ingredient play a pivotal role in the final outcome. Understanding these components is the first step to mastering the dish.
The Star of the Show: Thai Tea Mix
This is the most crucial ingredient for achieving the authentic flavor and color.
- What is Thai Tea Mix? It’s not just black tea. It’s a specific blend of strongly brewed Ceylon or Assam black tea, spices like star anise, cardamom, and cinnamon, and often other ingredients like tamarind seed or food coloring (which gives it its signature vibrant orange hue).
- Recommended Brand: The most popular and widely available brand is Pantai or ChaTraMue (the one with the red and white bag). These can be found in most Asian supermarkets or online. Using one of these authentic mixes is non-negotiable for getting the right flavor profile. Do not substitute with a simple black tea bag; you will miss all the characteristic spice notes.
The Custard Foundation: Cream, Eggs, and Sugar
This is the holy trinity of any great custard, and the ratios are key.
- Heavy Cream (or Whipping Cream): You must use a high-fat dairy product. Heavy cream, typically 36-40% milkfat, is what gives the crème brûlée its luxurious, rich mouthfeel and stable structure. Do not substitute with half-and-half or milk, as the custard will not set properly and will lack the necessary richness.
- Egg Yolks: This recipe uses only the yolks. The fat and emulsifiers in the yolks are what thicken the custard and give it its incredibly smooth, velvety texture and rich flavor. Using whole eggs would result in a lighter, more “eggy” and less decadent custard.
- Granulated Sugar: This is used to sweeten the custard and, more importantly, to create the brittle caramelized topping. Simple white granulated sugar is best for the topping because it melts cleanly and evenly, creating a perfect, glassy sheet.
Thai Tea Crème Brûlée: The Complete Recipe
This recipe will guide you through creating four perfect, restaurant-quality crème brûlées.
Ingredients
- 2 cups heavy cream
- 1/2 cup granulated sugar, divided
- 1/4 cup Thai tea mix (e.g., Pantai or ChaTraMue brand)
- 5 large egg yolks
- 1/4 teaspoon salt
- 2 tablespoons granulated sugar (for the topping)
Step-by-Step Instructions
The process can be broken down into six key stages: Infusing, Making the Custard, Baking, Chilling, and the final, glorious Brûlée.
Part 1: Infuse the Cream with Thai Tea Flavor
- Heat the Cream: In a medium saucepan, combine the heavy cream and 1/4 cup of the granulated sugar. Heat over medium heat, stirring occasionally, until the mixture is steaming and small bubbles are forming around the edges. Do not let it come to a full boil.
- Steep the Tea: Remove the saucepan from the heat. Add the Thai tea mix directly into the hot cream. Stir to combine, then cover the saucepan and let the tea steep for 15-20 minutes. This will infuse the cream with the tea’s flavor and vibrant orange color.
- Strain the Cream: Place a fine-mesh sieve over a clean bowl or large measuring cup. Pour the infused cream through the sieve to strain out all of the tea leaves. Use a spatula to gently press on the leaves to extract as much of the flavorful cream as possible. Discard the tea leaves. You will be left with a beautiful, fragrant, orange-colored cream.
Part 2: Create the Silky Custard Base
- Prepare for Baking: Preheat your oven to 325°F (165°C). Place four 6-ounce ramekins in a large baking dish or roasting pan (one with high sides).
- Whisk the Yolks: In a separate medium bowl, add the 5 egg yolks, the remaining 1/4 cup of granulated sugar, and the salt. Whisk together until the mixture is pale yellow, smooth, and slightly thickened.
- Temper the Eggs (The Most Important Step!): The tea-infused cream will still be warm. To prevent scrambling the eggs, you must temper them. Very slowly, while whisking the egg yolks constantly, pour about half a cup of the warm cream into the yolk mixture. This gently raises the temperature of the eggs.
- Combine: Once the first addition is fully incorporated, continue to slowly pour the remaining cream into the egg mixture, whisking constantly until everything is combined and smooth.
Part 3: Bake in a Water Bath (Bain-Marie)
- Fill the Ramekins: Carefully pour the final custard mixture evenly among the four ramekins.
- Create the Water Bath: Place the baking dish containing the ramekins on the oven rack. Carefully pour hot water into the baking dish (not into the ramekins!) until the water level comes halfway up the sides of the ramekins. This water bath is crucial as it ensures the custards cook gently and evenly, preventing them from curdling and resulting in a silky texture.
- Bake: Carefully slide the rack into the oven. Bake for 30-35 minutes.
Part 4: The Jiggle Test and Chilling
- Check for Doneness: The custards are done when the edges are set, but the centers still have a slight jiggle (like Jell-O) when you gently shake the pan. They will continue to set as they cool. Be careful not to overbake, which can result in a rubbery texture.
- Cool and Chill: Carefully remove the baking dish from the oven. Let the ramekins cool in the water bath for about 20 minutes before removing them. Place the ramekins on a wire rack to cool to room temperature. Once cooled, cover each ramekin with plastic wrap and refrigerate for at least 4 hours, but preferably overnight. This chilling step is non-negotiable. The custards must be completely cold and firm before you can brûlée the top.
Part 5: The Grand Finale – The Brûlée
- Prepare for Torching: Just before serving, remove the chilled custards from the refrigerator. Blot any condensation from the surface of the custards with the corner of a paper towel.
- Add the Sugar: Sprinkle about 1 to 1 ½ teaspoons of granulated sugar evenly over the top of each custard. Tilt the ramekin to ensure the entire surface is covered in a thin, even layer.
- Caramelize: Using a small kitchen torch, hold the flame about 2-3 inches from the sugar surface. Move the torch continuously in a slow, circular motion until the sugar melts, bubbles, and caramelizes into a beautiful, amber-colored, glassy crust.
- Serve Immediately: Let the crème brûlées sit for a minute or two for the sugar to harden. Serve immediately to enjoy the incredible contrast between the warm, crackly topping and the cold, creamy custard.
Essential Recipe Information
Preparation Time
- Active Prep Time: 25 minutes
- Steeping Time: 20 minutes
- Cook Time: 30-35 minutes
- Chilling Time: 4 hours minimum (overnight recommended)
- Total Time: Approximately 5 hours 20 minutes (mostly inactive)
Nutrition Facts
- Servings: 4 individual crème brûlées
- Calories per serving: Approximately 550-600 calories
Disclaimer: This is an estimate and can vary based on the specific brand of heavy cream and the exact amount of sugar used.
How to Serve and Present Your Masterpiece
Presentation elevates this dessert from delicious to unforgettable.
- The Classic Presentation:
- Serve each crème brûlée in its ramekin, placed on a small dessert plate.
- You can place a small doily or napkin under the ramekin to prevent it from sliding.
- Garnish for Elegance (A Little Goes a Long Way):
- Fresh Berries: A single fresh raspberry or a few blueberries placed on the side of the plate adds a pop of color and a touch of acidity to cut through the richness.
- Mint Sprig: A small sprig of fresh mint provides a beautiful green contrast against the amber top.
- Edible Flowers: For a truly show-stopping look, a single small, vibrant edible flower like a pansy or viola looks stunning.
- Perfect Pairings:
- Coffee: The bitterness of a strong espresso or a cup of black coffee pairs beautifully with the sweet, rich custard.
- Tea: Complement the dessert with a simple cup of hot jasmine or green tea to cleanse the palate.
- Dessert Wine: A late-harvest Riesling or a Sauternes would be a sophisticated and delicious beverage pairing.
Additional Tips for Crème Brûlée Perfection
These five tips will help you navigate the nuances of custard-making and ensure a flawless result.
- Strain Your Custard for Ultimate Silkiness: Even after straining the tea leaves, it’s a professional secret to strain the final custard mixture one more time through the fine-mesh sieve as you pour it into the ramekins. This catches any potential chalazae (the little white cords in egg yolks) or any tiny bits of accidentally cooked egg, guaranteeing an absolutely flawless, silky-smooth texture.
- The Water Bath is Your Best Friend: Do not be tempted to skip the bain-marie (water bath). It acts as an insulator, ensuring the custards are cooked with gentle, even heat. Baking them directly would expose them to harsh oven heat, causing the eggs to curdle, the texture to become grainy, and the edges to overcook before the center is set.
- Don’t Over-Steep the Tea: While it’s tempting to think longer is better for more flavor, over-steeping black tea can extract too many tannins, which will make your custard bitter and astringent. The 15-20 minute window is the sweet spot for maximum flavor without the bitterness.
- For a Flawless Brûlée, Use a Torch: While you can caramelize the sugar under a hot oven broiler, it’s risky. The broiler heats the entire custard, compromising the desired temperature contrast, and it’s very easy to burn the sugar. A small, inexpensive kitchen torch gives you precise control, allowing you to melt the sugar perfectly without warming the custard beneath, resulting in a much better final product.
- Let the Sugar Crust Harden: After you’ve torched the sugar, it will be molten lava. Give it a minute or two at room temperature to cool and harden into that signature brittle, glass-like sheet. The sound of that first crack is your reward for your patience!
Frequently Asked Questions (FAQ)
1. I don’t have a kitchen torch. Can I really use my oven’s broiler?
Yes, you can, but you must be extremely careful. Position the oven rack so the tops of the custards are 3-4 inches from the broiler element. Turn the broiler on high. Place the chilled, sugar-topped ramekins on a baking sheet and put them under the broiler. Watch them constantly—do not walk away. It will only take 1-2 minutes. Pull them out as soon as the sugar is caramelized, as it can go from perfect to burnt in a matter of seconds.
2. Can I make this dessert ahead of time for a party?
Absolutely! This is one of its best features. You can complete all the steps up to and including chilling the baked custards. They will keep perfectly in the refrigerator, covered in plastic wrap, for up to 3 days. Do the final sugar-sprinkling and torching step just before you plan to serve them for the best experience.
3. Why did my custard turn out grainy or scrambled?
This is the most common issue and it almost always happens for one of two reasons. First, you may have added the hot cream to the egg yolks too quickly without whisking constantly, which scrambled the eggs. Tempering slowly is key. Second, you may have baked the custards at too high a temperature or without a water bath, causing them to curdle.
4. My Thai tea mix already contains sugar. Should I adjust the sugar in the recipe?
This is a great question. Some Thai tea mixes do have sugar in them. To be safe, after you infuse and strain the cream (Step 3 of Part 1), give it a taste. If it’s already quite sweet, you can reduce the amount of sugar you whisk into the egg yolks. You might reduce it from 1/4 cup down to 2-3 tablespoons, depending on the sweetness of your cream.
5. Can I make a dairy-free version of this recipe?
Yes, you can make a delicious dairy-free version by substituting the heavy cream with full-fat canned coconut milk. The rich, fatty coconut milk will set up beautifully and its flavor is a natural and delicious pairing with the spices in the Thai tea. Follow the recipe exactly, just swapping the cream for an equal amount of well-shaken, full-fat coconut milk.

Thai Tea Crème Brûlée recipe
Ingredients
-
2 cups heavy cream
-
1/2 cup granulated sugar, divided
-
1/4 cup Thai tea mix (e.g., Pantai or ChaTraMue brand)
-
5 large egg yolks
-
1/4 teaspoon salt
-
2 tablespoons granulated sugar (for the topping)
Instructions
Part 1: Infuse the Cream with Thai Tea Flavor
-
Heat the Cream: In a medium saucepan, combine the heavy cream and 1/4 cup of the granulated sugar. Heat over medium heat, stirring occasionally, until the mixture is steaming and small bubbles are forming around the edges. Do not let it come to a full boil.
-
Steep the Tea: Remove the saucepan from the heat. Add the Thai tea mix directly into the hot cream. Stir to combine, then cover the saucepan and let the tea steep for 15-20 minutes. This will infuse the cream with the tea’s flavor and vibrant orange color.
-
Strain the Cream: Place a fine-mesh sieve over a clean bowl or large measuring cup. Pour the infused cream through the sieve to strain out all of the tea leaves. Use a spatula to gently press on the leaves to extract as much of the flavorful cream as possible. Discard the tea leaves. You will be left with a beautiful, fragrant, orange-colored cream.
Part 2: Create the Silky Custard Base
-
Prepare for Baking: Preheat your oven to 325°F (165°C). Place four 6-ounce ramekins in a large baking dish or roasting pan (one with high sides).
-
Whisk the Yolks: In a separate medium bowl, add the 5 egg yolks, the remaining 1/4 cup of granulated sugar, and the salt. Whisk together until the mixture is pale yellow, smooth, and slightly thickened.
-
Temper the Eggs (The Most Important Step!): The tea-infused cream will still be warm. To prevent scrambling the eggs, you must temper them. Very slowly, while whisking the egg yolks constantly, pour about half a cup of the warm cream into the yolk mixture. This gently raises the temperature of the eggs.
-
Combine: Once the first addition is fully incorporated, continue to slowly pour the remaining cream into the egg mixture, whisking constantly until everything is combined and smooth.
Part 3: Bake in a Water Bath (Bain-Marie)
-
Fill the Ramekins: Carefully pour the final custard mixture evenly among the four ramekins.
-
Create the Water Bath: Place the baking dish containing the ramekins on the oven rack. Carefully pour hot water into the baking dish (not into the ramekins!) until the water level comes halfway up the sides of the ramekins. This water bath is crucial as it ensures the custards cook gently and evenly, preventing them from curdling and resulting in a silky texture.
-
Bake: Carefully slide the rack into the oven. Bake for 30-35 minutes.
Part 4: The Jiggle Test and Chilling
-
Check for Doneness: The custards are done when the edges are set, but the centers still have a slight jiggle (like Jell-O) when you gently shake the pan. They will continue to set as they cool. Be careful not to overbake, which can result in a rubbery texture.
-
Cool and Chill: Carefully remove the baking dish from the oven. Let the ramekins cool in the water bath for about 20 minutes before removing them. Place the ramekins on a wire rack to cool to room temperature. Once cooled, cover each ramekin with plastic wrap and refrigerate for at least 4 hours, but preferably overnight. This chilling step is non-negotiable. The custards must be completely cold and firm before you can brûlée the top.
Part 5: The Grand Finale – The Brûlée
-
Prepare for Torching: Just before serving, remove the chilled custards from the refrigerator. Blot any condensation from the surface of the custards with the corner of a paper towel.
-
Add the Sugar: Sprinkle about 1 to 1 ½ teaspoons of granulated sugar evenly over the top of each custard. Tilt the ramekin to ensure the entire surface is covered in a thin, even layer.
-
Caramelize: Using a small kitchen torch, hold the flame about 2-3 inches from the sugar surface. Move the torch continuously in a slow, circular motion until the sugar melts, bubbles, and caramelizes into a beautiful, amber-colored, glassy crust.
-
Serve Immediately: Let the crème brûlées sit for a minute or two for the sugar to harden. Serve immediately to enjoy the incredible contrast between the warm, crackly topping and the cold, creamy custard.
Nutrition
- Serving Size: one normal portion
- Calories: 550-600


