
Taiwanese Milk Mochi has captured the hearts and taste buds of dessert lovers around the globe. This soft, chewy treat is a traditional Japanese rice cake that has been lovingly embraced and adapted in Taiwan. Known for its delightful texture and subtle sweetness, Milk Mochi is a versatile dessert that can be enjoyed in various flavors and forms. In this comprehensive guide, we’ll delve into the art of making Taiwanese Milk Mochi at home, explore the nutritional aspects, and answer common questions to ensure you create the perfect mochi every time.
Ingredients
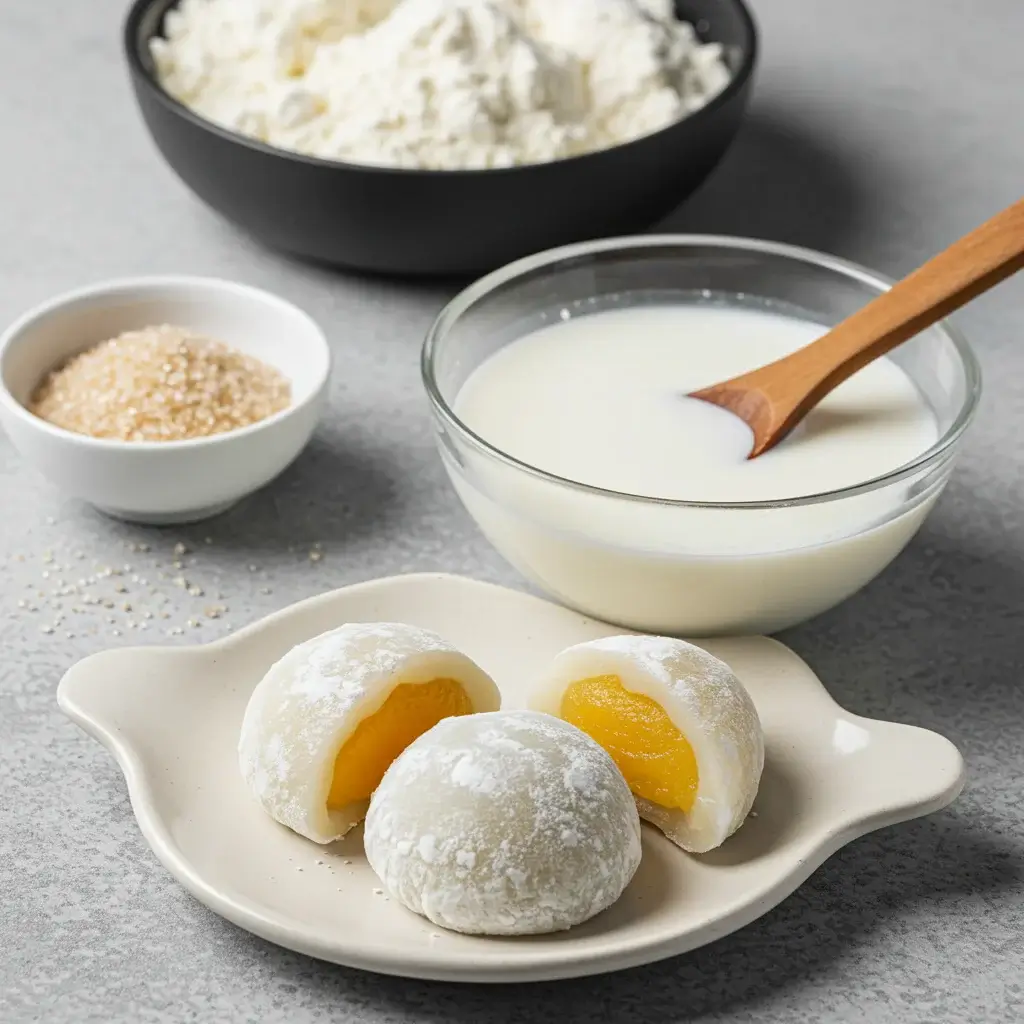
To embark on your Milk Mochi adventure, you’ll need a few simple ingredients. Here is a list of what you will need:
- 1 cup sweet rice flour (mochi flour)
- 1/4 cup sugar
- 1 cup milk (or almond milk for a dairy-free option)
- Cornstarch for dusting
These ingredients are readily available in most supermarkets, especially in the Asian foods section. Sweet rice flour, also known as glutinous rice flour, is the key ingredient that gives mochi its unique texture.
Instructions
Making Taiwanese Milk Mochi is a straightforward process that can be completed in under 30 minutes. Follow these steps for a successful mochi-making experience:
- Mix Dry Ingredients:
- In a medium-sized bowl, combine 1 cup of sweet rice flour and 1/4 cup of sugar. Mix well to ensure even distribution.
- Incorporate Milk:
- Gradually stir in 1 cup of milk (or almond milk) into the dry mixture. Stir continuously until the mixture is smooth and free of lumps.
- Microwave Cooking:
- Pour the mochi mixture into a microwave-safe dish. Microwave on high for 1 minute, then remove and stir. Repeat the process, microwaving in 1-minute intervals and stirring each time, until the mixture thickens. This usually takes about 3-4 minutes total.
- Prepare Work Surface:
- Dust a clean, flat surface with cornstarch to prevent sticking. Transfer the thickened mochi mixture onto the prepared surface.
- Cool and Knead:
- Allow the mochi to cool for a few minutes until it’s comfortable to handle. Knead the mochi gently to achieve a smooth, pliable texture.
- Shape the Mochi:
- Divide the mochi into small, bite-sized pieces. Shape them as desired, whether into balls or flattened discs. Roll each piece in cornstarch to prevent sticking.
- Serve and Enjoy:
- Your Taiwanese Milk Mochi is ready to be enjoyed! Serve immediately or store in an airtight container for later.
Nutrition Facts
For those mindful of their dietary intake, here’s a breakdown of the nutritional content per piece of mochi (makes about 8 pieces):
- Calories: 70
- Protein: 1g
- Carbs: 14g
- Fat: 1g
- Sugar: 3g
Mochi is a relatively low-calorie treat, making it an excellent choice for those seeking a sweet indulgence without the guilt.
How to Serve
Taiwanese Milk Mochi is a delightful and versatile dessert that can be enjoyed in a myriad of ways, each offering a unique experience that tantalizes the taste buds. Here are some comprehensive serving suggestions to elevate your mochi experience:
Traditional Style
One of the simplest yet most satisfying ways to enjoy Taiwanese Milk Mochi is in its traditional form. After preparing the mochi, dust it lightly with cornstarch to prevent stickiness and create a delicate texture. This method highlights the subtle sweetness and chewy consistency of the mochi itself. For an authentic experience, serve it alongside a cup of freshly brewed Taiwanese tea, such as Oolong or Jasmine, which complements the mochi’s flavors beautifully. This pairing not only enhances the taste but also creates a soothing ambiance perfect for afternoon tea or dessert after a meal.
Filled Mochi
Taking your mochi to the next level involves adding a sweet filling. Popular options include:
- Red Bean Paste: This classic filling is made from adzuki beans and sugar, offering a sweet and slightly earthy flavor that pairs harmoniously with the mochi’s chewy texture.
- Chocolate: For chocolate lovers, a rich chocolate ganache or chocolate hazelnut spread can be used to create a decadent treat. Simply pipe a small amount into the center of the mochi before sealing it.
- Fruit Preserves: Opt for fruit preserves such as strawberry, mango, or matcha-infused fillings for a refreshing burst of flavor. The fruity sweetness contrasts beautifully with the mochi’s soft exterior.
To prepare filled mochi, flatten small discs of the mochi dough, place a spoonful of your desired filling in the center, and carefully fold and seal the edges to encase the filling. Dust the finished mochi with cornstarch to keep it from sticking together.
Mochi Ice Cream
For a refreshing twist, consider transforming your mochi into mochi ice cream. This delightful fusion combines the chewy texture of mochi with the creamy richness of ice cream, creating an irresistible treat. To make mochi ice cream, follow these steps:
- Choose Your Ice Cream: Select your favorite flavors, whether classic vanilla, rich chocolate, or unique options like green tea or black sesame.
- Scoop and Freeze: Scoop small balls of ice cream and place them on a parchment-lined tray. Freeze until firm, which typically takes about 1-2 hours.
- Wrap in Mochi: Roll out your mochi dough to a thin layer and use a round cutter to create discs. Place a frozen ice cream ball in the center of each disc, quickly fold the edges over the ice cream, and seal them tightly. Dust the finished product with cornstarch to prevent sticking.
- Serve Immediately or Freeze: Mochi ice cream can be served right away for a soft texture or returned to the freezer for a firmer bite.
Mochi Toppings
Elevate your mochi experience further by adding delectable toppings. Here are some creative ideas to enhance the flavor and presentation of your mochi:
- Sweet Sauces: Drizzle warm caramel, rich chocolate sauce, or even a sweetened condensed milk over the mochi for a luxurious touch. These sauces can add a delightful contrast to the chewy texture of the mochi.
- Matcha Powder: A light sprinkle of matcha powder not only adds a beautiful green hue but also introduces a slightly bitter, earthy flavor that complements the sweetness of the mochi. Matcha adds a touch of elegance and depth to the dessert.
- Chopped Nuts: For added crunch, sprinkle finely chopped nuts such as almonds, peanuts, or pistachios over the mochi. These additions provide a delightful textural contrast and enhance the overall flavor profile.
- Fresh Fruit: Serve your mochi alongside fresh fruit slices, such as strawberries, kiwi, or mango. The natural sweetness and juiciness of the fruit can act as a refreshing counterbalance to the dense texture of the mochi.
By incorporating these serving suggestions, you can create a versatile and enjoyable mochi experience that caters to various tastes and occasions, making Taiwanese Milk Mochi not just a dessert, but a delightful culinary adventure. Whether served traditionally, filled, as ice cream, or with creative toppings, this beloved treat is sure to impress and satisfy your cravings.
Additional Tips for Perfecting Mochi
Creating the perfect mochi requires attention to detail and a few handy tips that can significantly enhance your results. Here’s an expanded guide that delves deeper into each aspect of the mochi-making process, ensuring you achieve the best texture and flavor.
Consistent Stirring
When preparing your mochi mixture, consistent stirring is crucial. After each microwave interval, take a moment to stir the mixture thoroughly. This step is essential for several reasons:
- Preventing Lumps: Stirring helps to break up any lumps that may form during cooking. By ensuring the mixture is smooth, you create a more uniform texture that is characteristic of well-made mochi.
- Even Cooking: The heat from the microwave can sometimes cook the mixture unevenly. By stirring consistently, you distribute the heat more evenly throughout the dough, which helps in achieving a consistent texture.
- Monitoring Doneness: As you stir, keep an eye on the texture. The mochi should be glossy and slightly translucent when it’s ready. If you notice any dry patches or lumps, it may require additional microwaving and stirring.
To maximize the effectiveness of your stirring, consider using a silicone spatula or a wooden spoon, as these tools are less likely to stick to the mochi mixture.
Proper Dusting
Dusting your work surface and hands with cornstarch is a critical step in the mochi-making process, and here’s why:
- Preventing Stickiness: Mochi is notorious for its stickiness. Using a generous amount of cornstarch on your hands and the work surface creates a barrier that prevents the dough from adhering to your skin or the counter, allowing for easier handling.
- Achieving the Right Shape: When forming your mochi, the dusting allows you to manipulate the dough without it sticking to your fingers or tools. This is especially important when you’re shaping the mochi into rounds or filling it with sweet or savory fillings.
- Aesthetic Appeal: A light dusting of cornstarch not only prevents stickiness but can also give your finished mochi a beautiful, powdered look. However, be mindful to shake off any excess cornstarch before serving, as it can affect the flavor.
To ensure optimal dusting, keep a small bowl of cornstarch nearby as you work, allowing for easy access to reapply when needed.
Cooling Time
After microwaving the mochi, it’s tempting to dive right in, but patience is key. Allowing the mochi to cool slightly before handling is vital for several reasons:
- Burn Prevention: The mochi will be extremely hot immediately after cooking, and touching it can result in burns. By letting it cool for a few minutes, you can avoid discomfort and safely shape or cut the mochi.
- Improved Texture: As the mochi cools, it begins to set, which helps improve its overall texture. Handling it too soon can result in a mushy or overly sticky product that is difficult to work with.
- Flavor Development: Cooling can also allow the flavors to meld together better, particularly if you’ve added any fillings or flavorings. The cooling process can enhance the overall taste and enjoyment of your mochi.
To expedite this process, place the mochi on a cool surface, such as a marble countertop, which will help draw away some of the heat.
Storage
Proper storage of leftover mochi is essential to maintain its freshness and texture. Here are detailed guidelines for storing your mochi:
- Room Temperature Storage: If you plan to consume the mochi within a couple of days, store it in an airtight container at room temperature. This will keep the mochi soft and chewy, preserving its delightful texture.
- Refrigeration: For longer storage, you can refrigerate the mochi. However, be aware that refrigeration can cause the mochi to harden slightly. To counteract this, simply let the mochi sit at room temperature for about 15-20 minutes before consuming, or lightly steam it to restore some of its original texture.
- Freezing Options: If you want to store the mochi for an extended period, consider freezing it. Wrap each piece tightly in plastic wrap and place them in a freezer-safe bag or container. When you’re ready to enjoy the frozen mochi, thaw it in the refrigerator overnight or at room temperature for a few hours. For a delightful treat, you can enjoy the mochi slightly frozen, as it provides a unique texture and experience.
By following these additional tips, you can elevate your mochi-making skills and enjoy this delightful treat with confidence and finesse. Happy mochi-making!
FAQs
1. Can I use regular flour instead of sweet rice flour?
No, sweet rice flour is essential for achieving the unique chewy texture of mochi. Regular flour will not yield the same results.
2. Can I make mochi without a microwave?
Yes, you can steam the mochi mixture over boiling water for 10-12 minutes, stirring halfway through, as an alternative to microwaving.
3. Is mochi gluten-free?
Yes, sweet rice flour is naturally gluten-free, making mochi a suitable treat for those with gluten sensitivities.
4. Can I use other types of milk?
Absolutely! You can use any milk substitute, such as soy milk, coconut milk, or oat milk, to cater to dietary preferences.
5. Why is my mochi too sticky?
If your mochi is excessively sticky, it may need more cooking time or additional cornstarch on the work surface.
Conclusion
Taiwanese Milk Mochi is a delightful dessert that brings joy with every bite. With its soft, chewy texture and subtle sweetness, it’s no wonder this treat has become a favorite among dessert enthusiasts. By following the simple steps outlined in this guide and incorporating the additional tips, you can create perfect mochi at home. Whether enjoyed on its own, filled, or topped with your favorite flavors, Milk Mochi offers endless possibilities for indulgence. Embrace the art of mochi-making and savor the deliciousness of this beloved Taiwanese treat.
Print
Taiwanese Milk Mochi recipe
Ingredients
- 1 cup sweet rice flour (mochi flour)
- 1/4 cup sugar
- 1 cup milk (or almond milk for a dairy-free option)
- Cornstarch for dusting
Instructions
- Mix Dry Ingredients:
- In a medium-sized bowl, combine 1 cup of sweet rice flour and 1/4 cup of sugar. Mix well to ensure even distribution.
- Incorporate Milk:
- Gradually stir in 1 cup of milk (or almond milk) into the dry mixture. Stir continuously until the mixture is smooth and free of lumps.
- Microwave Cooking:
- Pour the mochi mixture into a microwave-safe dish. Microwave on high for 1 minute, then remove and stir. Repeat the process, microwaving in 1-minute intervals and stirring each time, until the mixture thickens. This usually takes about 3-4 minutes total.
- Prepare Work Surface:
- Dust a clean, flat surface with cornstarch to prevent sticking. Transfer the thickened mochi mixture onto the prepared surface.
- Cool and Knead:
- Allow the mochi to cool for a few minutes until it’s comfortable to handle. Knead the mochi gently to achieve a smooth, pliable texture.
- Shape the Mochi:
- Divide the mochi into small, bite-sized pieces. Shape them as desired, whether into balls or flattened discs. Roll each piece in cornstarch to prevent sticking.
- Serve and Enjoy:
- Your Taiwanese Milk Mochi is ready to be enjoyed! Serve immediately or store in an airtight container for later.
Nutrition
- Serving Size: one normal portion
- Calories: 70
- Sugar: 3g
- Fat: 1g
- Carbohydrates: 14g
- Protein: 1g