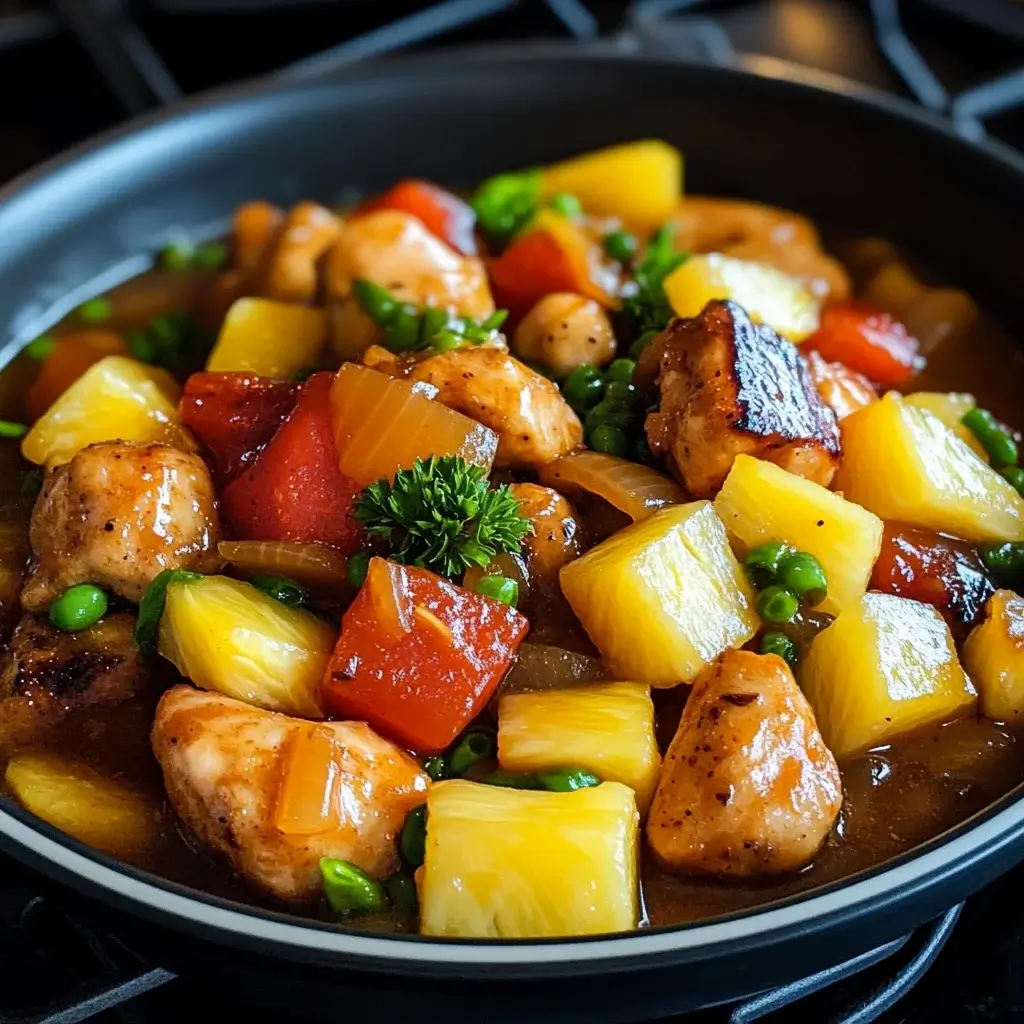

There are certain dishes that just scream comfort and nostalgia, and for my family, homemade Sweet and Sour Pineapple Chicken is right at the top of that list. Forget the sometimes gloopy, overly sweet versions from takeout; mastering this classic at home was a revelation. I remember the first time I really nailed it – the chicken perfectly crispy yet tender inside, coated in a sauce that hit that magical balance of tangy vinegar, fruity sweetness, and savory depth, studded with vibrant peppers and juicy pineapple chunks. The aroma filling the kitchen was incredible, a blend of sweet, tangy, and slightly caramelized notes that had everyone migrating towards the stove. Seeing my kids’ eyes light up and hearing my partner declare it “better than the restaurant” was the ultimate reward. It wasn’t just dinner; it felt like an achievement, transforming simple ingredients into something genuinely exciting. Since then, it’s become a go-to for weekend dinners, celebrations, or anytime we crave that irresistible sweet-tangy-crispy combination. It proves that with a little effort, you can create restaurant-quality flavours right in your own kitchen, tailored exactly to your taste.
Ingredients for Vibrant Sweet and Sour Pineapple Chicken
This recipe aims for that perfect restaurant-style balance. Using fresh pineapple adds incredible flavour, but canned works in a pinch!
For the Crispy Chicken:
- 1.5 lbs (about 680g) boneless, skinless chicken breasts or thighs, cut into 1-inch pieces
- 1 large egg, lightly beaten
- 1/2 cup (about 65g) cornstarch (cornflour)
- 1/4 cup (about 30g) all-purpose flour
- 1/2 teaspoon salt
- 1/4 teaspoon black pepper
- Vegetable oil or other high-smoke point oil for frying (about 1-2 inches deep in the pan, or less if shallow frying/pan-frying)
(See Tips section for baked chicken alternative)
For the Sweet and Sour Sauce:
- 3/4 cup (180ml) pineapple juice (reserved from canned pineapple, or use store-bought 100% pineapple juice)
- 1/2 cup (120ml) rice vinegar (or apple cider vinegar, white vinegar works but is harsher)
- 1/2 cup (about 100g) granulated sugar (adjust to taste)
- 1/3 cup (about 80ml) ketchup (provides colour and tangy base)
- 2 tablespoons soy sauce (use tamari for gluten-free)
- 1 tablespoon cornstarch (cornflour) mixed with 2 tablespoons cold water (slurry for thickening)
- Optional: 1 teaspoon sesame oil (adds nutty depth, stir in at the end)
- Optional: Pinch of red pepper flakes for a hint of heat
For the Stir-Fry:
- 1 tablespoon vegetable oil
- 1 medium onion, cut into 1-inch chunks
- 1 large bell pepper (any colour, red and green look great), cut into 1-inch chunks
- 1 cup (about 165g) fresh pineapple chunks (or canned pineapple chunks, drained – reserve the juice!)
- Optional Veggies: Sliced carrots, snow peas, broccoli florets (adjust cooking time accordingly)
For Garnish (Optional):
- Toasted sesame seeds
- Thinly sliced green onions (scallions)
Step-by-Step Instructions: Crafting Your Culinary Masterpiece
Follow these steps for perfectly crispy chicken coated in a glossy, flavourful sweet and sour sauce.
- Prepare the Chicken: Pat the cut chicken pieces thoroughly dry with paper towels. This is crucial for achieving a crispy coating. Place the dried chicken pieces in a medium bowl.
- Coat the Chicken: Add the lightly beaten egg, salt, and pepper to the chicken. Toss well to ensure every piece is coated. In a separate shallow dish or bowl, whisk together the 1/2 cup cornstarch and 1/4 cup all-purpose flour. Add the egg-coated chicken pieces to the cornstarch mixture, a few pieces at a time, tossing well to ensure they are fully and evenly coated. Shake off any excess flour/cornstarch. Place the coated chicken pieces on a wire rack or plate in a single layer – don’t let them pile up, or the coating can become gummy. Let them rest for about 10-15 minutes while you prepare the sauce and heat the oil; this helps the coating adhere better.
- Prepare the Sweet and Sour Sauce: In a medium saucepan, whisk together the pineapple juice, rice vinegar, sugar, ketchup, and soy sauce. Bring the mixture to a simmer over medium heat, stirring until the sugar is completely dissolved.
- Thicken the Sauce: While the sauce is simmering, prepare the cornstarch slurry by whisking together 1 tablespoon of cornstarch and 2 tablespoons of cold water in a small bowl until smooth. Slowly pour the slurry into the simmering sauce while whisking continuously. Continue to simmer and whisk for 1-2 minutes, or until the sauce thickens to a glossy consistency that coats the back of a spoon. If it gets too thick, you can thin it with a tablespoon of water or pineapple juice. If not thick enough, let it simmer a bit longer or add a tiny bit more slurry (mix 1/2 tsp cornstarch with 1 tsp water). Remove from heat. If using, stir in the sesame oil now. Set aside.
- Heat the Frying Oil: Pour about 1-2 inches of vegetable oil into a heavy-bottomed pot, Dutch oven, or wok. Heat the oil over medium-high heat until it reaches about 350-360°F (175-180°C). Use a thermometer for accuracy. If you don’t have one, a small piece of bread dropped in should turn golden brown in about 30-45 seconds, or a wooden chopstick inserted should have bubbles forming around it immediately. Alternatively, for pan-frying: Use about 1/2 inch of oil and work in batches, turning the chicken pieces.
- Fry the Chicken (in batches): Carefully add the coated chicken pieces to the hot oil, being careful not to overcrowd the pan (this lowers the oil temperature and makes the chicken greasy). Fry in batches for about 4-6 minutes per batch, turning occasionally, until golden brown, crispy, and cooked through. The internal temperature should reach 165°F (74°C). Use a slotted spoon or spider strainer to remove the cooked chicken from the oil and transfer it to a wire rack set over paper towels to drain excess oil. Repeat with the remaining chicken. (For extra crispy chicken, you can do a double fry: fry initially for 3-4 minutes until pale golden, remove, let rest, then fry again for 1-2 minutes just before serving until deep golden brown).
- Stir-Fry the Vegetables and Pineapple: Heat 1 tablespoon of vegetable oil in a large skillet or wok over medium-high heat. Add the onion and bell pepper chunks. Stir-fry for 2-3 minutes until they are crisp-tender (still have a slight bite). Add the pineapple chunks and stir-fry for another minute, just to heat them through. If using other optional vegetables like carrots or broccoli, add them with the onions and peppers, potentially needing slightly longer cooking time.
- Combine and Serve: Add the cooked, crispy chicken pieces to the skillet with the vegetables and pineapple. Pour the prepared sweet and sour sauce over everything. Gently toss to coat the chicken and vegetables evenly in the glossy sauce. Cook for just 1-2 minutes more, until everything is heated through. Be careful not to overcook at this stage, as it can make the chicken coating soggy.
- Garnish and Serve Immediately: Transfer the Sweet and Sour Pineapple Chicken to a serving platter. Garnish with toasted sesame seeds and sliced green onions, if desired. Serve immediately with steamed rice for the best texture and flavour.
Understanding the Nutrition: Balancing Indulgence and Health
Sweet and Sour Pineapple Chicken is undeniably delicious, but like many takeout favourites, it can lean towards the indulgent side, particularly regarding sugar and sodium content, and fat if deep-fried. Here’s an approximate nutritional overview, keeping in mind that variations in ingredients (especially sauce components and cooking method) will significantly impact the final numbers:
- Servings: This recipe typically yields 4 to 6 servings.
- Calories Per Serving (Approximate): Expect around 500-700 calories per serving (assuming 6 servings and traditional frying method), excluding rice.
Key Nutritional Considerations:
- Protein: Chicken provides a good source of lean protein, essential for muscle building and satiety.
- Vitamins & Minerals: Bell peppers are rich in Vitamin C, while pineapple offers Vitamin C and manganese. Onions contribute various beneficial compounds.
- Sugar: The sweet and sour sauce is the primary source of sugar. The amount can be adjusted, but reducing it too much will alter the signature flavour profile. Using fresh pineapple juice instead of sweetened varieties helps.
- Sodium: Soy sauce and ketchup contribute significantly to the sodium content. Using low-sodium soy sauce can help reduce this.
- Fat: The frying method adds considerable fat. Baking the chicken (see tips) or using an air fryer drastically reduces the fat content.
Making it Healthier:
- Bake or Air Fry: Opt for baking or air frying the chicken instead of deep-frying.
- Control Sugar: Reduce the sugar in the sauce slightly, compensating with the natural sweetness of the pineapple. Start by reducing by 1-2 tablespoons and taste.
- Low-Sodium: Use low-sodium soy sauce and check the sodium content of your ketchup.
- Whole Grains: Serve with brown rice or quinoa instead of white rice for added fiber and nutrients.
- Load Up Veggies: Increase the quantity and variety of vegetables (broccoli, carrots, snow peas) to boost fiber and nutrient density, potentially reducing the chicken portion slightly if desired.
Enjoy this dish as part of a balanced diet, being mindful of portion sizes and frequency.
Timing Your Triumph: Prep and Cook Times
Planning your meal helps ensure everything comes together smoothly. Here’s a realistic time estimate for making Sweet and Sour Pineapple Chicken:
- Preparation Time: Approximately 25-35 minutes. This includes:
- Cutting the chicken (5-10 mins)
- Coating the chicken (10 mins, including resting time)
- Chopping vegetables and pineapple (10 mins)
- Mixing the sauce ingredients (5 mins)
- Cook Time: Approximately 25-35 minutes. This includes:
- Heating the oil (5-7 mins)
- Frying the chicken in batches (15-20 mins total frying time)
- Cooking the sauce (3-5 mins)
- Stir-frying vegetables and combining (5-7 mins)
- Total Time: Roughly 50 minutes to 1 hour 10 minutes from start to finish.
Time-Saving Tips:
- Prep Ahead: Chop the vegetables and pineapple, and cut the chicken the day before. Store them in airtight containers in the refrigerator. You can also mix the sauce ingredients (excluding the cornstarch slurry) ahead of time.
- Multitask: Prepare the sauce while the chicken coating is resting or while the oil is heating.
- Batch Frying Efficiency: Have the next batch of chicken ready to go as soon as the previous one comes out of the oil.
- Clean As You Go: Wipe down surfaces and wash bowls while things are cooking or resting to minimize cleanup later.
While it involves several steps, none are overly complex, making it achievable even on a busier evening if you plan slightly ahead.
Sensational Serving Suggestions: Beyond the Bowl
Sweet and Sour Pineapple Chicken is fantastic on its own, but serving it thoughtfully elevates the entire meal. Here’s how to present it perfectly:
- The Classic Base:
- Steamed Rice: Fluffy white rice (like Jasmine or Basmati) is the quintessential pairing, perfect for soaking up that luscious sauce.
- Brown Rice: For a healthier, nuttier alternative with more fiber.
- Fried Rice: Serve alongside a simple vegetable or egg fried rice for a more substantial, takeout-style feast.
- Quinoa: A protein-packed, gluten-free grain option that complements the flavours well.
- Noodle Night:
- Plain Noodles: Serve over simple boiled egg noodles or chow mein noodles.
- Lo Mein: Toss with stir-fried lo mein noodles for an all-in-one dish.
- Garnishes for Flair:
- Toasted Sesame Seeds: Add a nutty crunch and visual appeal. Toast them lightly in a dry skillet for enhanced flavour.
- Sliced Green Onions (Scallions): Both the white and green parts, sliced thinly, add a fresh, sharp bite that cuts through the richness.
- Fresh Cilantro: If you enjoy cilantro, a few leaves add a bright, herbaceous note.
- Complementary Sides:
- Steamed Broccoli or Green Beans: Simple steamed greens provide a healthy, fresh contrast.
- Egg Rolls or Spring Rolls: Crispy rolls are a classic accompaniment to Chinese-American dishes.
- Wonton Soup: Start the meal with a light, savory wonton soup.
- Simple Cucumber Salad: A refreshing, lightly dressed cucumber salad can balance the sweetness.
- Presentation:
- Family Style: Serve directly from the skillet or transfer to a large platter placed in the center of the table.
- Individual Bowls: Portion rice or noodles into individual bowls and spoon the Sweet and Sour Pineapple Chicken generously over the top.
Pro Tips for Perfect Sweet and Sour Pineapple Chicken Every Time
Achieve consistently delicious results with these insider tips:
- Master the Crisp: Dry, Coat, Rest, Fry Hot! Achieving truly crispy chicken that stays crispy (for a while, at least) in the sauce requires attention to detail. Dry the chicken thoroughly before coating. Use a combination of cornstarch and flour in the coating – cornstarch provides superior crispiness. Rest the coated chicken for 10-15 minutes before frying; this helps the coating set. Most importantly, ensure your oil is hot (350-360°F / 175-180°C) and don’t overcrowd the pan. Frying in batches maintains the oil temperature, crucial for crispiness rather than sogginess. A double fry (optional) provides ultimate, longer-lasting crisp.
- Sauce Balance is Key: Taste and Adjust. Sweet and sour is a delicate balance. Different vinegars have different acidity levels, pineapples vary in sweetness, and personal preferences differ. Start with the recipe amounts, but taste the sauce before thickening. Too sweet? Add a tiny splash more vinegar or a pinch of salt. Too tangy? Add a teaspoon more sugar. Not flavourful enough? A dash more soy sauce might be needed. Getting the balance right before adding the cornstarch slurry is much easier.
- Fresh vs. Canned Pineapple: Fresh pineapple offers a brighter, less syrupy flavour and a slightly firmer texture that holds up better in the stir-fry. However, canned pineapple chunks packed in juice (not heavy syrup) are a perfectly acceptable and convenient substitute. The key advantage of canned is the readily available juice needed for the sauce. If using fresh, you may need to buy separate pineapple juice or blend some of the fresh pineapple core/scraps with water to extract juice. Don’t add the pineapple to the stir-fry until the very end – it just needs to be heated through, not cooked down.
- Don’t Drown the Chicken (Too Soon): Add the crispy chicken to the sauce just before serving. Gently toss to coat everything quickly and serve immediately. The longer the crispy chicken sits in the sauce, the softer the coating will become. If you need to hold the dish for a few minutes, keep the chicken and sauce separate until the absolute last moment.
- Vegetable Vibrancy: Crisp-Tender is the Goal. The vegetables (peppers, onions) should add colour, flavour, and, importantly, texture. Avoid cooking them until they are soft and limp. Stir-fry them over medium-high heat just until they are “crisp-tender” – cooked through but still retaining a pleasant bite. This provides a crucial textural contrast to the tender chicken and soft pineapple. Add quick-cooking veggies like snow peas nearer the end.
Frequently Asked Questions (FAQ) About Sweet and Sour Pineapple Chicken
Here are answers to some common queries about making this popular dish:
- Q: Can I bake the chicken instead of frying it for a healthier version?
- A: Yes, absolutely! While deep-frying yields the crispiest traditional result, baking is a great healthier alternative. To bake: Preheat your oven to 400°F (200°C). Coat the chicken as directed (egg wash then cornstarch/flour mixture). Place the coated chicken pieces in a single layer on a wire rack set over a baking sheet (this allows air circulation for better crisping). Lightly spray the chicken pieces with cooking oil spray. Bake for 15-20 minutes, flipping halfway through, until golden brown and cooked through (165°F/74°C internal temperature). The texture won’t be exactly the same as deep-fried, but it will still be delicious and significantly lower in fat. You can also use an air fryer following a similar principle (typically around 380°F/190°C for 12-15 minutes, shaking the basket periodically).
- Q: My sweet and sour sauce is too thin/too thick. How can I fix it?
- A: Sauce consistency is easily adjustable.
- Too Thin: If the sauce hasn’t thickened enough after simmering with the cornstarch slurry, it likely needs more simmering time or slightly more slurry. Ensure the sauce comes to a proper simmer after adding the slurry. If it’s still too thin, mix an additional 1/2 or 1 teaspoon of cornstarch with 1-2 teaspoons of cold water, whisk it into the simmering sauce, and cook for another minute until thickened.
- Too Thick: If the sauce becomes thicker than desired (it will thicken slightly more as it cools), simply whisk in a tablespoon or two of warm water, pineapple juice, or broth until it reaches your preferred consistency. Do this off the heat or over very low heat.
- A: Sauce consistency is easily adjustable.
- Q: Can I make Sweet and Sour Pineapple Chicken ahead of time?
- A: Components can be prepped ahead, but the final dish is best assembled and served immediately for optimal texture. You can:
- Prep: Cut chicken, chop veggies/pineapple, mix dry coating ingredients, and prepare the sauce (keep slurry separate) up to a day in advance. Store components separately in the fridge.
- Partial Cook: You could fry or bake the chicken ahead of time and refrigerate it. Reheat/re-crisp the chicken in a hot oven (around 400°F/200°C) or air fryer for a few minutes just before tossing with freshly made/reheated sauce and quickly stir-fried veggies.
- Full Dish (Reheating): While possible, the chicken coating will inevitably soften upon refrigeration and reheating in the sauce. Reheat gently on the stovetop or in the microwave, knowing the texture won’t be as crispy as when freshly made.
- A: Components can be prepped ahead, but the final dish is best assembled and served immediately for optimal texture. You can:
- Q: What are some good substitutions for ingredients?
- A: This recipe is quite flexible:
- Protein: Pork tenderloin (cut into pieces) works beautifully. Shrimp (adjust cooking time) or firm tofu (pressed and cubed/torn) are great alternatives.
- Vinegar: Apple cider vinegar is a good sub for rice vinegar. White vinegar works but is sharper, so you might use slightly less or add a touch more sugar.
- Sugar: Brown sugar can be used for a slightly deeper flavour. Honey or maple syrup could work but will change the flavour profile. Adjust amounts to taste.
- Vegetables: Use other stir-fry friendly veggies like broccoli florets, sliced carrots, snow peas, water chestnuts, or bamboo shoots. Adjust cooking times based on density.
- Gluten-Free: Use tamari instead of soy sauce, ensure your ketchup is GF, and use a gluten-free all-purpose flour blend (or just stick with cornstarch) for the coating.
- A: This recipe is quite flexible:
- Q: Why isn’t my chicken staying crispy after adding the sauce?
- A: This is the eternal challenge of sauced crispy things! Here’s the breakdown:
- Inevitability: Any breaded/battered item will eventually soften when coated in sauce. The goal is to maximize crispiness initially and serve immediately.
- Initial Crispiness: Ensure the chicken was very crispy to begin with (see Tip #1: dry chicken, good coating, hot oil, no overcrowding). Double frying helps create a more robust crust.
- Sauce Thickness: A slightly thicker sauce coats better without immediately soaking in as much as a thin sauce. Ensure your sauce is properly thickened.
- Timing: This is critical. Do NOT combine the chicken and sauce until the absolute last moment before serving. Toss quickly and get it on the plate.
- Temperature: Adding hot chicken to hot sauce helps maintain temperature and slightly slows the softening process compared to adding cool chicken to hot sauce.
- A: This is the eternal challenge of sauced crispy things! Here’s the breakdown:
By following the tips for maximum initial crispiness and minimizing the time the chicken spends in the sauce before eating, you’ll get the best possible result.
Print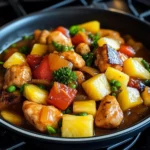
Sweet and Sour Pineapple Chicken recipe
Ingredients
For the Crispy Chicken:
- 1.5 lbs (about 680g) boneless, skinless chicken breasts or thighs, cut into 1-inch pieces
- 1 large egg, lightly beaten
- 1/2 cup (about 65g) cornstarch (cornflour)
- 1/4 cup (about 30g) all-purpose flour
- 1/2 teaspoon salt
- 1/4 teaspoon black pepper
- Vegetable oil or other high-smoke point oil for frying (about 1-2 inches deep in the pan, or less if shallow frying/pan-frying)
(See Tips section for baked chicken alternative)
For the Sweet and Sour Sauce:
- 3/4 cup (180ml) pineapple juice (reserved from canned pineapple, or use store-bought 100% pineapple juice)
- 1/2 cup (120ml) rice vinegar (or apple cider vinegar, white vinegar works but is harsher)
- 1/2 cup (about 100g) granulated sugar (adjust to taste)
- 1/3 cup (about 80ml) ketchup (provides colour and tangy base)
- 2 tablespoons soy sauce (use tamari for gluten-free)
- 1 tablespoon cornstarch (cornflour) mixed with 2 tablespoons cold water (slurry for thickening)
- Optional: 1 teaspoon sesame oil (adds nutty depth, stir in at the end)
- Optional: Pinch of red pepper flakes for a hint of heat
For the Stir-Fry:
- 1 tablespoon vegetable oil
- 1 medium onion, cut into 1-inch chunks
- 1 large bell pepper (any colour, red and green look great), cut into 1-inch chunks
- 1 cup (about 165g) fresh pineapple chunks (or canned pineapple chunks, drained – reserve the juice!)
- Optional Veggies: Sliced carrots, snow peas, broccoli florets (adjust cooking time accordingly)
For Garnish (Optional):
- Toasted sesame seeds
- Thinly sliced green onions (scallions)
Instructions
- Prepare the Chicken: Pat the cut chicken pieces thoroughly dry with paper towels. This is crucial for achieving a crispy coating. Place the dried chicken pieces in a medium bowl.
- Coat the Chicken: Add the lightly beaten egg, salt, and pepper to the chicken. Toss well to ensure every piece is coated. In a separate shallow dish or bowl, whisk together the 1/2 cup cornstarch and 1/4 cup all-purpose flour. Add the egg-coated chicken pieces to the cornstarch mixture, a few pieces at a time, tossing well to ensure they are fully and evenly coated. Shake off any excess flour/cornstarch. Place the coated chicken pieces on a wire rack or plate in a single layer – don’t let them pile up, or the coating can become gummy. Let them rest for about 10-15 minutes while you prepare the sauce and heat the oil; this helps the coating adhere better.
- Prepare the Sweet and Sour Sauce: In a medium saucepan, whisk together the pineapple juice, rice vinegar, sugar, ketchup, and soy sauce. Bring the mixture to a simmer over medium heat, stirring until the sugar is completely dissolved.
- Thicken the Sauce: While the sauce is simmering, prepare the cornstarch slurry by whisking together 1 tablespoon of cornstarch and 2 tablespoons of cold water in a small bowl until smooth. Slowly pour the slurry into the simmering sauce while whisking continuously. Continue to simmer and whisk for 1-2 minutes, or until the sauce thickens to a glossy consistency that coats the back of a spoon. If it gets too thick, you can thin it with a tablespoon of water or pineapple juice. If not thick enough, let it simmer a bit longer or add a tiny bit more slurry (mix 1/2 tsp cornstarch with 1 tsp water). Remove from heat. If using, stir in the sesame oil now. Set aside.
- Heat the Frying Oil: Pour about 1-2 inches of vegetable oil into a heavy-bottomed pot, Dutch oven, or wok. Heat the oil over medium-high heat until it reaches about 350-360°F (175-180°C). Use a thermometer for accuracy. If you don’t have one, a small piece of bread dropped in should turn golden brown in about 30-45 seconds, or a wooden chopstick inserted should have bubbles forming around it immediately. Alternatively, for pan-frying: Use about 1/2 inch of oil and work in batches, turning the chicken pieces.
- Fry the Chicken (in batches): Carefully add the coated chicken pieces to the hot oil, being careful not to overcrowd the pan (this lowers the oil temperature and makes the chicken greasy). Fry in batches for about 4-6 minutes per batch, turning occasionally, until golden brown, crispy, and cooked through. The internal temperature should reach 165°F (74°C). Use a slotted spoon or spider strainer to remove the cooked chicken from the oil and transfer it to a wire rack set over paper towels to drain excess oil. Repeat with the remaining chicken. (For extra crispy chicken, you can do a double fry: fry initially for 3-4 minutes until pale golden, remove, let rest, then fry again for 1-2 minutes just before serving until deep golden brown).
- Stir-Fry the Vegetables and Pineapple: Heat 1 tablespoon of vegetable oil in a large skillet or wok over medium-high heat. Add the onion and bell pepper chunks. Stir-fry for 2-3 minutes until they are crisp-tender (still have a slight bite). Add the pineapple chunks and stir-fry for another minute, just to heat them through. If using other optional vegetables like carrots or broccoli, add them with the onions and peppers, potentially needing slightly longer cooking time.
- Combine and Serve: Add the cooked, crispy chicken pieces to the skillet with the vegetables and pineapple. Pour the prepared sweet and sour sauce over everything. Gently toss to coat the chicken and vegetables evenly in the glossy sauce. Cook for just 1-2 minutes more, until everything is heated through. Be careful not to overcook at this stage, as it can make the chicken coating soggy.
- Garnish and Serve Immediately: Transfer the Sweet and Sour Pineapple Chicken to a serving platter. Garnish with toasted sesame seeds and sliced green onions, if desired. Serve immediately with steamed rice for the best texture and flavour.
Nutrition
- Serving Size: one normal portion
- Calories: 500-700