
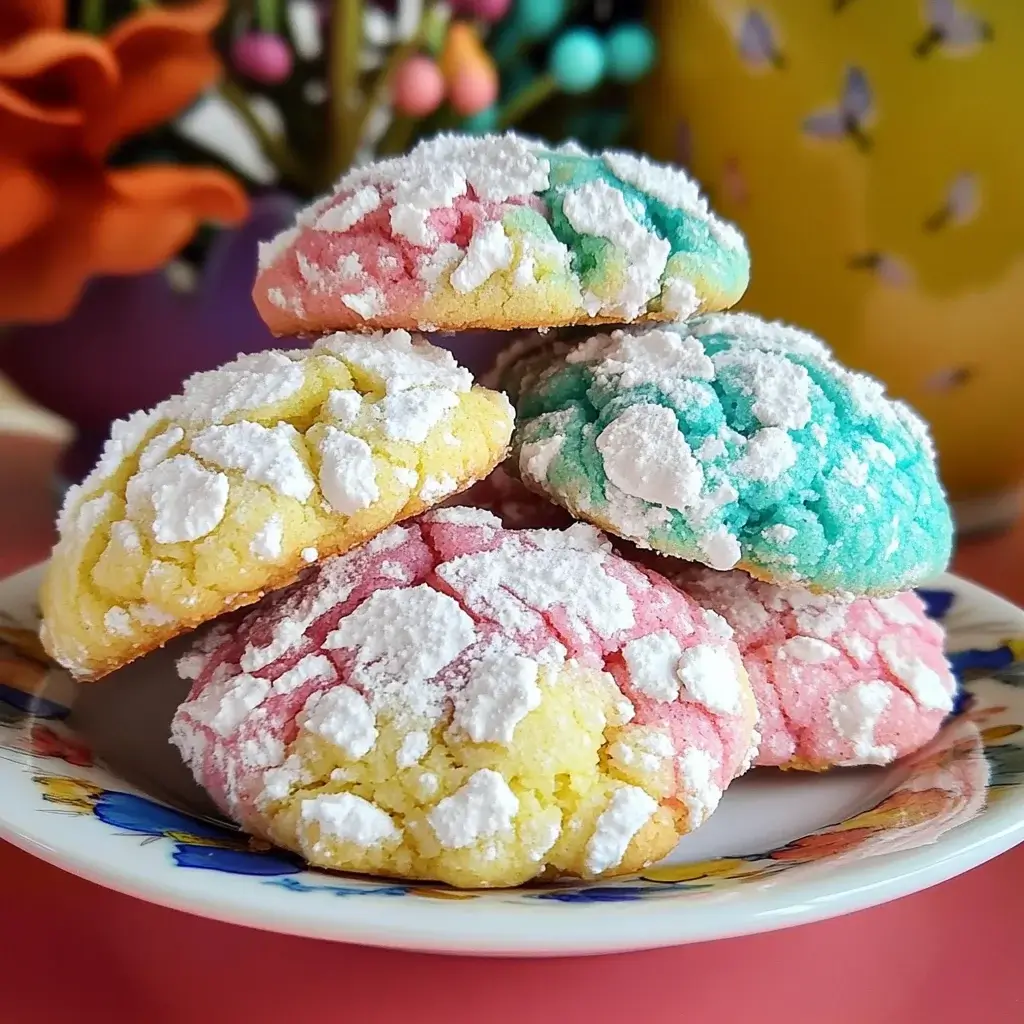

As winter’s chill fades and the first signs of spring emerge, my kitchen transforms into a haven of pastel hues and citrusy aromas. And nothing quite embodies the spirit of springtime baking in our home like Springtime Crinkle Cookies. These aren’t just any cookies; they are little balls of sunshine, bursting with bright flavors and boasting a whimsical, cracked appearance that’s as delightful to look at as it is to eat. From the moment I first baked a batch, the reaction from my family was pure joy. The kids, especially, were mesmerized by the magical crinkling effect as the cookies baked, transforming from smooth pastel spheres into beautifully textured treats. The zesty lemon flavor, combined with the soft, chewy texture and the sugary coating, was an instant hit. These cookies are not only incredibly delicious but also surprisingly easy to make, making them perfect for baking with children or for a quick and impressive spring dessert. They’ve become our go-to treat for Easter gatherings, spring picnics, and simply brightening up any day with a touch of sweetness. If you’re looking for a cookie recipe that captures the essence of springtime – light, bright, and utterly irresistible – then look no further. Springtime Crinkle Cookies are about to become your new favorite way to welcome the season of renewal and joy.
Ingredients for Sunshine in a Cookie: Springtime Crinkle Cookie Essentials
To create these delightful Springtime Crinkle Cookies, you’ll need a selection of pantry staples, along with a few key ingredients that give them their signature spring flavor and pastel charm. Here’s a detailed list of what you’ll need to bake a batch of these cheerful cookies:
- For the Cookie Dough:
- 1 cup (2 sticks) Unsalted Butter, softened: Butter is the foundation of these cookies, providing richness, flavor, and a tender crumb. Using unsalted butter allows you to control the salt level. Ensure it’s softened to room temperature for easy creaming.
- 1 ½ cups Granulated Sugar: Sugar not only sweetens the cookies but also contributes to their texture and spread. Granulated sugar works best for crinkle cookies, helping to create that signature cracked surface.
- 2 Large Eggs: Eggs bind the ingredients together, add moisture, and contribute to the cookie’s structure and chewiness. Use large eggs for consistent results.
- ¼ cup Vegetable Oil: Adding vegetable oil helps to create a softer, chewier cookie texture that stays moist for longer. It also aids in the crinkling process.
- 1 teaspoon Vanilla Extract: Vanilla extract enhances the overall flavor profile of the cookies, adding a warm and subtle sweetness that complements the other ingredients. Use pure vanilla extract for the best flavor.
- 1 tablespoon Lemon Zest (from about 2 lemons): Lemon zest is the star of the show, infusing the cookies with a bright, citrusy flavor that screams “springtime.” Freshly grated lemon zest is essential for the best flavor.
- ¼ cup Lemon Juice, freshly squeezed: Fresh lemon juice adds a tangy counterpoint to the sweetness and enhances the lemon flavor. Freshly squeezed juice is always preferred for its vibrant taste.
- 3 cups All-Purpose Flour: Flour provides the structure for the cookies. All-purpose flour is versatile and works well in this recipe. Measure accurately using the spoon-and-level method to avoid adding too much flour, which can result in dry cookies.
- 2 teaspoons Baking Powder: Baking powder is a leavening agent that helps the cookies rise and become light and airy. Ensure your baking powder is fresh for optimal leavening.
- ½ teaspoon Salt: Salt balances the sweetness and enhances the flavors of the other ingredients.
- For the Crinkle Coating:
- ½ cup Granulated Sugar: For rolling the cookie dough balls before baking, adding extra sweetness and contributing to the crinkled appearance.
- ½ cup Powdered Sugar (Confectioners’ Sugar): Powdered sugar is essential for creating the classic crinkle cookie coating. As the cookies bake, the powdered sugar coating cracks beautifully, revealing the cookie dough underneath.
- Optional Springtime Touches:
- Pastel Food Coloring Gel (pink, yellow, blue, green): For creating pastel-colored cookie dough, adding a visual springtime element. Gel food coloring is recommended as it provides vibrant color without thinning the dough.
- Sprinkles (pastel or spring-themed): For adding extra decoration and festive flair to the finished cookies.
Detailed Ingredient Breakdown and Considerations:
- Butter: Using softened butter is crucial for creaming it properly with sugar, which incorporates air into the dough and contributes to the light and airy texture of the cookies. If you forget to soften your butter, you can gently microwave it in short intervals, but be very careful not to melt it.
- Sugar (Granulated and Powdered): Granulated sugar is used both in the dough for sweetness and for rolling the cookie dough balls. Powdered sugar is specifically for the crinkle coating and is essential for achieving the signature cracked appearance. Do not substitute granulated sugar for powdered sugar in the coating.
- Eggs: Use large eggs at room temperature for better incorporation into the dough. If your eggs are cold, you can quickly warm them by placing them in a bowl of warm water for a few minutes.
- Vegetable Oil: While butter provides flavor, vegetable oil contributes to the soft and chewy texture of these cookies. You can use other neutral oils like canola oil or grapeseed oil if preferred.
- Vanilla Extract: Pure vanilla extract is recommended for the best flavor. You can also use other extracts like almond extract or citrus extracts to complement the lemon flavor or create variations.
- Lemon Zest and Juice: Fresh lemon zest and juice are key to the bright, citrusy flavor of Springtime Crinkle Cookies. Use a microplane or fine grater to zest the lemons, ensuring you only grate the yellow part of the peel and avoid the bitter white pith. Freshly squeezed lemon juice provides the most vibrant flavor; avoid bottled lemon juice if possible.
- Flour: Measure your flour accurately using the spoon-and-level method: spoon flour into your measuring cup and level it off with a straight edge. Avoid scooping flour directly from the bag, as this can pack it down and result in using too much flour.
- Baking Powder: Ensure your baking powder is fresh (check the expiration date). Old baking powder may not leaven properly, resulting in flat cookies.
- Salt: Salt is a flavor enhancer in baking. Don’t skip it! It balances the sweetness and brings out the other flavors in the cookies.
- Food Coloring Gel (Optional): Gel food coloring is preferred over liquid food coloring because it is more concentrated and won’t thin out the dough. Use pastel shades for a springtime look. Start with a small amount and add more gradually until you achieve your desired color.
- Sprinkles (Optional): Choose pastel or spring-themed sprinkles to enhance the festive look of the cookies. You can add sprinkles before baking or after the cookies have cooled.
Step-by-Step Instructions: Baking Your Springtime Crinkle Cookies
Baking Springtime Crinkle Cookies is a straightforward process, but following these steps carefully will ensure perfect results every time. Here’s a detailed guide to baking these delightful cookies:
Step 1: Prepare the Cookie Dough
- Cream Butter and Sugar: In a large bowl or the bowl of a stand mixer fitted with the paddle attachment, cream together the softened butter and granulated sugar until light and fluffy. This process should take about 2-3 minutes. Creaming incorporates air into the mixture, which is essential for light and tender cookies.
- Incorporate Wet Ingredients: Beat in the eggs one at a time, mixing well after each addition. Then, stir in the vegetable oil, vanilla extract, lemon zest, and lemon juice. Mix until all wet ingredients are fully incorporated and the mixture is smooth. The mixture may look slightly curdled at this stage, but it will come together when you add the dry ingredients.
- Combine Dry Ingredients: In a separate medium bowl, whisk together the all-purpose flour, baking powder, and salt. Whisking ensures that the baking powder and salt are evenly distributed throughout the flour.
- Gradually Add Dry Ingredients to Wet Ingredients: Gradually add the dry ingredients to the wet ingredients, mixing on low speed (or by hand) until just combined. Be careful not to overmix the dough. Overmixing can develop the gluten in the flour, resulting in tough cookies. Mix until the flour is just incorporated and no streaks of dry flour remain.
- Add Food Coloring (Optional): If using food coloring, divide the dough into separate bowls (if making multiple colors). Add a few drops of gel food coloring to each bowl and gently mix until the color is evenly distributed throughout the dough. Start with a small amount of food coloring and add more gradually until you achieve your desired pastel shade.
- Chill the Dough: Cover the bowl(s) of dough with plastic wrap and refrigerate for at least 2 hours, or preferably overnight. Chilling the dough is crucial for crinkle cookies. It firms up the dough, making it easier to handle and roll, and prevents the cookies from spreading too much during baking. Chilling also enhances the crinkling effect.
Step 2: Prepare for Baking
- Preheat Oven and Prepare Baking Sheets: Preheat your oven to 350°F (175°C). Line baking sheets with parchment paper or silicone baking mats. Parchment paper prevents sticking and makes cleanup easier.
- Prepare Sugar Coatings: Place the granulated sugar and powdered sugar in separate shallow bowls.
Step 3: Shape and Coat the Cookies
- Scoop Dough: Remove the chilled cookie dough from the refrigerator. Use a cookie scoop (about 1.5 tablespoons size) or a spoon to scoop out portions of dough. Roll each portion into a smooth ball using your hands. Work quickly as the dough will soften as it warms up. If the dough becomes too soft to handle, return it to the refrigerator for a short time to firm up again.
- Roll in Granulated Sugar: Roll each dough ball in granulated sugar, coating it evenly.
- Roll in Powdered Sugar: Next, generously roll each granulated sugar-coated dough ball in powdered sugar, ensuring it is completely covered with a thick layer. The thick layer of powdered sugar is essential for the crinkling effect.
- Arrange on Baking Sheets: Place the coated dough balls on the prepared baking sheets, leaving about 2 inches of space between each cookie to allow for spreading.
Step 4: Bake the Cookies
- Bake: Bake in the preheated oven for 10-12 minutes, or until the edges are just set and the centers are still slightly soft. Do not overbake the cookies, as they will become dry. The cookies will crinkle beautifully during baking.
- Cool on Baking Sheets: Remove the baking sheets from the oven and let the cookies cool on the baking sheets for a few minutes before transferring them to a wire rack to cool completely. Cooling on the baking sheets allows the cookies to set slightly and prevents them from breaking when transferred.
Step 5: Decorate (Optional)
- Add Sprinkles (Optional): If desired, while the cookies are still slightly warm (but not too hot), gently press pastel or spring-themed sprinkles onto the tops of the cookies. The warmth will help the sprinkles adhere.
Step 6: Store and Serve
- Cool Completely: Ensure the cookies are completely cooled before storing or serving.
- Store: Store cooled Springtime Crinkle Cookies in an airtight container at room temperature for up to 5 days.
- Serve: Serve and enjoy these delightful Springtime Crinkle Cookies! They are perfect on their own, with a glass of milk, or as part of a spring dessert platter.
Nutrition Facts (per Cookie – Estimated)
- Servings: Approximately 24-30 cookies (depending on cookie size)
- Serving Size: 1 cookie
- Approximate Calories per Serving (estimated, without optional sprinkles): 150-180 calories (This is an estimate and can vary significantly based on cookie size and specific ingredient brands.)
Important Note: Nutritional information is an estimate and will vary depending on the specific ingredients used, brands, and cookie size. For more precise nutritional information, calculate based on the specific ingredients you use. These cookies are a treat and should be enjoyed in moderation.
Preparation Time: Springtime Baking Timeline
- Prep Time: 30-40 minutes (includes creaming butter, mixing dough, chilling dough)
- Chill Time: 2 hours (minimum, or overnight)
- Bake Time: 20-30 minutes (baking in batches, 10-12 minutes per batch)
- Cooling Time: 30-45 minutes (cooling cookies completely)
- Total Time: 3-4 hours (including chill time) – can be broken down over time by chilling dough overnight.
How to Serve Springtime Crinkle Cookies: Presentation and Pairings
Springtime Crinkle Cookies are not only delicious but also visually appealing, making them perfect for various occasions. Here are some serving suggestions to showcase these delightful treats:
- Presentation Ideas:
- Cookie Platter: Arrange the cookies on a pretty platter or serving tray, mixing different pastel colors if you made variations. Add some fresh spring flowers or greenery around the platter for a festive touch.
- Tiered Stand: Display the cookies on a tiered cake stand for an elegant presentation, perfect for tea parties or spring brunches.
- Gift Boxes or Bags: Package the cookies in cellophane bags tied with pastel ribbons or in decorative cookie boxes to give as gifts for Easter, spring holidays, or just because.
- Individual Dessert Plates: Serve 2-3 cookies per person on individual dessert plates, perhaps with a scoop of ice cream or a dollop of whipped cream.
- Serving Occasions:
- Easter Celebrations: These cookies are perfect for Easter brunch, Easter dessert, or Easter egg hunts. Their pastel colors and bright lemon flavor are ideal for the holiday.
- Spring Brunches or Luncheons: Serve Springtime Crinkle Cookies as a sweet treat at spring brunches, luncheons, or afternoon tea parties.
- Spring Picnics: Pack these cookies for spring picnics or outdoor gatherings. They travel well and are a delightful portable dessert.
- Teacher Gifts or Thank You Gifts: A batch of these cookies makes a thoughtful and homemade gift for teachers, neighbors, or anyone you want to thank during the spring season.
- Everyday Treat: Enjoy these cookies as a simple and delicious everyday treat to brighten up any spring day.
- Pairing Suggestions:
- Milk: Cold milk (dairy or non-dairy) is a classic pairing for cookies.
- Coffee or Tea: Serve with hot coffee, tea (especially lemon or herbal tea), or iced tea.
- Lemonade or Iced Lemon Tea: Enhance the lemon flavor by pairing the cookies with refreshing lemonade or iced lemon tea.
- Sparkling Wine or Prosecco: For a more sophisticated pairing, serve with a glass of chilled sparkling wine or Prosecco.
- Fruit Salad: Complement the cookies with a fresh spring fruit salad for a lighter dessert option.
- Vanilla Ice Cream or Sorbet: Serve warm cookies with a scoop of vanilla ice cream or lemon sorbet for a delightful dessert combination.
Expert Baker Tips: Achieving Crinkle Cookie Perfection
- Chill the Dough Thoroughly: Chilling the dough for at least 2 hours, or preferably overnight, is crucial for crinkle cookies. It firms up the dough, making it easier to handle and roll, and it also helps to prevent excessive spreading and encourages better crinkling during baking. Don’t skip this step!
- Don’t Skimp on Powdered Sugar: Generously coat the dough balls in powdered sugar. A thick layer of powdered sugar is essential for creating the signature crinkled appearance. The contrast between the granulated sugar and the powdered sugar is what creates the beautiful cracks as the cookies bake.
- Bake at the Right Temperature and Time: Bake the cookies at 350°F (175°C) and avoid overbaking. Overbaked cookies will be dry and less chewy. Bake until the edges are just set and the centers are still slightly soft. They will continue to set as they cool.
- Work Quickly When Rolling and Coating: Work quickly when rolling the dough balls and coating them in sugar, especially if your kitchen is warm. The dough will soften as it warms up, making it stickier and harder to handle. If the dough becomes too soft, return it to the refrigerator for a short time to firm up.
- Experiment with Flavors and Colors: While lemon is a classic springtime flavor, feel free to experiment with other citrus flavors like orange or lime. You can also add other extracts like almond or peppermint. Get creative with pastel food coloring to create a variety of colorful and festive cookies.
Frequently Asked Questions: Crinkle Cookie Conundrums Solved
Q1: Why are my crinkle cookies not crinkling?
A: There are several reasons why your crinkle cookies might not be crinkling properly:
* Dough Not Chilled Enough: Chilling the dough is essential for crinkling. Make sure you chill the dough for at least 2 hours, or preferably overnight.
* Not Enough Powdered Sugar: A thick coating of powdered sugar is crucial for the crinkling effect. Ensure you are generously coating the dough balls in powdered sugar.
* Oven Temperature Too Low: Make sure your oven is preheated to the correct temperature (350°F/175°C). If the oven temperature is too low, the cookies may spread too much before the powdered sugar has a chance to crack.
* Overmixing the Dough: Overmixing can develop gluten, which can prevent the cookies from spreading and crinkling properly. Mix the dough until just combined.
Q2: Can I make these cookies ahead of time?
A: Yes, you can make the cookie dough ahead of time. The dough can be stored in the refrigerator for up to 3 days. You can also roll the dough into balls, coat them in sugar, and store them in an airtight container in the refrigerator for up to 2 days before baking. Bake them directly from the refrigerator, adding a minute or two to the baking time if needed. Baked cookies can be stored in an airtight container at room temperature for up to 5 days.
Q3: Can I freeze crinkle cookie dough?
A: Yes, you can freeze crinkle cookie dough. Scoop the dough into balls, roll them in granulated sugar and powdered sugar, and then freeze them on a baking sheet until solid. Once frozen, transfer them to a freezer-safe bag or container. Freeze for up to 2-3 months. Bake directly from frozen, adding 2-3 minutes to the baking time.
Q4: Can I make these cookies gluten-free?
A: Yes, you can make gluten-free Springtime Crinkle Cookies. Substitute the all-purpose flour with a gluten-free all-purpose flour blend. Ensure the blend contains xanthan gum or add ¼ teaspoon of xanthan gum per cup of gluten-free flour for better texture. Follow the recipe as directed, and they should crinkle beautifully and be just as delicious.
Q5: My cookie dough is too sticky to roll into balls. What should I do?
A: If your cookie dough is too sticky to roll, it likely needs to be chilled for longer. Return the dough to the refrigerator and chill for another 30-60 minutes, or until it firms up enough to handle. You can also lightly flour your hands when rolling the dough balls to prevent sticking. Avoid adding too much extra flour to the dough itself, as this can make the cookies dry.
Print
Springtime Crinkle Cookies recipe
Ingredients
- For the Cookie Dough:
- 1 cup (2 sticks) Unsalted Butter, softened: Butter is the foundation of these cookies, providing richness, flavor, and a tender crumb. Using unsalted butter allows you to control the salt level. Ensure it’s softened to room temperature for easy creaming.
- 1 ½ cups Granulated Sugar: Sugar not only sweetens the cookies but also contributes to their texture and spread. Granulated sugar works best for crinkle cookies, helping to create that signature cracked surface.
- 2 Large Eggs: Eggs bind the ingredients together, add moisture, and contribute to the cookie’s structure and chewiness. Use large eggs for consistent results.
- ¼ cup Vegetable Oil: Adding vegetable oil helps to create a softer, chewier cookie texture that stays moist for longer. It also aids in the crinkling process.
- 1 teaspoon Vanilla Extract: Vanilla extract enhances the overall flavor profile of the cookies, adding a warm and subtle sweetness that complements the other ingredients. Use pure vanilla extract for the best flavor.
- 1 tablespoon Lemon Zest (from about 2 lemons): Lemon zest is the star of the show, infusing the cookies with a bright, citrusy flavor that screams “springtime.” Freshly grated lemon zest is essential for the best flavor.
- ¼ cup Lemon Juice, freshly squeezed: Fresh lemon juice adds a tangy counterpoint to the sweetness and enhances the lemon flavor. Freshly squeezed juice is always preferred for its vibrant taste.
- 3 cups All-Purpose Flour: Flour provides the structure for the cookies. All-purpose flour is versatile and works well in this recipe. Measure accurately using the spoon-and-level method to avoid adding too much flour, which can result in dry cookies.
- 2 teaspoons Baking Powder: Baking powder is a leavening agent that helps the cookies rise and become light and airy. Ensure your baking powder is fresh for optimal leavening.
- ½ teaspoon Salt: Salt balances the sweetness and enhances the flavors of the other ingredients.
- For the Crinkle Coating:
- ½ cup Granulated Sugar: For rolling the cookie dough balls before baking, adding extra sweetness and contributing to the crinkled appearance.
- ½ cup Powdered Sugar (Confectioners’ Sugar): Powdered sugar is essential for creating the classic crinkle cookie coating. As the cookies bake, the powdered sugar coating cracks beautifully, revealing the cookie dough underneath.
- Optional Springtime Touches:
- Pastel Food Coloring Gel (pink, yellow, blue, green): For creating pastel-colored cookie dough, adding a visual springtime element. Gel food coloring is recommended as it provides vibrant color without thinning the dough.
- Sprinkles (pastel or spring-themed): For adding extra decoration and festive flair to the finished cookies.
Instructions
Step 1: Prepare the Cookie Dough
- Cream Butter and Sugar: In a large bowl or the bowl of a stand mixer fitted with the paddle attachment, cream together the softened butter and granulated sugar until light and fluffy. This process should take about 2-3 minutes. Creaming incorporates air into the mixture, which is essential for light and tender cookies.
- Incorporate Wet Ingredients: Beat in the eggs one at a time, mixing well after each addition. Then, stir in the vegetable oil, vanilla extract, lemon zest, and lemon juice. Mix until all wet ingredients are fully incorporated and the mixture is smooth. The mixture may look slightly curdled at this stage, but it will come together when you add the dry ingredients.
- Combine Dry Ingredients: In a separate medium bowl, whisk together the all-purpose flour, baking powder, and salt. Whisking ensures that the baking powder and salt are evenly distributed throughout the flour.
- Gradually Add Dry Ingredients to Wet Ingredients: Gradually add the dry ingredients to the wet ingredients, mixing on low speed (or by hand) until just combined. Be careful not to overmix the dough. Overmixing can develop the gluten in the flour, resulting in tough cookies. Mix until the flour is just incorporated and no streaks of dry flour remain.
- Add Food Coloring (Optional): If using food coloring, divide the dough into separate bowls (if making multiple colors). Add a few drops of gel food coloring to each bowl and gently mix until the color is evenly distributed throughout the dough. Start with a small amount of food coloring and add more gradually until you achieve your desired pastel shade.
- Chill the Dough: Cover the bowl(s) of dough with plastic wrap and refrigerate for at least 2 hours, or preferably overnight. Chilling the dough is crucial for crinkle cookies. It firms up the dough, making it easier to handle and roll, and prevents the cookies from spreading too much during baking. Chilling also enhances the crinkling effect.
Step 2: Prepare for Baking
- Preheat Oven and Prepare Baking Sheets: Preheat your oven to 350°F (175°C). Line baking sheets with parchment paper or silicone baking mats. Parchment paper prevents sticking and makes cleanup easier.
- Prepare Sugar Coatings: Place the granulated sugar and powdered sugar in separate shallow bowls.
Step 3: Shape and Coat the Cookies
- Scoop Dough: Remove the chilled cookie dough from the refrigerator. Use a cookie scoop (about 1.5 tablespoons size) or a spoon to scoop out portions of dough. Roll each portion into a smooth ball using your hands. Work quickly as the dough will soften as it warms up. If the dough becomes too soft to handle, return it to the refrigerator for a short time to firm up again.
- Roll in Granulated Sugar: Roll each dough ball in granulated sugar, coating it evenly.
- Roll in Powdered Sugar: Next, generously roll each granulated sugar-coated dough ball in powdered sugar, ensuring it is completely covered with a thick layer. The thick layer of powdered sugar is essential for the crinkling effect.
- Arrange on Baking Sheets: Place the coated dough balls on the prepared baking sheets, leaving about 2 inches of space between each cookie to allow for spreading.
Step 4: Bake the Cookies
- Bake: Bake in the preheated oven for 10-12 minutes, or until the edges are just set and the centers are still slightly soft. Do not overbake the cookies, as they will become dry. The cookies will crinkle beautifully during baking.
- Cool on Baking Sheets: Remove the baking sheets from the oven and let the cookies cool on the baking sheets for a few minutes before transferring them to a wire rack to cool completely. Cooling on the baking sheets allows the cookies to set slightly and prevents them from breaking when transferred.
Step 5: Decorate (Optional)
- Add Sprinkles (Optional): If desired, while the cookies are still slightly warm (but not too hot), gently press pastel or spring-themed sprinkles onto the tops of the cookies. The warmth will help the sprinkles adhere.
Step 6: Store and Serve
- Cool Completely: Ensure the cookies are completely cooled before storing or serving.
- Store: Store cooled Springtime Crinkle Cookies in an airtight container at room temperature for up to 5 days.
- Serve: Serve and enjoy these delightful Springtime Crinkle Cookies! They are perfect on their own, with a glass of milk, or as part of a spring dessert platter.
Nutrition
- Serving Size: one normal portion
- Calories: 150-180


