
Growing up in the South, banana pudding isn’t just a dessert; it’s a sacred ritual. It’s the centerpiece of Sunday dinners, the star of church potlucks, and the ultimate offering of comfort. My grandmother’s recipe was legendary, a creamy, dreamy concoction she’d whip up in her big, sunshine-yellow Pyrex dish. For years, I made it her way, never deviating. But as my circle of friends grew, I found myself hosting gatherings with vegetarian loved ones. I was shocked to learn that many store-bought whipped toppings and instant pudding mixes—common shortcuts—contained gelatin. Even more, I wanted to create a version that was pure, from-scratch, and undeniably vegetarian without sacrificing a single drop of its authentic, soul-soothing magic. After several attempts, perfecting the custard’s richness and ensuring the meringue was billowy and stable, I finally landed on this recipe. When I served it at my last family get-together, no one knew it was my “vegetarian version.” My cousin, a banana pudding connoisseur, took one bite, closed his eyes, and just said, “That’s it. That’s the stuff.” That’s when I knew I had honored the tradition while making it welcoming for everyone at the table.
The Ultimate Southern Vegetarian Banana Pudding: Creamy, Classic, and Gelatin-Free
This isn’t just a recipe; it’s a guide to creating a true Southern masterpiece, completely from scratch and entirely vegetarian. We’re skipping the boxes of instant mix and tubs of commercial topping to build layers of flavor and texture that are simply unparalleled. At the heart of this dessert is a rich, slow-cooked vanilla custard, layered with perfectly ripe bananas and iconic Nilla Wafers, all crowned with a voluminous, cloud-like toasted meringue. This recipe honors the time-tested methods that make Southern banana pudding a beloved classic, ensuring every spoonful is a nostalgic journey of creamy custard, sweet banana, and soft, cake-like wafers. It’s a labor of love that is worth every single second.
The Sacred Text: Your Ingredient List
Crafting the perfect banana pudding from scratch is all about using quality ingredients. Each component is chosen specifically to build the authentic flavor and texture that defines this dessert. This recipe is naturally vegetarian as it uses no gelatin or animal-derived thickeners.
For the Rich and Creamy Custard:
- Whole Milk: 3 cups. The high-fat content of whole milk is essential for creating a luxuriously rich and creamy custard. Using lower-fat milk will result in a thinner, less decadent pudding.
- Granulated Sugar: ¾ cup. Provides the perfect amount of sweetness to balance the richness of the eggs and milk without being cloying.
- All-Purpose Flour: ⅓ cup. Our primary thickening agent for the custard. It creates a stable, silky-smooth texture when cooked properly. Some recipes use cornstarch, but flour gives a more traditional, slightly denser body.
- Salt: ¼ teaspoon. A crucial ingredient in any sweet dish. Salt doesn’t make it salty; it enhances the sweetness and deepens the other flavors.
- Large Eggs: 4, yolks and whites separated. The egg yolks are the key to the custard’s incredible richness, color, and flavor. The egg whites are reserved for our magnificent meringue topping. Ensure your eggs are at room temperature for better incorporation.
- Unsalted Butter: 2 tablespoons, cut into small pieces. Whisked in at the end, the butter adds another layer of silky richness and a smooth mouthfeel.
- Pure Vanilla Extract: 2 teaspoons. Use high-quality pure vanilla extract, not imitation vanilla. The vanilla is a star flavor in the custard, and a good extract makes a world of difference.
For the Layers and Topping:
- Ripe Bananas: 4-5 medium. The ideal bananas for banana pudding are yellow with a few brown freckles. They should be firm enough to slice neatly but ripe enough to have developed their sweet, fragrant flavor. Avoid green bananas (too starchy) or overly brown, mushy bananas (they will turn to liquid).
- Nilla Wafers: 1 box (11 oz). This is the non-negotiable, iconic cookie for classic Southern banana pudding. As they sit in the pudding, they soften into a wonderfully tender, cake-like layer.
- Cream of Tartar: ½ teaspoon. This is a stabilizer for the egg whites. It helps the meringue whip up to a greater volume and prevents it from “weeping” or collapsing.
- Granulated Sugar: 6 tablespoons. This sugar is specifically for the meringue, giving it sweetness, structure, and a beautiful glossy sheen.
The Ritual: Step-by-Step Instructions
Making banana pudding from scratch is a process. Follow each phase carefully for a flawless result. We’ll start with the custard, then whip the meringue, and finally assemble our masterpiece.
Phase 1: Creating the Silky Vanilla Custard
- Separate the Eggs: Carefully separate your eggs, placing the 4 yolks in a medium-sized bowl and the 4 whites in a completely clean, grease-free large bowl (preferably glass or metal). Set the bowl of whites aside for later; this will be for your meringue.
- Combine Dry Ingredients: In a medium-sized, heavy-bottomed saucepan, whisk together the ¾ cup of sugar, ⅓ cup of flour, and ¼ teaspoon of salt. Combining the dry ingredients first prevents the flour from clumping when you add the milk.
- Temper the Eggs: Lightly whisk the egg yolks in their bowl. Gradually pour in about 1 cup of the whole milk, whisking constantly. This mixture is your “temper.” Now, slowly pour the milk and egg yolk mixture into the saucepan with the dry ingredients, whisking continuously until everything is smooth.
- Cook the Custard: Add the remaining 2 cups of milk to the saucepan. Place the pan over medium heat. Cook, whisking constantly and making sure to scrape the bottom and corners of the pan, for about 8-12 minutes. The mixture will slowly thicken. You must whisk continuously to prevent the eggs from scrambling and the bottom from scorching.
- Achieve Thickness: The custard is done when it is thick enough to coat the back of a spoon. It should have the consistency of a thick gravy or yogurt. Once it reaches this stage, remove it from the heat immediately.
- Finish with Butter and Vanilla: Off the heat, add the 2 tablespoons of butter pieces and the 2 teaspoons of vanilla extract. Whisk until the butter is completely melted and the custard is smooth and glossy.
- Cover and Cool Slightly: To prevent a skin from forming, press a piece of plastic wrap directly onto the surface of the custard. Let it cool on the counter for about 15-20 minutes while you prepare the other components.
Phase 2: Whipping the Cloud-Like Meringue
- Start Beating the Whites: Using an electric hand mixer or a stand mixer with the whisk attachment, beat the reserved egg whites on medium speed until they become foamy and opaque.
- Add Stabilizer: Add the ½ teaspoon of cream of tartar and continue to beat until the whites form soft peaks (when you lift the beaters, a peak will form and then gently droop over).
- Add Sugar Gradually: With the mixer still running, begin adding the 6 tablespoons of sugar, one tablespoon at a time. Beat for about 20-30 seconds between each addition. This slow process allows the sugar to fully dissolve, which is key to a stable, non-gritty meringue.
- Beat to Stiff, Glossy Peaks: Once all the sugar is incorporated, turn the mixer up to high speed. Beat for another 2-4 minutes, or until the meringue is thick, voluminous, and holds a stiff, glossy peak. This means when you lift the beaters, the peak that forms stands straight up without collapsing.
Phase 3: Assembling and Baking the Pudding
- Preheat Oven: Preheat your oven to 325°F (165°C).
- Choose Your Vessel: Select a 2-quart baking dish, a trifle bowl, or an 8×8 inch glass dish.
- First Layer: Spread a thin layer of the warm custard on the bottom of your dish. This creates a base for the wafers.
- Layer the Wafers and Bananas: Arrange a single layer of Nilla Wafers over the custard. Top the wafers with a single layer of sliced bananas.
- Layer the Custard: Pour about one-third of the remaining custard evenly over the bananas.
- Repeat Layers: Continue layering: Nilla Wafers, then bananas, then custard. The number of layers will depend on the shape of your dish. End with a final, generous layer of custard on top.
- Crown with Meringue: Spoon the prepared meringue over the top of the warm pudding. Use the back of a spoon or a spatula to spread it carefully, making sure it touches the edges of the dish all the way around. This “seals” the meringue and prevents it from shrinking too much during baking. Create decorative swirls and peaks in the meringue for a beautiful, classic look.
- Bake: Place the dish in the preheated oven and bake for 15-20 minutes, or until the meringue is a beautiful golden brown on the tips of the peaks. Keep a close eye on it, as meringue can go from golden to burnt very quickly.
- The Crucial Chill: Remove the pudding from the oven. It must now cool completely on a wire rack for about 1 hour, and then be transferred to the refrigerator to chill for at least 4 hours, or preferably overnight. This step is non-negotiable! It allows the custard to fully set and the wafers to soften into that perfect, cake-like consistency.
Nutrition Facts
This is a rich, decadent dessert. The nutritional information is an estimate based on the recipe yielding 10 servings.
- Servings: 10
- Calories Per Serving: Approximately 380-420 calories.
Preparation Time
This dessert is a journey, not a sprint. The chilling time is passive but absolutely essential to the final result.
- Active Preparation Time: 30 minutes (making custard, whipping meringue, assembly)
- Bake Time: 15-20 minutes
- Cooling & Chilling Time: 5+ hours
- Total Time: Approximately 6 hours
How to Serve: Presenting Your Southern Gem
Serving this pudding is the final, rewarding step of the ritual.
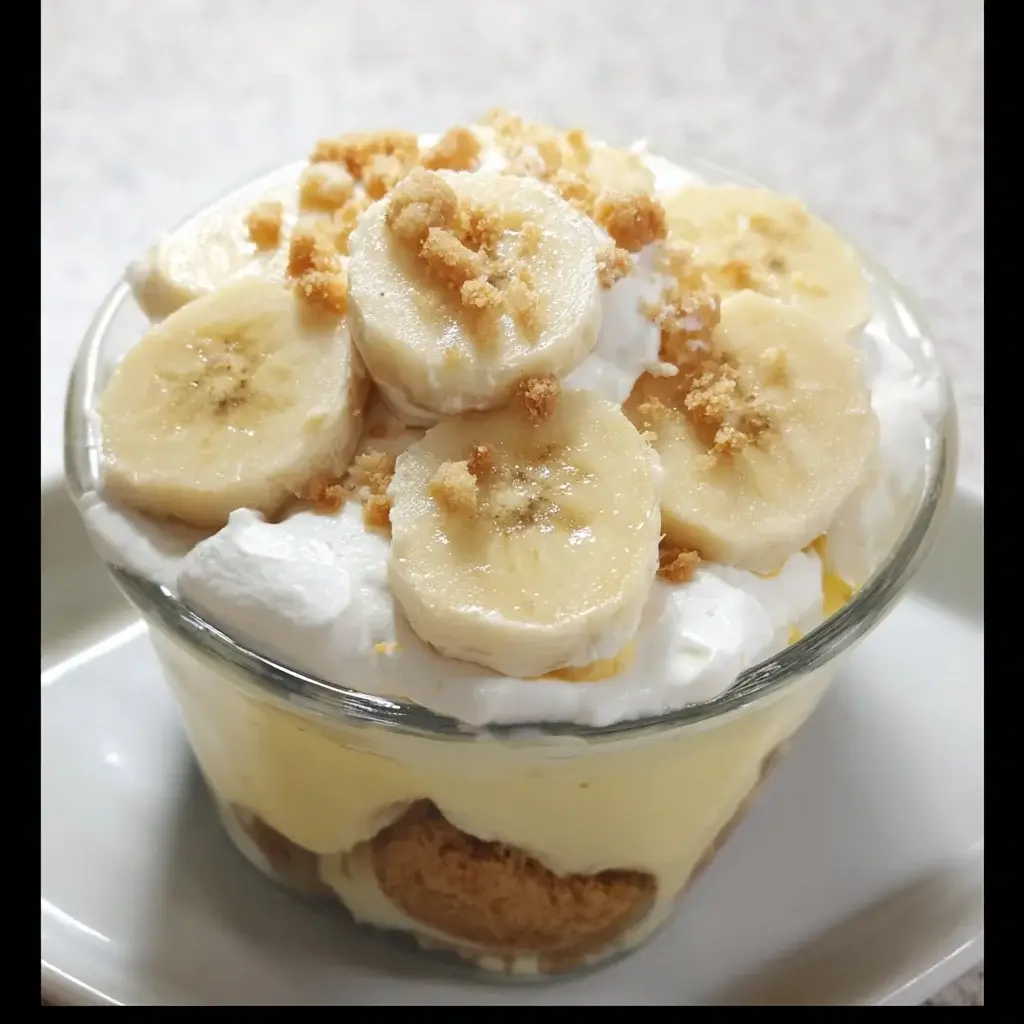
- The Right Vessel: For a stunning presentation, assemble the pudding in a glass trifle bowl. This allows guests to see all the beautiful, distinct layers of wafer, banana, and custard.
- Individual Portions: For a more formal or portion-controlled option, layer the pudding in individual glass ramekins or mason jars. You’ll need to reduce the baking time for the meringue slightly.
- Serve Chilled: Always serve the banana pudding cold, straight from the refrigerator. This is when the texture and flavors are at their absolute peak.
- The Perfect Scoop: Use a large serving spoon and scoop all the way down to the bottom of the dish to ensure each serving gets a perfect ratio of meringue, custard, bananas, and softened wafers.
- Garnishes (Optional but lovely):
- Crumble a few extra Nilla Wafers and sprinkle the crumbs over the top of each serving just before it goes to the table.
- Place a single, fresh Nilla Wafer standing up in each portion.
- A sprig of fresh mint can add a nice pop of color.
Additional Tips for Pudding Perfection
These five tips will help you navigate the nuances of from-scratch pudding and ensure a flawless result every time.
1. The Banana Balancing Act:
The ripeness of your bananas is critical. Use bananas that are bright yellow with a few brown “sugar spots.” These are at their peak of sweetness and flavor. If they are even slightly green, they will be starchy and won’t taste right. If they are overly black and mushy, they will have an overpowering flavor and will turn watery in the pudding.
2. The No-Bake Whipped Cream Alternative:
If meringue isn’t your thing or you want a no-bake option, you can top the pudding with homemade whipped cream instead. To do this, assemble the pudding as directed but do not top with meringue or bake. Let the assembled pudding chill completely in the fridge for at least 4 hours. Before serving, whip 1 ½ cups of heavy whipping cream with 3 tablespoons of powdered sugar and 1 teaspoon of vanilla extract until stiff peaks form. Spread the whipped cream over the chilled pudding. This version is lighter and has a different, but equally delicious, character.
3. Preventing Watery Custard:
The key to a thick, stable custard is cooking it long enough. Don’t rush the process. Keep whisking over medium heat until it’s noticeably thick. Another crucial step is tempering the eggs correctly. Pouring the hot milk into the eggs too quickly will scramble them, ruining the texture. Go slow and whisk constantly.
4. Secrets to a Stable Meringue:
A “weeping” meringue (one that leaches liquid) is a common problem. To prevent this: ensure your mixing bowl is completely free of any grease or fat (even a speck of egg yolk can ruin it). Use the cream of tartar as a stabilizer. Add the sugar very slowly so it fully dissolves. Finally, spreading the meringue on a warm pudding base and sealing it to the edges of the dish helps it cook properly and adhere to the pudding, reducing shrinkage and weeping.
5. Make-Ahead Strategy:
You can make the custard portion of this recipe a day in advance. Cook it as directed, press plastic wrap against the surface, and store it in the refrigerator. When you’re ready to assemble, give the cold custard a vigorous whisk to smooth it out. You should always make the meringue, assemble the pudding, and bake it on the day you plan to serve it for the best results.
Frequently Asked Questions (FAQ)
1. What exactly makes this banana pudding “vegetarian”?
Many common shortcuts for banana pudding, like instant pudding mixes or frozen whipped toppings (e.g., Cool Whip), contain gelatin as a stabilizer. Gelatin is derived from animal collagen, making those versions non-vegetarian. This recipe is built entirely from scratch using eggs, milk, flour, sugar, and butter, with no hidden animal products, making it 100% vegetarian.
2. My bananas always turn brown. How can I prevent this?
Bananas oxidize and turn brown when exposed to air. There are two main ways to combat this. First, you can gently toss the banana slices in a very small amount of lemon juice (about a teaspoon for all the slices). The acid slows the browning process. Second, assemble the pudding quickly. Have your custard and wafers ready to go so that once you slice the bananas, they are immediately covered by the custard, which protects them from the air.
3. Can I use a different kind of cookie?
While Nilla Wafers are the soul of a classic Southern banana pudding, you can certainly experiment. Shortbread cookies or butter cookies would be a delicious, rich alternative. Chessmen cookies are a very popular choice for a slightly more upscale version. Just be aware that different cookies will soften at different rates and will change the final flavor profile.
4. How should I store leftovers?
Store leftover banana pudding covered tightly with plastic wrap in the refrigerator for up to 3 days. Be aware of what to expect: the Nilla Wafers will continue to soften and may become very mushy (which many people love!), and the meringue may begin to weep and shrink after the first day. The bananas may also darken further. While it’s still delicious, it is undeniably at its absolute best on the day it is made.
5. Can this recipe be made vegan?
Creating a truly vegan version that mimics this recipe is challenging but possible. You would need to make several substitutions. For the custard, use a full-fat plant-based milk like oat or cashew milk, substitute a cornstarch slurry for the egg yolks as a thickener, and use vegan butter. For the meringue, you would need to make an aquafaba (chickpea brine) meringue. For the layers, ensure you use vegan-friendly cookies. The result will be different from the original but can still be a delicious layered dessert.
Southern Vegetarian Banana Pudding recipe
Ingredients
For the Rich and Creamy Custard:
-
Whole Milk: 3 cups. The high-fat content of whole milk is essential for creating a luxuriously rich and creamy custard. Using lower-fat milk will result in a thinner, less decadent pudding.
-
Granulated Sugar: ¾ cup. Provides the perfect amount of sweetness to balance the richness of the eggs and milk without being cloying.
-
All-Purpose Flour: ⅓ cup. Our primary thickening agent for the custard. It creates a stable, silky-smooth texture when cooked properly. Some recipes use cornstarch, but flour gives a more traditional, slightly denser body.
-
Salt: ¼ teaspoon. A crucial ingredient in any sweet dish. Salt doesn’t make it salty; it enhances the sweetness and deepens the other flavors.
-
Large Eggs: 4, yolks and whites separated. The egg yolks are the key to the custard’s incredible richness, color, and flavor. The egg whites are reserved for our magnificent meringue topping. Ensure your eggs are at room temperature for better incorporation.
-
Unsalted Butter: 2 tablespoons, cut into small pieces. Whisked in at the end, the butter adds another layer of silky richness and a smooth mouthfeel.
-
Pure Vanilla Extract: 2 teaspoons. Use high-quality pure vanilla extract, not imitation vanilla. The vanilla is a star flavor in the custard, and a good extract makes a world of difference.
For the Layers and Topping:
-
Ripe Bananas: 4-5 medium. The ideal bananas for banana pudding are yellow with a few brown freckles. They should be firm enough to slice neatly but ripe enough to have developed their sweet, fragrant flavor. Avoid green bananas (too starchy) or overly brown, mushy bananas (they will turn to liquid).
-
Nilla Wafers: 1 box (11 oz). This is the non-negotiable, iconic cookie for classic Southern banana pudding. As they sit in the pudding, they soften into a wonderfully tender, cake-like layer.
-
Cream of Tartar: ½ teaspoon. This is a stabilizer for the egg whites. It helps the meringue whip up to a greater volume and prevents it from “weeping” or collapsing.
-
Granulated Sugar: 6 tablespoons. This sugar is specifically for the meringue, giving it sweetness, structure, and a beautiful glossy sheen.
Instructions
Phase 1: Creating the Silky Vanilla Custard
-
Separate the Eggs: Carefully separate your eggs, placing the 4 yolks in a medium-sized bowl and the 4 whites in a completely clean, grease-free large bowl (preferably glass or metal). Set the bowl of whites aside for later; this will be for your meringue.
-
Combine Dry Ingredients: In a medium-sized, heavy-bottomed saucepan, whisk together the ¾ cup of sugar, ⅓ cup of flour, and ¼ teaspoon of salt. Combining the dry ingredients first prevents the flour from clumping when you add the milk.
-
Temper the Eggs: Lightly whisk the egg yolks in their bowl. Gradually pour in about 1 cup of the whole milk, whisking constantly. This mixture is your “temper.” Now, slowly pour the milk and egg yolk mixture into the saucepan with the dry ingredients, whisking continuously until everything is smooth.
-
Cook the Custard: Add the remaining 2 cups of milk to the saucepan. Place the pan over medium heat. Cook, whisking constantly and making sure to scrape the bottom and corners of the pan, for about 8-12 minutes. The mixture will slowly thicken. You must whisk continuously to prevent the eggs from scrambling and the bottom from scorching.
-
Achieve Thickness: The custard is done when it is thick enough to coat the back of a spoon. It should have the consistency of a thick gravy or yogurt. Once it reaches this stage, remove it from the heat immediately.
-
Finish with Butter and Vanilla: Off the heat, add the 2 tablespoons of butter pieces and the 2 teaspoons of vanilla extract. Whisk until the butter is completely melted and the custard is smooth and glossy.
-
Cover and Cool Slightly: To prevent a skin from forming, press a piece of plastic wrap directly onto the surface of the custard. Let it cool on the counter for about 15-20 minutes while you prepare the other components.
Phase 2: Whipping the Cloud-Like Meringue
-
Start Beating the Whites: Using an electric hand mixer or a stand mixer with the whisk attachment, beat the reserved egg whites on medium speed until they become foamy and opaque.
-
Add Stabilizer: Add the ½ teaspoon of cream of tartar and continue to beat until the whites form soft peaks (when you lift the beaters, a peak will form and then gently droop over).
-
Add Sugar Gradually: With the mixer still running, begin adding the 6 tablespoons of sugar, one tablespoon at a time. Beat for about 20-30 seconds between each addition. This slow process allows the sugar to fully dissolve, which is key to a stable, non-gritty meringue.
-
Beat to Stiff, Glossy Peaks: Once all the sugar is incorporated, turn the mixer up to high speed. Beat for another 2-4 minutes, or until the meringue is thick, voluminous, and holds a stiff, glossy peak. This means when you lift the beaters, the peak that forms stands straight up without collapsing.
Phase 3: Assembling and Baking the Pudding
-
Preheat Oven: Preheat your oven to 325°F (165°C).
-
Choose Your Vessel: Select a 2-quart baking dish, a trifle bowl, or an 8×8 inch glass dish.
-
First Layer: Spread a thin layer of the warm custard on the bottom of your dish. This creates a base for the wafers.
-
Layer the Wafers and Bananas: Arrange a single layer of Nilla Wafers over the custard. Top the wafers with a single layer of sliced bananas.
-
Layer the Custard: Pour about one-third of the remaining custard evenly over the bananas.
-
Repeat Layers: Continue layering: Nilla Wafers, then bananas, then custard. The number of layers will depend on the shape of your dish. End with a final, generous layer of custard on top.
-
Crown with Meringue: Spoon the prepared meringue over the top of the warm pudding. Use the back of a spoon or a spatula to spread it carefully, making sure it touches the edges of the dish all the way around. This “seals” the meringue and prevents it from shrinking too much during baking. Create decorative swirls and peaks in the meringue for a beautiful, classic look.
-
Bake: Place the dish in the preheated oven and bake for 15-20 minutes, or until the meringue is a beautiful golden brown on the tips of the peaks. Keep a close eye on it, as meringue can go from golden to burnt very quickly.
-
The Crucial Chill: Remove the pudding from the oven. It must now cool completely on a wire rack for about 1 hour, and then be transferred to the refrigerator to chill for at least 4 hours, or preferably overnight. This step is non-negotiable! It allows the custard to fully set and the wafers to soften into that perfect, cake-like consistency.
Nutrition
- Serving Size: one normal portion
- Calories: 380-420