



There are meals that are just food, and then there are experiences. Making truly great Smoky BBQ Ribs falls squarely into the latter category. I remember the first time I dedicated a whole afternoon to the process, meticulously prepping the ribs, blending the perfect rub, and patiently tending the smoker. The aroma that filled the backyard was intoxicating, a promise of the deliciousness to come. When those ribs finally emerged, glistening with a beautiful mahogany bark, tender enough to gently pull from the bone but not fall apart into mush, the entire family gathered around with an almost reverent silence. That first bite – smoky, savory, slightly sweet, with a gentle tang from the sauce – was pure bliss. The kids, usually quick to finish and run, lingered, savoring every mouthful, their faces and fingers happily sticky. It wasn’t just dinner; it was an event, a memory made. Since then, these Smoky BBQ Ribs have become a celebrated staple for our summer gatherings, a testament to the magic that happens when good ingredients, patience, and a little bit of smoke come together.
The Allure of Perfectly Smoked BBQ Ribs: A Journey to Flavor Heaven
There’s something undeniably primal and deeply satisfying about biting into a perfectly cooked BBQ rib. The smoky aroma, the tender meat that yields with just the right amount of pull, the complex layers of flavor from the rub and the sauce – it’s an experience that tantalizes all the senses. Achieving this pinnacle of barbecue perfection at home might seem daunting, but with the right techniques and a little patience, crafting fall-off-the-bone tender, flavor-packed smoky BBQ ribs is well within your reach. This comprehensive guide will walk you through every step, from selecting the right cut of ribs and creating a mouthwatering spice rub, to mastering the low-and-slow smoking process that transforms humble pork into a culinary masterpiece. Whether you’re a seasoned pitmaster or a curious beginner, get ready to embark on a delicious journey that will make you the hero of your next cookout. This isn’t just a recipe; it’s an invitation to create unforgettable flavors and lasting memories.
Ingredients for Unforgettable Smoky BBQ Ribs
The foundation of exceptional ribs lies in quality ingredients. Here’s what you’ll need to create ribs that will have everyone talking:
- Pork Ribs: 2 racks (approximately 4-6 pounds total).
- Choice of Ribs:
- Baby Back Ribs: Leaner, more tender, and cook slightly faster. They come from the upper part of the rib cage, near the loin.
- St. Louis Style Ribs (Spare Ribs trimmed): Meatier, more flavorful due to higher fat content, and take a bit longer to cook. These are spare ribs with the brisket bone (rib tips) and sternum removed, making them flatter and more uniform.
- Spare Ribs (untrimmed): The largest and meatiest cut, requiring a bit more trimming (removing the skirt flap and brisket bone if desired).
- Choice of Ribs:
- For the Binder (Optional, but Recommended):
- 2-4 tablespoons yellow mustard or a light coating of olive oil. This helps the rub adhere to the meat. The mustard flavor cooks off.
- For the Smoky BBQ Rub (makes about 1 cup, enough for 2-3 racks):
- 1/2 cup packed dark brown sugar (light brown sugar works too)
- 1/4 cup smoked paprika (provides color and smoky depth)
- 2 tablespoons coarse kosher salt (or 1.5 tablespoons table salt)
- 2 tablespoons freshly ground black pepper
- 1 tablespoon chili powder (mild or spicy, your preference)
- 1 tablespoon garlic powder
- 1 tablespoon onion powder
- 1 teaspoon cayenne pepper (adjust to your heat preference, or omit)
- 1/2 teaspoon ground cumin (optional, for earthy notes)
- For Spritzing (Optional, helps keep ribs moist and attract smoke):
- 1 cup apple cider vinegar
- 1 cup apple juice or water
- (Mix in a food-safe spray bottle)
- For Wrapping (The “Texas Crutch” – Optional, for extra tenderness and moisture):
- 1/4 cup apple juice, apple cider vinegar, or beer per rack
- 2-4 tablespoons unsalted butter, cut into pats (optional)
- A drizzle of honey or agave nectar (optional)
- Heavy-duty aluminum foil
- BBQ Sauce:
- 1 to 1.5 cups of your favorite BBQ sauce (store-bought or homemade). Choose a sauce that complements the smoky flavor – sweet, tangy, or spicy based on your preference.
A Note on Ingredients:
- Rub: Feel free to adjust the rub ingredients to your personal taste. Want it spicier? Add more cayenne. Prefer it sweeter? Slightly increase the brown sugar. The key is a balance of sweet, savory, and a touch of heat.
- Wood for Smoking: The choice of wood significantly impacts the flavor. Popular choices for pork ribs include:
- Hickory: Strong, classic smoky flavor, slightly bacon-like.
- Oak: Medium smoky flavor, good all-around choice.
- Apple: Mild, sweet, fruity smoke, excellent with pork.
- Cherry: Mild, sweet, fruity, gives a beautiful reddish hue to the meat.
- Pecan: Similar to hickory but milder and sweeter.
- Mesquite: Very strong, intense smoky flavor; use sparingly or blend with milder woods.
You can use wood chunks, chips (soaked if using on a charcoal grill, unsoaked for most smokers), or pellets depending on your smoker type.
Step-by-Step Instructions: Mastering the Art of Smoky BBQ Ribs
Patience is key to perfectly smoked ribs. Follow these steps, and you’ll be rewarded with incredible flavor and texture. The popular “3-2-1 method” (3 hours unwrapped, 2 hours wrapped, 1 hour unwrapped with sauce) is often cited for spare ribs, while baby backs might do better with a “2-2-1” or “2-1-1” approach due to their smaller size. Adjust times based on your ribs and smoker.
- Prepare the Ribs (Day Before or Several Hours Ahead):
- Remove the Membrane (Silverskin): This is crucial. The membrane is a tough, papery layer on the bone-side of the ribs. If left on, it becomes tough and prevents smoke and rub from penetrating.
- Lay the ribs bone-side up. Use a dinner knife or a spoon handle to gently lift a corner of the membrane from one end of the rack.
- Once you have a piece lifted, grab it firmly with a paper towel (for better grip) and pull it off the ribs. It should come off in one or two large pieces. If it tears, just grab a new edge and continue.
- Trim Excess Fat: Trim off any large, hard pieces of fat from the ribs, but leave some fat for flavor and moisture. For spare ribs, you might also trim the “skirt” (a flap of meat on the bone side) and any loose bits that might burn.
- Pat Dry: Thoroughly pat the ribs dry with paper towels. This helps the binder and rub adhere.
- Remove the Membrane (Silverskin): This is crucial. The membrane is a tough, papery layer on the bone-side of the ribs. If left on, it becomes tough and prevents smoke and rub from penetrating.
- Apply Binder and Rub:
- Lightly coat all surfaces of the ribs with your chosen binder (yellow mustard or olive oil). You only need a thin layer.
- Generously apply the Smoky BBQ Rub to all sides of the ribs, pressing it gently into the meat. Don’t be shy – you want a good coating.
- Once rubbed, you can wrap the ribs tightly in plastic wrap or place them in a large zip-top bag and refrigerate for at least 2 hours, or preferably overnight. This allows the salt in the rub to work its magic (dry brining). If short on time, you can proceed to smoking after about 30-60 minutes at room temperature.
- Prepare Your Smoker (or Oven – see FAQ for oven method):
- Preheat your smoker to 225-250°F (107-121°C). This low and slow temperature is key to tender ribs.
- Add your chosen wood chunks, chips, or pellets according to your smoker’s manufacturer instructions to generate clean, thin blue smoke (not thick white smoke, which can be acrid).
- Place a water pan in your smoker if it has one, or add a disposable aluminum pan filled with water. This helps maintain a humid environment and stabilize temperature.
- Phase 1: The Initial Smoke (Building Bark and Flavor)
- Place the rubbed ribs meat-side up directly on the smoker grates.
- Smoke for 2-3 hours (2 hours for baby backs, 3 for St. Louis/spare ribs).
- During this phase, if you choose to spritz, start after the first hour. Lightly spritz the ribs every 45-60 minutes with your apple cider vinegar/juice mixture. This helps keep the surface moist, attract smoke, and build a nice bark (the flavorful crust).
- The ribs should develop a deep reddish-brown, mahogany color.
- Phase 2: Wrapping (The “Texas Crutch” – For Tenderness and Moisture)
- Lay out two large sheets of heavy-duty aluminum foil per rack (shiny side in, if you believe the myth, though it likely makes little difference).
- Place a rack of ribs meat-side down onto the foil.
- Add your wrapping liquids/enhancements: drizzle with apple juice/vinegar, add pats of butter, and a drizzle of honey if using.
- Wrap the ribs tightly in the foil, ensuring a good seal to trap steam. Be careful not to puncture the foil with the rib bones. You can double-wrap if needed.
- Return the wrapped ribs to the smoker (or oven, if transitioning).
- Continue to cook for another 1.5-2 hours (1.5 for baby backs, 2 for St. Louis/spare ribs). The goal here is to braise the ribs in their own juices and the added liquid, making them very tender.
- Phase 3: Saucing and Finishing (Setting the Glaze)
- Carefully unwrap the ribs. Be cautious of hot steam. The bones should be noticeably exposed, and the meat should be very tender. You can test for tenderness by picking up the rack with tongs; it should bend easily, and the meat should start to crack on the surface.
- Discard the foil and any accumulated liquid (or save it to mix into your BBQ sauce for extra flavor).
- Place the unwrapped ribs back on the smoker grates, meat-side up.
- Brush a light to moderate layer of your favorite BBQ sauce onto the ribs.
- Continue to cook for another 30 minutes to 1 hour, or until the sauce has caramelized and set, becoming tacky but not burnt. You can apply a second thin coat of sauce in the last 15-20 minutes if desired. Be careful, as sugary sauces can burn easily.
- Check for Doneness:
- Bend Test: Pick up the rack with tongs from one end. If it bends easily and the meat cracks significantly on the surface, they’re likely done.
- Bone Twist/Pull: Gently try to twist or pull out one of the middle bones. If it wiggles easily and starts to come free from the meat with little resistance, they’re ready.
- Internal Temperature: While not always the primary indicator for ribs (tenderness is key), an internal temperature between 195-205°F (90-96°C) in the thickest part of the meat between the bones is a good target for tender ribs.
- You’re looking for “pull-from-the-bone” tender, not necessarily “fall-off-the-bone” mushy (unless that’s your preference!).
- Rest the Ribs (Crucial Step!):
- Once done, carefully remove the ribs from the smoker.
- Tent them loosely with aluminum foil or wrap them in butcher paper and let them rest on a cutting board for at least 15-30 minutes before slicing. This allows the juices to redistribute throughout the meat, resulting in more tender and flavorful ribs. Do not skip this step!
- Slice and Serve:
- Place the rested rack meat-side down on a cutting board (this makes it easier to see and cut between the bones).
- Using a sharp knife, slice between each bone.
- Serve immediately with extra BBQ sauce on the side, if desired, and your favorite BBQ accompaniments.
Nutrition Facts: What to Expect Per Serving
Nutritional information for BBQ ribs can vary significantly based on the cut of ribs, the amount of rub and sauce used, and the final serving size. The following is a general estimate.
- Servings: A full rack of St. Louis style ribs typically serves 2-3 people as a main course, while a rack of baby backs might serve 1-2 hungry adults. This recipe (2 racks) should serve 4-6 people.
- Calories per serving (approximate, based on a 3-4 bone serving of St. Louis style ribs): 450-650 calories.
Approximate Breakdown (per serving):
- Protein: 25-35g
- Fat: 30-45g (A significant portion is saturated fat, depending on the cut and trimming)
- Carbohydrates: 15-30g (Mostly from sugar in the rub and BBQ sauce)
- Sodium: Can be high due to salt in the rub and sauce.
For a more precise calculation, you’d need to use an online nutrition calculator and input your exact ingredients, quantities, and serving sizes. Ribs are an indulgent meal, best enjoyed in moderation as part of a balanced diet.
Time Commitment: Patience Rewarded
Great smoked ribs are a labor of love and require patience. Here’s a breakdown:
- Preparation Time:
- Trimming and membrane removal: 15-20 minutes per rack.
- Applying rub: 5-10 minutes per rack.
- Resting with rub (optional dry brine): 2 hours to overnight (passive time).
- Cook Time (Smoking):
- Phase 1 (Initial Smoke): 2-3 hours.
- Phase 2 (Wrapped): 1.5-2 hours.
- Phase 3 (Saucing & Finishing): 30 minutes – 1 hour.
- Total Smoke/Cook Time: Approximately 4-6 hours, depending on rib type and smoker temperature.
- Rest Time (Post-Cook): 15-30 minutes.
- Total Active Time: Approximately 45-60 minutes.
- Total Overall Time (including optional overnight brining and full cook/rest): Can range from 7 hours to over 24 hours. If not brining overnight, expect about 5-7 hours from smoker preheat to serving.
This isn’t a quick weeknight meal, but rather a perfect weekend project that yields incredibly rewarding results.
How to Serve Your Masterpiece: Beyond the Plate
Your perfectly smoked BBQ ribs deserve a presentation and accompaniments that do them justice.
- On a Platter:
- Arrange the sliced ribs artfully on a large wooden cutting board or a rustic platter.
- Garnish with fresh parsley or green onions for a pop of color.
- Classic BBQ Sides (Essential!):
- Coleslaw: Creamy or vinegar-based, coleslaw provides a cool, crunchy contrast.
- Potato Salad: A hearty and satisfying classic.
- Cornbread: Slightly sweet cornbread or corn muffins are perfect for soaking up extra sauce.
- Baked Beans: Smoky, sweet, and savory baked beans are a natural fit.
- Macaroni and Cheese: Creamy, cheesy mac and cheese is a crowd-pleaser.
- Corn on the Cob: Grilled or boiled, sweet corn is always a hit.
- Pickles: Dill pickle spears or bread-and-butter pickles offer a tangy counterpoint.
- Extra BBQ Sauce: Always serve extra BBQ sauce on the side for those who like their ribs extra saucy.
- Wet Naps or Paper Towels: Essential! BBQ ribs are a gloriously messy affair.
- Beverages:
- Craft Beer: A good Pale Ale, IPA, or a darker Lager pairs well.
- Iced Tea: Sweet or unsweetened, a refreshing choice.
- Lemonade: Tart and sweet, cuts through the richness.
- Bourbon or Whiskey: For those who enjoy a spirit pairing.
Serve family-style and let everyone dig in!
Additional Tips for Rib-Smoking Glory
Elevate your rib game with these five expert tips:
- Don’t Rush the Process – Low and Slow is King: The magic of tender, flavorful ribs happens over time at low temperatures (225-250°F / 107-121°C). This allows the connective tissues (collagen) to break down slowly into gelatin, making the meat incredibly moist and tender without drying out. Rushing by increasing the heat will result in tough, dry ribs.
- Membrane Removal is Non-Negotiable for Best Texture: That thin, silvery membrane on the bone-side of the ribs doesn’t render down during cooking. If left on, it becomes tough, rubbery, and acts as a barrier, preventing your delicious rub and smoke from fully penetrating the meat from that side. Taking a few extra minutes to remove it makes a huge difference.
- Choose Your Wood Wisely for Optimal Smoke Flavor: The type of wood you use imparts a distinct character to your ribs. Fruitwoods like apple or cherry offer a milder, sweeter smoke, while hickory and oak provide a stronger, more traditional BBQ flavor. Avoid softwoods like pine, fir, or cedar, as they produce acrid smoke that will ruin your meat. Always aim for thin, blue, almost invisible smoke, not thick white billowing smoke.
- The Rest is Just as Important as the Cook: Just like a good steak, ribs need to rest after coming off the smoker. This allows the muscle fibers to relax and the juices to redistribute throughout the meat. Slicing into them too early will cause those precious juices to run out, leaving you with drier ribs. A 15-30 minute rest, loosely tented with foil, makes a world of difference.
- Sauce Late in the Game to Prevent Burning: Most BBQ sauces contain a significant amount of sugar. If you apply the sauce too early in the cooking process, the sugar can burn and become bitter before the ribs are fully cooked and tender. Wait until the last 30-60 minutes of cooking to apply your sauce, allowing it to heat through and caramelize into a beautiful, tacky glaze without charring.
Frequently Asked Questions (FAQ) about Smoky BBQ Ribs
Here are answers to common questions that arise when smoking ribs:
- Q: What’s the difference between Baby Back Ribs and St. Louis Style/Spare Ribs, and which should I choose?
- A: Baby Back Ribs come from the upper loin section, are shorter, more curved, leaner, and generally more tender. They cook faster. Spare Ribs are from the belly section, are larger, flatter, and have more fat, which means more flavor but they take longer to cook. St. Louis Style Ribs are spare ribs that have had the sternum bone, cartilage, and rib tips removed, making them more rectangular and uniform, similar to baby backs but meatier.
- Choice: If you prefer leaner, quicker-cooking ribs, go for baby backs. If you want richer flavor and more meat, and have more time, St. Louis style or spare ribs are excellent. Both can be fantastic when cooked properly.
- Q: Can I make these ribs in the oven if I don’t have a smoker?
- A: Yes, you can make very good ribs in the oven, though they won’t have the authentic smoke flavor. To mimic it, use smoked paprika generously in your rub and consider adding a tiny amount (1/4 – 1/2 teaspoon) of liquid smoke to your BBQ sauce or wrapping liquid.
- Oven Method: Follow the same prep and rub instructions. Preheat your oven to 275-300°F (135-150°C). Place ribs on a foil-lined baking sheet. You can cook them unwrapped for 1.5-2 hours, then wrap them in foil with a little liquid (like apple juice) and cook for another 1.5-2 hours, or until tender. Finally, unwrap, apply BBQ sauce, and broil (watching carefully!) or bake at a higher temp (350°F/175°C) for 15-20 minutes to set the sauce.
- A: Yes, you can make very good ribs in the oven, though they won’t have the authentic smoke flavor. To mimic it, use smoked paprika generously in your rub and consider adding a tiny amount (1/4 – 1/2 teaspoon) of liquid smoke to your BBQ sauce or wrapping liquid.
- Q: How do I know for sure when my ribs are perfectly done?
- A: There are a few reliable indicators beyond just time:
- The Bend Test: Pick up the rack from one end with tongs. It should bend significantly, and the surface of the meat should crack easily.
- The Bone Twist/Pull: Gently grab an exposed bone end from the middle of the rack. It should wiggle easily, and you should be able to twist it and feel it starting to detach from the meat.
- Visual Cues: The meat will have pulled back from the ends of the bones, exposing about 1/4 to 1/2 inch of bone.
- Internal Temperature: While tenderness is paramount, an internal temperature between 195-205°F (90-96°C) is a good guideline.
- A: There are a few reliable indicators beyond just time:
- Q: What does “stall” mean in smoking, and will it happen to my ribs?
- A: The “stall” is a phenomenon where the internal temperature of the meat stops rising (or even drops slightly) for a period during low-and-slow cooking, typically around 150-165°F (65-74°C). It’s caused by evaporative cooling – as moisture evaporates from the surface of the meat, it cools the meat down. Ribs, being thinner than large cuts like brisket or pork butt, may experience a less pronounced stall or power through it relatively quickly. Wrapping the ribs in foil (the Texas Crutch) is a common way to push through the stall, as it traps moisture and helps the temperature continue to rise.
- Q: Can I prepare the rub or even rub the ribs ahead of time?
- A: Absolutely! The BBQ rub can be made weeks or even months in advance and stored in an airtight container in a cool, dark place. Rubbing the ribs and letting them sit in the refrigerator overnight (or for at least 2-4 hours) is highly recommended. This acts as a dry brine, allowing the salt in the rub to penetrate the meat, enhancing flavor and moisture. Just make sure they are tightly wrapped in plastic wrap or in a sealed bag.
Crafting exceptional Smoky BBQ Ribs is a journey of patience and passion, but the rewards are immeasurable. The smoky aroma, the tender bite, and the chorus of satisfied “mmmms” from your guests will make every minute worthwhile. So, fire up that smoker, embrace the low-and-slow philosophy, and get ready to produce ribs that are nothing short of legendary. Happy smoking!
Print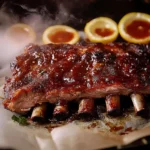
Smoky BBQ Ribs recipe
Ingredients
-
- Beef Ribs: 2 racks (approximately 4-6 pounds total).
-
- Choice of Ribs:
-
- Baby Back Ribs: Leaner, more tender, and cook slightly faster. They come from the upper part of the rib cage, near the loin.
-
- St. Louis Style Ribs (Spare Ribs trimmed): Meatier, more flavorful due to higher fat content, and take a bit longer to cook. These are spare ribs with the brisket bone (rib tips) and sternum removed, making them flatter and more uniform.
-
- Spare Ribs (untrimmed): The largest and meatiest cut, requiring a bit more trimming (removing the skirt flap and brisket bone if desired).
-
- Choice of Ribs:
-
- Beef Ribs: 2 racks (approximately 4-6 pounds total).
-
- For the Binder (Optional, but Recommended):
-
- 2–4 tablespoons yellow mustard or a light coating of olive oil. This helps the rub adhere to the meat. The mustard flavor cooks off.
-
- For the Binder (Optional, but Recommended):
-
- For the Smoky BBQ Rub (makes about 1 cup, enough for 2-3 racks):
-
- 1/2 cup packed dark brown sugar (light brown sugar works too)
-
- 1/4 cup smoked paprika (provides color and smoky depth)
-
- 2 tablespoons coarse kosher salt (or 1.5 tablespoons table salt)
-
- 2 tablespoons freshly ground black pepper
-
- 1 tablespoon chili powder (mild or spicy, your preference)
-
- 1 tablespoon garlic powder
-
- 1 tablespoon onion powder
-
- 1 teaspoon cayenne pepper (adjust to your heat preference, or omit)
-
- 1/2 teaspoon ground cumin (optional, for earthy notes)
-
- For the Smoky BBQ Rub (makes about 1 cup, enough for 2-3 racks):
-
- For Spritzing (Optional, helps keep ribs moist and attract smoke):
-
- 1 cup apple cider vinegar
-
- 1 cup apple juice or water
-
- (Mix in a food-safe spray bottle)
-
- For Spritzing (Optional, helps keep ribs moist and attract smoke):
-
- For Wrapping (The “Texas Crutch” – Optional, for extra tenderness and moisture):
-
- 1/4 cup apple juice, apple cider vinegar, or beer per rack
-
- 2–4 tablespoons unsalted butter, cut into pats (optional)
-
- A drizzle of honey or agave nectar (optional)
-
- Heavy-duty aluminum foil
-
- For Wrapping (The “Texas Crutch” – Optional, for extra tenderness and moisture):
-
- BBQ Sauce:
-
- 1 to 1.5 cups of your favorite BBQ sauce (store-bought or homemade). Choose a sauce that complements the smoky flavor – sweet, tangy, or spicy based on your preference.
-
- BBQ Sauce:
Instructions
-
- Prepare the Ribs (Day Before or Several Hours Ahead):
-
- Remove the Membrane (Silverskin): This is crucial. The membrane is a tough, papery layer on the bone-side of the ribs. If left on, it becomes tough and prevents smoke and rub from penetrating.
-
- Lay the ribs bone-side up. Use a dinner knife or a spoon handle to gently lift a corner of the membrane from one end of the rack.
-
- Once you have a piece lifted, grab it firmly with a paper towel (for better grip) and pull it off the ribs. It should come off in one or two large pieces. If it tears, just grab a new edge and continue.
-
- Remove the Membrane (Silverskin): This is crucial. The membrane is a tough, papery layer on the bone-side of the ribs. If left on, it becomes tough and prevents smoke and rub from penetrating.
-
- Trim Excess Fat: Trim off any large, hard pieces of fat from the ribs, but leave some fat for flavor and moisture. For spare ribs, you might also trim the “skirt” (a flap of meat on the bone side) and any loose bits that might burn.
-
- Pat Dry: Thoroughly pat the ribs dry with paper towels. This helps the binder and rub adhere.
-
- Prepare the Ribs (Day Before or Several Hours Ahead):
-
- Apply Binder and Rub:
-
- Lightly coat all surfaces of the ribs with your chosen binder (yellow mustard or olive oil). You only need a thin layer.
-
- Generously apply the Smoky BBQ Rub to all sides of the ribs, pressing it gently into the meat. Don’t be shy – you want a good coating.
-
- Once rubbed, you can wrap the ribs tightly in plastic wrap or place them in a large zip-top bag and refrigerate for at least 2 hours, or preferably overnight. This allows the salt in the rub to work its magic (dry brining). If short on time, you can proceed to smoking after about 30-60 minutes at room temperature.
-
- Apply Binder and Rub:
-
- Prepare Your Smoker (or Oven – see FAQ for oven method):
-
- Preheat your smoker to 225-250°F (107-121°C). This low and slow temperature is key to tender ribs.
-
- Add your chosen wood chunks, chips, or pellets according to your smoker’s manufacturer instructions to generate clean, thin blue smoke (not thick white smoke, which can be acrid).
-
- Place a water pan in your smoker if it has one, or add a disposable aluminum pan filled with water. This helps maintain a humid environment and stabilize temperature.
-
- Prepare Your Smoker (or Oven – see FAQ for oven method):
-
- Phase 1: The Initial Smoke (Building Bark and Flavor)
-
- Place the rubbed ribs meat-side up directly on the smoker grates.
-
- Smoke for 2-3 hours (2 hours for baby backs, 3 for St. Louis/spare ribs).
-
- During this phase, if you choose to spritz, start after the first hour. Lightly spritz the ribs every 45-60 minutes with your apple cider vinegar/juice mixture. This helps keep the surface moist, attract smoke, and build a nice bark (the flavorful crust).
-
- The ribs should develop a deep reddish-brown, mahogany color.
-
- Phase 1: The Initial Smoke (Building Bark and Flavor)
-
- Phase 2: Wrapping (The “Texas Crutch” – For Tenderness and Moisture)
-
- Lay out two large sheets of heavy-duty aluminum foil per rack (shiny side in, if you believe the myth, though it likely makes little difference).
-
- Place a rack of ribs meat-side down onto the foil.
-
- Add your wrapping liquids/enhancements: drizzle with apple juice/vinegar, add pats of butter, and a drizzle of honey if using.
-
- Wrap the ribs tightly in the foil, ensuring a good seal to trap steam. Be careful not to puncture the foil with the rib bones. You can double-wrap if needed.
-
- Return the wrapped ribs to the smoker (or oven, if transitioning).
-
- Continue to cook for another 1.5-2 hours (1.5 for baby backs, 2 for St. Louis/spare ribs). The goal here is to braise the ribs in their own juices and the added liquid, making them very tender.
-
- Phase 2: Wrapping (The “Texas Crutch” – For Tenderness and Moisture)
-
- Phase 3: Saucing and Finishing (Setting the Glaze)
-
- Carefully unwrap the ribs. Be cautious of hot steam. The bones should be noticeably exposed, and the meat should be very tender. You can test for tenderness by picking up the rack with tongs; it should bend easily, and the meat should start to crack on the surface.
-
- Discard the foil and any accumulated liquid (or save it to mix into your BBQ sauce for extra flavor).
-
- Place the unwrapped ribs back on the smoker grates, meat-side up.
-
- Brush a light to moderate layer of your favorite BBQ sauce onto the ribs.
-
- Continue to cook for another 30 minutes to 1 hour, or until the sauce has caramelized and set, becoming tacky but not burnt. You can apply a second thin coat of sauce in the last 15-20 minutes if desired. Be careful, as sugary sauces can burn easily.
-
- Phase 3: Saucing and Finishing (Setting the Glaze)
-
- Check for Doneness:
-
- Bend Test: Pick up the rack with tongs from one end. If it bends easily and the meat cracks significantly on the surface, they’re likely done.
-
- Bone Twist/Pull: Gently try to twist or pull out one of the middle bones. If it wiggles easily and starts to come free from the meat with little resistance, they’re ready.
-
- Internal Temperature: While not always the primary indicator for ribs (tenderness is key), an internal temperature between 195-205°F (90-96°C) in the thickest part of the meat between the bones is a good target for tender ribs.
-
- You’re looking for “pull-from-the-bone” tender, not necessarily “fall-off-the-bone” mushy (unless that’s your preference!).
-
- Check for Doneness:
-
- Rest the Ribs (Crucial Step!):
-
- Once done, carefully remove the ribs from the smoker.
-
- Tent them loosely with aluminum foil or wrap them in butcher paper and let them rest on a cutting board for at least 15-30 minutes before slicing. This allows the juices to redistribute throughout the meat, resulting in more tender and flavorful ribs. Do not skip this step!
-
- Rest the Ribs (Crucial Step!):
-
- Slice and Serve:
-
- Place the rested rack meat-side down on a cutting board (this makes it easier to see and cut between the bones).
-
- Using a sharp knife, slice between each bone.
-
- Serve immediately with extra BBQ sauce on the side, if desired, and your favorite BBQ accompaniments.
-
- Slice and Serve:
Nutrition
- Serving Size: one normal portion
- Calories: 450-650
- Fat: 30-45g
- Carbohydrates: 15-30g
- Protein: 25-35g


