

For the longest time, falafel was a restaurant-only treat for my family. I adored those crispy, herb-packed spheres of goodness, but the thought of recreating them at home was daunting. The biggest hurdle? The deep fryer. The mess, the lingering smell of oil, and the sheer amount of fat involved just didn’t align with my vision of a healthy, easy weeknight meal. I tried countless “baked falafel” recipes, but they often turned out disappointingly dry, crumbly, or dense—a pale imitation of the real thing. I had almost given up hope when I had a breakthrough: what if I treated falafel like a meal-prep powerhouse? I developed a method that not only skipped the deep fryer entirely but was specifically designed to be made in a large batch and frozen. The sheet pan was the key to a beautifully crisp exterior and a tender, moist interior. The first time I pulled a bag of these frozen falafel pucks out on a chaotic Tuesday night and had a delicious, healthy dinner on the table in 20 minutes, I knew I had cracked the code. My family devoured them, stuffing them into pitas and crumbling them over salads. This Sheet Pan Freezer Falafel recipe has revolutionized our meal plan, transforming a once-intimidating dish into our go-to solution for a quick, flavorful, and incredibly satisfying plant-based meal.
The Ultimate Sheet Pan Freezer Falafel Recipe
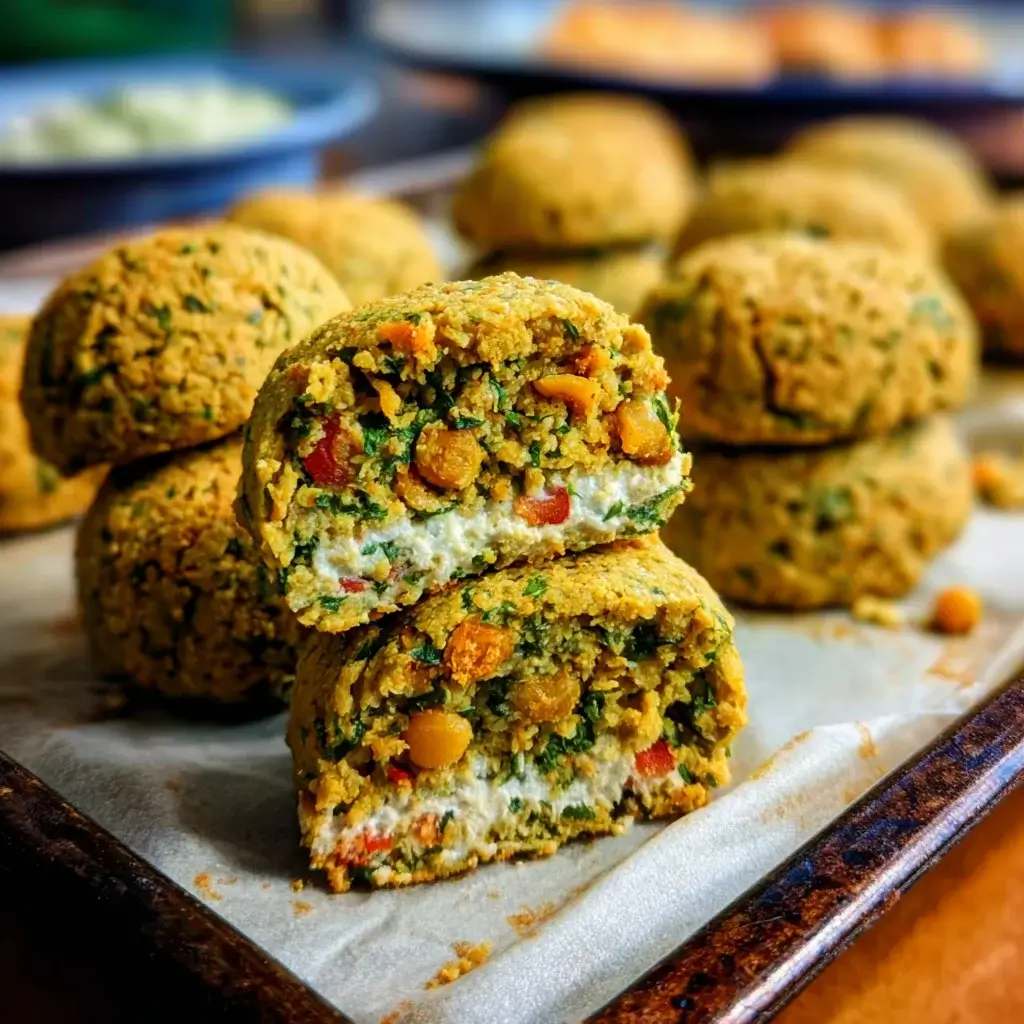
This recipe is engineered for both flavor and convenience. By using dried chickpeas (a non-negotiable for authentic texture) and a precise baking method, we achieve a falafel that is wonderfully moist and tender on the inside with a delightful golden-brown crust on the outside. The best part? You can bake a huge batch at once and freeze the rest for countless quick and healthy meals down the road.
Yields: Approximately 24-28 falafel patties
Prep time: 25 minutes (plus overnight soaking)
Cook time: 25-30 minutes
Complete Ingredients List
- Dried Chickpeas: 1 cup (do NOT use canned chickpeas)
- Yellow Onion: 1 small, roughly chopped
- Garlic: 4-5 cloves, peeled
- Fresh Parsley: 1 large bunch (about 1.5 cups packed), thick stems removed
- Fresh Cilantro: 1 large bunch (about 1.5 cups packed), thick stems removed
- Ground Cumin: 1 ½ teaspoons
- Ground Coriander: 1 teaspoon
- Fine Sea Salt: 1 teaspoon
- Freshly Ground Black Pepper: ½ teaspoon
- Cayenne Pepper: ¼ teaspoon (optional, for a little heat)
- Baking Powder: 1 teaspoon (this helps create a lighter, fluffier texture)
- All-Purpose Flour or Chickpea Flour: 2 tablespoons (this acts as a binder)
- Olive Oil: 3-4 tablespoons, for brushing
Step-by-Step Instructions
Follow these detailed steps carefully. The success of your falafel, particularly its texture, hinges on the initial preparation of the chickpeas and the processing of the mixture.
Step 1: The Crucial Overnight Soak
Place the 1 cup of dried chickpeas in a large bowl. Cover them with several inches of cold water, as they will triple in size. Let them soak on the counter at room temperature for at least 8 hours, or preferably overnight (up to 18 hours is fine). Do not try to rush this process by boiling them. The goal is to rehydrate the chickpeas until they are tender enough to split with a fingernail, but still raw. This raw, soaked state is the secret to the classic, fluffy-yet-sturdy falafel texture. Using canned, pre-cooked chickpeas will result in a mushy, pasty mixture that will not hold its shape.
Step 2: Drain and Dry
Once the chickpeas have finished soaking, drain them thoroughly in a colander. Rinse them with fresh, cold water. It’s important to get them as dry as possible. You can pat them dry with a clean kitchen towel or paper towels, or even let them air-dry in the colander for 15-20 minutes. Excess water can make the mixture too wet.
Step 3: Process the Aromatics and Herbs
In the bowl of a large food processor, add the chopped onion and garlic cloves. Pulse several times until they are finely minced. Scrape down the sides of the bowl. Next, add the large bunches of fresh parsley and cilantro. Pulse again until the herbs are finely chopped and incorporated with the onion and garlic.
Step 4: Process the Chickpeas and Spices
Add the drained and dried chickpeas to the food processor with the herb mixture. Add the ground cumin, ground coriander, salt, black pepper, and optional cayenne pepper. Pulse the mixture in short bursts. Scrape down the sides of the bowl frequently. Continue pulsing until the mixture is finely ground and resembles the texture of coarse sand or couscous. Be very careful not to over-process! You do not want a smooth paste like hummus. The mixture should still have a visible, crumbly texture. If you over-process, the falafel will be dense and heavy.
Step 5: Add Binder and Rest the Mixture
Transfer the falafel mixture to a large bowl. Sprinkle the baking powder and the 2 tablespoons of flour over the top. Use a spatula or your hands to gently mix everything together until just combined. Cover the bowl with plastic wrap and place it in the refrigerator to chill for at least 30 minutes, or up to an hour. This step is crucial; it allows the flour to hydrate and the mixture to firm up, making it much easier to shape.
Step 6: Preheat Oven and Prepare for Baking
While the mixture is chilling, preheat your oven to 400°F (200°C). Line a large baking sheet with parchment paper for easy cleanup and to prevent sticking.
Step 7: Shape the Falafel Patties
Remove the chilled mixture from the refrigerator. Use a tablespoon or a small cookie scoop to portion out the mixture. Roll each portion into a ball (about 1.5 inches in diameter), and then gently flatten it into a small, thick patty, about ½-inch thick. Flattening them into patties ensures more surface area comes into contact with the pan, resulting in a crispier exterior. Place the shaped patties onto the prepared baking sheet, leaving a little space between each one.
Step 8: Bake to Golden Perfection
Using a pastry brush, generously brush the tops of the falafel patties with olive oil. Bake for 15 minutes. Carefully remove the sheet pan from the oven, flip each patty over, and brush the other side with olive oil. Return the pan to the oven and bake for another 10-15 minutes, or until the falafel are firm to the touch and beautifully golden brown on both sides.
Step 9: Cool and Freeze for Later
Let the baked falafel cool on the baking sheet for a few minutes before enjoying. For freezing, allow the falafel to cool completely to room temperature. Then, place the baking sheet with the cooled falafel directly into the freezer. Let them “flash freeze” for 1-2 hours until they are solid. Once frozen solid, transfer the falafel patties to a freezer-safe zip-top bag or airtight container. They can be stored in the freezer for up to 3 months.
To Cook from Frozen: Simply place the frozen falafel on a parchment-lined baking sheet and bake in a preheated 375°F (190°C) oven for 15-20 minutes, or until heated through and crispy.
Nutritional Snapshot
This baked falafel recipe is a fantastic source of plant-based protein, fiber, and complex carbohydrates, making it a healthy and satisfying meal.
- Servings: This recipe makes about 6-7 servings.
- Serving Size: 4 falafel patties.
- Calories per Serving: Approximately 220-260 kcal.
Disclaimer: This is an estimate and can vary based on the exact size of your falafel and the amount of olive oil used.
- Protein: A single serving provides about 8-10 grams of plant-based protein, which is great for satiety and muscle maintenance.
- Fiber: With about 7-9 grams of dietary fiber per serving, these falafel are excellent for digestive health and help keep you feeling full for longer.
- Fat: This recipe is significantly lower in fat than its deep-fried counterpart, containing around 10-12 grams of fat per serving, primarily from heart-healthy olive oil.
- Carbohydrates: As a complex carbohydrate source, they provide sustained energy, with about 25 grams of carbs per serving.
A Breakdown of the Time Investment
While there is an overnight soaking period, the active time required for this recipe is minimal, especially considering the large, freezer-friendly batch it produces.
- Soaking Time: 8-18 hours (inactive)
- Active Preparation Time: 25 minutes (chopping, processing, and shaping)
- Chilling Time: 30-60 minutes (inactive)
- Cooking Time: 25-30 minutes
- Total Active Time: Approximately 55 minutes for a batch that will provide multiple future meals.
How to Serve Your Sheet Pan Falafel: A World of Options
Falafel is incredibly versatile. Move beyond the standard pita and explore all the delicious ways to enjoy your homemade freezer stash.
- The Classic Falafel Pita Sandwich:
- Bread: Warm, soft pita bread, either whole or cut in half to form a pocket.
- Sauce: A generous drizzle of creamy tahini sauce (see mini-recipe below) or a cooling tzatziki.
- Fillings: Stuff the pita with 3-4 falafel patties and top with shredded lettuce, chopped tomatoes and cucumbers (Israeli salad), pickled turnips, and a sprinkle of fresh parsley.
- The Ultimate Falafel Power Bowl:
- Base: Start with a bed of fluffy quinoa, brown rice, couscous, or mixed greens.
- Toppings: Arrange 4-5 falafel patties around the bowl. Add complementary toppings like hummus, roasted red peppers, Kalamata olives, chopped red onion, and crumbled feta cheese (if not vegan).
- Dressing: Drizzle everything with a generous amount of tahini dressing or a lemon-herb vinaigrette.
- As a Protein-Packed Salad Topper:
- Crumble 3-4 warm falafel patties over a large Mediterranean-style chopped salad containing romaine lettuce, cucumbers, tomatoes, bell peppers, and red onions.
- This adds incredible flavor, texture, and satisfying plant-based protein, turning a simple salad into a full meal.
- On a Mezze Platter for Entertaining:
- Arrange the baked falafel on a large platter.
- Surround them with bowls of various dips like classic hummus, baba ghanoush, and muhammara (roasted red pepper dip).
- Add other elements like warm pita triangles, olives, feta cheese cubes, and fresh vegetable crudités (cucumber, carrots, bell peppers) for a beautiful and delicious appetizer spread.
Mini-Recipe: Simple Creamy Tahini Sauce
- In a small bowl, whisk together:
- ½ cup tahini (sesame paste)
- ½ cup lukewarm water (add slowly)
- ¼ cup fresh lemon juice
- 1 clove garlic, minced or grated
- ¼ teaspoon salt
- Whisk until smooth and creamy. The mixture may seize up at first; just keep whisking and adding water until it reaches a drizzlable consistency.
5 Additional Tips for Falafel Success
These five key tips will help you navigate the common pitfalls of homemade falafel and ensure a perfect batch every time.
- Dried Chickpeas Are Not a Suggestion, They’re a Rule: This cannot be overstated. Canned chickpeas have been fully cooked and have a high moisture content and a soft, starchy texture. Using them will result in a pasty, wet dough that will fall apart and have a gummy texture. The unique, fluffy-yet-sturdy texture of authentic falafel comes exclusively from using soaked, uncooked chickpeas.
- Find the Perfect Texture: Coarse, Not Paste: The second most common mistake is over-processing the falafel mixture. You are not making hummus. Pulse the food processor in short bursts and scrape down the sides often. The final texture should be homogenous but still crumbly and coarse, like wet sand. This creates air pockets within the falafel, leading to a lighter, fluffier interior.
- Don’t Skip the Chill Time: After mixing, the falafel base will be quite soft and a bit sticky. Chilling the mixture in the refrigerator for at least 30 minutes is a crucial step. It allows the starches to set and the flour to absorb excess moisture, making the dough much firmer and easier to shape into patties that won’t fall apart.
- Embrace Fresh Herbs for Vibrant Flavor: While you use dried spices like cumin and coriander, the signature flavor of great falafel comes from an abundant amount of fresh parsley and cilantro. Don’t be shy with them! Using dried herbs simply will not produce the same bright, green, fresh flavor. This is what separates amazing homemade falafel from mediocre store-bought versions.
- Patties, Not Balls, for Maximum Crispiness: While traditional fried falafel is often spherical, forming the mixture into flattened patties (about ½-inch thick) is far better for baking. This shape maximizes the surface area that is in direct contact with the hot sheet pan, which is essential for developing a uniform, golden-brown, and crispy crust on both sides.
Frequently Asked Questions (FAQ)
Here are answers to some of the most common questions about making sheet pan freezer falafel.
1. Can I make this recipe in an air fryer?
Absolutely! The air fryer is a fantastic tool for making crispy falafel. To cook them fresh, preheat your air fryer to 375°F (190°C). Place the shaped patties in a single layer in the basket (you’ll likely need to work in batches), spray them lightly with oil, and air fry for 12-15 minutes, flipping halfway through, until golden and crisp. To cook from frozen, air fry at 375°F (190°C) for 15-18 minutes, flipping halfway.
2. Is this recipe gluten-free?
Yes, this recipe is very easy to make gluten-free. The core ingredients are all naturally gluten-free. The only component you need to swap is the 2 tablespoons of all-purpose flour. Simply substitute it with a certified gluten-free flour, such as chickpea flour (which enhances the flavor), oat flour, or a gluten-free all-purpose blend.
3. My falafel mixture is too wet and won’t hold its shape. What did I do wrong?
A wet mixture is usually caused by one of two things: the chickpeas were not dried thoroughly enough after soaking, or the mixture was over-processed into a paste. To fix it, try adding another tablespoon of chickpea flour or oat flour to the mixture to help absorb some of the excess moisture. Then, let it chill in the refrigerator for a full hour to help it firm up as much as possible.
4. My falafel turned out dry. How can I prevent this next time?
Dry baked falafel is a common problem this recipe is designed to avoid. The most likely culprits are over-baking or not using enough oil. Make sure you are brushing the patties generously with olive oil on both sides. Also, keep a close eye on them in the last 5-10 minutes of baking and pull them out as soon as they are firm and golden brown. The abundance of fresh herbs in this recipe also helps to keep the interior moist.
5. I don’t have a food processor. Can I still make this recipe?
While a food processor is by far the easiest and most effective tool, you can make falafel without one, though it requires some effort. You can try to pass the soaked chickpeas and other ingredients through a meat grinder on the finest setting. Alternatively, you can use a high-powered blender, but you must work in very small batches and use the “pulse” function sparingly to avoid creating a paste. A food processor is highly recommended for the best and most consistent results.

Sheet Pan Freezer Falafel recipe
Ingredients
-
Dried Chickpeas: 1 cup (do NOT use canned chickpeas)
-
Yellow Onion: 1 small, roughly chopped
-
Garlic: 4-5 cloves, peeled
-
Fresh Parsley: 1 large bunch (about 1.5 cups packed), thick stems removed
-
Fresh Cilantro: 1 large bunch (about 1.5 cups packed), thick stems removed
-
Ground Cumin: 1 ½ teaspoons
-
Ground Coriander: 1 teaspoon
-
Fine Sea Salt: 1 teaspoon
-
Freshly Ground Black Pepper: ½ teaspoon
-
Cayenne Pepper: ¼ teaspoon (optional, for a little heat)
-
Baking Powder: 1 teaspoon (this helps create a lighter, fluffier texture)
-
All-Purpose Flour or Chickpea Flour: 2 tablespoons (this acts as a binder)
-
Olive Oil: 3-4 tablespoons, for brushing
Instructions
Step 1: The Crucial Overnight Soak
Place the 1 cup of dried chickpeas in a large bowl. Cover them with several inches of cold water, as they will triple in size. Let them soak on the counter at room temperature for at least 8 hours, or preferably overnight (up to 18 hours is fine). Do not try to rush this process by boiling them. The goal is to rehydrate the chickpeas until they are tender enough to split with a fingernail, but still raw. This raw, soaked state is the secret to the classic, fluffy-yet-sturdy falafel texture. Using canned, pre-cooked chickpeas will result in a mushy, pasty mixture that will not hold its shape.
Step 2: Drain and Dry
Once the chickpeas have finished soaking, drain them thoroughly in a colander. Rinse them with fresh, cold water. It’s important to get them as dry as possible. You can pat them dry with a clean kitchen towel or paper towels, or even let them air-dry in the colander for 15-20 minutes. Excess water can make the mixture too wet.
Step 3: Process the Aromatics and Herbs
In the bowl of a large food processor, add the chopped onion and garlic cloves. Pulse several times until they are finely minced. Scrape down the sides of the bowl. Next, add the large bunches of fresh parsley and cilantro. Pulse again until the herbs are finely chopped and incorporated with the onion and garlic.
Step 4: Process the Chickpeas and Spices
Add the drained and dried chickpeas to the food processor with the herb mixture. Add the ground cumin, ground coriander, salt, black pepper, and optional cayenne pepper. Pulse the mixture in short bursts. Scrape down the sides of the bowl frequently. Continue pulsing until the mixture is finely ground and resembles the texture of coarse sand or couscous. Be very careful not to over-process! You do not want a smooth paste like hummus. The mixture should still have a visible, crumbly texture. If you over-process, the falafel will be dense and heavy.
Step 5: Add Binder and Rest the Mixture
Transfer the falafel mixture to a large bowl. Sprinkle the baking powder and the 2 tablespoons of flour over the top. Use a spatula or your hands to gently mix everything together until just combined. Cover the bowl with plastic wrap and place it in the refrigerator to chill for at least 30 minutes, or up to an hour. This step is crucial; it allows the flour to hydrate and the mixture to firm up, making it much easier to shape.
Step 6: Preheat Oven and Prepare for Baking
While the mixture is chilling, preheat your oven to 400°F (200°C). Line a large baking sheet with parchment paper for easy cleanup and to prevent sticking.
Step 7: Shape the Falafel Patties
Remove the chilled mixture from the refrigerator. Use a tablespoon or a small cookie scoop to portion out the mixture. Roll each portion into a ball (about 1.5 inches in diameter), and then gently flatten it into a small, thick patty, about ½-inch thick. Flattening them into patties ensures more surface area comes into contact with the pan, resulting in a crispier exterior. Place the shaped patties onto the prepared baking sheet, leaving a little space between each one.
Step 8: Bake to Golden Perfection
Using a pastry brush, generously brush the tops of the falafel patties with olive oil. Bake for 15 minutes. Carefully remove the sheet pan from the oven, flip each patty over, and brush the other side with olive oil. Return the pan to the oven and bake for another 10-15 minutes, or until the falafel are firm to the touch and beautifully golden brown on both sides.
Step 9: Cool and Freeze for Later
Let the baked falafel cool on the baking sheet for a few minutes before enjoying. For freezing, allow the falafel to cool completely to room temperature. Then, place the baking sheet with the cooled falafel directly into the freezer. Let them “flash freeze” for 1-2 hours until they are solid. Once frozen solid, transfer the falafel patties to a freezer-safe zip-top bag or airtight container. They can be stored in the freezer for up to 3 months.
Nutrition
- Serving Size: one normal portion
- Calories: 220-260 kcal
- Fat: 10-12 grams
- Carbohydrates: 25 grams
- Fiber: 7-9 grams
- Protein: 8-10 grams


