
Summer arrives, and suddenly, my garden (and my local farmer’s market stand) seems to explode with yellow squash. Those cheerful, sunny vegetables are prolific, and finding delicious ways to use them all becomes a delightful challenge. For years, I admittedly overlooked the simple yellow squash, often finding it watery or bland when boiled or steamed. Then, I discovered the magic of sautéing. The first time I tried this quick sauté method, tossing slices of tender squash in a hot pan with just a touch of garlic and olive oil until they were perfectly tender-crisp with beautifully caramelized edges, was a revelation. It wasn’t mushy; it was flavorful. Simple salt and pepper brought out its natural sweetness, enhanced by the savory garlic. My family, initially skeptical (“Just squash?”), were instantly converted. They loved the texture – soft but with a slight bite – and the subtle sweetness. Now, this Sautéed Yellow Squash is one of our most requested summer side dishes. It comes together in minutes, uses minimal ingredients, and celebrates the fresh flavor of the season in the most uncomplicated, delicious way. It’s proof that sometimes, the simplest preparations are truly the best.
Ingredients for Simple Sautéed Yellow Squash
This recipe focuses on enhancing the natural flavor of yellow squash with basic aromatics. It’s designed for simplicity and speed, but feel free to add variations (see notes). This quantity typically serves 2-4 people as a side dish.
- Yellow Squash: 2 medium yellow summer squash (about 1 to 1.5 lbs / 450-680g total). Choose squash that are firm, smooth-skinned, relatively heavy for their size, and free of major blemishes or soft spots. Smaller to medium-sized squash tend to be more tender and have fewer seeds.
- Olive Oil or Butter: 1-2 tablespoons. Extra virgin olive oil lends a fruity note, while butter adds richness (or use a combination). Avocado oil or another neutral high-heat oil also works.
- Garlic: 1-3 cloves garlic, minced or thinly sliced. Adjust the amount based on your love for garlic! Fresh garlic provides the best flavor.
- Salt: ½ teaspoon kosher salt or sea salt, or more to taste. Crucial for drawing out flavor.
- Black Pepper: ¼ teaspoon freshly ground black pepper, or more to taste. Freshly ground offers superior flavor.
- Optional Additions for Enhanced Flavor:
- Onion: ¼ to ½ cup finely chopped yellow or sweet onion, or thinly sliced shallots. Sautéed with the garlic, this adds a layer of savory sweetness.
- Fresh Herbs: 1-2 tablespoons chopped fresh herbs like parsley, thyme, basil, dill, or chives, stirred in at the end.
- Red Pepper Flakes: A pinch (⅛ to ¼ teaspoon) added with the garlic for a touch of heat.
- Lemon Juice: A squeeze of fresh lemon juice (about 1-2 teaspoons) added after cooking brightens the flavors.
- Parmesan Cheese: 1-2 tablespoons grated Parmesan cheese sprinkled over the top just before serving.
- Other Spices: Smoked paprika, onion powder, or dried Italian seasoning can be added with the salt and pepper.
Ingredient Notes & Considerations:
- Squash Freshness: Use fresh, firm squash. Older, larger squash can sometimes be watery or have tougher skin and larger seeds. If using very large squash, you might want to scoop out the seeds before slicing.
- Oil/Fat Choice: Olive oil is classic for Mediterranean flavor. Butter adds richness and helps with browning but can burn more easily; combining it with oil mitigates this. Choose based on your desired flavor profile.
- Garlic Prep: Minced garlic disperses more evenly but can burn faster. Thinly sliced garlic offers milder flavor pockets. Add it carefully to prevent burning, which makes it bitter.
- Seasoning: Don’t underestimate salt and pepper! They are key to bringing out the squash’s delicate sweetness. Taste and adjust at the end.
Step-by-Step Instructions
This method focuses on achieving perfectly tender-crisp sautéed yellow squash with some desirable browning, avoiding the common pitfall of mushy, steamed squash.
Phase 1: Preparation
- Wash and Trim Squash: Thoroughly wash the yellow squash under cold running water to remove any dirt. Pat them dry with paper towels. Trim off both the stem end and the blossom end.
- Slice the Squash: Slice the squash crosswise into uniform rounds, about ¼ to ½ inch thick. Aim for consistency in thickness to ensure even cooking. You can also slice them lengthwise and then into half-moons if preferred. Uniformity is key!
- Prepare Aromatics: If using onion or shallots, chop them finely or slice thinly. Mince or thinly slice the garlic cloves. If using fresh herbs, chop them and set aside.
Phase 2: Sautéing
- Heat the Pan and Fat: Place a large skillet or sauté pan (large enough to hold the squash mostly in a single layer) over medium-high heat. Add the olive oil and/or butter. Allow the fat to heat up until the oil shimmers slightly or the butter melts and starts to foam. A hot pan is crucial for searing rather than steaming.
- Sauté Aromatics (If Using): If using onion or shallots, add them to the hot pan. Sauté for 2-3 minutes, stirring occasionally, until they begin to soften and become translucent.
- Add Garlic: Add the minced or sliced garlic (and red pepper flakes, if using) to the pan. Sauté for just 30-60 seconds, stirring constantly, until fragrant. Be very careful not to burn the garlic, as it will turn bitter.
- Add the Squash: Carefully add the sliced yellow squash to the hot pan. Spread it out in as even a layer as possible. Avoid overcrowding the pan! If necessary, cook the squash in two batches. Overcrowding lowers the pan temperature and causes the squash to steam instead of sauté, leading to a mushy texture.
- Sauté the Squash: Let the squash cook undisturbed for 2-4 minutes to allow the bottom side to develop some golden-brown color. Then, stir or toss the squash gently. Continue cooking for another 3-6 minutes, stirring occasionally, until the squash is “tender-crisp.” This means it should be softened but still have a slight bite in the center. It should not be mushy or falling apart. Look for golden-brown edges. The total cooking time will typically be 6-10 minutes, depending on the heat, pan, and thickness of the slices.
- Season: Sprinkle the squash evenly with the salt and freshly ground black pepper during the last couple of minutes of cooking, or right after removing from heat. Seasoning earlier can draw out more moisture, potentially hindering browning.
Phase 3: Finishing Touches
- Stir in Herbs/Lemon/Cheese (Optional): Remove the pan from the heat. If using fresh herbs, stir them in now. If using lemon juice, drizzle it over the squash. If using Parmesan cheese, sprinkle it over the top. Toss gently to combine.
- Taste and Adjust: Taste a piece of squash and adjust seasoning (salt, pepper, lemon juice) as needed.
- Serve Immediately: Sautéed yellow squash is best served hot, straight from the pan, to enjoy its optimal texture and flavor.
Nutritional Information (Approximate)
Nutritional values for sautéed yellow squash are estimates and depend on the exact amount of oil/butter used, the size of the squash, and any optional additions like cheese. The following is a guideline per serving, assuming the recipe makes 3 servings and uses 1.5 tablespoons of olive oil.
- Servings: 3
- Calories Per Serving (Approximate): 80 – 120 calories.
Health Benefits & Considerations:
- Low in Calories: Yellow squash itself is very low in calories.
- Rich in Vitamins: A good source of Vitamin C, Vitamin A (beta-carotene), Vitamin B6, folate, magnesium, potassium, and manganese.
- Dietary Fiber: Contains dietary fiber, which aids digestion.
- Hydrating: High water content.
- Fat Content: The primary source of calories and fat in this dish comes from the added olive oil or butter. Using less fat will lower the calorie count.
- Sodium: Sodium content depends on how much salt is added.
- Naturally Gluten-Free & Vegan (if using oil): Fits into many dietary patterns. Adding cheese makes it vegetarian but not vegan.
Overall, simple sautéed yellow squash is a very healthy, nutrient-dense side dish. It’s a fantastic way to add vegetables to your meal with minimal added calories, especially if mindful of the cooking fat used.
Preparation Time Breakdown
This recipe is prized for its speed and simplicity, making it an ideal weeknight side dish.
- Active Prep Time: 5 – 7 minutes (Washing, trimming, and slicing squash; mincing garlic/chopping onion).
- Cook Time: 7 – 12 minutes (Sautéing aromatics and squash until tender-crisp).
Total Time (Approximate): 12 – 20 minutes.
Key Takeaway: You can have this delicious and healthy side dish on the table in under 20 minutes, making it incredibly convenient for busy schedules.
How to Serve Your Sautéed Yellow Squash
Sautéed yellow squash is a versatile side dish that pairs well with a wide variety of main courses and cuisines. Here are some serving ideas:
- Classic Side Dish: Serve alongside grilled, roasted, or pan-seared main courses:
- Chicken: Grilled chicken breast, roasted chicken, pan-seared chicken thighs.
- Fish: Baked salmon, grilled tilapia or cod, pan-seared shrimp or scallops.
- Pork: Pork chops, pork tenderloin.
- Beef: Steak, roast beef.
- Vegetarian Mains: Lentil loaf, black bean burgers, tofu scrambles, baked tofu or tempeh.
- Pasta Partner:
- Toss the sautéed squash (perhaps with added cherry tomatoes or spinach) with your favorite pasta, a drizzle of olive oil, and some Parmesan cheese for a light vegetarian pasta dish.
- Serve as a side to heartier pasta dishes like lasagna or spaghetti with meat sauce.
- Grain Bowl Component: Add sautéed yellow squash to grain bowls built with quinoa, farro, rice, along with other roasted vegetables, greens, protein, and a flavorful dressing.
- Brunch Addition: Serve alongside eggs (scrambled, fried, omelets), bacon or sausage, and toast for a colorful and healthy brunch component.
- Part of a Vegetable Medley: Combine sautéed yellow squash with other sautéed or roasted vegetables like zucchini, bell peppers, onions, broccoli, or asparagus for a vibrant mixed veggie side.
- On Toast: Spoon warm sautéed squash over toasted crusty bread, perhaps spread with ricotta or goat cheese, for a simple bruschetta-style appetizer or light lunch.
- Taco Filling: Roughly chop the sautéed squash and use it as part of a vegetarian taco filling along with black beans, corn, and spices.
- Presentation:
- Serve warm, directly from the skillet.
- Transfer to a serving bowl or platter.
- Garnish with extra fresh herbs, a sprinkle of Parmesan, or a final drizzle of good olive oil.
The mild sweetness and tender texture of sautéed yellow squash make it an agreeable companion to countless dishes, adding color, nutrition, and fresh summer flavor to your plate.
Additional Tips for Perfect Sautéed Yellow Squash
Achieving sautéed squash perfection means hitting that sweet spot between tender and crisp, with lovely caramelized notes. These tips will help you nail it every time.
- Ensure Uniform Slicing: Slice the squash into rounds or half-moons of consistent thickness (ideally ¼ to ½ inch). If some pieces are significantly thicker than others, the thinner pieces will overcook and become mushy while the thicker ones are still underdone. Uniformity is the foundation for even cooking. A mandoline can be helpful for perfect slices, but careful knife work is sufficient.
- Use a Large Enough Pan & Don’t Overcrowd: This is perhaps the most critical tip to avoid steaming and achieve browning. Use the largest skillet you have relative to the amount of squash. When you add the squash, arrange it in a single layer as much as possible. If the squash pieces are piled on top of each other, they will trap steam, lower the pan temperature, and boil in their own liquid rather than sautéing in the hot fat. If necessary, cook in two batches. It takes slightly longer overall but yields vastly superior results.
- Get the Pan Hot Before Adding Squash: Preheat your skillet over medium-high heat and ensure the oil is shimmering or the butter is melted and foamy before adding the squash. Adding squash to a cool pan also encourages steaming. A hot pan allows the exterior of the squash to sear and begin caramelizing immediately upon contact.
- Aim for Tender-Crisp, Not Mushy: The goal is squash that is softened and heated through but still retains a slight firmness or bite in the center. Overcooking is the primary cause of mushy squash. Start checking for doneness after about 5-6 minutes of sautéing. Pierce a piece with a fork or taste it. It should yield easily but not collapse. Remember that it will continue to cook slightly from residual heat after you remove it from the pan.
- Season Thoughtfully (Timing Matters): While seasoning is essential, consider when you add salt. Salt draws moisture out of vegetables. Adding salt at the very beginning can make the squash release more water, potentially hindering browning and making the pan soupy. For optimal browning, try seasoning during the last few minutes of cooking or immediately after removing the squash from the heat. Always taste and adjust seasoning just before serving. Freshly ground black pepper adds significantly more flavor than pre-ground.
By keeping these simple techniques in mind – consistent slicing, proper pan heat, avoiding crowding, cooking to tender-crisp, and smart seasoning – you’ll consistently turn humble yellow squash into a delicious, beautifully textured side dish.
Frequently Asked Questions (FAQ)
Here are answers to some common questions about preparing sautéed yellow squash:
1. Why did my sautéed yellow squash turn out mushy and watery?
- Answer: This is the most common issue and usually happens for a few reasons:
- Overcrowding the Pan: This is the primary culprit. Piling too much squash into the pan lowers the temperature and causes the squash to steam in its own released liquid instead of sautéing in hot oil. Cook in batches if necessary, ensuring the squash is mostly in a single layer.
- Pan Not Hot Enough: Starting with a cool or insufficiently heated pan prevents searing and encourages steaming. Ensure the pan and oil are properly heated (medium-high heat, shimmering oil) before adding the squash.
- Overcooking: Simply cooking the squash for too long will break down its structure, leading to mushiness. Aim for tender-crisp (softened with a slight bite) and remove from heat promptly.
- Salting Too Early: Salting right at the beginning can draw out excess moisture, hindering browning and contributing to a watery pan. Try salting towards the end of the cooking process.
- Using Old/Watery Squash: Very large or old squash naturally contain more water.
2. Do I need to peel yellow squash before sautéing? Can I eat the skin?
- Answer: No, you generally do not need to peel yellow summer squash before sautéing. The skin is thin, tender, edible, and contains nutrients and fiber. Simply wash the squash thoroughly to remove any dirt. The exception might be if you have an exceptionally large, older squash with noticeably tough or blemished skin, in which case you might choose to peel it partially or fully. For most standard yellow squash, leaving the skin on is preferred for nutrition, texture, and ease of preparation.
3. What’s the difference between yellow squash and zucchini? Can I substitute zucchini?
- Answer: Yellow squash and zucchini are both types of summer squash and are often used interchangeably in recipes.
- Shape: Yellow squash typically has a bulbous bottom and tapering neck (straightneck or crookneck varieties), while zucchini is generally straight and uniformly cylindrical.
- Skin: Yellow squash skin is usually smooth and yellow. Zucchini skin is typically smooth and dark green (though golden zucchini exists).
- Seeds/Texture: Yellow squash often has slightly larger seeds and a potentially softer texture when cooked compared to zucchini, which tends to hold its shape a bit better.
- Flavor: Both have mild flavors, with some finding yellow squash slightly sweeter.
- Substitution: Yes, you can absolutely substitute zucchini for yellow squash (or use a mix of both) in this sautéed recipe. The cooking method and time will be virtually identical.
4. Can I add other vegetables to this dish?
- Answer: Definitely! Sautéed yellow squash pairs beautifully with many other vegetables. Add them based on their required cooking times:
- Cook with Onions/Garlic: Add diced bell peppers (any color) or sliced mushrooms along with the onions before adding the garlic and squash.
- Cook with Squash: Add sliced zucchini along with the yellow squash. Cherry tomatoes (halved) can be added during the last few minutes of cooking until they just soften.
- Add Near End: Add quick-cooking vegetables like corn kernels (fresh or frozen/thawed) or peas during the last 2-3 minutes. Stir in fresh spinach leaves during the final minute until just wilted.
5. Can I make sautéed yellow squash ahead of time? How do I reheat it?
- Answer: Sautéed yellow squash is truly best enjoyed fresh, immediately after cooking, when its texture is perfectly tender-crisp. However, you can make it ahead if necessary.
- Storage: Store cooled leftovers in an airtight container in the refrigerator for up to 3 days.
- Reheating: The squash will soften upon refrigeration and reheating. Avoid the microwave if possible, as it tends to make the squash watery and mushy. The best way to reheat is often in a skillet over medium heat with a tiny bit of oil or butter for a few minutes until warmed through. You can also reheat it briefly in an air fryer or toaster oven at around 350°F (175°C) until warm. It won’t be quite as good as fresh, but these methods are better than microwaving.

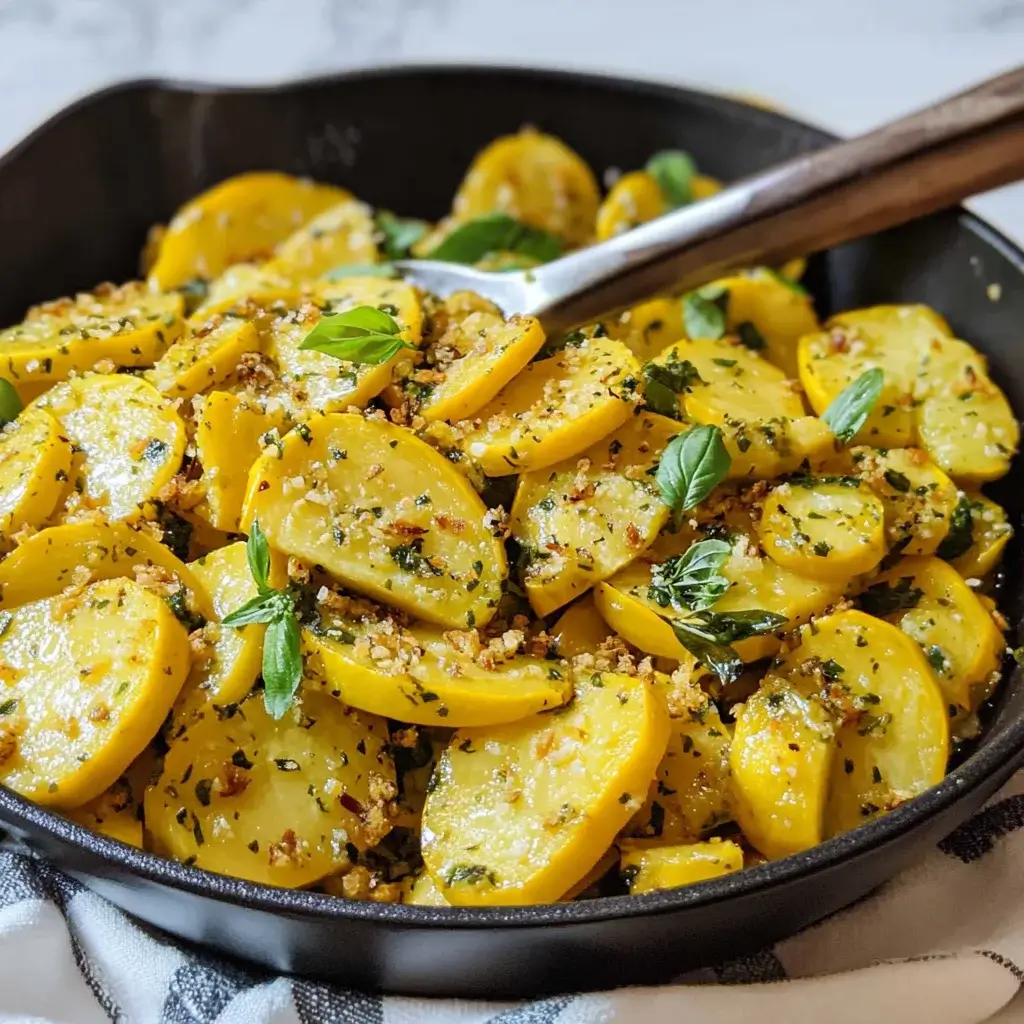
Sautéed Yellow Squash recipe
Ingredients
-
- Yellow Squash: 2 medium yellow summer squash (about 1 to 1.5 lbs / 450-680g total). Choose squash that are firm, smooth-skinned, relatively heavy for their size, and free of major blemishes or soft spots. Smaller to medium-sized squash tend to be more tender and have fewer seeds.
-
- Olive Oil or Butter: 1-2 tablespoons. Extra virgin olive oil lends a fruity note, while butter adds richness (or use a combination). Avocado oil or another neutral high-heat oil also works.
-
- Garlic: 1-3 cloves garlic, minced or thinly sliced. Adjust the amount based on your love for garlic! Fresh garlic provides the best flavor.
-
- Salt: ½ teaspoon kosher salt or sea salt, or more to taste. Crucial for drawing out flavor.
-
- Black Pepper: ¼ teaspoon freshly ground black pepper, or more to taste. Freshly ground offers superior flavor.
-
- Optional Additions for Enhanced Flavor:
-
- Onion: ¼ to ½ cup finely chopped yellow or sweet onion, or thinly sliced shallots. Sautéed with the garlic, this adds a layer of savory sweetness.
-
- Fresh Herbs: 1-2 tablespoons chopped fresh herbs like parsley, thyme, basil, dill, or chives, stirred in at the end.
-
- Red Pepper Flakes: A pinch (⅛ to ¼ teaspoon) added with the garlic for a touch of heat.
-
- Lemon Juice: A squeeze of fresh lemon juice (about 1-2 teaspoons) added after cooking brightens the flavors.
-
- Parmesan Cheese: 1-2 tablespoons grated Parmesan cheese sprinkled over the top just before serving.
-
- Other Spices: Smoked paprika, onion powder, or dried Italian seasoning can be added with the salt and pepper.
-
- Optional Additions for Enhanced Flavor:
Instructions
Phase 1: Preparation
-
- Wash and Trim Squash: Thoroughly wash the yellow squash under cold running water to remove any dirt. Pat them dry with paper towels. Trim off both the stem end and the blossom end.
-
- Slice the Squash: Slice the squash crosswise into uniform rounds, about ¼ to ½ inch thick. Aim for consistency in thickness to ensure even cooking. You can also slice them lengthwise and then into half-moons if preferred. Uniformity is key!
-
- Prepare Aromatics: If using onion or shallots, chop them finely or slice thinly. Mince or thinly slice the garlic cloves. If using fresh herbs, chop them and set aside.
Phase 2: Sautéing
-
- Heat the Pan and Fat: Place a large skillet or sauté pan (large enough to hold the squash mostly in a single layer) over medium-high heat. Add the olive oil and/or butter. Allow the fat to heat up until the oil shimmers slightly or the butter melts and starts to foam. A hot pan is crucial for searing rather than steaming.
-
- Sauté Aromatics (If Using): If using onion or shallots, add them to the hot pan. Sauté for 2-3 minutes, stirring occasionally, until they begin to soften and become translucent.
-
- Add Garlic: Add the minced or sliced garlic (and red pepper flakes, if using) to the pan. Sauté for just 30-60 seconds, stirring constantly, until fragrant. Be very careful not to burn the garlic, as it will turn bitter.
-
- Add the Squash: Carefully add the sliced yellow squash to the hot pan. Spread it out in as even a layer as possible. Avoid overcrowding the pan! If necessary, cook the squash in two batches. Overcrowding lowers the pan temperature and causes the squash to steam instead of sauté, leading to a mushy texture.
-
- Sauté the Squash: Let the squash cook undisturbed for 2-4 minutes to allow the bottom side to develop some golden-brown color. Then, stir or toss the squash gently. Continue cooking for another 3-6 minutes, stirring occasionally, until the squash is “tender-crisp.” This means it should be softened but still have a slight bite in the center. It should not be mushy or falling apart. Look for golden-brown edges. The total cooking time will typically be 6-10 minutes, depending on the heat, pan, and thickness of the slices.
-
- Season: Sprinkle the squash evenly with the salt and freshly ground black pepper during the last couple of minutes of cooking, or right after removing from heat. Seasoning earlier can draw out more moisture, potentially hindering browning.
Phase 3: Finishing Touches
-
- Stir in Herbs/Lemon/Cheese (Optional): Remove the pan from the heat. If using fresh herbs, stir them in now. If using lemon juice, drizzle it over the squash. If using Parmesan cheese, sprinkle it over the top. Toss gently to combine.
-
- Taste and Adjust: Taste a piece of squash and adjust seasoning (salt, pepper, lemon juice) as needed.
-
- Serve Immediately: Sautéed yellow squash is best served hot, straight from the pan, to enjoy its optimal texture and flavor.
Nutrition
- Serving Size: one normal portion
- Calories: 80 – 120