

Introduction
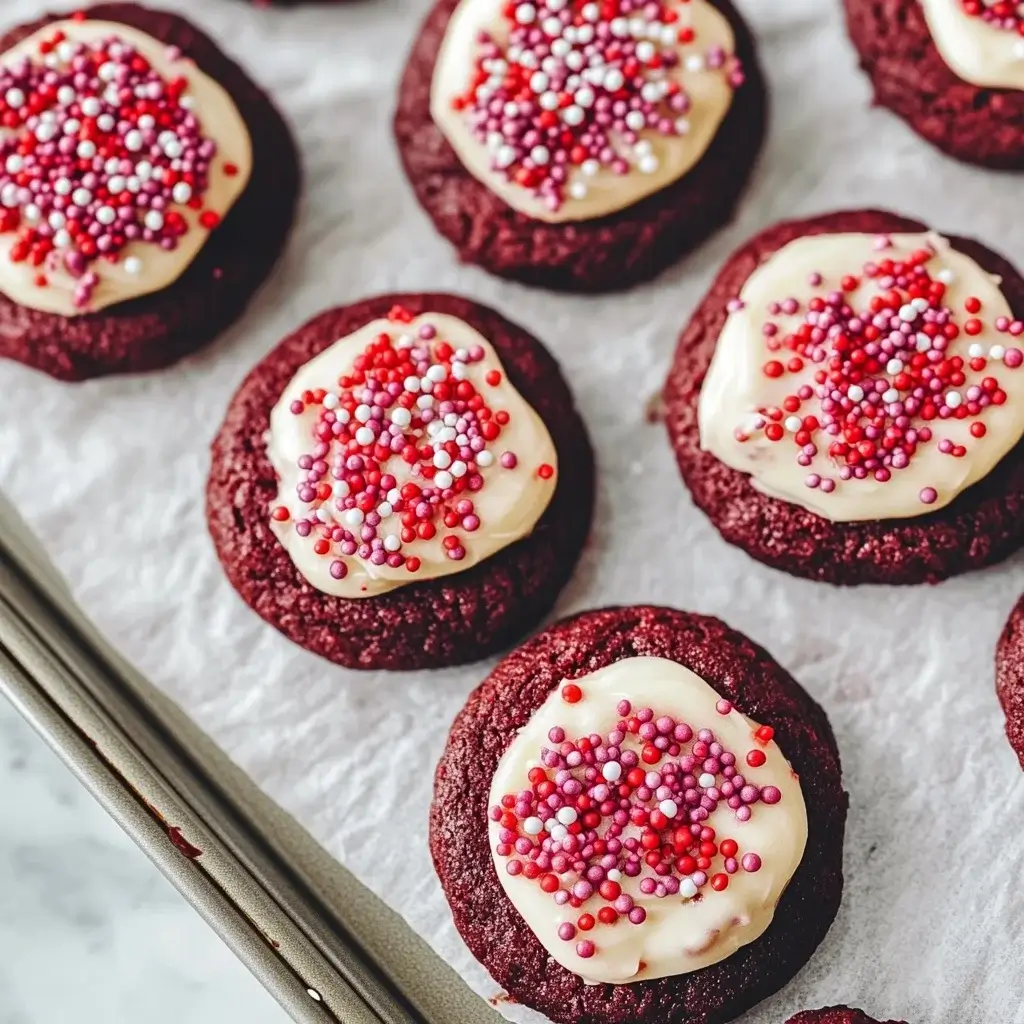
When it comes to beloved desserts, few can rival the elegant appeal of red velvet cake. Known for its rich, velvety texture and striking red hue, red velvet has become a staple in the world of confections. But what if you could enjoy this classic flavor in a new, exciting form that’s perfect for sharing and snacking? Enter Frosted Red Velvet Cupcake Cookies. These delightful treats combine the best of both worlds—the irresistible allure of red velvet and the convenient, handheld nature of cookies. In this comprehensive guide, we’ll walk you through each step of creating these delectable cookies, ensuring you have all the tips and tricks needed to achieve baking success.
Ingredients
Before you dive into baking, it’s essential to gather all your ingredients. Here’s what you’ll need:
For the Cookies:
- 1½ cups all-purpose flour
- ¼ cup unsweetened cocoa powder
- 1 tbsp instant milk powder
- 1 tbsp cornstarch
- ½ tsp baking powder
- ¼ tsp baking soda
- ¼ tsp salt
- ½ cup unsalted butter, softened
- 3 tbsp vegetable oil
- ½ cup packed brown sugar
- ½ cup granulated sugar
- 1 large egg
- 1 tsp vanilla extract
- 1 tsp vinegar
- 1-2 tsp red liquid-gel food coloring
For the Frosting:
- 3 oz cream cheese, softened
- 6 tbsp unsalted butter, softened
- 1 tsp vanilla extract
- 1½ cups powdered sugar
Instructions
Follow these steps to create your Frosted Red Velvet Cupcake Cookies:
1. Preheat Oven:
Set your oven to 350°F (175°C) and line two baking sheets with parchment paper.
2. Mix Dry Ingredients:
In a bowl, whisk together:
- Flour
- Cocoa powder
- Milk powder
- Cornstarch
- Baking powder
- Baking soda
- Salt
Set aside.
3. Combine Wet Ingredients:
In a large bowl, mix together:
- Softened butter
- Vegetable oil
- Brown sugar
- Granulated sugar
Mix until smooth. Add in:
- Egg
- Vanilla extract
- Vinegar
- Red food coloring
Mix well.
4. Combine Mixtures:
Gradually add the dry ingredients to the wet ingredients, stirring until a thick dough forms.
5. Scoop Cookies:
Use a cookie scoop to drop large mounds of dough (about 3-4 tablespoons) onto the prepared baking sheets, leaving about 3 inches between each.
6. Bake:
Bake for 12-15 minutes, until cookies are puffed and lightly golden at the edges.
7. Cool:
Let cookies cool on the baking sheet for 5 minutes, then transfer to a wire rack to cool completely.
8. Make Frosting:
Beat cream cheese and butter together until smooth. Add vanilla and powdered sugar, mixing until creamy. Chill the frosting if it’s too soft.
9. Frost Cookies:
Spread or pipe frosting onto cooled cookies. If any cookies are uneven, crumble them and sprinkle the crumbs over the frosted cookies for decoration.
Nutrition Facts
Understanding the nutritional profile of your treats can help you indulge mindfully. Here’s a rough estimate of the nutrition facts per cookie (based on a batch of 12):
- Calories: 250
- Total Fat: 13g
- Saturated Fat: 8g
- Cholesterol: 40mg
- Sodium: 150mg
- Total Carbohydrates: 31g
- Dietary Fiber: 1g
- Sugars: 20g
- Protein: 2g
Please note that these values are approximate and can vary based on the exact ingredients and portion sizes used.
How to Serve
Frosted Red Velvet Cupcake Cookies are not only delicious but also incredibly versatile, allowing you to serve them in a multitude of delightful ways. Here’s a detailed look at how to present and enjoy these scrumptious treats:
As a Dessert
These cookies are an excellent choice for concluding any meal, whether it’s a casual family dinner or an elegant dinner party. Their rich, velvety texture and sweet frosting provide a satisfying end to a culinary experience. To elevate their presentation, consider serving them on a decorative platter or cake stand. You can even dust them lightly with powdered sugar or cocoa powder for an extra touch of elegance. For a more gourmet feel, pair the cookies with a scoop of vanilla ice cream or a dollop of whipped cream, allowing guests to indulge in a delightful fusion of flavors and textures.
During Festive Occasions
The striking red hue of these cookies makes them a festive delight, perfect for various celebrations throughout the year. For Valentine’s Day, their romantic color can be complemented with heart-shaped decorations or by using pink frosting to add an extra touch of love. During Christmas, consider adorning them with festive sprinkles, edible glitter, or themed sugar decorations to create a holiday atmosphere. For birthdays, personalize the cookies with colorful frosting and decorative birthday candles, transforming them into unique party favors that guests will adore. You can even create a cupcake cookie tower, stacking them to create an impressive centerpiece that captures attention and adds to the celebratory mood.
With a Beverage
Pairing Frosted Red Velvet Cupcake Cookies with the right beverage can enhance the overall tasting experience. A classic pairing is a glass of cold milk, whose creaminess perfectly balances the sweetness of the cookies. For coffee lovers, a robust cup of freshly brewed coffee or a sweet latte can complement the rich flavors of the cookies, making for a delightful afternoon treat. If you prefer a lighter option, a cup of herbal tea, such as chamomile or mint, can provide a refreshing contrast. For a more indulgent experience, consider serving them alongside hot chocolate, topped with whipped cream for an extra layer of decadence. Experimenting with different beverage pairings can turn a simple snack into a sophisticated treat, perfect for gatherings or quiet evenings at home.
Creative Serving Ideas
To further enhance the presentation and enjoyment of Frosted Red Velvet Cupcake Cookies, consider these creative serving ideas:
- Cookie Sandwiches: Take two cookies and sandwich a layer of cream cheese frosting or flavored buttercream in between. This not only adds extra flavor but also creates a fun, handheld dessert that’s easy to enjoy.
- Mini Dessert Plates: Create a dessert platter by serving the cookies alongside other bite-sized treats, such as brownie bites or mini cheesecakes. This allows guests to sample a variety of flavors and textures in one sitting.
- Gift Packaging: Package individual cookies in clear cellophane bags tied with a ribbon for a thoughtful and delicious homemade gift. This is especially popular during the holiday season or for special occasions like weddings and baby showers.
- Themed Decor: When serving at events, consider theming the presentation to match the occasion. For example, use heart-shaped plates for Valentine’s Day or decorate the serving area with holiday-themed items to create an immersive experience.
Additional Tips
To ensure your cookies turn out perfectly every time, consider these detailed tips that enhance your baking experience and improve your final product:
Measure Ingredients Accurately
Baking is a precise science where the balance of ingredients can significantly affect the outcome of your cookies. To achieve the best results, it is essential to measure your ingredients accurately. Use the following methods for precise measurements:
- Use a Kitchen Scale: For the most accurate results, especially with flour and sugar, consider using a digital kitchen scale. Weighing ingredients provides a consistent measure that cups can’t always guarantee due to variations in packing.
- Level Off Dry Ingredients: When using measuring cups for dry ingredients, scoop the ingredient into the cup and then level it off with a straight edge, such as a knife or spatula. This technique ensures you’re not adding too much or too little.
- Liquid Measurements: Use a liquid measuring cup for wet ingredients, and ensure that you’re reading the measurement at eye level to avoid parallax errors.
Use Room Temperature Ingredients
The temperature of your ingredients plays a significant role in the texture and consistency of your cookie dough. Here’s why you should use room temperature ingredients:
- Easier Mixing: Room temperature butter, cream cheese, and eggs blend more easily into the dough, creating a uniform mixture without lumps. Cold ingredients can lead to a lumpy dough, which affects the final texture of your cookies.
- Better Incorporation of Air: When butter is at room temperature, it can trap air more effectively during creaming, which contributes to a lighter, fluffier cookie. Aim for butter that is slightly softened but not melted; it should yield slightly when pressed.
- Consistent Baking: Using room temperature ingredients helps the dough spread evenly while baking, leading to cookies that are consistently shaped and textured.
Adjust Food Coloring as Needed
If you’re aiming for a specific aesthetic with your cookies, particularly if they are festive or themed, the right amount of food coloring can make a significant difference:
- Start Small: When adding food coloring, start with a small amount and gradually increase until you reach your desired shade. This method allows you to have more control over the color intensity.
- Types of Food Coloring: Different types of food coloring (gel, liquid, powder) can vary in concentration. Gel coloring often provides vibrant results with less liquid added to the dough, while liquid may require more to achieve the same intensity. Be mindful of the type you’re using and adjust accordingly.
- Mix Thoroughly: Ensure that the food coloring is well incorporated into the dough to avoid streaks or uneven coloration. Use a spatula or mixer to blend it evenly.
Chill the Dough
Chilling your cookie dough can be a game-changer, especially if you’re working with soft or sticky mixtures:
- Prevent Spread: If your dough feels too soft or sticky, chilling it can help it firm up and prevent excessive spreading during baking. A quick chill of about 20 minutes in the refrigerator can significantly improve the shape and thickness of your cookies.
- Enhance Flavor: Chilling the dough also allows flavors to meld and mature, leading to a more complex taste in the final product. For some recipes, resting the dough overnight can yield even better results.
- Easier Handling: Cold dough is easier to handle and shape. If you’re rolling out the dough for cut-out cookies, chilling makes it less prone to sticking and helps maintain clean edges.
Frosting Consistency
Achieving the right consistency for your frosting is crucial for both taste and appearance. Here’s how to manage frosting effectively:
- Adjusting Consistency: If your frosting is too soft and runny, it can be difficult to pipe or spread. To thicken it, gradually add powdered sugar until you achieve the desired thickness. Conversely, if it’s too thick, add a small amount of milk or cream until it reaches a spreadable consistency.
- Chill if Necessary: If your frosting is too soft, chilling it in the refrigerator for 10-15 minutes can help firm it up for better application. This is especially important for intricate piping work or when you want to create defined shapes.
- Test Before Applying: Always do a quick test of your frosting’s consistency on a small piece of cookie or a plate. This allows you to see how it spreads or holds its shape before committing to frosting your entire batch.
By following these comprehensive tips, you can elevate your cookie-baking skills and ensure that each batch comes out perfectly, full of flavor, and visually appealing. Happy baking!
FAQs
What makes red velvet different from other chocolate cookies?
Red velvet is distinct due to its mild cocoa flavor, tender crumb, and unique red hue. The addition of vinegar and buttermilk (or in this case, milk powder and vinegar) contributes to its signature texture.
Can I use natural food coloring?
Yes, natural food coloring can be used, but the color may not be as vibrant.
How should I store these cookies?
Store the cookies in an airtight container in the refrigerator for up to a week. Let them come to room temperature before serving for the best texture.
Can I make these cookies ahead of time?
Absolutely! You can prepare the dough ahead and refrigerate it for up to 2 days. Baked cookies can also be frozen for up to 3 months.
What if I don’t have a cookie scoop?
You can use a tablespoon or ice cream scoop to portion the dough. Just ensure they are evenly sized for even baking.
Conclusion
Frosted Red Velvet Cupcake Cookies are a delightful fusion of flavors and textures, bringing the elegance of red velvet cake into the convenient form of a cookie. Whether you’re baking for a special occasion or simply to satisfy a sweet craving, these cookies are sure to impress. With their vibrant color, soft texture, and creamy frosting, they offer a unique and memorable treat. Happy baking!
Print
Red Velvet Cupcake Cookies Recipe 🍪❤️
Ingredients
For the Cookies:
- 1½ cups all-purpose flour
- ¼ cup unsweetened cocoa powder
- 1 tbsp instant milk powder
- 1 tbsp cornstarch
- ½ tsp baking powder
- ¼ tsp baking soda
- ¼ tsp salt
- ½ cup unsalted butter, softened
- 3 tbsp vegetable oil
- ½ cup packed brown sugar
- ½ cup granulated sugar
- 1 large egg
- 1 tsp vanilla extract
- 1 tsp vinegar
- 1–2 tsp red liquid-gel food coloring
For the Frosting:
- 3 oz cream cheese, softened
- 6 tbsp unsalted butter, softened
- 1 tsp vanilla extract
- 1½ cups powdered sugar
Instructions
1. Preheat Oven:
Set your oven to 350°F (175°C) and line two baking sheets with parchment paper.
2. Mix Dry Ingredients:
In a bowl, whisk together:
- Flour
- Cocoa powder
- Milk powder
- Cornstarch
- Baking powder
- Baking soda
- Salt
Set aside.
3. Combine Wet Ingredients:
In a large bowl, mix together:
- Softened butter
- Vegetable oil
- Brown sugar
- Granulated sugar
Mix until smooth. Add in:
- Egg
- Vanilla extract
- Vinegar
- Red food coloring
Mix well.
4. Combine Mixtures:
Gradually add the dry ingredients to the wet ingredients, stirring until a thick dough forms.
5. Scoop Cookies:
Use a cookie scoop to drop large mounds of dough (about 3-4 tablespoons) onto the prepared baking sheets, leaving about 3 inches between each.
6. Bake:
Bake for 12-15 minutes, until cookies are puffed and lightly golden at the edges.
7. Cool:
Let cookies cool on the baking sheet for 5 minutes, then transfer to a wire rack to cool completely.
8. Make Frosting:
Beat cream cheese and butter together until smooth. Add vanilla and powdered sugar, mixing until creamy. Chill the frosting if it’s too soft.
9. Frost Cookies:
Spread or pipe frosting onto cooled cookies. If any cookies are uneven, crumble them and sprinkle the crumbs over the frosted cookies for decoration.
Nutrition
- Serving Size: one normal portion
- Calories: 250
- Sugar: 20g
- Sodium: 150mg
- Fat: 13g
- Saturated Fat: 8g
- Carbohydrates: 31g
- Fiber: 1g
- Protein: 2g
- Cholesterol: 40mg


