
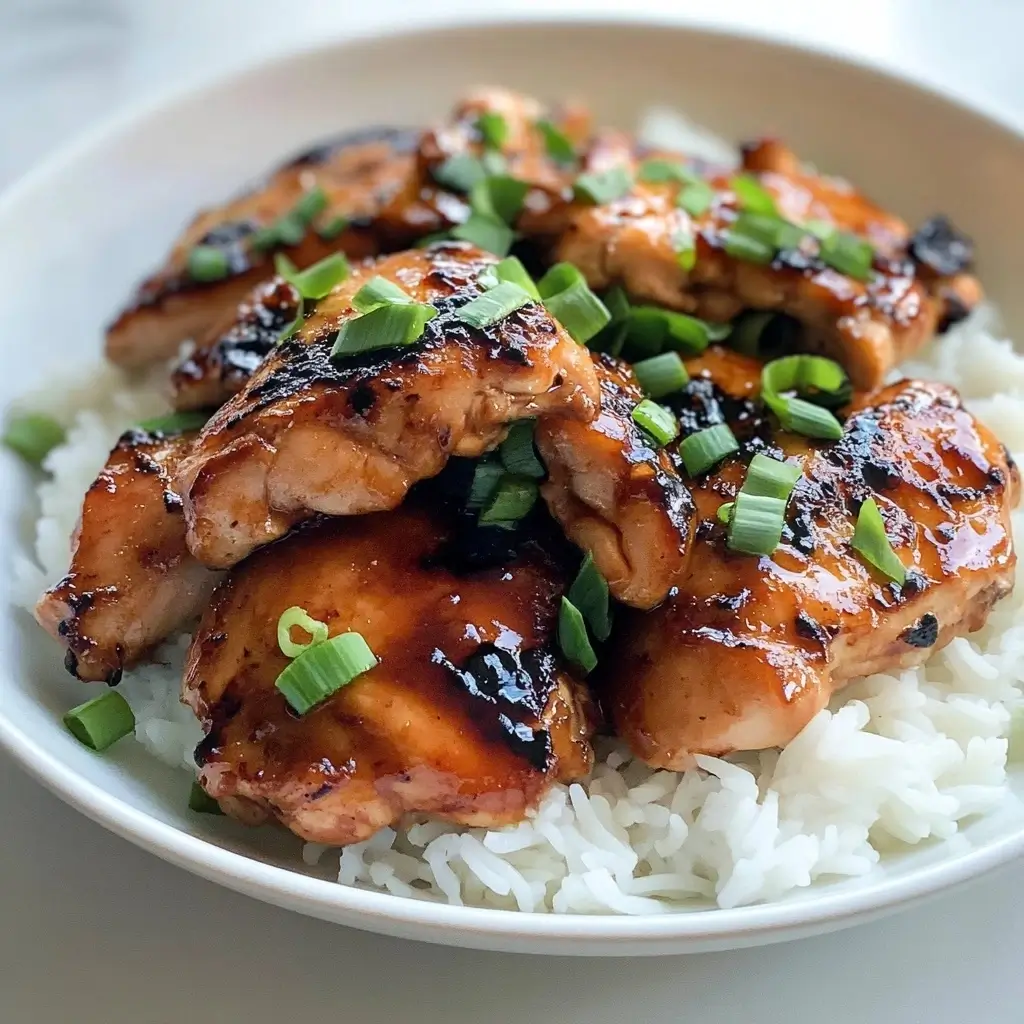

In the realm of quick and delicious meals, Quick Garlic Miso Chicken stands out as a flavor-packed, easy-to-make dish that will leave your taste buds singing. Whether you’re looking for a quick weeknight meal or a dish to impress guests, this recipe has you covered. Using a blend of miso paste, apple cider vinegar, and other rich ingredients, this dish offers a harmonious balance of savory, sweet, and umami flavors. Plus, it’s cooked in an air fryer, making it a healthier option without sacrificing taste. Read on to discover how to create this culinary delight and enjoy a meal that’s both nutritious and satisfying.
Ingredients
To make this delicious Quick Garlic Miso Chicken, you’ll need the following ingredients. Each item plays a crucial role in enhancing the overall flavor profile of the dish:
- 8 boneless, skinless chicken thighs
- 4 tablespoons minced green onions
- 2 tablespoons white miso paste
- 2 tablespoons apple cider vinegar (alternative to rice vinegar)
- 2 tablespoons mirin (or use a splash of water)
- 1 tablespoon honey
- 1 tablespoon soy sauce
- 1 tablespoon minced garlic
Instructions
Creating this delectable dish is simple and straightforward. Follow these step-by-step instructions to ensure your chicken turns out perfectly every time.
1. Mix Sauce
In a mixing bowl, combine the following ingredients to create a flavorful sauce:
- White miso paste
- Apple cider vinegar
- Mirin (or a splash of water)
- Honey
- Soy sauce
- Minced garlic
Stir these ingredients together until you achieve a smooth and well-blended sauce.
2. Coat Chicken
Take the boneless, skinless chicken thighs and add them to the bowl containing the sauce. Massage the sauce into the chicken until each piece is thoroughly coated. This ensures that the flavors penetrate deeply into the meat, resulting in a delicious and aromatic dish.
3. Prepare Air Fryer
Next, prepare your air fryer for cooking:
- Line the air fryer basket with parchment paper to prevent the chicken from sticking.
- Lay the coated chicken thighs in a single layer in the basket.
- Pour any remaining sauce over the chicken to maximize flavor.
4. Cook
Set your air fryer to 320°F (160°C) and cook the chicken for 20 minutes. Halfway through the cooking time, flip the chicken to ensure even cooking on both sides. For an extra crispy finish, broil the chicken for an additional 2 minutes.
5. Serve
Before serving, check that the internal temperature of the chicken has reached 165°F (75°C) to ensure it’s fully cooked. Baste the chicken with the delicious juices from the bottom of the air fryer basket. Garnish with freshly minced green onions for added flavor and a pop of color.
Nutrition Facts
Understanding the nutritional value of your meals is essential for maintaining a balanced diet. Here’s the nutritional breakdown per serving of Quick Garlic Miso Chicken:
- Calories: Approximately 300
- Protein: 24g
- Carbohydrates: 10g
- Fat: 15g
This dish offers a good balance of macronutrients, making it an excellent choice for those looking to enjoy a flavorful yet nutritious meal.
How to Serve
Quick Garlic Miso Chicken is not only packed with flavor but also incredibly versatile, making it an excellent choice for any meal. Below are several delightful serving suggestions that will enhance your dining experience and cater to different tastes and dietary preferences.
Over Rice
One of the simplest and most satisfying ways to serve Quick Garlic Miso Chicken is over a bed of rice. The fluffy grains of rice act as a perfect canvas to soak up the savory miso sauce, providing a delightful contrast in textures.
- Jasmine Rice: The aromatic qualities of jasmine rice complement the umami flavors of the garlic miso chicken beautifully. Its slightly sticky texture allows it to cling to the sauce, ensuring that every bite is flavorful.
- Brown Rice: For a heartier and more nutritious option, consider serving the chicken over brown rice. Rich in fiber and nutrients, brown rice adds a nutty flavor that pairs well with the dish’s savory profile.
- Coconut Rice: For a tropical twist, try making coconut rice. The subtle sweetness from the coconut milk balances the savory notes of the chicken, creating a harmonious blend of flavors.
With Vegetables
Adding vegetables to your meal not only enhances its nutritional value but also introduces vibrant colors and textures to your plate. Here are some vegetable pairings that complement Quick Garlic Miso Chicken perfectly:
- Roasted Vegetables: Roasting vegetables like broccoli, asparagus, or bell peppers brings out their natural sweetness and adds a delightful charred flavor. Toss them in olive oil, salt, and pepper before roasting to enhance their taste. The crispy edges of the vegetables provide a delightful contrast to the tender chicken.
- Steamed Vegetables: For a lighter option, steaming vegetables retains their nutrients while providing a clean and fresh taste. Consider broccoli, snap peas, or carrots, which can be seasoned lightly with salt or a splash of lemon juice to brighten their flavor.
- Sautéed Greens: Sautéing greens such as spinach, kale, or bok choy with garlic and a splash of soy sauce can create a delicious and nutrient-rich side dish. The earthy flavors of the greens pair excellently with the garlic miso sauce.
In a Salad
Transform Quick Garlic Miso Chicken into a refreshing salad that is both light and satisfying. This option is ideal for those seeking a healthy meal without sacrificing flavor.
- Mixed Greens: Start with a base of mixed greens such as arugula, spinach, or romaine. The peppery notes of arugula or the crunch of romaine can add depth to your salad.
- Add Colorful Vegetables: Incorporate cherry tomatoes for a burst of sweetness, cucumber for crunch, and shredded carrots for a pop of color. These ingredients not only enhance the visual appeal but also add a variety of textures.
- Dress It Right: A light vinaigrette made from olive oil, apple cider vinegar, and a touch of honey can enhance the salad’s freshness without overpowering the flavors of the chicken. Alternatively, a miso-based dressing can echo the flavors in the chicken and create a cohesive dish.
- Toppings: Consider adding toppings such as sliced almonds or sesame seeds for added crunch, or avocado for creaminess. These elements can take your salad to the next level, turning it into a satisfying meal.
Conclusion
Quick Garlic Miso Chicken can be enjoyed in myriad ways, making it a truly adaptable dish. Whether served over rice, paired with vibrant vegetables, or incorporated into a fresh salad, each method showcases the savory flavors of the chicken while allowing you to customize your meal according to your preferences. With these serving suggestions, you can easily create a delicious and balanced meal that caters to any occasion or dietary need.
Additional Tips
To elevate your cooking experience and ensure that your Quick Garlic Miso Chicken turns out perfectly every time, consider implementing the following comprehensive tips:
1. Marinate Longer
While the recipe may suggest a brief marination period, taking the time to marinate the chicken for an hour or even up to 24 hours can significantly enhance the dish’s flavor profile. This extended marination allows the chicken to absorb the rich, umami notes of the miso paste and the aromatic qualities of garlic, resulting in a more flavorful and tender meat. If you opt for a longer marination, make sure to store the chicken in the refrigerator to maintain food safety. Additionally, consider using a resealable plastic bag for marinating; this method ensures that the marinade evenly coats the chicken and allows for better flavor penetration.
2. Use Fresh Ingredients
The quality of your ingredients can make a world of difference in your dish. For this recipe, fresh garlic and green onions are essential. Fresh garlic has a more robust flavor compared to pre-minced or powdered options, offering a pungent aroma that enhances the overall taste. When preparing your garlic, consider mincing it finely to release its essential oils and maximize flavor. As for green onions, opt for vibrant, firm stalks with no wilting or browning. Chopping the green onions just before serving will preserve their crispness and add a fresh, bright flavor that balances the richness of the miso and garlic.
3. Adjust Sweetness
The balance of flavors is key to a well-rounded dish. In this recipe, honey serves as a natural sweetener that complements the savory miso, but personal taste can vary significantly. Start with the recommended amount of honey and taste the marinade before adding more. If you prefer a more pronounced sweetness, gradually increase the honey, tasting as you go, until you reach your desired balance. Alternatively, if you find the mix too sweet, consider adding a splash of soy sauce or a dash of vinegar to bring back some acidity, which can help to cut through the sweetness and enhance the overall flavor complexity.
4. Experiment with Miso Varieties
Miso comes in various types, each with its unique flavor profile. The most common types include white (shiro), yellow (shinshu), and red (aka) miso. White miso is milder and slightly sweeter, making it ideal for those who prefer a less intense flavor. Yellow miso provides a balanced taste, while red miso is more robust and salty. Feel free to experiment with different varieties to find the one that best suits your palate. You can even mix different types of miso for a more layered flavor experience.
5. Incorporate Additional Aromatics
To further enhance the flavor, consider adding other aromatics to the marinade. Ingredients like ginger, sesame oil, or a splash of rice vinegar can introduce new dimensions to the dish. Fresh ginger, for example, adds a spicy zing that pairs well with the savory notes of miso and garlic. A touch of sesame oil can contribute a nutty aroma, while rice vinegar can provide acidity that balances the sweetness and richness of the sauce.
6. Choose the Right Cooking Method
While the recipe may specify a particular cooking method, feel free to adapt based on your preferences and available equipment. Grilling, baking, or pan-searing can all yield delicious results, but each method offers different textures and flavors. For instance, grilling can impart a smoky flavor and crispy exterior, while baking guarantees even cooking and moisture retention. If you choose to pan-sear, ensure that your pan is adequately heated before adding the chicken to achieve a beautiful caramelization.
7. Serve with Complementary Sides
To create a well-rounded meal, consider pairing your Quick Garlic Miso Chicken with sides that complement its flavors. Steamed rice or quinoa can serve as a neutral base to soak up the rich sauce, while sautéed vegetables such as bok choy, bell peppers, or snap peas can add freshness and crunch. For a complete meal, you might also consider a simple salad with a citrus vinaigrette to introduce brightness and acidity.
8. Store Leftovers Properly
If you find yourself with leftovers, storing them correctly is vital to maintain flavor and texture. Allow the chicken to cool completely before transferring it to an airtight container. Store it in the refrigerator, where it will keep well for up to three days. When reheating, consider using a skillet over medium heat to preserve the chicken’s moisture, adding a splash of water or broth if necessary to prevent drying out.
By incorporating these additional tips, you will not only enhance your cooking experience but also ensure that your Quick Garlic Miso Chicken is a delightful dish that impresses at every meal. Happy cooking!
FAQs
Can I use a different cut of chicken?
Absolutely! While boneless, skinless chicken thighs are recommended for their tenderness and flavor, you can also use chicken breasts. Adjust the cooking time accordingly, as chicken breasts may require a slightly longer cooking time.
Can I make this dish without an air fryer?
Yes, you can! If you don’t have an air fryer, bake the chicken in a preheated oven at 375°F (190°C) for 25-30 minutes, or until the internal temperature reaches 165°F (75°C).
What can I substitute for mirin?
If you don’t have mirin on hand, you can use a splash of water with a teaspoon of sugar to mimic its sweetness. Alternatively, rice vinegar or a dry white wine can be used as a substitute.
How do I store leftovers?
Store any leftovers in an airtight container in the refrigerator for up to three days. Reheat in the air fryer or oven to retain the crispy texture.
Conclusion
Quick Garlic Miso Chicken is a delightful dish that combines ease of preparation with rich, savory flavors. Whether you’re a seasoned chef or a beginner in the kitchen, this recipe is sure to become a staple in your culinary repertoire. With its versatile serving options and nutrition-packed profile, it’s perfect for any occasion. So, gather your ingredients, fire up your air fryer, and enjoy a meal that’s as satisfying as it is delicious. Bon appétit!
Print
Quick Garlic Miso Chicken Recipe 🍗
Ingredients
- 8 boneless, skinless chicken thighs
- 4 tablespoons minced green onions
- 2 tablespoons white miso paste
- 2 tablespoons apple cider vinegar (alternative to rice vinegar)
- 2 tablespoons mirin (or use a splash of water)
- 1 tablespoon honey
- 1 tablespoon soy sauce
- 1 tablespoon minced garlic
Instructions
1. Mix Sauce
In a mixing bowl, combine the following ingredients to create a flavorful sauce:
- White miso paste
- Apple cider vinegar
- Mirin (or a splash of water)
- Honey
- Soy sauce
- Minced garlic
Stir these ingredients together until you achieve a smooth and well-blended sauce.
2. Coat Chicken
Take the boneless, skinless chicken thighs and add them to the bowl containing the sauce. Massage the sauce into the chicken until each piece is thoroughly coated. This ensures that the flavors penetrate deeply into the meat, resulting in a delicious and aromatic dish.
3. Prepare Air Fryer
Next, prepare your air fryer for cooking:
- Line the air fryer basket with parchment paper to prevent the chicken from sticking.
- Lay the coated chicken thighs in a single layer in the basket.
- Pour any remaining sauce over the chicken to maximize flavor.
4. Cook
Set your air fryer to 320°F (160°C) and cook the chicken for 20 minutes. Halfway through the cooking time, flip the chicken to ensure even cooking on both sides. For an extra crispy finish, broil the chicken for an additional 2 minutes.
5. Serve
Before serving, check that the internal temperature of the chicken has reached 165°F (75°C) to ensure it’s fully cooked. Baste the chicken with the deli
Nutrition
- Serving Size: one normal portion
- Calories: Approximately 300
- Fat: 15g
- Carbohydrates: 10g
- Protein: 24g


