

Of all the quick and easy meals in my culinary arsenal, there is one that reigns supreme in our household: the humble quesadilla, transformed into perfectly shareable wedges. It’s more than just a recipe for us; it’s a tradition. I can still picture my kids, small and wide-eyed, reaching their little hands for a warm, cheesy triangle after a long day at the park. It was our go-to “we’re too tired to cook” dinner, our “friends are coming over unexpectedly” appetizer, and our “let’s have a movie night on the couch” feast. The magic lies in its simplicity and the universal appeal of that glorious cheese pull. The sound of the tortilla crisping in the pan, the aroma of melting cheese filling the kitchen—it’s a sensory experience that signals comfort and satisfaction are just minutes away. This recipe isn’t about complicated techniques or exotic ingredients; it’s about taking a few simple staples and turning them into something universally loved, a golden-brown parcel of joy that never fails to bring smiles to the faces around my table.
Why These Cheesy Quesadilla Wedges Are a Culinary Masterpiece
Before we dive into the nuts and bolts of creating these delectable treats, let’s talk about why this specific method—quesadillas cut into wedges—will become your new favorite way to enjoy this classic dish. It’s a simple change, but it elevates the entire experience from a simple folded-over meal to an interactive, shareable, and endlessly versatile culinary event.
- Ultimate Shareability: Cutting a full-moon quesadilla into wedges, like a pizza, instantly makes it a communal dish. It’s perfect for party platters, family-style dinners, or after-school snacks. Everyone can grab a piece (or five) without committing to a whole quesadilla.
- The Perfect Dipping Vessel: The triangular shape of the wedge is engineered for dipping. The sturdy, sealed edge provides a perfect handle, while the pointed tip is ideal for scooping up generous amounts of salsa, guacamole, or sour cream. It maximizes the topping-to-quesadilla ratio in every single bite.
- Incredible Versatility: This recipe serves as a foundational blueprint. We’ll start with the classic cheese quesadilla, the gold standard of comfort food. But from there, the possibilities are infinite. We will explore how to incorporate chicken, beef, beans, and a rainbow of vegetables to cater to every palate and dietary need.
- Speed and Simplicity: In a world of complex, time-consuming recipes, the quesadilla stands as a testament to the beauty of simplicity. From pantry to plate, you can have these warm, crispy wedges ready in under 15 minutes, making it the undisputed champion of weeknight dinners and last-minute cravings.
- Kid-Friendly and Approved: There are few foods as universally accepted by children as a cheese quesadilla. The familiar flavors, the fun-to-eat shape, and the lack of “scary” ingredients make it a guaranteed win with even the pickiest eaters.
The Ultimate Quesadilla Wedges: Ingredients You’ll Need
The beauty of a perfect quesadilla lies in the quality and harmony of just a few key ingredients. While you can certainly get creative, mastering the basics is the first step to quesadilla nirvana. This recipe is for a classic cheese quesadilla, which serves as the perfect canvas for any additions you desire.
- Large Flour Tortillas: 4 (10-inch “burrito size” tortillas work best for creating large, shareable wedges)
- Shredded Cheese: 3 cups of a good melting cheese blend.
- Unsalted Butter: 2 tablespoons (or a neutral oil like canola or avocado oil)
- Optional for Garnish: Fresh cilantro, chopped green onions.
A Deep Dive into the Core Components
The Tortilla: While corn tortillas have their place in Mexican cuisine, large flour tortillas are the undisputed champion for making quesadillas. Their pliability allows them to be folded and filled without cracking, and they crisp up to a beautiful golden-brown, offering a satisfying yet tender bite. Look for the 10-inch or “burrito size” tortillas for the best results, as they give you ample surface area for cheese and fillings.
The Cheese (The Heart and Soul): This is where you can truly make a quesadilla your own. While any melting cheese will work, a blend offers the best of all worlds: flavor and that coveted “cheese pull.”
- The Gold Standard Blend: For the absolute best results, I recommend a mix of Monterey Jack and a medium Cheddar. Monterey Jack is the star player for meltability—it’s mild, creamy, and creates that iconic, stretchy pull. Cheddar brings a sharper, more complex flavor to the party, cutting through the richness. A 50/50 blend is a great starting point.
- Authentic Mexican Cheeses: To elevate your quesadilla, seek out Mexican cheeses. Oaxaca cheese is the king of melting, often sold in a ball that you shred like string cheese. Asadero is another fantastic choice, known for its buttery flavor and smooth melt.
- Pro Tip: Shred Your Own! Pre-shredded cheese is convenient, but it’s coated in starches like potato starch or cellulose to prevent clumping. These agents inhibit a perfectly smooth, gooey melt. Buying a block of cheese and shredding it yourself takes two extra minutes but pays off tenfold in the final texture and flavor.
The Fat (For Frying): You need a little fat in the pan to ensure the tortilla crisps up evenly and doesn’t burn.
- Butter: Offers unparalleled flavor. It browns beautifully and gives the tortilla a rich, savory taste. Just be sure to use medium heat, as butter can burn quickly.
- Oil: A neutral oil like canola, vegetable, or avocado oil has a higher smoke point, making it more forgiving. It will yield a slightly crispier, more “fried” texture than butter.
- The Best of Both Worlds: For the ultimate quesadilla, use a combination of both! A teaspoon of oil with a pat of butter gives you the high-heat tolerance of the oil and the delicious flavor of the butter.
Step-by-Step Instructions for Perfect Quesadilla Wedges
Follow these simple steps to achieve a quesadilla that is crispy on the outside, gloriously gooey on the inside, and perfectly structured for slicing into wedges.
Step 1: Prepare Your Station (Mise en Place)
Before the heat hits the pan, get everything ready. Shred your cheese into a bowl. If you’re using any additional fillings like cooked chicken or sautéed vegetables, have them prepared and ready to go. Place your tortillas, butter, and a spatula next to your stove. This preparation ensures the cooking process is smooth and fast.
Step 2: Heat the Pan
Place a large non-stick skillet, cast-iron pan, or griddle over medium heat. A common mistake is using heat that’s too high, which burns the tortilla before the cheese has a chance to fully melt. Medium heat is the sweet spot for a golden-brown exterior and a perfectly melted interior.
Step 3: Add the First Tortilla
Once the pan is preheated, melt about half a tablespoon of butter (or add a teaspoon of oil) and swirl it to coat the surface. Place one tortilla flat in the pan. Let it warm for about 30 seconds, just until it becomes soft and pliable.
Step 4: Build Your Quesadilla
Working quickly, sprinkle about ¾ cup of your shredded cheese blend evenly over the entire surface of the tortilla in the pan. Be sure to go all the way to the edges. This “edge-to-edge” cheese technique is the secret to a flavorful quesadilla and helps glue the two tortillas together. If you are adding other fillings (like cooked chicken, beans, or veggies), sprinkle them evenly over the cheese now.
Step 5: Top and Press
Place a second tortilla directly on top of the cheese-covered one. Use your spatula to gently press down on the top tortilla. This helps the layers meld together and encourages even melting and browning.
Step 6: Cook to Golden Perfection
Let the quesadilla cook for 2-3 minutes on the first side. You can peek underneath by lifting an edge with your spatula. You’re looking for a beautiful, even golden-brown color and crispy texture. The cheese along the edges should be visibly melted and starting to bubble.
Step 7: The Flip
This can be the most intimidating part, but it’s easy with the right technique. Slide your spatula all the way under the center of the quesadilla. In one swift, confident motion, flip it over. If a little cheese escapes, don’t worry—those crispy bits of fried cheese (often called “frico”) are a delicious bonus!
Step 8: Finish Cooking
Add another half-tablespoon of butter to the pan if it looks dry, letting it melt around the edges of the quesadilla. Press down gently with the spatula again and cook for another 2-3 minutes on the second side, until it’s equally golden-brown and the cheese in the center is completely melted and gooey.
Step 9: Rest and Cut
Slide the finished quesadilla from the pan onto a cutting board. This is a crucial step: let it rest for 1-2 minutes before cutting. This allows the molten cheese to set up slightly, which will prevent it from all oozing out the moment you slice into it.
Step 10: Slice into Wedges
Using a sharp chef’s knife or a pizza cutter, slice the quesadilla into 6 or 8 equal triangular wedges. A pizza cutter is especially effective for a clean, quick cut. Arrange the wedges on a platter and serve immediately. Repeat the process with the remaining tortillas and cheese.
Nutrition Facts
Please note that these values are an approximation for a basic cheese quesadilla. The final nutritional content will vary significantly based on the type and amount of cheese, the type of tortilla, and any additional fillings used.
- Servings: 4 (with each person having half a quesadilla, or 3-4 wedges)
- Calories Per Serving (approximate): 450-550 kcal
This estimate assumes 10-inch flour tortillas and a full-fat cheddar/Monterey Jack cheese blend.
Preparation and Cooking Time
This recipe is the definition of a quick meal, perfect for any occasion when time is short but appetites are big.
- Preparation Time: 5 minutes (includes shredding cheese and gathering ingredients)
- Cooking Time: 5-6 minutes per quesadilla
- Total Time: Approximately 15-20 minutes for two full quesadillas (4 servings)
How to Serve Your Quesadilla Wedges: Dips, Toppings, and Pairings
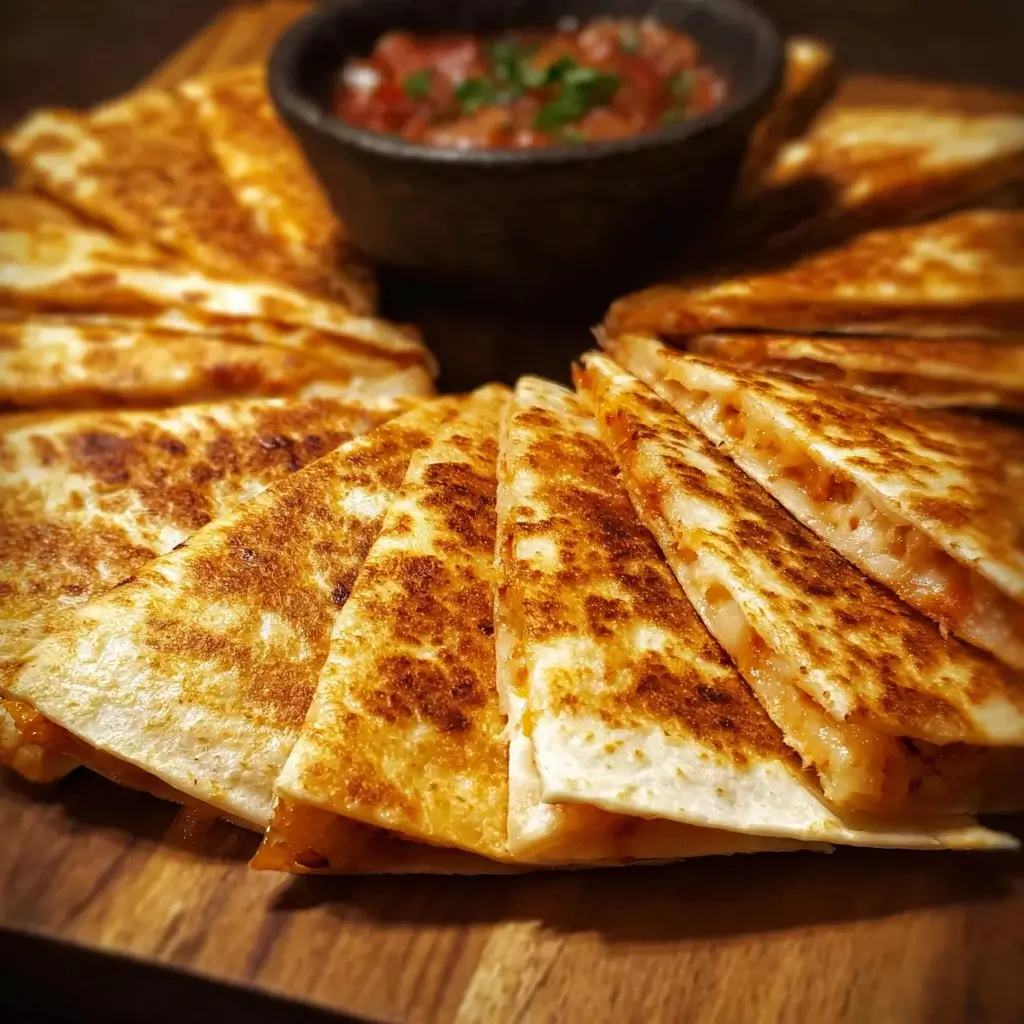
A quesadilla is fantastic on its own, but it becomes a true feast when paired with the right accompaniments. Serving the wedges on a large platter surrounded by small bowls of dips and toppings creates an interactive and visually appealing meal.
The Essential Dips (The Holy Trinity)
- Classic Salsa: A vibrant, slightly acidic salsa is the perfect counterpoint to the rich, cheesy quesadilla.
- Pico de Gallo: A fresh, chunky mix of diced tomatoes, onion, cilantro, jalapeño, and lime juice.
- Salsa Verde: A tangy and bright salsa made from tomatillos, cilantro, and green chiles.
- Restaurant-Style Roasted Tomato Salsa: A smooth, smoky salsa that clings beautifully to each wedge.
- Creamy Guacamole: No quesadilla platter is complete without a bowl of rich, creamy guacamole. The combination of avocado, lime, and cilantro is a classic pairing for a reason.
- Sour Cream or Mexican Crema: A dollop of cool, tangy sour cream or its thinner, less tangy cousin, Mexican Crema, adds a wonderful cooling element that balances out any spice from salsas or fillings.
Next-Level Toppings for Sprinkling
- Fresh Cilantro: Roughly chopped cilantro adds a burst of fresh, herbaceous flavor.
- Diced White Onion: A sprinkle of finely diced white onion provides a sharp, clean crunch.
- Pickled Jalapeños: For those who like a bit of heat and tangy vinegar bite.
- Crumbled Cotija Cheese: This salty, crumbly Mexican cheese adds another layer of savory flavor and texture when sprinkled over the warm wedges.
- A Drizzle of Hot Sauce: Let everyone choose their favorite hot sauce to customize their heat level.
Making It a Complete Meal
Transform your quesadilla wedges from a snack into a hearty dinner with these simple side dishes:
- Cilantro-Lime Rice: A fluffy and flavorful rice that complements the Mexican flavors perfectly.
- Refried Beans or Black Beans: A scoop of seasoned beans adds protein and makes the meal more substantial.
- Simple Mexican-Inspired Salad: A crisp salad of romaine lettuce, corn, black beans, cherry tomatoes, and a light lime vinaigrette.
5 Pro Tips for Restaurant-Quality Quesadillas at Home
Elevate your quesadilla game from good to unforgettable with these five essential tips from a seasoned pro.
1. Master the Heat Management: As mentioned, medium heat is crucial. Too low, and the cheese won’t melt properly by the time the tortilla is done. Too high, and you’ll have a burnt tortilla with a solid block of cheese inside. Find the medium setting on your stove and let the pan heat up fully before you start. This ensures an even, golden-brown crust and perfectly melted cheese every time.
2. Don’t Overstuff Your Quesadilla: It’s tempting to load your quesadilla with a mountain of cheese and fillings, but restraint is key. Overstuffing leads to two major problems: the fillings won’t heat through properly, and when you flip it, the contents are likely to spill out, creating a mess. A thin, even layer of cheese and fillings is all you need for a perfectly balanced and structurally sound quesadilla.
3. Create a “Cheese Seal”: When adding your cheese, make sure to sprinkle it all the way to the very edge of the bottom tortilla. As it melts, this outer ring of cheese will act like a delicious, edible glue, sealing the two tortillas together. This not only keeps your fillings contained but also ensures every bite has cheesy goodness.
4. The Two-Handed Flip Technique: For a foolproof flip, don’t rely on the spatula alone. Slide the spatula under the center. Place your other hand (carefully!) flat on top of the quesadilla to hold it steady. In one quick, coordinated movement, turn your wrist to flip the quesadilla over. Your hand provides stability and prevents the top tortilla from sliding off.
5. Embrace the Crispy Cheese Edges: Don’t be afraid if a little cheese oozes out the sides and fries directly on the pan. This is not a mistake; it’s a bonus! These crispy, lacey bits of fried cheese are called “frico” and they add an incredibly savory, crunchy texture to the edges of your quesadilla wedges. Many chefs create this effect on purpose.
Frequently Asked Questions (FAQ) About Making Quesadilla Wedges
Here are answers to some of the most common questions people have when making this simple yet delicious dish.
1. Can I make quesadillas ahead of time for a party?
Yes, you can. The best method is to cook them fully, let them cool completely, and then store them in the refrigerator, either whole or pre-cut. To reheat, place them on a baking sheet in a single layer and warm them in an oven at 375°F (190°C) for about 5-10 minutes, or until heated through and re-crisped. Reheating in the microwave is not recommended as it will make the tortillas soft and soggy.
2. What is the best pan to use for making quesadillas?
A well-seasoned cast-iron skillet is the absolute best choice. It retains and distributes heat incredibly evenly, giving you a superior golden-brown crust. A good quality non-stick skillet is a close second and is more forgiving for beginners. If you’re making a large batch, an electric griddle is a fantastic tool as it allows you to cook two or three at once.
3. My quesadillas always turn out soggy. What am I doing wrong?
Sogginess is usually caused by excess moisture. If you’re adding fillings like vegetables (onions, bell peppers) or beans, make sure they are as dry as possible. Sauté your vegetables until their moisture has cooked off, and drain and rinse your beans very well. Also, avoid using watery salsas inside the quesadilla; save them for dipping.
4. Can I make these quesadilla wedges gluten-free?
Absolutely! The easiest way is to substitute the flour tortillas with corn tortillas. They will be smaller and have a more rustic, corn-forward flavor, but they are delicious. You can also find excellent gluten-free flour tortillas in most major grocery stores now, which will give you a result very similar to the original recipe.
5. How do I get my quesadillas to be extra crispy?
For maximum crispiness, a few things are key. First, use a combination of butter and oil in the pan. Second, don’t be afraid to press down on the quesadilla with your spatula as it cooks; this increases the contact with the hot pan. Finally, ensure you’re cooking on consistent medium heat. This longer, slower cooking time allows the moisture in the tortilla to evaporate, leading to a much crispier final product.

Quesadillas Cut Into Wedges recipe
Ingredients
-
Large Flour Tortillas: 4 (10-inch “burrito size” tortillas work best for creating large, shareable wedges)
-
Shredded Cheese: 3 cups of a good melting cheese blend.
-
Unsalted Butter: 2 tablespoons (or a neutral oil like canola or avocado oil)
-
Optional for Garnish: Fresh cilantro, chopped green onions.
Instructions
Step 1: Prepare Your Station (Mise en Place)
Before the heat hits the pan, get everything ready. Shred your cheese into a bowl. If you’re using any additional fillings like cooked chicken or sautéed vegetables, have them prepared and ready to go. Place your tortillas, butter, and a spatula next to your stove. This preparation ensures the cooking process is smooth and fast.
Step 2: Heat the Pan
Place a large non-stick skillet, cast-iron pan, or griddle over medium heat. A common mistake is using heat that’s too high, which burns the tortilla before the cheese has a chance to fully melt. Medium heat is the sweet spot for a golden-brown exterior and a perfectly melted interior.
Step 3: Add the First Tortilla
Once the pan is preheated, melt about half a tablespoon of butter (or add a teaspoon of oil) and swirl it to coat the surface. Place one tortilla flat in the pan. Let it warm for about 30 seconds, just until it becomes soft and pliable.
Step 4: Build Your Quesadilla
Working quickly, sprinkle about ¾ cup of your shredded cheese blend evenly over the entire surface of the tortilla in the pan. Be sure to go all the way to the edges. This “edge-to-edge” cheese technique is the secret to a flavorful quesadilla and helps glue the two tortillas together. If you are adding other fillings (like cooked chicken, beans, or veggies), sprinkle them evenly over the cheese now.
Step 5: Top and Press
Place a second tortilla directly on top of the cheese-covered one. Use your spatula to gently press down on the top tortilla. This helps the layers meld together and encourages even melting and browning.
Step 6: Cook to Golden Perfection
Let the quesadilla cook for 2-3 minutes on the first side. You can peek underneath by lifting an edge with your spatula. You’re looking for a beautiful, even golden-brown color and crispy texture. The cheese along the edges should be visibly melted and starting to bubble.
Step 7: The Flip
This can be the most intimidating part, but it’s easy with the right technique. Slide your spatula all the way under the center of the quesadilla. In one swift, confident motion, flip it over. If a little cheese escapes, don’t worry—those crispy bits of fried cheese (often called “frico”) are a delicious bonus!
Step 8: Finish Cooking
Add another half-tablespoon of butter to the pan if it looks dry, letting it melt around the edges of the quesadilla. Press down gently with the spatula again and cook for another 2-3 minutes on the second side, until it’s equally golden-brown and the cheese in the center is completely melted and gooey.
Step 9: Rest and Cut
Slide the finished quesadilla from the pan onto a cutting board. This is a crucial step: let it rest for 1-2 minutes before cutting. This allows the molten cheese to set up slightly, which will prevent it from all oozing out the moment you slice into it.
Step 10: Slice into Wedges
Using a sharp chef’s knife or a pizza cutter, slice the quesadilla into 6 or 8 equal triangular wedges. A pizza cutter is especially effective for a clean, quick cut. Arrange the wedges on a platter and serve immediately. Repeat the process with the remaining tortillas and cheese.
Nutrition
- Serving Size: one normal portion
- Calories: 450-550


