

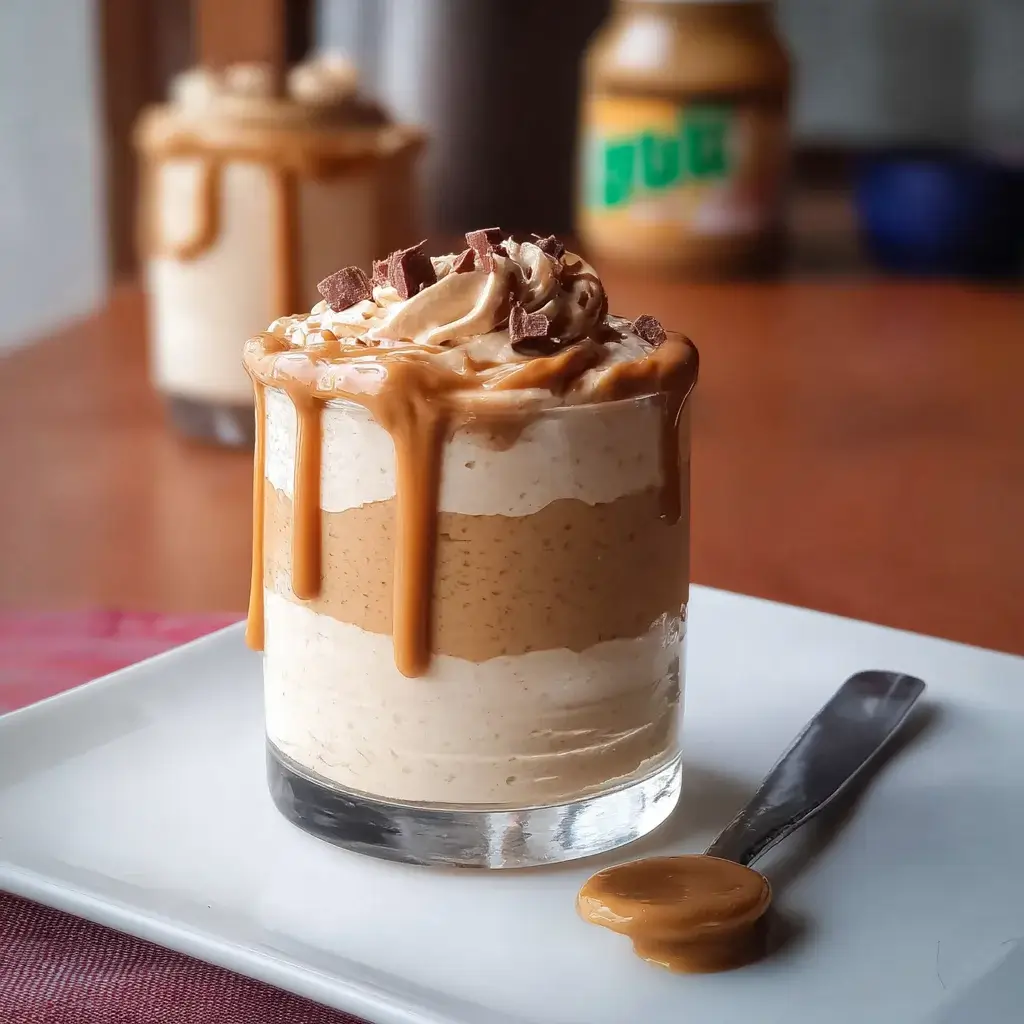

The Ultimate Creamy Peanut Butter Mousse Recipe
Welcome to what will soon become your go-to dessert for any and every occasion. This recipe is designed for maximum flavor and the most luxuriously smooth texture with minimal effort. It strikes the perfect balance, being rich and decadent without feeling heavy. It’s the kind of dessert that elicits sighs of contentment and demands a second helping. Prepare to fall in love with the silkiest, most flavorful peanut butter mousse you’ve ever tasted.
Ingredients for a Dreamy Peanut Butter Mousse
The magic of this recipe lies in its simplicity. Each ingredient is chosen for a specific purpose to create the perfect texture and flavor profile. Using high-quality, full-fat ingredients is the key to achieving a truly decadent result.
- Cream Cheese: 8 ounces (226g), full-fat, softened to room temperature. This is the secret weapon. It provides a stable base, a subtle tang that cuts through the richness, and an incredibly creamy mouthfeel that you can’t achieve with whipped cream alone.
- Creamy Peanut Butter: 1 cup (256g). Use a standard commercial creamy peanut butter like Jif or Skippy. These contain emulsifiers that keep the mousse smooth and prevent it from separating. Natural peanut butters that require stirring can sometimes result in a grainy texture.
- Powdered Sugar: 1 cup (120g), sifted. Also known as confectioners’ sugar, this dissolves instantly into the cream cheese base, ensuring a silky-smooth texture without any grittiness that granulated sugar might leave behind. Sifting removes any lumps.
- Pure Vanilla Extract: 2 teaspoons. Vanilla doesn’t make it taste like vanilla; it enhances and rounds out the other flavors, making the peanut butter taste even more complex and delicious.
- Heavy Whipping Cream: 1 ½ cups (360ml), very cold. This is what gives the mousse its light, airy, “cloud-like” quality. The high-fat content allows it to be whipped into stable peaks, incorporating air and creating volume. It must be cold to whip up properly.
- A Pinch of Salt: ¼ teaspoon (optional, but recommended). If you’re using unsalted peanut butter, this is essential. Even with regular peanut butter, a tiny pinch of salt elevates the sweetness and brings out the nutty flavor.
Step-by-Step Instructions for the Perfect Peanut Butter Mousse
Follow these instructions carefully to ensure your mousse is perfectly smooth, airy, and stable. The process is broken down into two main parts: creating the flavorful peanut butter base and then folding in the light, airy whipped cream.
Part 1: Creating the Rich Peanut Butter Base
- Beat the Cream Cheese: In a large mixing bowl, place your softened cream cheese. It is crucial that the cream cheese is at room temperature to avoid lumps. Using an electric hand mixer or a stand mixer fitted with the paddle attachment, beat the cream cheese on medium speed for about 1-2 minutes until it’s completely smooth and creamy, with no visible lumps. Scrape down the sides and bottom of the bowl with a rubber spatula to ensure everything is incorporated.
- Add Peanut Butter and Sugar: Add the creamy peanut butter, sifted powdered sugar, vanilla extract, and the pinch of salt (if using) to the bowl with the beaten cream cheese. Start mixing on low speed to prevent the powdered sugar from flying everywhere. Once it’s mostly incorporated, increase the speed to medium-high and beat for another 2-3 minutes. The mixture should be very smooth, light in color, and well-combined. Scrape the bowl down again to make sure there are no streaks of unmixed ingredients. This base should be irresistibly creamy on its own.
Part 2: Whipping the Cream and Folding
- Whip the Heavy Cream: In a separate, clean, and preferably chilled mixing bowl, pour in the very cold heavy whipping cream. Chilling the bowl and the beaters for about 15 minutes in the freezer beforehand will help the cream whip up faster and with more volume. Using clean beaters, whip the cream on medium-high speed. It will go through stages: bubbly, then thickened like melted ice cream, then soft peaks. Continue whipping until you reach stiff peaks. You’ll know you’re there when you can lift the beaters out of the cream and the peak that forms holds its shape without flopping over. Be careful not to over-whip, or you’ll start to make butter.
- Lighten the Base: Take about one-third of the whipped cream and add it to the peanut butter base. Use your spatula to gently mix it in. Don’t worry about being too delicate here; this step is designed to lighten the dense peanut butter mixture, making it easier to fold in the rest of the whipped cream without deflating it.
- Fold in the Remaining Cream: Add the remaining two-thirds of the whipped cream to the lightened peanut butter base. Now, switch to a gentle folding motion. Using your rubber spatula, cut down through the center of the mixture to the bottom of the bowl, then sweep up along the side, turning the mixture over on itself. Rotate the bowl a quarter turn and repeat. Continue this gentle motion just until no white streaks of whipped cream remain. It’s important not to stir or mix vigorously, as this will deflate the air you worked so hard to whip into the cream, resulting in a dense, heavy mousse.
- Chill to Set: Once combined, the mousse is technically ready, but it will be quite soft. For the best texture, you need to chill it. Spoon or pipe the mousse into your desired serving dishes (small bowls, ramekins, or glasses work well). Cover with plastic wrap, pressing it gently onto the surface of the mousse to prevent a skin from forming. Refrigerate for at least 4 hours, or preferably overnight. Chilling allows the fats to firm up and the flavors to meld together, resulting in a perfect mousse texture.
Nutrition Facts
Please note that these values are an approximation and can vary based on the specific brands of ingredients used.
- Servings: This recipe makes approximately 6-8 servings.
- Calories per Serving: Approximately 450-550 kcal (based on 6 servings).
This is a decadent dessert, rich in fats and sugars, and is best enjoyed as a special treat.
Preparation Time
One of the best parts of this recipe is how quickly it comes together.
- Active Preparation Time: 15-20 minutes
- Chilling Time: 4 hours to overnight
- Total Time: 4 hours 20 minutes (minimum)
How to Serve Your Peanut Butter Mousse
The presentation can elevate this simple dessert into something truly spectacular. Here are some elegant and fun ways to serve your peanut butter mousse.
Serving Vessels:
- Individual Ramekins or Bowls: The classic choice. This allows for easy portion control and individual customization with toppings.
- Wine or Martini Glasses: For an elegant, dinner-party-worthy presentation. The long stem makes it look sophisticated.
- Small Mason Jars: A rustic and charming option, perfect for picnics or casual gatherings. You can even layer the mousse with crushed cookies.
- As a Pie Filling: Pour the finished mousse into a pre-baked pie crust (graham cracker, Oreo, or a salty pretzel crust are all fantastic choices) and chill until firm.
Irresistible Topping Ideas:
The rich, creamy mousse is a blank canvas. Mix and match these toppings for the ultimate experience.
- Chocolate Lovers:
- Chocolate Ganache Drizzle: A simple mix of melted chocolate and a little heavy cream drizzled over the top.
- Chocolate Shavings: Use a vegetable peeler on a bar of good quality semi-sweet or dark chocolate.
- Mini Chocolate Chips: Adds a nice textural crunch.
- Crumbled Brownies: For an ultra-decadent dessert.
- Salty & Crunchy:
- Crushed Pretzels: The salty crunch is the perfect counterpoint to the sweet, creamy mousse.
- Chopped Peanuts: Enhances the peanut flavor and adds texture.
- Sea Salt Flakes: A light sprinkle of flaky sea salt (like Maldon) makes the flavors pop.
- Crushed Potato Chips: Don’t knock it until you try it! The salty, savory crunch is surprisingly delicious.
- Fruity & Fresh:
- Sliced Bananas: A classic pairing with peanut butter.
- Fresh Raspberries or Sliced Strawberries: The tartness of the berries cuts through the richness beautifully.
- A Dollop of Raspberry or Strawberry Jam: Swirl a bit into the mousse before chilling or add a spoonful on top.
- Creamy & Sweet:
- Extra Whipped Cream: A simple, elegant dollop on top.
- Caramel or Butterscotch Sauce: A drizzle of warm caramel sauce is pure heaven.
- Crushed Cookies: Oreo, Biscoff, or Nutter Butter cookies are all excellent choices.
- Miniature Peanut Butter Cups: Chop them up and sprinkle them over the top for a double dose of peanut butter and chocolate goodness.
Additional Tips for Mousse Perfection
These five tips will help you troubleshoot common issues and ensure your mousse is flawless every single time.
- The Room Temperature Rule: Your cream cheese must be fully softened to room temperature. Cold cream cheese is the number one cause of lumpy mousse. If you’re in a hurry, you can unwrap the block of cream cheese, place it on a microwave-safe plate, and microwave it in 10-second intervals until softened but not melted.
- The Cold Rule: Conversely, your heavy whipping cream, mixing bowl, and beaters should be as cold as possible. Cold cream whips up faster, holds its shape better, and incorporates more air, leading to a lighter, fluffier mousse.
- Master the Fold: The folding technique is non-negotiable for a light mousse. Resisting the urge to stir is key. The goal is to combine the whipped cream with the peanut butter base while losing as little air as possible. Be patient and gentle; it’s worth the effort.
- Don’t Skimp on Chilling: While it’s tempting to dig in right away, the chilling time is essential. It firms up the mousse to the perfect consistency and allows the flavors to meld and deepen. A 4-hour chill is good, but an overnight chill is even better.
- Make it Ahead: This is the perfect make-ahead dessert for parties or holidays. You can prepare it completely a day or two in advance. Simply keep it covered in the refrigerator. Wait to add any crunchy toppings like pretzels or cookies until just before serving to ensure they stay crisp.
Frequently Asked Questions (FAQ)
Here are answers to some of the most common questions about making this peanut butter mousse recipe.
1. Can I use natural peanut butter for this recipe?
It is not recommended. Natural peanut butters, where the oil separates, can behave unpredictably in this recipe. They can cause the mousse to have a slightly grainy texture or even break and become oily. For the smoothest, most stable result, stick with a commercial, no-stir creamy peanut butter.
2. Why is my mousse runny or not setting properly?
There are two likely culprits. First, you may have under-whipped your heavy cream. It needs to be beaten to stiff peaks to provide the structure the mousse needs. If it’s only at the soft peak stage, the mousse will be too soft. Second, you may have been too aggressive when folding the whipped cream into the base, deflating all the air. Always use a gentle folding motion. Lastly, ensure you are giving it adequate time to chill and set in the refrigerator.
3. Can I make this dessert dairy-free or vegan?
Yes, with some substitutions, though the texture and flavor will be different. You can use a high-quality vegan cream cheese alternative and a vegan peanut butter. For the whipped cream, the best substitute is using the solid cream from two cans of full-fat coconut milk that have been chilled overnight. Scoop out only the solid cream, leaving the water behind, and whip it with the powdered sugar until it forms peaks.
4. How long does this peanut butter mousse last in the refrigerator?
When stored properly in an airtight container or covered tightly with plastic wrap, the mousse will last for up to 4-5 days in the refrigerator. The texture will be at its absolute best in the first 2-3 days. After that, it may begin to weep slightly or become a bit denser, but it will still be delicious.
5. Can I freeze peanut butter mousse?
Yes, you can! This mousse freezes surprisingly well. Portion it into freezer-safe containers and freeze for up to 2 months. It takes on a texture similar to a rich, frozen cheesecake or semi-freddo. To serve, let it thaw in the refrigerator for about an hour or on the counter for 15-20 minutes to soften slightly. This is a great way to have a decadent dessert on hand at all times.
Peanut Butter Mousse Recipe
Ingredients
Ingredients for a Dreamy Peanut Butter Mousse
The magic of this recipe lies in its simplicity. Each ingredient is chosen for a specific purpose to create the perfect texture and flavor profile. Using high-quality, full-fat ingredients is the key to achieving a truly decadent result.
-
Cream Cheese: 8 ounces (226g), full-fat, softened to room temperature. This is the secret weapon. It provides a stable base, a subtle tang that cuts through the richness, and an incredibly creamy mouthfeel that you can’t achieve with whipped cream alone.
-
Creamy Peanut Butter: 1 cup (256g). Use a standard commercial creamy peanut butter like Jif or Skippy. These contain emulsifiers that keep the mousse smooth and prevent it from separating. Natural peanut butters that require stirring can sometimes result in a grainy texture.
-
Powdered Sugar: 1 cup (120g), sifted. Also known as confectioners’ sugar, this dissolves instantly into the cream cheese base, ensuring a silky-smooth texture without any grittiness that granulated sugar might leave behind. Sifting removes any lumps.
-
Pure Vanilla Extract: 2 teaspoons. Vanilla doesn’t make it taste like vanilla; it enhances and rounds out the other flavors, making the peanut butter taste even more complex and delicious.
-
Heavy Whipping Cream: 1 ½ cups (360ml), very cold. This is what gives the mousse its light, airy, “cloud-like” quality. The high-fat content allows it to be whipped into stable peaks, incorporating air and creating volume. It must be cold to whip up properly.
-
A Pinch of Salt: ¼ teaspoon (optional, but recommended). If you’re using unsalted peanut butter, this is essential. Even with regular peanut butter, a tiny pinch of salt elevates the sweetness and brings out the nutty flavor.
Instructions
Part 1: Creating the Rich Peanut Butter Base
-
Beat the Cream Cheese: In a large mixing bowl, place your softened cream cheese. It is crucial that the cream cheese is at room temperature to avoid lumps. Using an electric hand mixer or a stand mixer fitted with the paddle attachment, beat the cream cheese on medium speed for about 1-2 minutes until it’s completely smooth and creamy, with no visible lumps. Scrape down the sides and bottom of the bowl with a rubber spatula to ensure everything is incorporated.
-
Add Peanut Butter and Sugar: Add the creamy peanut butter, sifted powdered sugar, vanilla extract, and the pinch of salt (if using) to the bowl with the beaten cream cheese. Start mixing on low speed to prevent the powdered sugar from flying everywhere. Once it’s mostly incorporated, increase the speed to medium-high and beat for another 2-3 minutes. The mixture should be very smooth, light in color, and well-combined. Scrape the bowl down again to make sure there are no streaks of unmixed ingredients. This base should be irresistibly creamy on its own.
Part 2: Whipping the Cream and Folding
-
Whip the Heavy Cream: In a separate, clean, and preferably chilled mixing bowl, pour in the very cold heavy whipping cream. Chilling the bowl and the beaters for about 15 minutes in the freezer beforehand will help the cream whip up faster and with more volume. Using clean beaters, whip the cream on medium-high speed. It will go through stages: bubbly, then thickened like melted ice cream, then soft peaks. Continue whipping until you reach stiff peaks. You’ll know you’re there when you can lift the beaters out of the cream and the peak that forms holds its shape without flopping over. Be careful not to over-whip, or you’ll start to make butter.
-
Lighten the Base: Take about one-third of the whipped cream and add it to the peanut butter base. Use your spatula to gently mix it in. Don’t worry about being too delicate here; this step is designed to lighten the dense peanut butter mixture, making it easier to fold in the rest of the whipped cream without deflating it.
-
Fold in the Remaining Cream: Add the remaining two-thirds of the whipped cream to the lightened peanut butter base. Now, switch to a gentle folding motion. Using your rubber spatula, cut down through the center of the mixture to the bottom of the bowl, then sweep up along the side, turning the mixture over on itself. Rotate the bowl a quarter turn and repeat. Continue this gentle motion just until no white streaks of whipped cream remain. It’s important not to stir or mix vigorously, as this will deflate the air you worked so hard to whip into the cream, resulting in a dense, heavy mousse.
-
Chill to Set: Once combined, the mousse is technically ready, but it will be quite soft. For the best texture, you need to chill it. Spoon or pipe the mousse into your desired serving dishes (small bowls, ramekins, or glasses work well). Cover with plastic wrap, pressing it gently onto the surface of the mousse to prevent a skin from forming. Refrigerate for at least 4 hours, or preferably overnight. Chilling allows the fats to firm up and the flavors to meld together, resulting in a perfect mousse texture.
Nutrition
- Serving Size: one normal portion
- Calories: 450-550 kcal


