
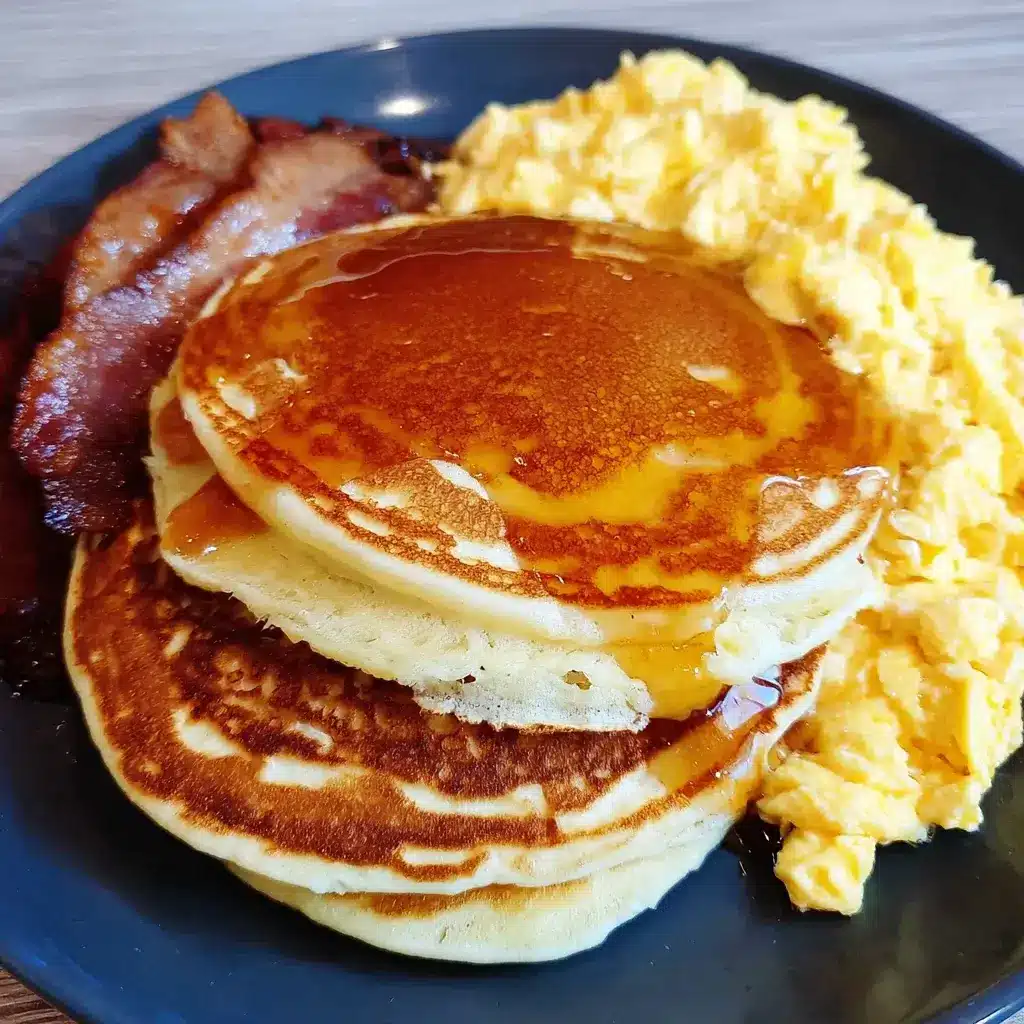

Of all the weekend rituals my family holds dear, Sunday brunch sits right at the top. It’s a slow, deliberate affair, a welcome departure from the frantic weekday mornings of toast-grabbing and backpack-checking. For years, the great debate would rage as the coffee maker gurgled to life: sweet or savory? The kids, naturally, would campaign for a mountain of fluffy, syrup-drenched pancakes. My husband and I, however, often craved the hearty, comforting satisfaction of perfectly scrambled eggs. The solution, born out of a desire to make everyone happy, became our household’s most celebrated culinary creation: The Ultimate Pancake and Scrambled Egg Platter. This isn’t just about making two separate dishes and putting them on a plate; it’s about creating a symphony of flavors and textures. It’s the pillowy softness of a buttermilk pancake meeting the creamy, velvety richness of slow-scrambled eggs. It’s the sweet kiss of maple syrup cutting through the savory, buttery goodness. The first time I served this, the silence at the table was all the review I needed, broken only by the clinking of forks and contented sighs. It has since become our signature dish for lazy Sundays, special occasions, and whenever we need a meal that feels like a warm hug. This recipe isn’t just food; it’s a memory-maker.
The Unbeatable Harmony: Why Pancakes and Scrambled Eggs Are the Perfect Pair
Before we dive into the spatulas and mixing bowls, let’s take a moment to appreciate why this combination is more than just a breakfast of convenience—it’s a masterpiece of culinary balance. In the world of gastronomy, the most memorable dishes often play on contrasts, and this duo is a prime example.
First, consider the flavor profile. You have the quintessential sweet notes from the pancakes, amplified by whatever toppings you choose—maple syrup, fresh berries, or a dusting of powdered sugar. This sweetness is perfectly anchored by the savory, rich, and slightly salty profile of the scrambled eggs. Neither flavor overwhelms the other; instead, they dance together on the palate. A bite of fluffy pancake followed by a forkful of creamy egg creates a “flavor reset,” making each subsequent bite just as exciting as the first.
Next is the all-important element of texture. A perfect pancake is light, airy, and almost cloud-like, with a tender crumb that soaks up syrup beautifully. In contrast, ideal scrambled eggs are soft, custardy, and have small, delicate curds. The textural interplay is magnificent. The slight chew of the pancake gives way to the melt-in-your-mouth creaminess of the eggs. It prevents palate fatigue and makes the meal feel incredibly luxurious and satisfying.
Finally, there’s the versatility. This combination is the ultimate blank canvas. You can keep it classic and simple or elevate it into a brunch fit for royalty. Add salty, crispy bacon or savory sausage links to the plate for a third layer of flavor and texture. Introduce freshness with a side of sliced avocado or a simple green salad with a lemon vinaigrette. The pancakes can be studded with blueberries or chocolate chips, while the eggs can be enhanced with chives, cheese, or sautéed spinach. It’s a foundational meal that invites creativity and personalization, ensuring it never gets boring. It’s the perfect answer to the age-old “sweet or savory” breakfast question because the answer is, resoundingly, “both!”
Complete Ingredients for the Perfect Breakfast
Clarity is key in the kitchen. For that reason, we’ve separated the ingredients for the pancakes and the eggs. This ensures you can focus on one perfect component at a time before bringing them together in glorious harmony.
For the Fluffy Buttermilk Pancakes (Yields 8-10 pancakes):
- All-Purpose Flour: 2 cups (250g)
- Granulated Sugar: 2 tablespoons
- Baking Powder: 2 teaspoons
- Baking Soda: 1 teaspoon
- Fine Sea Salt: ½ teaspoon
- Buttermilk: 2 cups (480ml), shaken well (store-bought or homemade*)
- Large Eggs: 2
- Unsalted Butter: 4 tablespoons (½ stick), melted and slightly cooled, plus more for greasing the pan
- Vanilla Extract: 1 teaspoon
*Homemade Buttermilk Tip: If you don’t have buttermilk, you can easily make a substitute. For every 1 cup of regular milk, stir in 1 tablespoon of white vinegar or lemon juice. Let it stand for 5-10 minutes until it slightly curdles.
For the Creamy, Dreamy Scrambled Eggs (Serves 4):
- Large Eggs: 8
- Whole Milk or Heavy Cream: ¼ cup (60ml) – Heavy cream yields a richer, more decadent result.
- Unsalted Butter: 2 tablespoons, divided
- Fine Sea Salt: ½ teaspoon, or to taste
- Freshly Ground Black Pepper: ¼ teaspoon, or to taste
- Optional: Fresh Chives: 1 tablespoon, finely chopped
Step-by-Step Instructions for Breakfast Perfection
The secret to a stress-free cooking process is a good workflow. We’ll start by making the pancake batter and letting it rest while we prepare and cook the eggs. The pancakes cook quickly, so they can be made right at the end to be served hot.
Part 1: Preparing the Fluffy Pancake Batter
- Combine Dry Ingredients: In a large mixing bowl, add the 2 cups of all-purpose flour, 2 tablespoons of sugar, 2 teaspoons of baking powder, 1 teaspoon of baking soda, and ½ teaspoon of salt. Whisk everything together thoroughly for about 30 seconds. This step is crucial as it ensures the leavening agents are evenly distributed, which is the key to a uniform rise and fluffy texture.
- Combine Wet Ingredients: In a separate medium-sized bowl, whisk the 2 large eggs until the yolks and whites are just combined. Then, whisk in the 2 cups of buttermilk and 1 teaspoon of vanilla extract.
- Melt the Butter: In a small, microwave-safe bowl or on the stovetop, melt the 4 tablespoons of unsalted butter. Set it aside to cool for a minute or two. You don’t want it to be piping hot when you add it to the eggs, or it could scramble them prematurely.
- Combine Wet and Dry: Pour the wet ingredient mixture into the large bowl with the dry ingredients. Gently fold them together with a rubber spatula or wooden spoon until they are just combined. It is absolutely essential not to overmix! The batter should be lumpy. Overmixing develops the gluten in the flour, which will result in tough, rubbery pancakes instead of light and fluffy ones.
- Fold in the Butter: Gently pour the slightly cooled melted butter into the batter and fold it in with just a few more strokes.
- Rest the Batter: Let the pancake batter rest on the counter for at least 10-15 minutes. This allows the flour to fully hydrate and the gluten to relax, resulting in a more tender pancake. This is the perfect time to start on the eggs.
Part 2: Crafting the Creamy Scrambled Eggs
- Crack and Whisk the Eggs: Crack the 8 large eggs into a medium bowl. Add the ¼ cup of milk or heavy cream, ½ teaspoon of salt, and ¼ teaspoon of black pepper. Whisk vigorously until the mixture is uniform in color and slightly frothy. This incorporates air, which helps create a fluffier result.
- Prepare the Pan: Place a non-stick skillet over medium-low heat. Add 1 tablespoon of the unsalted butter and allow it to melt and foam gently. Swirl the pan to coat the entire surface. The key to creamy eggs is gentle heat.
- Cook Low and Slow: Pour the egg mixture into the warm skillet. Let it sit, undisturbed, for about 30-45 seconds, until the edges just begin to set.
- Gently Push, Don’t Scramble: Using a rubber spatula, gently push the eggs from the edges toward the center of the pan. Tilt the pan to allow the uncooked egg to flow into the empty space. Continue this gentle pushing motion every 20-30 seconds. Avoid frantically scrambling them, as this breaks the curds into tiny, dry pieces. You’re aiming for large, soft, pillowy curds.
- The Finishing Touch: When the eggs are about 90% cooked (they should still look slightly wet and glossy), remove the skillet from the heat. The residual heat in the pan will continue to cook them to perfection. Stir in the remaining 1 tablespoon of butter and the optional fresh chives. This final addition of cold butter stops the cooking process and adds an incredible layer of creamy richness. Set aside and cover to keep warm.
Part 3: Cooking the Pancakes and Assembling
- Heat the Griddle: Place a large non-stick skillet or a griddle over medium heat. To test if it’s ready, flick a few drops of water onto the surface; they should sizzle and dance before evaporating.
- Grease the Pan: Add a small amount of butter or a slick of neutral oil to the hot pan and swirl to coat.
- Pour the Batter: Using a ¼-cup measuring cup for uniform-sized pancakes, pour the batter onto the hot griddle, leaving a couple of inches between each pancake.
- Watch for Bubbles: Cook for about 2-3 minutes on the first side. You’ll know it’s time to flip when you see bubbles forming and popping on the surface and the edges look set and slightly dry.
- Flip and Finish: Using a thin, wide spatula, confidently flip the pancakes. Cook for another 1-2 minutes on the second side, until golden brown and cooked through.
- Serve Immediately: As the pancakes are cooked, transfer them to a platter. Serve immediately alongside the warm, creamy scrambled eggs for the ultimate breakfast experience.
Nutrition Facts
- Servings: 4
- Calories per serving (approximately): 780 kcal
Disclaimer: The nutritional information provided is an estimate and can vary based on the specific ingredients used (e.g., whole milk vs. heavy cream, brand of flour, etc.), and portion sizes.
Preparation and Cooking Time
- Preparation Time: 20 minutes (includes resting time for pancake batter)
- Cooking Time: 25 minutes
- Total Time: 45 minutes
How to Serve Your Pancake and Egg Masterpiece
Presentation elevates a meal from simple sustenance to a memorable event. This breakfast combo is wonderfully versatile and can be served in several delightful ways.
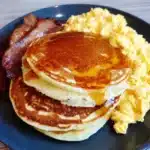
- The Classic Stack:
- Create a stack of two or three warm pancakes on each plate.
- Place a generous scoop of the creamy scrambled eggs right next to the stack.
- Drape a couple of strips of crispy bacon or place sausage links leaning against the pancakes for a picture-perfect look.
- Finish with a small pat of butter on top of the pancakes and a drizzle of warm maple syrup over everything.
- The Brunch Board Experience:
- Arrange a large platter or wooden board as the centerpiece of your table.
- Place the pancakes in a cascading pile on one side of the board.
- Spoon the scrambled eggs into a small bowl and place it in the center.
- Fill the rest of the board with an array of accompaniments. Use small bowls for:
- Fresh Fruits: Sliced strawberries, blueberries, raspberries, and banana slices.
- Syrups & Spreads: Warm maple syrup, honey, chocolate sauce, and fruit preserves.
- Savory Add-ons: Crispy bacon, sausage patties, sliced avocado, and sautéed mushrooms.
- Toppings: Whipped cream, chopped nuts, and chocolate chips.
- This interactive setup allows everyone to build their perfect plate and is fantastic for hosting guests.
- The “All-in-One” Plate:
- For a truly integrated flavor experience, place the scrambled eggs directly on top of a single large pancake.
- Drizzle with maple syrup and add a crack of black pepper. The syrup will seep into the eggs, creating an incredible sweet and savory bite.
- Serve with a side of fresh fruit to cut through the richness.
5 Additional Tips for Flawless Results
- Keep Pancakes Warm and Crisp: If you’re cooking in batches, preheat your oven to 200°F (95°C). Place a wire cooling rack on a baking sheet and place the finished pancakes on the rack in a single layer. This keeps them warm without steaming them (which can make them soggy), ensuring the last pancake is as good as the first.
- Flavor Variations Are Your Friend: Don’t be afraid to experiment. Add a pinch of cinnamon or nutmeg to the pancake batter for a warm, spiced flavor. For a savory twist, fold ½ cup of shredded sharp cheddar cheese and some chopped chives into the egg mixture just before you take it off the heat.
- The Secret to a Perfect Pancake Shape: For perfectly round pancakes every time, use a batter dispenser or a squeeze bottle. If you don’t have one, a simple soup ladle also works well to pour a consistent amount of batter in a controlled way.
- Use Room Temperature Ingredients for Pancakes: For the fluffiest possible pancakes, try to use buttermilk and eggs that are at room temperature. Cold ingredients don’t incorporate as smoothly and can affect the final texture. Simply take them out of the fridge 20-30 minutes before you start.
- Don’t Press Down on Your Pancakes! A common mistake is to press down on the pancakes with the spatula after flipping them. This is a cardinal sin of pancake making! It deflates all the air you worked to incorporate, resulting in dense, flat discs. Let them cook undisturbed after the flip.
Frequently Asked Questions (FAQ)
1. Can I make the pancake batter ahead of time?
You can, but with a caveat. You can mix the dry ingredients and the wet ingredients in separate, airtight containers and store them in the fridge for up to 2 days. When you’re ready to cook, combine them, fold in the melted butter, and proceed. However, for the absolute fluffiest results, it’s best not to pre-mix the batter entirely, as the baking powder and soda will start reacting as soon as they hit the liquid, losing some of their leavening power over time.
2. How do I store and reheat leftovers?
Leftovers are fantastic! Store leftover pancakes in an airtight container or zip-top bag in the refrigerator for up to 3 days. Store the scrambled eggs in a separate airtight container for up to 2 days.
- To Reheat Pancakes: The best way is in a toaster or toaster oven for a slightly crispy edge. You can also microwave them for about 30-45 seconds, but they will be softer.
- To Reheat Scrambled Eggs: Reheat them gently in a non-stick skillet over low heat with a tiny bit of butter. Stir frequently until just warmed through. Avoid the microwave, as it can make them rubbery.
3. Can I make this recipe gluten-free or dairy-free?
Absolutely!
- For Gluten-Free: Substitute the all-purpose flour with a high-quality 1-to-1 gluten-free baking blend. Results can vary by brand, but most modern blends work exceptionally well.
- For Dairy-Free:
- In the pancakes, use a dairy-free milk alternative (like almond, soy, or oat milk) with lemon juice or vinegar to create a “buttermilk.” Use a plant-based butter substitute or coconut oil instead of butter.
- In the eggs, use a splash of unsweetened almond milk or just omit the milk/cream entirely. Use oil or dairy-free butter for cooking.
4. Why are my pancakes flat and dense instead of fluffy?
This is the most common pancake problem and usually stems from one of two things. First, you may have overmixed the batter. Remember, lumps are your friend! Mix only until the wet and dry ingredients are just combined. Second, your leavening agents (baking powder/soda) might be expired. To test baking powder, drop a spoonful into hot water; it should fizz vigorously. To test baking soda, drop a spoonful into vinegar; it should also bubble up immediately.
5. What is the best pan to use for pancakes and eggs?
For both, a high-quality non-stick skillet is your most reliable choice. It allows for easy flipping of pancakes and prevents the delicate eggs from sticking, making cleanup a breeze. A well-seasoned cast-iron skillet is another excellent option, especially for pancakes, as it retains and distributes heat incredibly evenly, leading to a beautifully uniform golden-brown crust. However, it requires more care and proper seasoning to be effectively non-stick for the eggs.
Pancakes with Scrambled Eggs recipe
Ingredients
For the Fluffy Buttermilk Pancakes (Yields 8-10 pancakes):
-
All-Purpose Flour: 2 cups (250g)
-
Granulated Sugar: 2 tablespoons
-
Baking Powder: 2 teaspoons
-
Baking Soda: 1 teaspoon
-
Fine Sea Salt: ½ teaspoon
-
Buttermilk: 2 cups (480ml), shaken well (store-bought or homemade*)
-
Large Eggs: 2
-
Unsalted Butter: 4 tablespoons (½ stick), melted and slightly cooled, plus more for greasing the pan
-
Vanilla Extract: 1 teaspoon
*Homemade Buttermilk Tip: If you don’t have buttermilk, you can easily make a substitute. For every 1 cup of regular milk, stir in 1 tablespoon of white vinegar or lemon juice. Let it stand for 5-10 minutes until it slightly curdles.
For the Creamy, Dreamy Scrambled Eggs (Serves 4):
-
Large Eggs: 8
-
Whole Milk or Heavy Cream: ¼ cup (60ml) – Heavy cream yields a richer, more decadent result.
-
Unsalted Butter: 2 tablespoons, divided
-
Fine Sea Salt: ½ teaspoon, or to taste
-
Freshly Ground Black Pepper: ¼ teaspoon, or to taste
-
Optional: Fresh Chives: 1 tablespoon, finely chopped
Instructions
Part 1: Preparing the Fluffy Pancake Batter
-
Combine Dry Ingredients: In a large mixing bowl, add the 2 cups of all-purpose flour, 2 tablespoons of sugar, 2 teaspoons of baking powder, 1 teaspoon of baking soda, and ½ teaspoon of salt. Whisk everything together thoroughly for about 30 seconds. This step is crucial as it ensures the leavening agents are evenly distributed, which is the key to a uniform rise and fluffy texture.
-
Combine Wet Ingredients: In a separate medium-sized bowl, whisk the 2 large eggs until the yolks and whites are just combined. Then, whisk in the 2 cups of buttermilk and 1 teaspoon of vanilla extract.
-
Melt the Butter: In a small, microwave-safe bowl or on the stovetop, melt the 4 tablespoons of unsalted butter. Set it aside to cool for a minute or two. You don’t want it to be piping hot when you add it to the eggs, or it could scramble them prematurely.
-
Combine Wet and Dry: Pour the wet ingredient mixture into the large bowl with the dry ingredients. Gently fold them together with a rubber spatula or wooden spoon until they are just combined. It is absolutely essential not to overmix! The batter should be lumpy. Overmixing develops the gluten in the flour, which will result in tough, rubbery pancakes instead of light and fluffy ones.
-
Fold in the Butter: Gently pour the slightly cooled melted butter into the batter and fold it in with just a few more strokes.
-
Rest the Batter: Let the pancake batter rest on the counter for at least 10-15 minutes. This allows the flour to fully hydrate and the gluten to relax, resulting in a more tender pancake. This is the perfect time to start on the eggs.
Part 2: Crafting the Creamy Scrambled Eggs
-
Crack and Whisk the Eggs: Crack the 8 large eggs into a medium bowl. Add the ¼ cup of milk or heavy cream, ½ teaspoon of salt, and ¼ teaspoon of black pepper. Whisk vigorously until the mixture is uniform in color and slightly frothy. This incorporates air, which helps create a fluffier result.
-
Prepare the Pan: Place a non-stick skillet over medium-low heat. Add 1 tablespoon of the unsalted butter and allow it to melt and foam gently. Swirl the pan to coat the entire surface. The key to creamy eggs is gentle heat.
-
Cook Low and Slow: Pour the egg mixture into the warm skillet. Let it sit, undisturbed, for about 30-45 seconds, until the edges just begin to set.
-
Gently Push, Don’t Scramble: Using a rubber spatula, gently push the eggs from the edges toward the center of the pan. Tilt the pan to allow the uncooked egg to flow into the empty space. Continue this gentle pushing motion every 20-30 seconds. Avoid frantically scrambling them, as this breaks the curds into tiny, dry pieces. You’re aiming for large, soft, pillowy curds.
-
The Finishing Touch: When the eggs are about 90% cooked (they should still look slightly wet and glossy), remove the skillet from the heat. The residual heat in the pan will continue to cook them to perfection. Stir in the remaining 1 tablespoon of butter and the optional fresh chives. This final addition of cold butter stops the cooking process and adds an incredible layer of creamy richness. Set aside and cover to keep warm.
Part 3: Cooking the Pancakes and Assembling
-
Heat the Griddle: Place a large non-stick skillet or a griddle over medium heat. To test if it’s ready, flick a few drops of water onto the surface; they should sizzle and dance before evaporating.
-
Grease the Pan: Add a small amount of butter or a slick of neutral oil to the hot pan and swirl to coat.
-
Pour the Batter: Using a ¼-cup measuring cup for uniform-sized pancakes, pour the batter onto the hot griddle, leaving a couple of inches between each pancake.
-
Watch for Bubbles: Cook for about 2-3 minutes on the first side. You’ll know it’s time to flip when you see bubbles forming and popping on the surface and the edges look set and slightly dry.
-
Flip and Finish: Using a thin, wide spatula, confidently flip the pancakes. Cook for another 1-2 minutes on the second side, until golden brown and cooked through.
-
Serve Immediately: As the pancakes are cooked, transfer them to a platter. Serve immediately alongside the warm, creamy scrambled eggs for the ultimate breakfast experience.
Nutrition
- Serving Size: one normal portion
- Calories: 780 kcal


