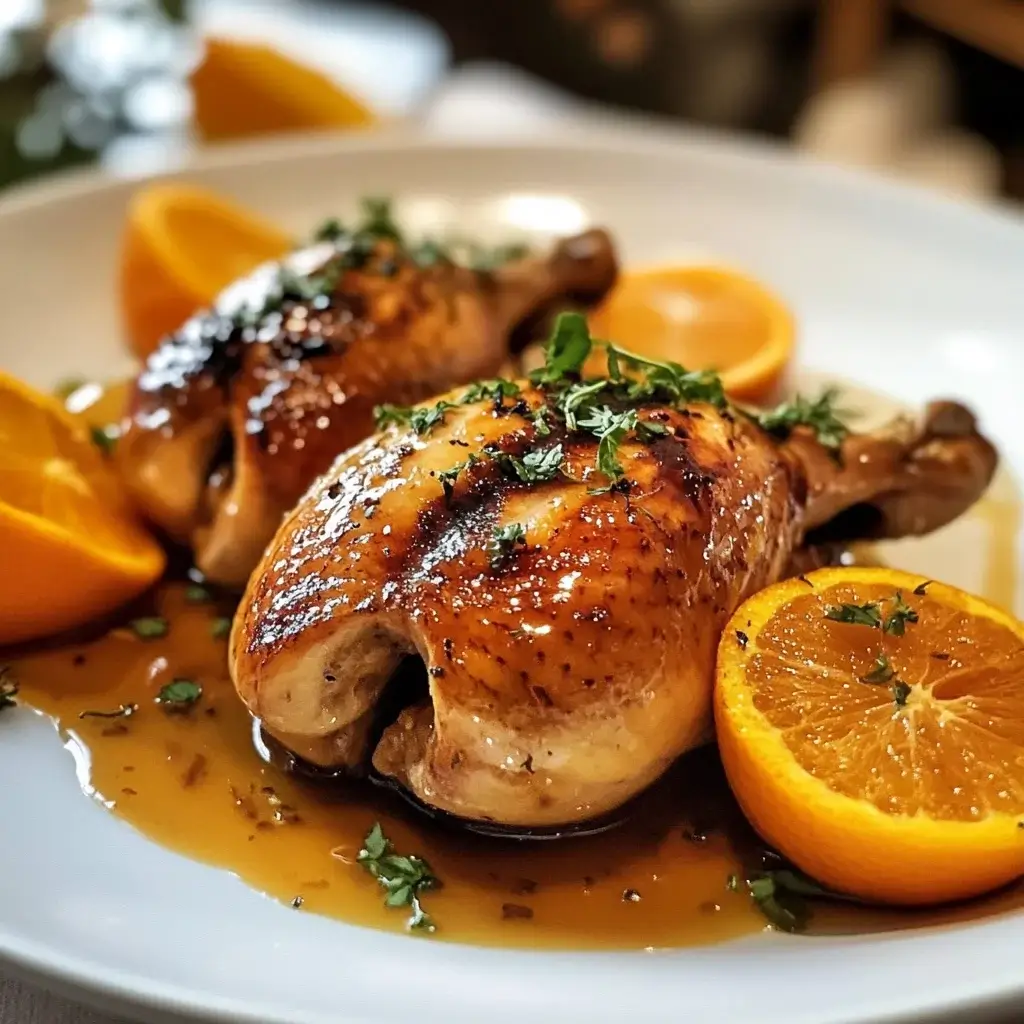

I’ll never forget the first time I tasted Orange-Glazed Quail. It was at a small, family-run restaurant nestled in the French countryside. The aroma wafting from the kitchen was intoxicating – a tantalizing blend of citrus, herbs, and roasted game bird. When the dish arrived, it was a picture of rustic elegance: perfectly browned quail, glistening with a vibrant orange glaze, nestled on a bed of wild rice. One bite, and I was transported. The quail was incredibly tender and juicy, infused with a delicate gamey flavor perfectly balanced by the bright, sweet, and slightly tangy orange glaze. It was sophisticated yet comforting, a dish that felt both special occasion worthy and wonderfully approachable. My dining companions, usually more accustomed to chicken or beef, were equally captivated. “This is amazing!” was the unanimous verdict. Since then, I’ve been on a mission to recreate that magical experience at home. After numerous attempts, countless oranges squeezed, and a few happy taste testers (my family, always eager volunteers!), I’ve perfected this Orange-Glazed Quail recipe. It’s surprisingly easy to prepare, yet delivers restaurant-quality results. Prepare to impress your guests (or simply treat yourself!) with this exquisite dish – it’s a delightful adventure in flavor that’s sure to become a new favorite.
Ingredients
To create this delightful Orange-Glazed Quail, you’ll need a selection of fresh, quality ingredients. The key to a truly exceptional dish lies in the details, so choosing flavorful oranges and fresh herbs will make a noticeable difference. Here’s a comprehensive list of everything you’ll need, broken down for clarity and ease of shopping:
For the Quail:
- 8 Whole Quail, semi-boneless or bone-in: The star of our dish! Quail are small game birds with a delicate, slightly gamey flavor. You can find them semi-boneless (partially deboned for easier eating) or bone-in. Semi-boneless quail are often preferred for ease of serving and eating, especially for less experienced game bird diners. Bone-in quail, however, can be slightly more flavorful as the bones contribute to the roasting process. Choose whichever you prefer or what is available. Ensure the quail are thawed completely if frozen.
- 2 tablespoons Olive Oil: For browning the quail and adding richness. Olive oil is a healthy and versatile choice. You can also use avocado oil or another neutral cooking oil if preferred.
- 1 teaspoon Kosher Salt: Essential for seasoning the quail and enhancing its natural flavors. Kosher salt is preferred for its larger crystals, which distribute evenly and provide a cleaner salt taste.
- 1/2 teaspoon Black Pepper, freshly ground: Provides a classic peppery bite and complements the quail and orange glaze. Freshly ground black pepper offers a much more aromatic and intense flavor than pre-ground pepper.
- 2 sprigs Fresh Rosemary: Adds a fragrant, piney, and slightly peppery note that pairs beautifully with game birds and citrus. Fresh rosemary is ideal for its robust flavor and aroma. You can substitute with 1 teaspoon of dried rosemary if fresh is unavailable, but fresh is highly recommended.
- 2 sprigs Fresh Thyme: Contributes an earthy, slightly lemony, and herbaceous flavor that complements the rosemary and orange. Fresh thyme adds a delicate and nuanced flavor. You can substitute with 1 teaspoon of dried thyme if fresh is unavailable, but fresh is preferable.
For the Orange Glaze:
- 1 cup Freshly Squeezed Orange Juice (from about 3-4 oranges): The heart of our glaze, providing the bright, citrusy base. Freshly squeezed orange juice is essential for the best flavor. Avoid using bottled or processed orange juice, as it often lacks the vibrant freshness of freshly squeezed juice. Choose sweet, juicy oranges like Valencia or Navel oranges.
- 1/2 cup Dry White Wine (such as Sauvignon Blanc or Pinot Grigio): Adds acidity, complexity, and depth to the glaze. Dry white wine complements the orange flavor and helps to balance the sweetness. Sauvignon Blanc or Pinot Grigio are good choices for their crispness and citrus notes. You can substitute with chicken broth if you prefer to omit alcohol.
- 1/4 cup Honey: Provides sweetness and a lovely glossy texture to the glaze. Honey adds a natural sweetness and a subtle floral note. You can also use maple syrup or agave nectar as alternatives, but honey is traditionally used and provides a unique flavor profile.
- 2 tablespoons Orange Zest (from about 2 oranges): Intensifies the orange flavor and adds aromatic citrus oils. Orange zest is packed with essential oils and provides a concentrated burst of orange flavor. Use a microplane or fine grater to zest the oranges, being careful to only zest the orange part of the peel and avoid the bitter white pith underneath.
- 2 tablespoons Butter, unsalted: Adds richness, smoothness, and a velvety texture to the glaze. Butter helps to emulsify the glaze and create a luxurious mouthfeel. Unsalted butter is preferred to control the salt level in the glaze.
- 1 tablespoon Soy Sauce (low sodium): Adds umami, depth, and a savory counterpoint to the sweetness of the orange and honey. Low sodium soy sauce is recommended to control the saltiness. Soy sauce enhances the overall flavor complexity of the glaze and prevents it from being overly sweet.
- 1 teaspoon Dijon Mustard: Adds a subtle tang and complexity to the glaze, balancing the sweetness and richness. Dijon mustard provides a gentle acidity and a slight sharpness that complements the other flavors.
- 1/2 teaspoon Garlic Powder: Enhances the savory notes in the glaze and adds a subtle garlic flavor. Garlic powder is used to provide a mellow garlic flavor that blends seamlessly into the glaze. You can also use 1 clove of minced fresh garlic if you prefer a more pronounced garlic flavor, but garlic powder is often preferred for glazes to avoid any raw garlic bite.
- Pinch of Red Pepper Flakes (optional, for a touch of heat): Adds a subtle warmth and a hint of spice to balance the sweetness. Red pepper flakes provide a gentle heat that complements the citrus and honey without overpowering the dish. Omit if you prefer a completely non-spicy glaze.
Instructions
Now, let’s bring these flavorful ingredients together to create our exquisite Orange-Glazed Quail. Follow these step-by-step instructions for a perfectly roasted and beautifully glazed quail dish:
Step 1: Prepare the Quail – Seasoning for Flavor
Properly preparing the quail is the first step to ensuring a flavorful and juicy final dish.
- Preheat Oven: Preheat your oven to 400°F (200°C). This temperature is ideal for roasting quail, allowing them to cook through while developing a beautiful golden-brown skin.
- Pat Quail Dry: Pat the quail dry thoroughly with paper towels. Removing excess moisture from the skin is crucial for achieving crispy, browned skin during roasting.
- Season Quail: In a small bowl, combine the kosher salt and freshly ground black pepper. Season the quail generously inside and out with the salt and pepper mixture. Make sure to season the cavity of each quail as well as the skin.
- Stuff with Herbs: Place a sprig of fresh rosemary and a sprig of fresh thyme inside the cavity of each quail. These herbs will infuse the quail with their aromatic flavors as they roast.
Step 2: Brown the Quail – Building Flavor and Color
Browning the quail before roasting adds a layer of flavor and creates a beautiful golden-brown color. This step is optional but highly recommended for enhancing the overall presentation and taste.
- Heat Olive Oil: Heat the olive oil in a large oven-safe skillet or Dutch oven over medium-high heat until it is shimmering hot. Ensure the skillet is large enough to accommodate all the quail in a single layer without overcrowding.
- Brown Quail on All Sides: Carefully place the seasoned quail in the hot skillet, breast side down first. Brown them on all sides, turning them with tongs, for about 2-3 minutes per side, or until they are nicely browned. Work in batches if necessary to avoid overcrowding the pan, as overcrowding will steam the quail rather than brown them. The browning process develops rich, savory flavors through the Maillard reaction.
- Remove Quail from Skillet: Once browned, remove the quail from the skillet and set them aside on a plate. Leave any rendered fat and browned bits in the skillet, as these will contribute to the flavor of the glaze.
Step 3: Prepare the Orange Glaze – A Symphony of Citrus and Sweetness
While the quail are resting briefly, let’s prepare the vibrant and flavorful orange glaze.
- Deglaze Skillet (Optional but Recommended): If there are browned bits stuck to the bottom of the skillet after browning the quail, deglaze the skillet by pouring in the dry white wine. Scrape up the browned bits with a wooden spoon or spatula as the wine simmers. This deglazing process captures all those flavorful browned bits and incorporates them into the glaze. Simmer the wine for a minute or two until slightly reduced. If you are omitting wine, you can skip this step or deglaze with a tablespoon or two of chicken broth.
- Combine Glaze Ingredients: In the same skillet (or a separate saucepan if you used a roasting pan instead of a skillet), combine the freshly squeezed orange juice, honey, orange zest, butter, soy sauce, Dijon mustard, garlic powder, and red pepper flakes (if using).
- Simmer and Reduce Glaze: Bring the glaze mixture to a simmer over medium heat, stirring occasionally. Reduce the heat to low and simmer gently for about 10-15 minutes, or until the glaze has thickened slightly and reduced by about one-third. The glaze should be syrupy enough to coat the back of a spoon. Simmering reduces the liquid and concentrates the flavors, creating a richer and more intense glaze. Be careful not to over-reduce the glaze, as it will thicken further as it cools.
Step 4: Roast and Glaze the Quail – Infusing Flavor and Tenderness
Now, we’ll roast the quail and generously coat them with the luscious orange glaze.
- Return Quail to Skillet: Place the browned quail back into the skillet with the orange glaze. Arrange them in a single layer, if possible, and spoon the glaze generously over each quail, ensuring they are well coated.
- Roast in Oven: Transfer the skillet to the preheated oven and roast for 15-20 minutes, or until the quail are cooked through and the internal temperature reaches 165°F (74°C) in the thickest part of the thigh (avoiding the bone). The exact roasting time will depend on the size of the quail and your oven temperature.
- Baste with Glaze (Optional but Recommended): During the last 5-7 minutes of roasting, you can baste the quail with the glaze in the skillet every few minutes to ensure they are evenly coated and beautifully glossy. This basting process adds extra flavor and creates a sticky, caramelized glaze on the quail.
Step 5: Rest and Serve – The Final Touch of Perfection
Resting the quail briefly before serving allows the juices to redistribute, resulting in more tender and flavorful meat.
- Remove from Oven and Rest: Remove the skillet from the oven and let the quail rest in the skillet, tented loosely with aluminum foil, for about 5-10 minutes. Resting is crucial for juicy and tender quail.
- Serve Hot: Serve the Orange-Glazed Quail hot, drizzled with any remaining glaze from the skillet. Garnish with fresh orange slices, rosemary sprigs, or thyme sprigs, if desired, for an elegant presentation. Serve immediately and enjoy the delightful combination of flavors and textures!
Nutrition Facts
Orange-Glazed Quail is not only a flavorful and elegant dish but also offers a good source of protein and essential nutrients. Keep in mind that nutritional values can vary based on the specific size of the quail, the amount of glaze used, and portion sizes.
Servings:
This recipe typically yields approximately 4 servings (2 quail per serving).
Calories per Serving (Estimated):
Per serving (estimated, based on 2 quail per serving):
- Calories: Approximately 500-650 calories
- Protein: Around 40-50 grams
- Fat: Around 25-35 grams (depending on quail and oil used)
- Carbohydrates: Approximately 30-40 grams (primarily from orange juice and honey in the glaze)
- Fiber: Approximately 2-4 grams
Important Note: These are estimates. For precise nutritional information, you can use online nutrition calculators and input the specific ingredients and quantities you use. Quail is a lean protein source, and this dish provides a good balance of protein, fats, and carbohydrates. However, it’s also moderately calorie-dense due to the glaze and butter. Enjoy in moderation as part of a balanced diet.
Preparation Time
While Orange-Glazed Quail is an impressive dish, the preparation time is surprisingly manageable, making it suitable for both special occasions and slightly more elaborate weeknight meals. Here’s a breakdown:
Prep Time:
- Active Prep: Approximately 30-40 minutes (includes preparing quail, making the glaze, zesting and juicing oranges, chopping herbs, and measuring ingredients).
Cook Time:
- Browning Quail: 10-15 minutes
- Reducing Glaze: 10-15 minutes
- Roasting Quail: 15-20 minutes
- Resting Time: 5-10 minutes
Total Time:
- Total Time: Approximately 1 hour to 1 hour and 30 minutes.
Time-Saving Tip: You can prepare the orange glaze ahead of time, even a day or two in advance, and store it in the refrigerator. This will significantly reduce the active prep time on the day you plan to cook the quail. You can also zest and juice the oranges in advance.
How to Serve
Orange-Glazed Quail is a versatile dish that can be served in various ways, from elegant dinners to more casual gatherings. Here are some serving suggestions to create a complete and memorable meal:
Elegant Dinner Pairings:
- Wild Rice Pilaf: A nutty and flavorful wild rice pilaf complements the quail beautifully. The earthy notes of wild rice harmonize with the gamey quail and citrus glaze.
- Creamy Polenta: Smooth and creamy polenta provides a comforting and elegant base for the quail. The richness of the polenta balances the tanginess of the orange glaze.
- Roasted Asparagus or Green Beans: Simple roasted asparagus or green beans with a drizzle of olive oil and lemon juice add a touch of freshness and color.
- Mashed Sweet Potatoes: Sweet and savory mashed sweet potatoes offer a delightful contrast to the quail and glaze. The sweetness of the potatoes complements the citrus notes.
- Small Green Salad with Citrus Vinaigrette: A light and refreshing green salad with a citrus vinaigrette provides a palate-cleansing counterpoint to the richness of the quail.
Casual Gathering Options:
- Quail Salad: Serve the Orange-Glazed Quail sliced or shredded over a bed of mixed greens with orange segments, toasted nuts, and a light vinaigrette.
- Quail Sliders or Sandwiches: Shred the quail meat and serve it in mini sliders or sandwiches with a dollop of aioli or citrus mayonnaise and some crisp lettuce.
- Quail Tacos or Wraps: Shredded quail meat can be used as a filling for tacos or wraps, paired with salsa, avocado, and cilantro.
Garnish Ideas:
- Fresh Orange Slices or Segments: Adds a visual appeal and reinforces the orange flavor. Thin slices or segments of fresh orange provide a bright and juicy garnish.
- Rosemary or Thyme Sprigs: Echoes the herbs used in the recipe and adds a touch of rustic elegance. Fresh rosemary or thyme sprigs offer a fragrant and visually appealing garnish.
- Toasted Almonds or Pine Nuts: Adds a crunchy texture and nutty flavor. Toasted nuts provide a textural contrast and enhance the overall flavor profile.
- Chopped Parsley or Chives: Provides a fresh, herbaceous note and vibrant green color. Chopped fresh herbs add a pop of color and freshness.
Beverage Pairings:
- Dry White Wine (Sauvignon Blanc, Pinot Grigio): The same type of wine used in the glaze pairs beautifully with the dish.
- Rosé Wine: A crisp and dry rosé wine is also an excellent pairing, complementing both the quail and the citrus glaze.
- Light-bodied Red Wine (Pinot Noir): For red wine lovers, a light-bodied Pinot Noir can work well, especially if serving the quail with heartier sides like wild rice or polenta.
- Sparkling Wine or Champagne: For a celebratory occasion, sparkling wine or Champagne provides an elegant and festive pairing.
- Iced Tea or Lemonade: For a non-alcoholic option, iced tea or lemonade offer refreshing and complementary flavors.
Additional Tips for Perfect Orange-Glazed Quail
To ensure your Orange-Glazed Quail is a resounding success, consider these additional tips and tricks:
Tip 1: Choose High-Quality Quail – Start with the Best
The quality of your quail will directly impact the final dish. Look for plump, fresh or properly frozen quail from a reputable source. If using frozen quail, ensure they are fully thawed before cooking. Fresh quail will generally have a more delicate flavor and texture. If possible, inquire about the source and feeding of the quail, as these factors can influence the taste.
Tip 2: Don’t Overcook the Quail – Maintain Juiciness
Quail are small birds and can dry out quickly if overcooked. It’s crucial to monitor the cooking time and temperature carefully. Roast the quail until they are just cooked through and the internal temperature reaches 165°F (74°C) in the thickest part of the thigh. Use a meat thermometer to ensure accuracy. Overcooked quail will be dry and tough. It’s better to slightly undercook them and let them rest, as they will continue to cook slightly during resting.
Tip 3: Basting is Key for Glossy Glaze – Build Layers of Flavor
Basting the quail with the orange glaze during the last few minutes of roasting is essential for creating a beautifully glossy and flavorful glaze. The basting process helps to build up layers of glaze on the quail, creating a sticky, caramelized coating. It also keeps the quail moist and prevents them from drying out. Spoon the glaze over the quail every few minutes during the final roasting stage for the best results.
Tip 4: Adjust Glaze Sweetness and Tanginess – Customize to Taste
The orange glaze recipe provides a balanced sweetness and tanginess, but you can adjust it to your preference. If you prefer a sweeter glaze, add a little more honey. If you prefer a tangier glaze, increase the amount of orange juice or Dijon mustard, or add a squeeze of lemon juice. Taste the glaze as it simmers and adjust the ingredients to achieve your desired flavor profile.
Tip 5: Rest the Quail Before Serving – Maximize Tenderness
Resting the quail after roasting is crucial for achieving maximum tenderness and juiciness. Allow the quail to rest for at least 5-10 minutes, tented loosely with aluminum foil, before serving. Resting allows the juices to redistribute throughout the meat, resulting in a more tender and flavorful final product. If you slice or carve the quail immediately after removing it from the oven, the juices will run out, leaving you with drier meat.
Frequently Asked Questions (FAQ) About Orange-Glazed Quail
Got questions about preparing Orange-Glazed Quail? You’re not alone! Here are answers to some frequently asked questions to help you master this elegant dish:
Q1: Where can I buy quail?
A: Quail can be found at specialty butcher shops, gourmet grocery stores, and some well-stocked supermarkets, particularly those with a good selection of poultry or game birds. You may also be able to order quail online from reputable meat suppliers. Check your local farmers’ markets, as some poultry farmers may raise quail. If buying frozen quail, ensure they are properly packaged and from a trusted source.
Q2: Can I use boneless quail for this recipe?
A: While semi-boneless quail are often preferred for easier eating, using fully boneless quail is not recommended for roasting. Boneless quail tend to dry out more quickly during cooking. Semi-boneless or bone-in quail are better choices for roasting, as the bones help to keep the meat moist and flavorful. If you are using semi-boneless quail, be mindful of the cooking time, as they may cook slightly faster than bone-in quail.
Q3: Can I make the orange glaze ahead of time?
A: Yes, you can definitely make the orange glaze ahead of time. In fact, preparing the glaze in advance is a great time-saving tip. You can make the glaze up to 2-3 days ahead of time and store it in an airtight container in the refrigerator. Reheat the glaze gently on the stovetop or in the microwave before using it to glaze the quail. Making the glaze ahead allows the flavors to meld and deepen, and it simplifies the cooking process on the day you plan to serve the quail.
Q4: What if I don’t have white wine? Can I substitute something else in the glaze?
A: Yes, if you don’t have dry white wine or prefer to omit alcohol, you can substitute chicken broth in the orange glaze recipe. Chicken broth will provide moisture and savory depth to the glaze. You can also use apple juice or white grape juice as non-alcoholic substitutes, but these will add a bit more sweetness, so you may want to slightly reduce the amount of honey in the glaze if using these sweeter substitutes.
Q5: How do I know when quail is cooked through?
A: The best way to determine if quail is cooked through is to use a meat thermometer. Insert the thermometer into the thickest part of the quail thigh, avoiding the bone. The internal temperature should reach 165°F (74°C). Quail are small birds, so they cook relatively quickly. Overcooking will result in dry quail. Check the temperature after about 15 minutes of roasting and continue roasting until the target temperature is reached. You can also check for doneness by piercing the thigh with a fork or knife; the juices should run clear, not pink, when cooked through.
With these detailed instructions, tips, and answers to common questions, you are now well-prepared to create a truly impressive and delicious Orange-Glazed Quail dish that will delight your family and guests. Enjoy the culinary adventure!
Print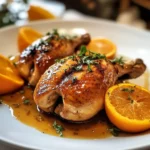
Orange-Glazed Quail recipe
Ingredients
For the Quail:
-
- 8 Whole Quail, semi-boneless or bone-in: The star of our dish! Quail are small game birds with a delicate, slightly gamey flavor. You can find them semi-boneless (partially deboned for easier eating) or bone-in. Semi-boneless quail are often preferred for ease of serving and eating, especially for less experienced game bird diners. Bone-in quail, however, can be slightly more flavorful as the bones contribute to the roasting process. Choose whichever you prefer or what is available. Ensure the quail are thawed completely if frozen.
-
- 2 tablespoons Olive Oil: For browning the quail and adding richness. Olive oil is a healthy and versatile choice. You can also use avocado oil or another neutral cooking oil if preferred.
-
- 1 teaspoon Kosher Salt: Essential for seasoning the quail and enhancing its natural flavors. Kosher salt is preferred for its larger crystals, which distribute evenly and provide a cleaner salt taste.
-
- 1/2 teaspoon Black Pepper, freshly ground: Provides a classic peppery bite and complements the quail and orange glaze. Freshly ground black pepper offers a much more aromatic and intense flavor than pre-ground pepper.
-
- 2 sprigs Fresh Rosemary: Adds a fragrant, piney, and slightly peppery note that pairs beautifully with game birds and citrus. Fresh rosemary is ideal for its robust flavor and aroma. You can substitute with 1 teaspoon of dried rosemary if fresh is unavailable, but fresh is highly recommended.
-
- 2 sprigs Fresh Thyme: Contributes an earthy, slightly lemony, and herbaceous flavor that complements the rosemary and orange. Fresh thyme adds a delicate and nuanced flavor. You can substitute with 1 teaspoon of dried thyme if fresh is unavailable, but fresh is preferable.
For the Orange Glaze:
-
- 1 cup Freshly Squeezed Orange Juice (from about 3–4 oranges): The heart of our glaze, providing the bright, citrusy base. Freshly squeezed orange juice is essential for the best flavor. Avoid using bottled or processed orange juice, as it often lacks the vibrant freshness of freshly squeezed juice. Choose sweet, juicy oranges like Valencia or Navel oranges.
-
- 1/2 cup Dry White Wine (such as Sauvignon Blanc or Pinot Grigio): Adds acidity, complexity, and depth to the glaze. Dry white wine complements the orange flavor and helps to balance the sweetness. Sauvignon Blanc or Pinot Grigio are good choices for their crispness and citrus notes. You can substitute with chicken broth if you prefer to omit alcohol.
-
- 1/4 cup Honey: Provides sweetness and a lovely glossy texture to the glaze. Honey adds a natural sweetness and a subtle floral note. You can also use maple syrup or agave nectar as alternatives, but honey is traditionally used and provides a unique flavor profile.
-
- 2 tablespoons Orange Zest (from about 2 oranges): Intensifies the orange flavor and adds aromatic citrus oils. Orange zest is packed with essential oils and provides a concentrated burst of orange flavor. Use a microplane or fine grater to zest the oranges, being careful to only zest the orange part of the peel and avoid the bitter white pith underneath.
-
- 2 tablespoons Butter, unsalted: Adds richness, smoothness, and a velvety texture to the glaze. Butter helps to emulsify the glaze and create a luxurious mouthfeel. Unsalted butter is preferred to control the salt level in the glaze.
-
- 1 tablespoon Soy Sauce (low sodium): Adds umami, depth, and a savory counterpoint to the sweetness of the orange and honey. Low sodium soy sauce is recommended to control the saltiness. Soy sauce enhances the overall flavor complexity of the glaze and prevents it from being overly sweet.
-
- 1 teaspoon Dijon Mustard: Adds a subtle tang and complexity to the glaze, balancing the sweetness and richness. Dijon mustard provides a gentle acidity and a slight sharpness that complements the other flavors.
-
- 1/2 teaspoon Garlic Powder: Enhances the savory notes in the glaze and adds a subtle garlic flavor. Garlic powder is used to provide a mellow garlic flavor that blends seamlessly into the glaze. You can also use 1 clove of minced fresh garlic if you prefer a more pronounced garlic flavor, but garlic powder is often preferred for glazes to avoid any raw garlic bite.
-
- Pinch of Red Pepper Flakes (optional, for a touch of heat): Adds a subtle warmth and a hint of spice to balance the sweetness. Red pepper flakes provide a gentle heat that complements the citrus and honey without overpowering the dish. Omit if you prefer a completely non-spicy glaze.
Instructions
Step 1: Prepare the Quail – Seasoning for Flavor
Properly preparing the quail is the first step to ensuring a flavorful and juicy final dish.
-
- Preheat Oven: Preheat your oven to 400°F (200°C). This temperature is ideal for roasting quail, allowing them to cook through while developing a beautiful golden-brown skin.
-
- Pat Quail Dry: Pat the quail dry thoroughly with paper towels. Removing excess moisture from the skin is crucial for achieving crispy, browned skin during roasting.
-
- Season Quail: In a small bowl, combine the kosher salt and freshly ground black pepper. Season the quail generously inside and out with the salt and pepper mixture. Make sure to season the cavity of each quail as well as the skin.
-
- Stuff with Herbs: Place a sprig of fresh rosemary and a sprig of fresh thyme inside the cavity of each quail. These herbs will infuse the quail with their aromatic flavors as they roast.
Step 2: Brown the Quail – Building Flavor and Color
Browning the quail before roasting adds a layer of flavor and creates a beautiful golden-brown color. This step is optional but highly recommended for enhancing the overall presentation and taste.
-
- Heat Olive Oil: Heat the olive oil in a large oven-safe skillet or Dutch oven over medium-high heat until it is shimmering hot. Ensure the skillet is large enough to accommodate all the quail in a single layer without overcrowding.
-
- Brown Quail on All Sides: Carefully place the seasoned quail in the hot skillet, breast side down first. Brown them on all sides, turning them with tongs, for about 2-3 minutes per side, or until they are nicely browned. Work in batches if necessary to avoid overcrowding the pan, as overcrowding will steam the quail rather than brown them. The browning process develops rich, savory flavors through the Maillard reaction.
-
- Remove Quail from Skillet: Once browned, remove the quail from the skillet and set them aside on a plate. Leave any rendered fat and browned bits in the skillet, as these will contribute to the flavor of the glaze.
Step 3: Prepare the Orange Glaze – A Symphony of Citrus and Sweetness
While the quail are resting briefly, let’s prepare the vibrant and flavorful orange glaze.
-
- Deglaze Skillet (Optional but Recommended): If there are browned bits stuck to the bottom of the skillet after browning the quail, deglaze the skillet by pouring in the dry white wine. Scrape up the browned bits with a wooden spoon or spatula as the wine simmers. This deglazing process captures all those flavorful browned bits and incorporates them into the glaze. Simmer the wine for a minute or two until slightly reduced. If you are omitting wine, you can skip this step or deglaze with a tablespoon or two of chicken broth.
-
- Combine Glaze Ingredients: In the same skillet (or a separate saucepan if you used a roasting pan instead of a skillet), combine the freshly squeezed orange juice, honey, orange zest, butter, soy sauce, Dijon mustard, garlic powder, and red pepper flakes (if using).
-
- Simmer and Reduce Glaze: Bring the glaze mixture to a simmer over medium heat, stirring occasionally. Reduce the heat to low and simmer gently for about 10-15 minutes, or until the glaze has thickened slightly and reduced by about one-third. The glaze should be syrupy enough to coat the back of a spoon. Simmering reduces the liquid and concentrates the flavors, creating a richer and more intense glaze. Be careful not to over-reduce the glaze, as it will thicken further as it cools.
Step 4: Roast and Glaze the Quail – Infusing Flavor and Tenderness
Now, we’ll roast the quail and generously coat them with the luscious orange glaze.
-
- Return Quail to Skillet: Place the browned quail back into the skillet with the orange glaze. Arrange them in a single layer, if possible, and spoon the glaze generously over each quail, ensuring they are well coated.
-
- Roast in Oven: Transfer the skillet to the preheated oven and roast for 15-20 minutes, or until the quail are cooked through and the internal temperature reaches 165°F (74°C) in the thickest part of the thigh (avoiding the bone). The exact roasting time will depend on the size of the quail and your oven temperature.
-
- Baste with Glaze (Optional but Recommended): During the last 5-7 minutes of roasting, you can baste the quail with the glaze in the skillet every few minutes to ensure they are evenly coated and beautifully glossy. This basting process adds extra flavor and creates a sticky, caramelized glaze on the quail.
Step 5: Rest and Serve – The Final Touch of Perfection
Resting the quail briefly before serving allows the juices to redistribute, resulting in more tender and flavorful meat.
-
- Remove from Oven and Rest: Remove the skillet from the oven and let the quail rest in the skillet, tented loosely with aluminum foil, for about 5-10 minutes. Resting is crucial for juicy and tender quail.
-
- Serve Hot: Serve the Orange-Glazed Quail hot, drizzled with any remaining glaze from the skillet. Garnish with fresh orange slices, rosemary sprigs, or thyme sprigs, if desired, for an elegant presentation. Serve immediately and enjoy the delightful combination of flavors and textures!
Nutrition
- Serving Size: one normal portion
- Calories: 500-650
- Fat: 25-35 grams
- Carbohydrates: 30-40 grams
- Fiber: 2-4 grams
- Protein: 40-50 grams