

There are few dishes in this world that are as universally loved and celebrated as a warm, sprawling platter of nachos. For my family, it’s more than just a snack; it’s an event. It’s the centerpiece of movie nights, the undisputed champion of game day spreads, and sometimes, when the week has been particularly long, it’s a perfectly acceptable and joyous dinner. I’ll never forget the first time I made nachos “the right way” on a sheet pan instead of just zapping a pile in the microwave. The difference was staggering. Each chip was perfectly coated in a blanket of gloriously melted cheese, the edges toasted to a perfect crisp. As I pulled the tray from the oven, the aroma of toasted corn and sharp cheddar filled the kitchen, and my kids’ eyes widened with anticipation. We gathered around the kitchen island, pulling away chip after chip, each one a perfect bite of crunchy, cheesy, savory goodness. That simple pan of nachos brought us together, creating a moment of shared, simple pleasure that no fancy meal ever could. It’s a recipe that’s less about precise measurements and more about a feeling—of comfort, of fun, and of pure, unadulterated deliciousness.
Why This Sheet Pan Method is the Ultimate Nacho Hack
Before we dive into the recipe, let’s talk about why making nachos on a sheet pan is a complete game-changer. For years, people have been piling chips and cheese into a bowl and microwaving it, resulting in a disappointing outcome: a core of molten-hot, lava-like cheese surrounded by a ring of lukewarm, naked chips, with the bottom layer inevitably turning into a soggy mess.
The sheet pan method solves every single one of these problems:
- Maximum Surface Area: By spreading the chips out in a single (or double) layer on a large baking sheet, you ensure that every single chip gets its fair share of cheese and toppings. No chip is left behind!
- Even Cooking: An oven provides dry, circulating heat that melts the cheese evenly and toasts the chips slightly, enhancing their corn flavor and making them even crispier.
- Crispiness Guaranteed: The dry heat of the oven prevents the dreaded sogginess that plagues microwaved nachos. The chips stay structurally sound and ready for dipping and scooping.
- Perfect for a Crowd: A large sheet pan can hold a massive amount of nachos, making it the ideal way to serve a hungry group of friends or family. It becomes a communal, shareable centerpiece for any gathering.
- Easy Cleanup: Lining your sheet pan with parchment paper or aluminum foil means cleanup is as simple as rolling up the paper and tossing it away.
The Anatomy of Perfect Nachos: Choosing Your Components
Truly great nachos are built on a foundation of quality ingredients. Each of the three core components—the chips, the cheese, and the toppings—plays a crucial role in the final product.
Part 1: The Chip (The Foundation)
The tortilla chip is the vehicle for all the goodness, so it needs to be strong.
- Thickness is Key: Flimsy, thin chips will break under the weight of cheese and toppings. Look for a sturdy, restaurant-style tortilla chip. A thicker cut chip, or one that is round instead of triangular, often has more structural integrity.
- Flavor Profile: A simple, salted corn tortilla chip is the classic and best choice. It provides a savory, corn-forward flavor that complements the other ingredients without overpowering them. Avoid heavily seasoned or flavored chips (like lime or chili) unless you are intentionally building a specific flavor profile around them.
Part 2: The Cheese (The Soul)
This is arguably the most important part. The right cheese blend is what separates good nachos from truly transcendent nachos. The goal is a combination of perfect meltability and fantastic flavor.
- The Melters: These are cheeses that become gooey and stringy when heated. Good options include Monterey Jack, low-moisture mozzarella, and Asadero or Oaxaca cheese.
- The Flavor-Bringers: These cheeses add a sharp, tangy, or nutty punch. Excellent choices include sharp cheddar, Colby, or a touch of Pepper Jack for a spicy kick.
- The Golden Rule: Always shred your own cheese! Pre-shredded bagged cheese contains additives like potato starch and cellulose to prevent the shreds from clumping. These additives inhibit smooth melting, resulting in a greasy or grainy texture. Buying blocks of cheese and shredding them yourself with a box grater takes only a few extra minutes and yields a vastly superior, creamier, and more luxurious cheese pull.
Complete Ingredients for Classic Melted Cheese Nachos
This recipe provides the perfect, simple base. The toppings are where you can get creative, but this foundation is flawless on its own.
- 1 large bag (13-15 oz) of thick, restaurant-style tortilla chips
- 4 oz (1 cup) freshly shredded Sharp Cheddar Cheese
- 4 oz (1 cup) freshly shredded Monterey Jack Cheese
- 1 large jalapeño, thinly sliced (optional, for a kick of heat)
- For serving (optional but recommended): Sour cream, guacamole, salsa, pico de gallo, fresh cilantro
Instructions: The Art of the Layer
Building the perfect pan of nachos is all about the layering technique. This ensures an ideal chip-to-cheese ratio in every single bite.
Step 1: Preheat and Prepare
Position an oven rack in the middle of your oven and preheat to 400°F (200°C). Line a large, rimmed baking sheet with parchment paper or aluminum foil for easy cleanup.
Step 2: Shred Your Cheese
Using a box grater, shred your blocks of sharp cheddar and Monterey Jack cheese into a medium-sized bowl. Toss them together with your fingers to create a uniform blend. This is the most important prep step!
Step 3: Build the First Layer
Arrange half of your tortilla chips on the prepared baking sheet. Spread them out into a relatively even, single layer, covering as much of the surface as possible. It’s okay if they overlap slightly, but avoid creating a thick pile.
Step 4: The First Cheese Application
Sprinkle half of your shredded cheese blend evenly over the layer of chips. Make sure to get cheese all the way to the edges. If using, scatter half of your sliced jalapeños over the cheese.
Step 5: Build the Second Layer
Scatter the remaining tortilla chips on top of the first cheesy layer. This creates pockets and height, making the final platter more interesting and ensuring even more cheese coverage.
Step 6: The Final Cheese Application
Sprinkle the remaining half of the cheese blend and the rest of the sliced jalapeños over the top layer of chips. Now, every chip in the pan has been exposed to the cheesy goodness.
Step 7: Bake to Golden Perfection
Place the sheet pan in the preheated oven. Bake for 7-10 minutes. You’re looking for the cheese to be fully melted, bubbly, and just beginning to turn golden brown in spots. The edges of the chips on top should be slightly toasted. Keep a close eye on them, as they can go from perfect to burnt very quickly.
Step 8: Top and Serve Immediately
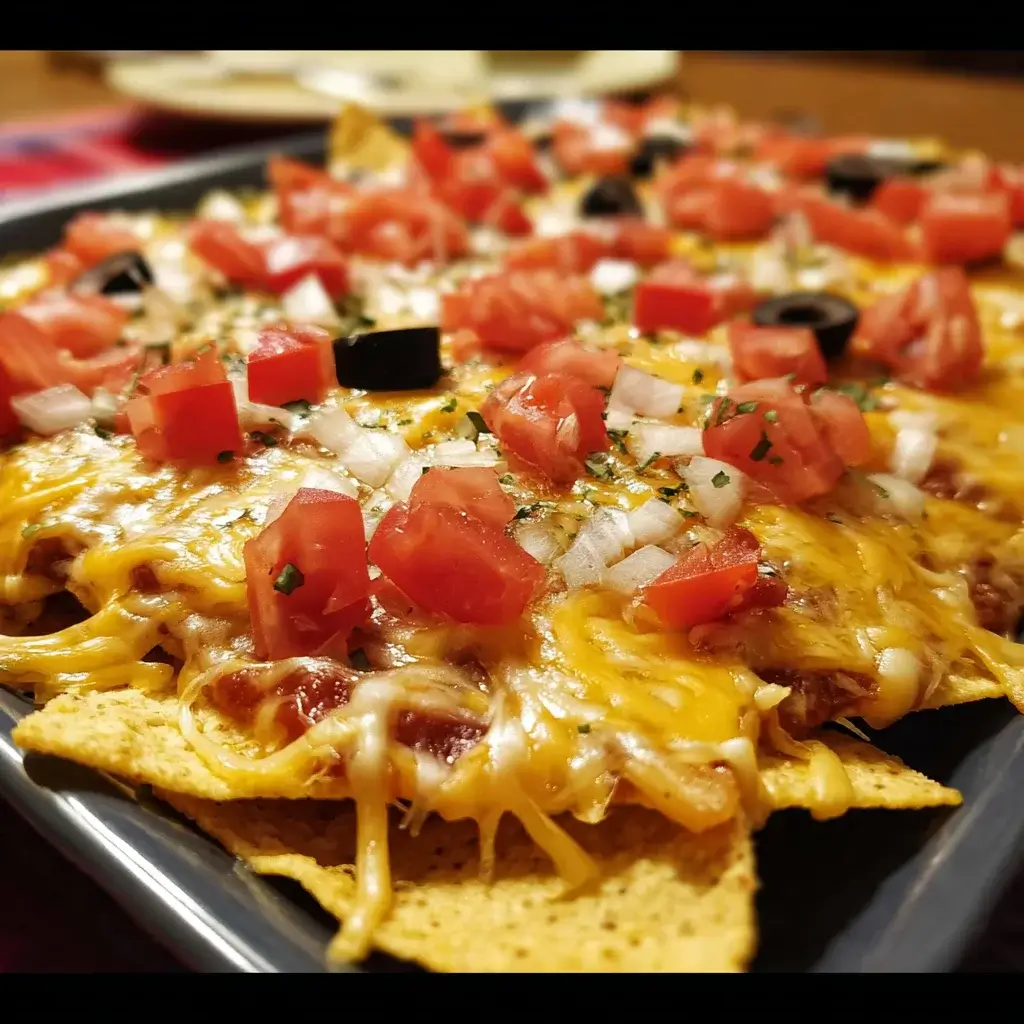
Carefully remove the sheet pan from the oven. Let it cool for just a minute before adding your “cold” toppings. Dollop with sour cream and guacamole, spoon over some salsa or pico de gallo, and finish with a sprinkle of fresh cilantro. Serve the entire tray immediately for the best experience.
Nutrition Facts
- Servings: 6-8 (as an appetizer)
- Calories per serving: Approximately 350-450 kcal (for the base nachos without heavy toppings)
Disclaimer: Nutritional information is an estimate and will vary significantly based on the specific brands of chips and cheese used, as well as the quantity and type of toppings added.
Preparation Time Breakdown
- Active Prep Time: 10 minutes (shredding cheese, layering)
- Cook Time: 7-10 minutes
- Total Time: Approximately 20 minutes
How to Serve: Building Your Ultimate Nacho Masterpiece
The cheesy base is just the beginning. Setting up a “nacho bar” with bowls of various toppings allows everyone to customize their own perfect bite. Use lists and bullet points for easy reference.
- Proteins (Add substance and make it a meal):
- Taco-Seasoned Ground Beef: Brown 1 lb of ground beef and mix with your favorite taco seasoning.
- Shredded Chicken: Use a rotisserie chicken for a quick option, or boil and shred chicken breasts tossed in salsa or adobo sauce.
- Pulled Pork (Carnitas): Leftover pulled pork is a fantastic, savory addition.
- Black Beans or Pinto Beans: A great vegetarian option. Rinse and drain a can of beans and scatter them over the chips before baking.
- Spicy Chorizo: Cooked and crumbled chorizo adds a smoky, spicy flavor.
- The Fresh & Zesty (Add brightness and crunch):
- Pico de Gallo: A fresh, chunky salsa of diced tomatoes, onions, cilantro, jalapeño, and lime juice.
- Diced Red Onion: Provides a sharp, pungent bite.
- Pickled Red Onions: Offer a tangy, sweet acidity that cuts through the richness.
- Diced Tomatoes: Simple and fresh.
- Fresh or Pickled Jalapeños: For that essential kick of heat.
- Chopped Fresh Cilantro: A non-negotiable for a bright, herbal finish.
- Corn Salsa: A mix of corn, black beans, red onion, and bell pepper.
- The Creamy & Cool (Balance the heat and add richness):
- Sour Cream or Mexican Crema: A cooling element that balances spice.
- Guacamole: Mashed avocado, lime juice, salt, onion, and cilantro.
- Queso Fresco or Cotija Cheese: Crumbled over the top after baking, these cheeses add a salty, milky flavor.
- Avocado Crema: A blend of sour cream, avocado, cilantro, and lime juice for a drizzly sauce.
5 Additional Tips for Nacho Nirvana
- Broil with Caution for Bubbly Brown Spots: For that classic “pub-style” finish with browned, bubbly cheese, you can switch the oven to the broil setting for the last 1-2 minutes of cooking. DO NOT WALK AWAY. The broiler is intensely hot and can burn the nachos in a matter of seconds. Watch it like a hawk.
- Don’t Overload the Pan: While it’s tempting to build a mountain of nachos, overcrowding the pan will lead to steaming instead of toasting. This can trap moisture and create soggy chips at the bottom. It’s better to make two separate, well-spaced pans of nachos than one overloaded one.
- Apply Toppings Strategically: To prevent sogginess, add your wettest toppings like salsa, sour cream, and guacamole after the nachos come out of the oven. Heavier toppings like ground beef or beans can be added before baking, as they benefit from being heated with the cheese.
- Warm Your Chips (A Pro Move): For next-level crispiness, spread your chips on the baking sheet and warm them in the oven for 3-5 minutes before adding any cheese or toppings. This dries them out slightly and ensures they are perfectly crisp and ready for the cheese.
- Serve Immediately and with Confidence: Nachos have a very short peak performance window. The moment they come out of the oven, the clock starts ticking. Have your toppings ready to go and call everyone to the kitchen. The best nachos are hot nachos, where the cheese is still perfectly gooey and the chips are warm and crisp.
Frequently Asked Questions (FAQ)
1. What are the absolute best cheeses for nachos?
The best result comes from a blend. A 50/50 mix of a great melter and a great flavor-bringer is ideal. The gold standard is a mix of medium or sharp cheddar (for flavor) and Monterey Jack (for its incredible melting properties). For a more authentic Mexican flavor, try Oaxaca cheese, which melts beautifully and has a mild, milky taste.
2. How do I prevent my nachos from getting soggy?
There are three keys to preventing soggy nachos. First, use sturdy, thick-cut tortilla chips that can handle the weight of the toppings. Second, follow the layering method on a sheet pan in the oven, which keeps the environment dry. Third, and most importantly, reserve wet toppings like salsa, sour cream, and pico de gallo for adding after baking. Serve the nachos immediately.
3. Can I make nachos in an air fryer or microwave?
You can, but the results are different. A microwave is the fastest method but often leads to unevenly melted cheese and soft, steamed chips. An air fryer can work well for a single serving; line the basket with foil, create a small, single layer, and air fry at 375°F (190°C) for 3-5 minutes. However, for feeding more than one person and achieving the best crispy texture, the oven sheet pan method remains undefeated.
4. Can I prepare nachos ahead of time?
You can do some of the prep work, but you should not assemble and bake them ahead of time. Nachos should always be baked just before serving. To save time, you can cook your protein (like ground beef), shred your cheese, and chop all your vegetables and toppings in advance. Store everything in separate airtight containers in the refrigerator. When it’s time to eat, assembly and baking will take less than 15 minutes.
5. I don’t have cheddar or Monterey Jack. What other cheeses can I use?
You can get creative with your cheese! Colby is a great, mild melter. Pepper Jack is a fantastic choice if you want to add a bit of built-in spice. A low-moisture mozzarella will give you an epic cheese pull, though it is very mild in flavor. Even a sprinkle of crumbled Cotija or queso fresco on top after baking can add a wonderful salty finish. The key is to avoid very hard, aged cheeses (like Parmesan) or overly processed cheeses, which don’t melt well.
Nachos With Melted Cheese recipe
Ingredients
-
1 large bag (13-15 oz) of thick, restaurant-style tortilla chips
-
4 oz (1 cup) freshly shredded Sharp Cheddar Cheese
-
4 oz (1 cup) freshly shredded Monterey Jack Cheese
-
1 large jalapeño, thinly sliced (optional, for a kick of heat)
-
For serving (optional but recommended): Sour cream, guacamole, salsa, pico de gallo, fresh cilantro
Instructions
Step 1: Preheat and Prepare
Position an oven rack in the middle of your oven and preheat to 400°F (200°C). Line a large, rimmed baking sheet with parchment paper or aluminum foil for easy cleanup.
Step 2: Shred Your Cheese
Using a box grater, shred your blocks of sharp cheddar and Monterey Jack cheese into a medium-sized bowl. Toss them together with your fingers to create a uniform blend. This is the most important prep step!
Step 3: Build the First Layer
Arrange half of your tortilla chips on the prepared baking sheet. Spread them out into a relatively even, single layer, covering as much of the surface as possible. It’s okay if they overlap slightly, but avoid creating a thick pile.
Step 4: The First Cheese Application
Sprinkle half of your shredded cheese blend evenly over the layer of chips. Make sure to get cheese all the way to the edges. If using, scatter half of your sliced jalapeños over the cheese.
Step 5: Build the Second Layer
Scatter the remaining tortilla chips on top of the first cheesy layer. This creates pockets and height, making the final platter more interesting and ensuring even more cheese coverage.
Step 6: The Final Cheese Application
Sprinkle the remaining half of the cheese blend and the rest of the sliced jalapeños over the top layer of chips. Now, every chip in the pan has been exposed to the cheesy goodness.
Step 7: Bake to Golden Perfection
Place the sheet pan in the preheated oven. Bake for 7-10 minutes. You’re looking for the cheese to be fully melted, bubbly, and just beginning to turn golden brown in spots. The edges of the chips on top should be slightly toasted. Keep a close eye on them, as they can go from perfect to burnt very quickly.
Step 8: Top and Serve Immediately
Carefully remove the sheet pan from the oven. Let it cool for just a minute before adding your “cold” toppings. Dollop with sour cream and guacamole, spoon over some salsa or pico de gallo, and finish with a sprinkle of fresh cilantro. Serve the entire tray immediately for the best experience.
Nutrition
- Serving Size: one normal portion
- Calories: 350-450


