
Mushy Peas. The name itself might not immediately conjure up images of culinary delight. In fact, for many, it might evoke a sense of mild trepidation, perhaps even a childhood memory of overcooked, bland, green… well, mush. I confess, I used to be in that camp. Growing up, mushy peas were something I politely tolerated alongside fish and chips, a necessary but not particularly exciting component of the meal. It wasn’t until I ventured into making them from scratch, from humble dried marrowfat peas, that my perspective completely shifted. The transformation was remarkable. Suddenly, these weren’t just “mushy peas,” but a vibrant, flavorful, and surprisingly nuanced side dish. The creamy texture, the subtle sweetness, the earthy pea flavor – all elevated by a touch of butter and seasoning – it was a revelation! My initial skepticism melted away with each spoonful. Now, homemade mushy peas are a regular feature in my kitchen, not just as a side for fish and chips (though they are undeniably perfect for that!), but alongside pies, sausages, and even as a comforting spread on toast. My family, initially as hesitant as I once was, are now enthusiastic converts. They request “your special peas” regularly, and I often find myself making double batches just to keep up with demand. Let me guide you through the simple magic of creating authentic, delicious mushy peas at home. Prepare to be surprised – and perhaps even fall in love – with this often-underestimated culinary gem!
Ingredients: The Simple Essentials for Authentic Mushy Peas
The beauty of mushy peas lies in its simplicity. You don’t need a long list of exotic ingredients to create this classic dish. In fact, the key is focusing on quality and the right type of peas. Here’s a breakdown of what you’ll need to make truly authentic and flavorful mushy peas:
The Star Ingredient: Dried Marrowfat Peas
- 500g (approximately 2 cups) Dried Marrowfat Peas: This is absolutely the most crucial ingredient. Marrowfat peas are not just any dried peas. They are specifically cultivated and dried to create the characteristic creamy texture and slightly sweet, ‘pea-y’ flavour that defines mushy peas. They are larger and starchier than garden peas and have a unique ability to break down and become wonderfully mushy when cooked. Look for them in bags labeled “Dried Marrowfat Peas” or “Mushy Pea Peas.” You’ll typically find them in the dried pulses section of supermarkets or in Asian or British food stores. Using any other type of dried pea will not yield authentic mushy peas.
For Soaking and Cooking:
- Water (for soaking and cooking): You’ll need plenty of water for both soaking and cooking the peas. The quality of your water can subtly affect the flavour, so using filtered water is a good option if your tap water has a strong taste.
- 1 teaspoon Bicarbonate of Soda (Baking Soda): This is a vital ingredient that helps to soften the pea skins and enhance the vibrant green colour. Bicarbonate of soda also aids in breaking down the peas, contributing to the desired mushy texture. Do not skip this ingredient!
For Flavour and Finishing:
- 50g (approximately 4 tablespoons) Butter (or vegan butter alternative): Butter adds richness, flavour, and a lovely silky texture to the finished mushy peas. Salted or unsalted butter can be used – adjust seasoning accordingly. For a vegan version, use a good quality plant-based butter alternative.
- Salt: Essential for seasoning and bringing out the natural flavours of the peas. Sea salt or kosher salt is recommended for a cleaner flavour.
- Black Pepper (freshly ground): Freshly ground black pepper adds a subtle warmth and spice that complements the sweetness of the peas and the richness of the butter.
- Optional Enhancements (to taste):
- Mint Sauce (traditional British): A small spoonful of mint sauce can add a refreshing and tangy counterpoint to the richness of the peas. Use sparingly as it can be quite potent.
- Lemon Juice: A squeeze of fresh lemon juice can brighten the flavour and add a touch of acidity.
- White Pepper: A pinch of white pepper offers a milder, more delicate heat than black pepper and is sometimes preferred in classic recipes.
- Sugar (a tiny pinch – optional): Some recipes call for a tiny pinch of sugar to enhance the natural sweetness of the peas, but this is entirely optional and often unnecessary if using good quality marrowfat peas.
Step-by-Step Instructions: The Simple Art of Making Mushy Peas
Making mushy peas is a straightforward process, but it does require some time for soaking. However, the active cooking time is relatively short, and the results are well worth the minimal effort. Here’s a detailed step-by-step guide to achieving perfect mushy peas every time:
Part 1: Soaking the Marrowfat Peas (Essential!)
- Rinse the peas: Place the dried marrowfat peas in a large colander and rinse them thoroughly under cold running water. This removes any dust or debris.
- Transfer to a large bowl: Place the rinsed peas in a large bowl. They will expand significantly during soaking, so ensure the bowl is large enough.
- Add bicarbonate of soda: Sprinkle the bicarbonate of soda (baking soda) over the peas.
- Cover with cold water: Pour plenty of cold water over the peas, ensuring they are completely submerged. The water level should be at least a few inches above the peas as they will absorb a lot of liquid.
- Soak for at least 12 hours, or preferably overnight: Cover the bowl with a clean cloth or plate and leave the peas to soak at room temperature for at least 12 hours, or ideally overnight (around 16-24 hours). This soaking process is crucial for softening the peas and allowing them to cook evenly and become mushy. You will notice the soaking water will become cloudy and slightly green – this is normal.
- Check for soaking: After soaking, the peas should have significantly increased in size and be plump and slightly softened. If they still feel very hard, you may need to soak them for a little longer.
Part 2: Cooking the Mushy Peas
- Drain and rinse the soaked peas: Drain the soaked peas in a colander and rinse them thoroughly under cold running water. This removes the soaking water and any remaining bicarbonate of soda.
- Transfer to a saucepan: Place the rinsed peas in a large, heavy-bottomed saucepan.
- Cover with fresh cold water: Add fresh cold water to the saucepan, ensuring the peas are just covered. You want just enough water to cook the peas without making them too watery. Start with about 2-3 cups of water and add more if needed during cooking.
- Bring to a boil, then reduce to a simmer: Bring the water to a rolling boil over high heat. Once boiling, immediately reduce the heat to low, cover the saucepan with a lid, and simmer gently.
- Simmer for 1-2 hours, or until peas are very tender and mushy: Simmer the peas gently, stirring occasionally, for 1 to 2 hours, or until they are incredibly tender and easily mashable. The cooking time will depend on the peas and the desired texture. Start checking them after 1 hour. You may need to add more boiling water during cooking if the water level gets too low and the peas start to dry out – add just enough to keep them simmering gently. The peas should break down easily when pressed against the side of the pan with a spoon.
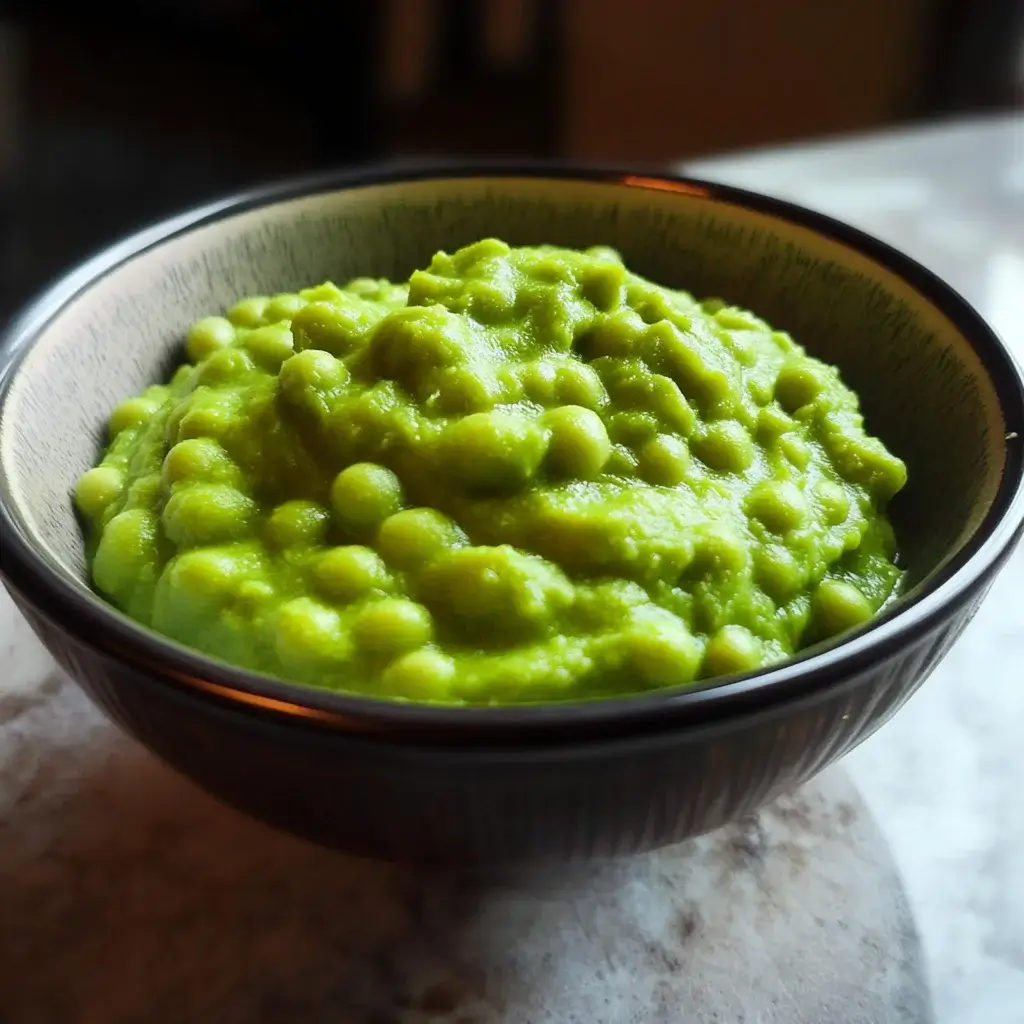
- Mash the peas: Once the peas are very tender, remove the saucepan from the heat. Using a potato masher, hand blender, or immersion blender, mash the peas to your desired consistency. For truly “mushy” peas, you’ll want to mash them quite thoroughly. Some people prefer a slightly chunkier texture, so mash accordingly. You can also use a fork for a more rustic mash. Be careful when blending hot peas, especially with a hand blender – splatter can occur!
Part 3: Finishing and Seasoning
- Stir in butter: Add the butter (or vegan butter alternative) to the mashed peas and stir until melted and fully incorporated. This will make the peas creamy and rich.
- Season with salt and pepper: Season generously with salt and freshly ground black pepper to taste. Start with about ½ teaspoon of salt and ¼ teaspoon of pepper, and then adjust to your preference.
- Add optional enhancements (if desired): If using, stir in a small spoonful of mint sauce or a squeeze of lemon juice. Taste and adjust seasoning as needed.
- Serve hot: Mushy peas are best served immediately while hot and creamy.
Nutrition Facts: Surprisingly Nutritious Mushy Peas
Mushy peas, often enjoyed as a comforting side dish, are not only delicious but also offer a range of nutritional benefits. They are a surprisingly good source of various vitamins, minerals, and fiber, making them a healthy addition to your meal. Here’s an estimated nutritional breakdown per serving:
- Servings: This recipe typically yields approximately 6-8 servings as a side dish.
- Serving Size (estimated): Approximately ½ cup (about 100-120g) of cooked mushy peas.
- Calories per serving (estimated): 150-200 calories (This is an estimate and can vary based on portion size, amount of butter used, and specific ingredients.)
Approximate Nutritional Breakdown per Serving (Estimated):
- Protein: 7-9 grams (Peas are a good source of plant-based protein)
- Fat: 8-12 grams (Primarily from butter; can be reduced by using less butter or a lower-fat alternative)
- Carbohydrates: 18-25 grams
- Fiber: 6-8 grams (Mushy peas are an excellent source of dietary fiber)
- Sugar: Naturally occurring sugars (low amount)
Vitamins and Minerals (per serving – estimated):
- Vitamin K: Good source (important for blood clotting and bone health)
- Folate (Vitamin B9): Good source (essential for cell growth and development)
- Manganese: Good source (important for metabolism and antioxidant function)
- Iron: Moderate source (important for carrying oxygen in the blood)
- Potassium: Moderate source (important for blood pressure regulation)
- Vitamin C: Small amount
- Vitamin A: Small amount
Health Benefits Highlights:
- High in Fiber: Mushy peas are an excellent source of dietary fiber, which is beneficial for digestive health, helps regulate blood sugar levels, promotes satiety, and may contribute to lower cholesterol.
- Good Source of Protein: They provide a decent amount of plant-based protein, contributing to muscle building and repair, and overall satiety.
- Rich in Vitamins and Minerals: Mushy peas offer a range of essential vitamins and minerals, contributing to overall health and well-being.
- Relatively Low in Fat (depending on butter usage): While butter adds fat, you can control the amount used or opt for a lower-fat alternative to manage fat content.
- Vegan and Vegetarian Friendly (when using vegan butter): Mushy peas are naturally vegan and vegetarian, making them a versatile side dish for various dietary needs.
Important Notes:
- These are estimates and can vary significantly based on specific ingredients, portion sizes, and cooking methods.
- The nutritional value is primarily derived from the marrowfat peas themselves. Butter adds calories and fat.
- For more accurate nutritional information, you can use online recipe analyzers or nutrition tracking apps, inputting the specific ingredients and quantities you use.
- Mushy peas, as part of a balanced diet, can be a healthy and nutritious side dish option.
Preparation Time: Soaking is Key, Cooking is Quick
While making mushy peas requires some advance planning due to the soaking time, the active preparation and cooking time is relatively short. Here’s a breakdown of the estimated time involved:
- Soaking Time: Minimum 12 hours, ideally overnight (16-24 hours). This is passive time – you don’t need to actively do anything during soaking.
- Prep Time (rinsing, measuring ingredients): Approximately 10-15 minutes.
- Cook Time: 1-2 hours (simmering time – mostly hands-off, requires occasional stirring).
- Mashing & Finishing Time: Approximately 5-10 minutes.
- Total Time (excluding soaking): Approximately 1 hour 15 minutes – 2 hours 25 minutes.
- Total Time (including soaking): Minimum 13 hours 15 minutes, up to 26 hours 25 minutes (depending on soaking time).
Tips for Time Management:
- Soak Peas Overnight: The best way to manage time is to soak the peas overnight. This can be done the day before you plan to cook them, making the process much more convenient.
- Weekend Prep: Mushy peas are a great side dish to prepare on a weekend when you have more time. You can soak them on Saturday and cook them on Sunday for a Sunday roast or family meal.
- Make Ahead and Reheat: Mushy peas can be made a day or two in advance and stored in the refrigerator. Reheat them gently on the stovetop or in the microwave before serving. They actually often taste even better the next day as the flavours have melded.
- Mostly Hands-Off Cooking: The simmering process is mostly hands-off. You can do other tasks in the kitchen or relax while the peas are simmering. Just remember to stir them occasionally and check the water level.
How to Serve Mushy Peas: Classic Pairings and Modern Twists
Mushy peas are a versatile side dish that complements a range of dishes, from classic British fare to modern culinary creations. Here are some popular and delicious ways to serve mushy peas:
- Classic British Pairings (Traditional):
- Fish and Chips: The quintessential pairing! Mushy peas are an absolute must-have alongside traditional British fish and chips. They provide a creamy, flavourful counterpoint to the crispy fried fish and potatoes.
- Pie and Mash: Another iconic British combination. Mushy peas are delicious served with meat pies (like steak and ale pie, or minced beef pie) and creamy mashed potatoes.
- Sausage and Mash: Sausages (bangers) and mashed potatoes with mushy peas is a comforting and hearty British pub classic.
- Sunday Roast: Mushy peas can be a welcome addition to a traditional Sunday roast dinner, especially alongside roast beef, chicken, or lamb.
- Modern and International Servings:
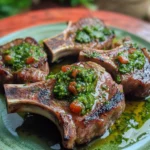
- Alongside Grilled or Roasted Meats: Mushy peas can be a surprisingly delicious accompaniment to grilled steak, chicken, or pork chops. The creamy texture and pea flavour provide a nice contrast to the savoury meat.
- With Vegetarian or Vegan Mains: Serve mushy peas as a side dish with vegetarian or vegan mains like lentil loaf, nut roast, or vegetable wellington.
- On Toast: For a simple and comforting snack or light meal, spread warm mushy peas on toasted bread. Top with a sprinkle of cheese or a poached egg for extra richness.
- As a Dip or Spread: Cool mushy peas and use them as a dip for crudités, crackers, or pita bread. You can also use them as a spread in sandwiches or wraps.
- In Bowls and Grain Bowls: Add a scoop of mushy peas to nourish bowls or grain bowls for added flavour, texture, and nutrition.
- With Curry: In some regions of the UK, mushy peas are even served alongside curry dishes as a comforting and cooling side.
- Serving Temperature and Garnishes:
- Serve Hot: Mushy peas are best served hot and creamy. Reheat gently if making ahead.
- Butter Swirl: A small swirl of melted butter on top just before serving enhances the richness and flavour.
- Fresh Mint Garnish: A sprig of fresh mint or finely chopped mint leaves can add a refreshing and aromatic garnish.
- Sprinkle of Paprika: A light sprinkle of paprika adds a touch of colour and subtle smoky flavour.
- Drizzle of Olive Oil: A drizzle of good quality olive oil can add richness and flavour, especially to vegan versions.
Additional Tips for Perfect Mushy Peas Every Time
To consistently create delicious, creamy, and flavourful mushy peas, keep these five essential tips in mind:
- Use Marrowfat Peas – No Substitutes!: This cannot be stressed enough. Authentic mushy peas must be made with dried marrowfat peas. Garden peas, split peas, or other types of dried peas will not produce the same texture or flavour. Seek out “marrowfat peas” specifically.
- Don’t Skip the Bicarbonate of Soda: Bicarbonate of soda (baking soda) is crucial for softening the pea skins, enhancing the green colour, and aiding in the mushying process. It’s not just for colour; it significantly impacts the texture. Use the recommended amount and don’t omit it.
- Soak for the Right Duration: Adequate soaking is essential for tender and evenly cooked peas. Soak for at least 12 hours, and ideally overnight (16-24 hours). This allows the peas to fully rehydrate and soften, reducing cooking time and ensuring they become properly mushy.
- Gentle Simmering is Key: Cook the peas at a gentle simmer, not a rolling boil. Boiling too vigorously can make the peas tough and the skins separate too much. A low and slow simmer is the key to creamy, tender mushy peas.
- Season Generously and to Taste: Seasoning is crucial for flavour. Don’t be shy with the salt and pepper. Taste and adjust seasoning throughout the cooking process and especially at the end. Remember that the flavour will develop and deepen as the peas cook. Consider adding other flavour enhancers like mint sauce, lemon juice, or white pepper to customize your mushy peas to your preference.
Frequently Asked Questions (FAQ) About Mushy Peas
Curious about the finer points of mushy peas? Here are answers to some common questions to help you become a mushy pea master:
Q1: Can I make mushy peas without bicarbonate of soda?
A: While technically you can make mushy peas without bicarbonate of soda, it is highly discouraged for authentic results. Bicarbonate of soda plays a crucial role in softening the pea skins, enhancing the vibrant green colour, and aiding in the mushying process. Without it, the peas will take longer to cook, may not become as mushy, and the skins may remain tougher. For truly authentic and delicious mushy peas, bicarbonate of soda is essential.
Q2: Can I use frozen peas to make mushy peas?
A: No, you cannot make authentic mushy peas using frozen peas. Mushy peas are specifically made from dried marrowfat peas. Frozen peas are garden peas, which are different varieties and have a different texture and starch content. Using frozen peas will result in a completely different dish, not traditional mushy peas. Frozen peas are too delicate and will become watery and overcooked if you try to make them mushy.
Q3: How do I store leftover mushy peas?
A: Leftover mushy peas can be stored in an airtight container in the refrigerator for up to 3-4 days. To reheat, gently warm them on the stovetop over low heat, stirring occasionally, or in the microwave. You may need to add a splash of water or broth if they become too thick during storage. Mushy peas actually often taste even better the next day as the flavours have melded.
Q4: Why are my mushy peas still hard after cooking for a long time?
A: There are a few potential reasons why your mushy peas might be hard even after prolonged cooking:
* Insufficient Soaking: The peas may not have been soaked for long enough. Ensure you soak them for at least 12 hours, ideally overnight (16-24 hours).
* Hard Water: Hard water can sometimes inhibit the softening of pulses. Using filtered water for soaking and cooking can help.
* Old Peas: Very old dried peas may take longer to cook or may never become truly tender. Try to use relatively fresh dried marrowfat peas.
* Insufficient Bicarbonate of Soda: Make sure you used the correct amount of bicarbonate of soda (baking soda). It is crucial for softening the peas.
* Cooking at Too High Heat: Cooking at a rolling boil instead of a gentle simmer can toughen the peas. Ensure you are simmering them gently.
Q5: Can I make vegan mushy peas?
A: Yes, absolutely! Mushy peas are naturally vegan except for the butter. To make vegan mushy peas, simply substitute the butter with a good quality vegan butter alternative. Ensure your chosen vegan butter is suitable for cooking and provides a similar richness and flavour to dairy butter. Olive oil can also be used for a slightly different flavour profile, though butter alternatives usually replicate the traditional taste more closely.
Mushy peas, often underestimated, are a testament to the fact that simple ingredients, when treated with care and understanding, can create truly delicious and comforting food. From the humble dried marrowfat pea to the creamy, flavourful final dish, making mushy peas at home is a rewarding culinary experience. So, embrace the “mush,” follow these steps, and prepare to discover the surprising delight of homemade mushy peas! Enjoy!
Print
Mushy Peas recipe
Ingredients
The Star Ingredient: Dried Marrowfat Peas
-
- 500g (approximately 2 cups) Dried Marrowfat Peas: This is absolutely the most crucial ingredient. Marrowfat peas are not just any dried peas. They are specifically cultivated and dried to create the characteristic creamy texture and slightly sweet, ‘pea-y’ flavour that defines mushy peas. They are larger and starchier than garden peas and have a unique ability to break down and become wonderfully mushy when cooked. Look for them in bags labeled “Dried Marrowfat Peas” or “Mushy Pea Peas.” You’ll typically find them in the dried pulses section of supermarkets or in Asian or British food stores. Using any other type of dried pea will not yield authentic mushy peas.
For Soaking and Cooking:
-
- Water (for soaking and cooking): You’ll need plenty of water for both soaking and cooking the peas. The quality of your water can subtly affect the flavour, so using filtered water is a good option if your tap water has a strong taste.
-
- 1 teaspoon Bicarbonate of Soda (Baking Soda): This is a vital ingredient that helps to soften the pea skins and enhance the vibrant green colour. Bicarbonate of soda also aids in breaking down the peas, contributing to the desired mushy texture. Do not skip this ingredient!
For Flavour and Finishing:
-
- 50g (approximately 4 tablespoons) Butter (or vegan butter alternative): Butter adds richness, flavour, and a lovely silky texture to the finished mushy peas. Salted or unsalted butter can be used – adjust seasoning accordingly. For a vegan version, use a good quality plant-based butter alternative.
-
- Salt: Essential for seasoning and bringing out the natural flavours of the peas. Sea salt or kosher salt is recommended for a cleaner flavour.
-
- Black Pepper (freshly ground): Freshly ground black pepper adds a subtle warmth and spice that complements the sweetness of the peas and the richness of the butter.
-
- Optional Enhancements (to taste):
-
- Mint Sauce (traditional British): A small spoonful of mint sauce can add a refreshing and tangy counterpoint to the richness of the peas. Use sparingly as it can be quite potent.
-
- Lemon Juice: A squeeze of fresh lemon juice can brighten the flavour and add a touch of acidity.
-
- White Pepper: A pinch of white pepper offers a milder, more delicate heat than black pepper and is sometimes preferred in classic recipes.
-
- Sugar (a tiny pinch – optional): Some recipes call for a tiny pinch of sugar to enhance the natural sweetness of the peas, but this is entirely optional and often unnecessary if using good quality marrowfat peas.
-
- Optional Enhancements (to taste):
Instructions
Part 1: Soaking the Marrowfat Peas (Essential!)
-
- Rinse the peas: Place the dried marrowfat peas in a large colander and rinse them thoroughly under cold running water. This removes any dust or debris.
-
- Transfer to a large bowl: Place the rinsed peas in a large bowl. They will expand significantly during soaking, so ensure the bowl is large enough.
-
- Add bicarbonate of soda: Sprinkle the bicarbonate of soda (baking soda) over the peas.
-
- Cover with cold water: Pour plenty of cold water over the peas, ensuring they are completely submerged. The water level should be at least a few inches above the peas as they will absorb a lot of liquid.
-
- Soak for at least 12 hours, or preferably overnight: Cover the bowl with a clean cloth or plate and leave the peas to soak at room temperature for at least 12 hours, or ideally overnight (around 16-24 hours). This soaking process is crucial for softening the peas and allowing them to cook evenly and become mushy. You will notice the soaking water will become cloudy and slightly green – this is normal.
-
- Check for soaking: After soaking, the peas should have significantly increased in size and be plump and slightly softened. If they still feel very hard, you may need to soak them for a little longer.
Part 2: Cooking the Mushy Peas
-
- Drain and rinse the soaked peas: Drain the soaked peas in a colander and rinse them thoroughly under cold running water. This removes the soaking water and any remaining bicarbonate of soda.
-
- Transfer to a saucepan: Place the rinsed peas in a large, heavy-bottomed saucepan.
-
- Cover with fresh cold water: Add fresh cold water to the saucepan, ensuring the peas are just covered. You want just enough water to cook the peas without making them too watery. Start with about 2-3 cups of water and add more if needed during cooking.
-
- Bring to a boil, then reduce to a simmer: Bring the water to a rolling boil over high heat. Once boiling, immediately reduce the heat to low, cover the saucepan with a lid, and simmer gently.
-
- Simmer for 1-2 hours, or until peas are very tender and mushy: Simmer the peas gently, stirring occasionally, for 1 to 2 hours, or until they are incredibly tender and easily mashable. The cooking time will depend on the peas and the desired texture. Start checking them after 1 hour. You may need to add more boiling water during cooking if the water level gets too low and the peas start to dry out – add just enough to keep them simmering gently. The peas should break down easily when pressed against the side of the pan with a spoon.
-
- Mash the peas: Once the peas are very tender, remove the saucepan from the heat. Using a potato masher, hand blender, or immersion blender, mash the peas to your desired consistency. For truly “mushy” peas, you’ll want to mash them quite thoroughly. Some people prefer a slightly chunkier texture, so mash accordingly. You can also use a fork for a more rustic mash. Be careful when blending hot peas, especially with a hand blender – splatter can occur!
Part 3: Finishing and Seasoning
-
- Stir in butter: Add the butter (or vegan butter alternative) to the mashed peas and stir until melted and fully incorporated. This will make the peas creamy and rich.
-
- Season with salt and pepper: Season generously with salt and freshly ground black pepper to taste. Start with about ½ teaspoon of salt and ¼ teaspoon of pepper, and then adjust to your preference.
-
- Add optional enhancements (if desired): If using, stir in a small spoonful of mint sauce or a squeeze of lemon juice. Taste and adjust seasoning as needed.
-
- Serve hot: Mushy peas are best served immediately while hot and creamy.
Nutrition
- Serving Size: one normal portion
- Calories: 150-200
- Fat: 8-12 grams
- Carbohydrates: 18-25 grams
- Fiber: 6-8 grams
- Protein: 7-9 grams