

“`html
There’s something undeniably magical about the moment you cut into a molten chocolate lava cake. As the warm, gooey center spills out, it’s a truly indulgent experience that captivates both the eyes and the taste buds. When I first tried this recipe at home, the delighted expressions on my family’s faces said it all. The combination of a soft cake exterior with a rich, molten center is the epitome of dessert perfection. It quickly became a family favorite, with requests for it at every special occasion. The recipe is surprisingly simple, yet the results are nothing short of spectacular.
Ingredients
The magic of a perfect molten chocolate lava cake begins with the right ingredients. Here’s what you’ll need to create this decadent dessert:
- 1/2 cup unsalted butter (plus extra for greasing)
- 1 cup high-quality dark chocolate, chopped
- 2 large eggs
- 2 egg yolks
- 1/4 cup granulated sugar
- 2 tablespoons all-purpose flour
- 1 teaspoon vanilla extract
- Pinch of salt
Instructions
Follow these steps to create your own molten chocolate lava cakes:
- Preheat your oven to 425°F (220°C). Generously butter four ramekins and place them on a baking sheet.
- In a medium saucepan, melt the butter and chocolate over low heat, stirring until smooth. Remove from heat and let it cool slightly.
- In a separate bowl, whisk together the eggs, egg yolks, and sugar until pale and fluffy.
- Gently fold the melted chocolate mixture into the egg mixture. Add the flour, vanilla extract, and salt, and fold until just combined.
- Divide the batter evenly among the prepared ramekins.
- Bake for about 12-14 minutes, until the edges are firm but the center is still soft.
- Remove from the oven and let the cakes cool in the ramekins for 1 minute. Carefully invert each ramekin onto a plate and let sit for 10 seconds. Gently lift to release the cake.
- Serve immediately while the centers are still molten.
Nutrition Facts
This recipe serves 4, with each serving containing approximately 450 calories. The rich ingredients make it a decadent treat, perfect for special occasions.
Preparation Time
The total preparation time for molten chocolate lava cakes is approximately 30 minutes, which includes 15 minutes of prep time and 15 minutes of baking. This quick turnaround makes it an excellent choice for those last-minute dessert cravings.
How to Serve
Molten chocolate lava cakes are best enjoyed fresh from the oven, as this ensures that the center remains gooey and warm, creating an unforgettable dessert experience. To elevate your presentation and flavor profile, consider the following serving suggestions that will enhance your molten chocolate creation:
- Ice Cream Pairing: One of the most popular ways to serve molten chocolate lava cakes is to top each one with a generous scoop of high-quality vanilla ice cream. The rich, creamy texture of the ice cream contrasts beautifully with the warm, molten chocolate interior of the cake. As you take a bite, the heat from the cake melts the ice cream ever so slightly, creating a delightful combination of temperatures and flavors. You might also explore other ice cream flavors, such as coffee, salted caramel, or even a decadent chocolate, to play with different taste profiles.
- Elegant Dusting: To add a touch of sophistication to your dessert, lightly dust each lava cake with powdered sugar right before serving. This simple yet effective technique not only enhances the visual appeal of the dessert but also provides a subtle sweetness that complements the rich chocolate flavor. For an added layer of elegance, consider using a stencil to create intricate patterns with the powdered sugar.
- Sauce Drizzles: Elevate your molten chocolate lava cakes with a drizzle of sauce. A raspberry sauce, with its tartness, can cut through the richness of the chocolate and add a refreshing twist. Alternatively, a warm caramel sauce can introduce a luscious sweetness that enhances the overall experience. To make the presentation more appealing, use a squeeze bottle or a spoon to create artistic swirls or lines of sauce across the plate.
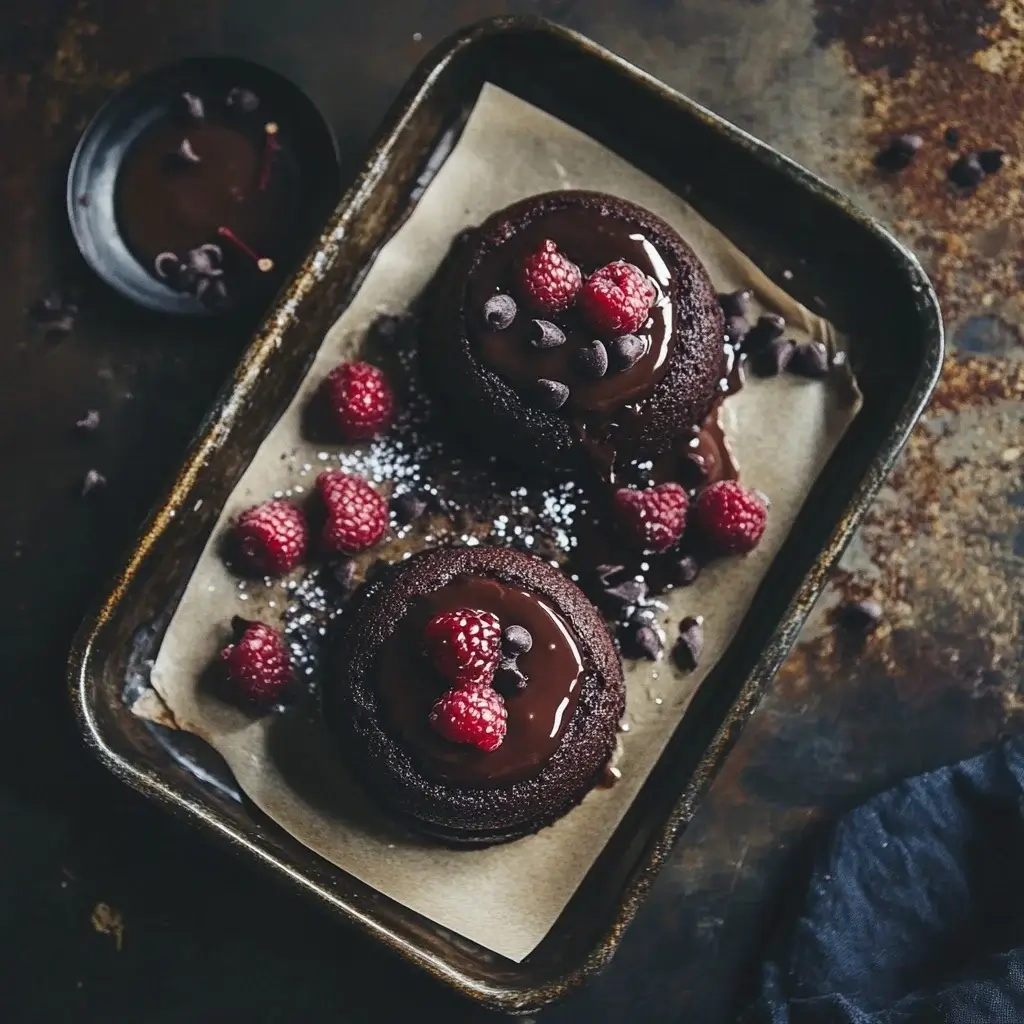
- Fresh Fruit Garnish: Adding fresh berries, such as raspberries, strawberries, or blueberries, can bring a vibrant pop of color and natural sweetness to your dessert. Not only do these fruits enhance the visual appeal, but they also provide a fresh, tart contrast to the rich, decadent chocolate. You can serve the berries whole, or if desired, create a berry compote by gently cooking them with a touch of sugar to release their juices and intensify their flavor.
- Whipped Cream or Crème Fraîche: For a luxurious finishing touch, consider adding a dollop of freshly whipped cream or a spoonful of crème fraîche. The light and airy texture of whipped cream complements the dense lava cake, while crème fraîche, with its slight tang, can balance the sweetness of the chocolate. You can flavor your whipped cream with a hint of vanilla extract or a sprinkle of cocoa powder for an extra touch.
- Chocolate Shavings or Curls: For those who can’t get enough chocolate, consider finishing your lava cake with chocolate shavings or curls. Use a vegetable peeler to create delicate curls from a chocolate bar, or finely shave chocolate with a grater. This addition not only enhances the chocolate experience but also adds a textural element that can be quite pleasing.
- Serving Temperature Considerations: While serving the lava cakes, ensure they are at the perfect temperature. Ideally, they should be served immediately after baking, allowing your guests to experience the molten center. If you need to bake them in advance, consider reheating them briefly in the oven to restore their warmth before serving.
By incorporating these serving suggestions, you can transform a simple molten chocolate lava cake into a stunning centerpiece that delights the senses and leaves a lasting impression on your guests. The combination of contrasting temperatures, textures, and flavors will create a memorable dessert experience that complements any occasion.
Additional Tips
To ensure your molten chocolate lava cakes are flawless, consider these additional tips that delve deeper into the nuances of baking and flavor enhancement:
Use High-Quality Chocolate
The foundation of any great chocolate dessert is the chocolate itself. Opt for high-quality dark chocolate with at least 70% cocoa content, as this provides a rich and intense flavor that will elevate your lava cakes. Look for brands that emphasize single-origin chocolate or artisanal production methods. Not only does high-quality chocolate taste better, but it also melts more smoothly, which is crucial for achieving that molten center. If you’re feeling adventurous, you can even explore different types of chocolate, such as bittersweet or semisweet, to find the perfect balance that suits your palate.
Don’t Overbake
One of the most critical aspects of baking molten chocolate lava cakes is striking the right balance with time and temperature. Overbaking is the enemy of the molten center; if baked too long, the gooey interior will solidify into a cake-like consistency. To avoid this, closely monitor your oven and adhere to the recommended baking time in your recipe. Every oven is different, so consider doing a test run with a single ramekin first. Start checking for doneness about two to three minutes before the suggested baking time. The cakes are ready when the edges are set, but the center still jiggles slightly when shaken.
Prep Ahead
One of the great advantages of molten chocolate lava cakes is their adaptability for make-ahead preparation. You can prepare the batter well in advance and store it in the refrigerator for up to 24 hours. This is particularly useful for dinner parties or special occasions. Just remember to bring the batter back to room temperature before baking—this ensures even cooking throughout. If you go this route, be sure to grease and flour your ramekins thoroughly to prevent sticking. You can even fill the ramekins, cover them tightly with plastic wrap, and refrigerate until you’re ready to bake.
Experiment with Flavors
While the classic molten chocolate lava cake is delightful on its own, there’s plenty of room for creativity. Consider enhancing the chocolate flavor by adding a teaspoon of espresso powder or finely ground coffee to the batter. This subtle addition can amplify the chocolate notes without overpowering them. Alternatively, a pinch of cinnamon or a dash of vanilla extract can introduce warmth and complexity. For a more adventurous twist, try incorporating flavored liqueurs like orange or raspberry into the batter or using flavored chocolate, such as chili or sea salt caramel, to create unique variations.
Use a Water Bath
If you’re particularly concerned about achieving the perfect molten center without the risk of overbaking, consider using a water bath (bain-marie). This technique involves placing your filled ramekins in a larger baking dish filled with hot water before placing them in the oven. The water bath helps to regulate the temperature and ensures even cooking, preventing the edges from setting too quickly while allowing the center to remain soft and gooey. This method is especially beneficial for recipes that require longer baking times. Just be cautious to avoid getting any water into the ramekins, as this could alter the texture of your cakes.
Final Thoughts
By incorporating these additional tips into your baking routine, you can transform your molten chocolate lava cakes from good to exceptional. High-quality ingredients, precise baking techniques, and a touch of creativity will ensure that your dessert impresses every time. Remember, practice makes perfect, so don’t hesitate to experiment and find the combination that works best for you. Enjoy the process, and savor the delicious results!
FAQ Section
1. Can I make molten chocolate lava cakes ahead of time?
Absolutely! Preparing the batter in advance is a great way to save time and ensure you can enjoy these delicious treats without the last-minute rush. To do this, simply follow the recipe up to the point of filling the ramekins. Once filled, cover each ramekin with plastic wrap or aluminum foil to prevent any moisture from affecting the batter. You can store the filled ramekins in the refrigerator for up to 24 hours. When you’re ready to bake, it’s essential to bring the cakes back to room temperature for about 30 minutes before placing them in the oven. This step helps ensure even baking, so your cakes achieve that perfect molten center.
2. Can I use milk chocolate instead of dark chocolate?
Yes, you can substitute milk chocolate for dark chocolate in your molten lava cakes. However, it’s important to consider that milk chocolate contains a higher sugar content and less cocoa solids than dark chocolate, which can lead to a sweeter and slightly less intense flavor profile. This variation may also affect the overall texture, potentially resulting in a cake that is softer and less rich than its dark chocolate counterpart. If you prefer a more balanced flavor, consider mixing milk chocolate with a bit of unsweetened cocoa powder to achieve a deeper chocolate taste while still using milk chocolate as the base.
3. What if I don’t have ramekins?
If you find yourself without ramekins, don’t worry! A muffin tin can serve as an excellent alternative. To use a muffin tin, simply grease each cup thoroughly with butter or non-stick cooking spray to prevent the cakes from sticking. Consider using cupcake liners for added convenience, but be aware that they may not release as easily as greased cups. Keep in mind that using a muffin tin may result in smaller cakes, so adjust your baking time accordingly. Start checking for doneness a few minutes earlier than the original recipe suggests, as smaller cakes will bake more quickly.
4. How do I know when the cakes are done?
Determining the perfect doneness for molten chocolate lava cakes is crucial for achieving that coveted gooey center. A good indicator is to observe the edges of the cakes; they should be firm and set, while the center should remain soft and slightly jiggly. You can gently shake the ramekin to see if the center moves slightly. An additional method is to perform the toothpick test: insert a toothpick into the edge of the cake, and if it comes out clean or with only a few moist crumbs, the cakes are ready. However, if the toothpick comes out with wet batter, they need more time. It’s better to underbake slightly than to overbake, as the goal is to maintain that luscious molten center.
5. Can I freeze molten chocolate lava cakes?
Yes, freezing molten chocolate lava cakes is a convenient option for those who want to enjoy them later. To freeze, prepare the batter and fill the ramekins without baking. Wrap each ramekin tightly with plastic wrap to prevent freezer burn, followed by a layer of aluminum foil for extra protection. You can store the wrapped cakes in the freezer for up to one month. When you’re ready to bake, remove the ramekins from the freezer but do not thaw them; instead, place them directly in a preheated oven. You will need to add a few extra minutes to the baking time compared to the original recipe, so keep an eye on them for that perfect molten texture. This method allows you to have freshly baked lava cakes on demand, making it a fantastic option for unexpected guests or a quick dessert fix!
“`


