

I’ve always been a devoted member of Team Chocolate. For me, a brownie meant one thing: a dark, decadent, fudgy square of pure cocoa bliss. The idea of a “blondie” was acceptable, but a green brownie? It felt like sacrilege. Then, during a trip to a Japanese-inspired café, I was served a small, intensely green square alongside my coffee. I was skeptical, but one bite changed everything. It was dense, chewy, and unbelievably fudgy, but instead of chocolate, my palate was met with a complex, earthy, and slightly sweet flavor that was both sophisticated and deeply comforting. It was, of course, a matcha brownie. I became obsessed. Recreating that perfect texture and balancing the unique flavor of matcha became my new baking mission. This recipe is the culmination of that obsession. It’s the one that made my chocolate-loving husband raise his eyebrows in surprise and ask for a second piece. It’s the one my friends now request for gatherings, a unique and elegant twist on a classic comfort dessert that never fails to impress with its vibrant color and unforgettable taste.
The Ultimate Fudgy Matcha Brownies Recipe
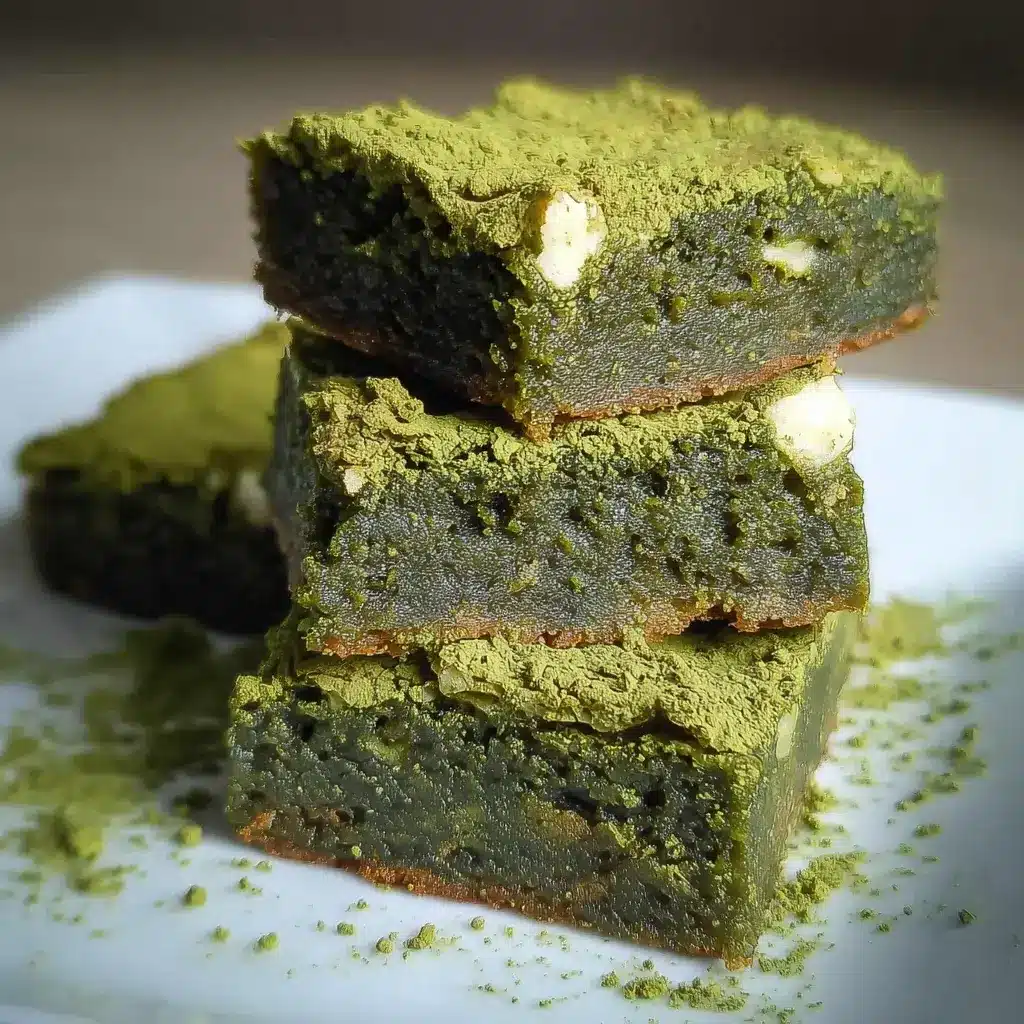
This recipe is meticulously crafted to produce a brownie (or more accurately, a matcha blondie) that is intensely fudgy, chewy, and packed with a robust matcha flavor, perfectly balanced by the creamy sweetness of white chocolate.
Core Ingredients for the Perfect Texture and Flavor
Precision is your best friend in baking. Using a kitchen scale is highly recommended for achieving the perfect fat-to-flour ratio that creates a fudgy texture rather than a cakey one.
- Unsalted Butter: 113g (1/2 cup or 1 stick) – This is the foundation of the brownie’s richness and fudgy texture.
- High-Quality White Chocolate: 170g (6 oz or about 1 cup of chips) – Do not skimp here! White chocolate provides the sweetness to balance matcha’s bitterness and contributes significantly to the chewy, dense texture. Use a baking bar or high-quality callets for the best melting and flavor.
- Granulated Sugar: 200g (1 cup) – Sugar does more than sweeten; it’s crucial for the texture. It interacts with the eggs to create that desirable crinkly top and contributes to the overall chewiness.
- Large Eggs: 2 – These should be at room temperature. Eggs bind the ingredients, provide moisture, and help create the fudgy structure.
- Vanilla Extract: 1 teaspoon – Vanilla enhances the other flavors in the brownie, adding a layer of aromatic depth that complements the matcha and white chocolate.
- High-Quality Matcha Powder: 20g (3 to 4 tablespoons) – This is the star of the show. Use a high-quality culinary or ceremonial grade matcha for the best, most vibrant green color and a smooth, non-bitter flavor. Low-quality matcha can taste muddy and turn a brownish-green color when baked.
- All-Purpose Flour: 120g (1 cup) – Provides the main structure for the brownies. Be careful not to use too much, as this is what leads to a cakey result.
- Salt: 1/2 teaspoon – Salt is a flavor enhancer. It balances the sweetness of the white chocolate and sugar and makes the matcha flavor pop.
Optional Mix-ins for Extra Texture and Flavor
- White Chocolate Chips or Chunks: 85g (1/2 cup) – For those who love pockets of melted white chocolate throughout their brownies.
- Toasted Macadamia Nuts or Pistachios: 75g (1/2 cup), roughly chopped – Nuts add a wonderful crunchy contrast to the chewy brownie.
Step-by-Step Instructions for Flawless Matcha Brownies
Follow these steps closely to ensure your brownies are perfectly fudgy, vibrant green, and utterly delicious.
Step 1: Preparation and Preheat
- Preheat Your Oven: Position a rack in the middle of your oven and preheat it to 350°F (175°C).
- Prepare Your Pan: Grease an 8×8 inch (20×20 cm) square baking pan with butter or non-stick spray. For easy removal and clean-cut slices, create a parchment paper “sling.” Cut two strips of parchment paper to fit the width of the pan, leaving an overhang on two opposite sides. Lay them in the pan in a cross shape. This overhang will act as handles to lift the brownies out once they’ve cooled.
Step 2: Create the Wet Ingredient Base
- Melt Butter and White Chocolate: In a medium, microwave-safe bowl, combine the 113g of unsalted butter and 170g of white chocolate. Microwave in 30-second intervals, stirring well after each interval, until the mixture is completely melted and smooth. Be careful not to overheat or the white chocolate can seize. Alternatively, you can use a double boiler by placing the bowl over a saucepan of simmering water.
- Cool Slightly: Set the melted chocolate mixture aside to cool for about 5-10 minutes. It should be warm, not hot, to the touch. This prevents the eggs from scrambling when you add them.
Step 3: Combine and Whisk
- Add Sugar and Eggs: Pour the 200g of granulated sugar into the slightly cooled white chocolate mixture and whisk until combined. Add the 2 room-temperature eggs and the 1 teaspoon of vanilla extract. Whisk vigorously for about 1 minute. The mixture should become glossy, pale, and slightly thickened. This step is key to developing the coveted shiny, crinkly brownie top.
Step 4: Incorporate the Dry Ingredients
- Sift for Smoothness: In a separate small bowl, place a fine-mesh sieve over top. Add the 120g of all-purpose flour, 20g of matcha powder, and 1/2 teaspoon of salt. Sift the ingredients together into the bowl. Sifting is especially important for matcha powder, which is prone to clumping. This ensures an even distribution of flavor and a smooth, uniform green color.
- Fold Gently: Add the sifted dry ingredients to the wet mixture. Using a rubber spatula, gently fold everything together until just combined. You should see a few faint streaks of flour remaining. Do not overmix. Overmixing develops the gluten in the flour, which will result in tough, cakey brownies instead of soft, fudgy ones.
- Add Mix-ins (Optional): If you are using white chocolate chips or nuts, add them now and fold a few more times until they are evenly distributed.
Step 5: Bake to Perfection
- Pour and Spread: Pour the batter into your prepared baking pan and use the spatula to spread it into an even layer, making sure it reaches all the corners.
- Bake: Place the pan in the preheated oven and bake for 25-30 minutes. The edges should be set and slightly puffed, and the center should look just barely set (it will no longer be liquidy but will still be very soft).
- The Doneness Test: To check for doneness, insert a toothpick or wooden skewer into the center of the brownies. Unlike a cake, you do not want it to come out clean. It should come out with moist, fudgy crumbs attached. If it comes out with wet, liquid batter, it needs a few more minutes. If it comes out clean, it is likely overbaked.
Step 6: The All-Important Cooling Process
- Cool Completely: Remove the pan from the oven and place it on a wire cooling rack. Let the brownies cool completely in the pan, which will take at least 2 hours. This is the hardest but most crucial step. Cutting into them while warm will result in a gooey mess. As they cool, the brownies will set up, becoming even fudgier and developing a richer flavor.
- Chill for Clean Cuts (Optional but Recommended): For ultra-clean, professional-looking squares, cover the cooled pan with plastic wrap and refrigerate for at least 1 hour (or up to 4) before slicing.
- Slice and Serve: Once cooled (and chilled, if desired), use the parchment paper handles to lift the entire slab of brownies out of the pan. Place on a cutting board and use a large, sharp knife to slice into 16 squares. For the cleanest cuts, wipe the knife clean with a damp paper towel between each slice.
Nutrition Facts
- Servings: 16 small brownies
- Calories Per Serving: Approximately 190-220 kcal
(Disclaimer: This nutritional information is an estimate. The actual values will vary depending on the specific brands of ingredients used, especially the white chocolate.)
Preparation Time
- Active Preparation Time: 15 minutes
- Baking Time: 25-30 minutes
- Cooling Time: 2 hours (minimum)
- Total Time: Approximately 2 hours and 45 minutes
How to Serve Your Matcha Brownies
These vibrant treats are fantastic on their own, but they can be transformed into a showstopping dessert with the right pairings.
- Simple & Elegant:
- Serve at room temperature with a simple dusting of extra matcha powder or powdered sugar for a beautiful contrast.
- Pair a square with a cup of hot, unsweetened Japanese green tea (like Sencha or Genmaicha) to complement the matcha flavor.
- A La Mode Perfection:
- Gently warm a brownie in the microwave for 10-15 seconds and top with a scoop of high-quality ice cream. Classic vanilla bean is perfect, but for a more adventurous pairing, try:
- Black sesame ice cream
- Adzuki red bean ice cream
- Coconut ice cream
- Gently warm a brownie in the microwave for 10-15 seconds and top with a scoop of high-quality ice cream. Classic vanilla bean is perfect, but for a more adventurous pairing, try:
- Decadent Toppings:
- Drizzle with a tangy raspberry or strawberry coulis. The tartness of the berries cuts through the richness beautifully.
- Add a dollop of fresh, lightly sweetened whipped cream.
- Sprinkle with toasted sesame seeds or chopped pistachios for a nutty crunch.
5 Essential Tips for Matcha Brownie Mastery
- Invest in Good Matcha: This is the most important tip. The quality of your matcha powder directly dictates the color and flavor of your brownies. A high-grade culinary matcha is your best bet. It will give you that brilliant green hue and a smooth, complex flavor. Low-grade matcha can be yellowish-brown, bitter, and gritty.
- Do Not Overbake: The line between a fudgy brownie and a dry, cakey one is very thin. Err on the side of underbaking. The brownies will continue to cook from residual heat as they cool in the pan. Remember the toothpick test: moist crumbs are the goal, not a clean skewer.
- Sift Your Dry Ingredients: Matcha powder is notoriously clumpy. If you don’t sift it with the flour and salt, you will end up with bitter, dark green pockets in your finished brownies. Sifting ensures a uniform color and flavor distribution.
- The Cooling Period is Non-Negotiable: I know it’s tempting to dive in while they are warm and gooey, but patience is a virtue in brownie making. Cooling completely allows the brownies to set, developing that dense, fudgy texture. It also allows the matcha flavor to mature and deepen.
- White Chocolate is Key: While it may be tempting to experiment, this recipe is specifically balanced for the sweetness and fat content of white chocolate. It complements the earthy matcha perfectly. Using milk or dark chocolate will overpower the matcha and completely change the dessert’s character and texture.
Your Matcha Brownie Questions, Answered!
1. Why did my matcha brownies turn out a dull, brownish-green color?
This is usually due to one of two things: low-quality matcha powder or overbaking. Low-grade matcha lacks the vibrant chlorophyll of its higher-grade counterparts and will bake into a less appealing color. Overbaking can also “toast” the matcha, dulling its color and making it more bitter.
2. Can I reduce the amount of sugar in this recipe?
You can, but it will affect the final product. Sugar is not just for sweetness; it’s a “wet” ingredient that contributes to the moist, chewy texture and helps create the shiny, crinkly top. Reducing the sugar by more than 1/4 cup (50g) may result in a drier, more cake-like brownie that lacks the signature crust.
3. What’s the difference between ceremonial and culinary grade matcha, and which should I use?
Ceremonial grade matcha is the highest quality, made from the youngest tea leaves, and is intended for drinking as traditional tea. It has a very smooth, delicate flavor and vibrant color. Culinary grade is designed for baking and cooking. It has a more robust, slightly more bitter flavor profile that is designed to stand up to other ingredients like fat and sugar. A high-quality culinary grade is perfect for this recipe. You can use ceremonial grade if you wish, but it is much more expensive.
4. My brownies are too cakey. What did I do wrong?
Cakey brownies are almost always a result of either overmixing the batter after the flour was added or using too much flour. Overmixing develops gluten, creating a tough, bready texture. Always fold the dry ingredients in gently and stop as soon as they are just incorporated. Also, ensure you are measuring your flour correctly—scooping directly from the bag can compact it, leading you to use more than the recipe calls for.
5. How should I store matcha brownies, and how long do they last?
Store the brownies in an airtight container. They will keep at room temperature for up to 3 days, or in the refrigerator for up to a week. In fact, many people prefer the texture of these brownies after they have been chilled, as they become even denser and fudgier. You can also freeze them for up to 3 months. Wrap the entire slab or individual squares tightly in plastic wrap, then place in a freezer-safe bag. Thaw at room temperature before enjoying.

Matcha Brownies recipe
Ingredients
-
Unsalted Butter: 113g (1/2 cup or 1 stick) – This is the foundation of the brownie’s richness and fudgy texture.
-
High-Quality White Chocolate: 170g (6 oz or about 1 cup of chips) – Do not skimp here! White chocolate provides the sweetness to balance matcha’s bitterness and contributes significantly to the chewy, dense texture. Use a baking bar or high-quality callets for the best melting and flavor.
-
Granulated Sugar: 200g (1 cup) – Sugar does more than sweeten; it’s crucial for the texture. It interacts with the eggs to create that desirable crinkly top and contributes to the overall chewiness.
-
Large Eggs: 2 – These should be at room temperature. Eggs bind the ingredients, provide moisture, and help create the fudgy structure.
-
Vanilla Extract: 1 teaspoon – Vanilla enhances the other flavors in the brownie, adding a layer of aromatic depth that complements the matcha and white chocolate.
-
High-Quality Matcha Powder: 20g (3 to 4 tablespoons) – This is the star of the show. Use a high-quality culinary or ceremonial grade matcha for the best, most vibrant green color and a smooth, non-bitter flavor. Low-quality matcha can taste muddy and turn a brownish-green color when baked.
-
All-Purpose Flour: 120g (1 cup) – Provides the main structure for the brownies. Be careful not to use too much, as this is what leads to a cakey result.
-
Salt: 1/2 teaspoon – Salt is a flavor enhancer. It balances the sweetness of the white chocolate and sugar and makes the matcha flavor pop.
Optional Mix-ins for Extra Texture and Flavor
-
White Chocolate Chips or Chunks: 85g (1/2 cup) – For those who love pockets of melted white chocolate throughout their brownies.
-
Toasted Macadamia Nuts or Pistachios: 75g (1/2 cup), roughly chopped – Nuts add a wonderful crunchy contrast to the chewy brownie.
Instructions
Step 1: Preparation and Preheat
-
Preheat Your Oven: Position a rack in the middle of your oven and preheat it to 350°F (175°C).
-
Prepare Your Pan: Grease an 8×8 inch (20×20 cm) square baking pan with butter or non-stick spray. For easy removal and clean-cut slices, create a parchment paper “sling.” Cut two strips of parchment paper to fit the width of the pan, leaving an overhang on two opposite sides. Lay them in the pan in a cross shape. This overhang will act as handles to lift the brownies out once they’ve cooled.
Step 2: Create the Wet Ingredient Base
-
Melt Butter and White Chocolate: In a medium, microwave-safe bowl, combine the 113g of unsalted butter and 170g of white chocolate. Microwave in 30-second intervals, stirring well after each interval, until the mixture is completely melted and smooth. Be careful not to overheat or the white chocolate can seize. Alternatively, you can use a double boiler by placing the bowl over a saucepan of simmering water.
-
Cool Slightly: Set the melted chocolate mixture aside to cool for about 5-10 minutes. It should be warm, not hot, to the touch. This prevents the eggs from scrambling when you add them.
Step 3: Combine and Whisk
-
Add Sugar and Eggs: Pour the 200g of granulated sugar into the slightly cooled white chocolate mixture and whisk until combined. Add the 2 room-temperature eggs and the 1 teaspoon of vanilla extract. Whisk vigorously for about 1 minute. The mixture should become glossy, pale, and slightly thickened. This step is key to developing the coveted shiny, crinkly brownie top.
Step 4: Incorporate the Dry Ingredients
-
Sift for Smoothness: In a separate small bowl, place a fine-mesh sieve over top. Add the 120g of all-purpose flour, 20g of matcha powder, and 1/2 teaspoon of salt. Sift the ingredients together into the bowl. Sifting is especially important for matcha powder, which is prone to clumping. This ensures an even distribution of flavor and a smooth, uniform green color.
-
Fold Gently: Add the sifted dry ingredients to the wet mixture. Using a rubber spatula, gently fold everything together until just combined. You should see a few faint streaks of flour remaining. Do not overmix. Overmixing develops the gluten in the flour, which will result in tough, cakey brownies instead of soft, fudgy ones.
-
Add Mix-ins (Optional): If you are using white chocolate chips or nuts, add them now and fold a few more times until they are evenly distributed.
Step 5: Bake to Perfection
-
Pour and Spread: Pour the batter into your prepared baking pan and use the spatula to spread it into an even layer, making sure it reaches all the corners.
-
Bake: Place the pan in the preheated oven and bake for 25-30 minutes. The edges should be set and slightly puffed, and the center should look just barely set (it will no longer be liquidy but will still be very soft).
-
The Doneness Test: To check for doneness, insert a toothpick or wooden skewer into the center of the brownies. Unlike a cake, you do not want it to come out clean. It should come out with moist, fudgy crumbs attached. If it comes out with wet, liquid batter, it needs a few more minutes. If it comes out clean, it is likely overbaked.
Step 6: The All-Important Cooling Process
-
Cool Completely: Remove the pan from the oven and place it on a wire cooling rack. Let the brownies cool completely in the pan, which will take at least 2 hours. This is the hardest but most crucial step. Cutting into them while warm will result in a gooey mess. As they cool, the brownies will set up, becoming even fudgier and developing a richer flavor.
-
Chill for Clean Cuts (Optional but Recommended): For ultra-clean, professional-looking squares, cover the cooled pan with plastic wrap and refrigerate for at least 1 hour (or up to 4) before slicing.
-
Slice and Serve: Once cooled (and chilled, if desired), use the parchment paper handles to lift the entire slab of brownies out of the pan. Place on a cutting board and use a large, sharp knife to slice into 16 squares. For the cleanest cuts, wipe the knife clean with a damp paper towel between each slice.
Nutrition
- Serving Size: one normal portion
- Calories: 190-220 kcal


