
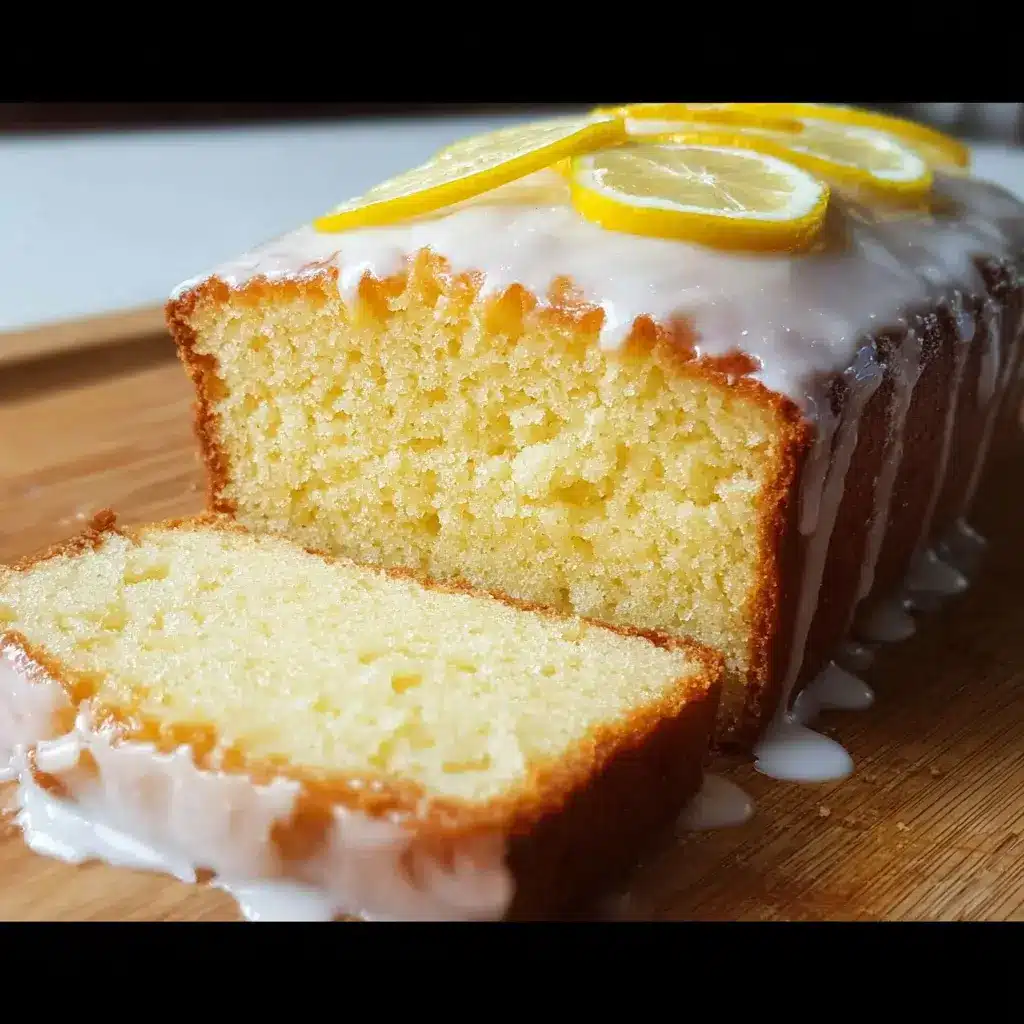

Of all the recipes that have graced my kitchen over the years, there are a select few that have earned a permanent, coveted spot in my handwritten recipe book. This Lemon Yogurt Loaf is one of them. It’s more than just a cake; it’s a bright, zesty slice of sunshine that has the power to turn any afternoon slump into a moment of pure bliss. I first baked it on a dreary, rainy Sunday, hoping to bring a little cheer indoors. The moment the aroma of warm lemon and sweet vanilla began to fill the house, I knew I had a winner. My family, initially drawn in by the smell, was completely won over by the first bite. The crumb is impossibly moist and tender, thanks to the magic of Greek yogurt, and the flavor is a perfect symphony of tangy lemon and sweet, buttery cake, all crowned with a sharp, sweet lemon glaze that crackles ever so slightly as you slice into it. It has since become our go-to for everything from lazy weekend breakfasts and afternoon tea with friends to a simple yet elegant dessert for special occasions. It’s a recipe that never fails to impress and, more importantly, never fails to make us smile.
The Ultimate Lemon Yogurt Loaf: Ingredients for a Perfect Crumb
The beauty of this recipe lies in its use of simple, everyday ingredients that come together to create something truly extraordinary. Each component plays a crucial role in achieving the perfect balance of flavor and texture. Here’s exactly what you’ll need:
For the Lemon Yogurt Loaf:
- All-Purpose Flour: 1 ½ cups (190g) – The structural backbone of our loaf.
- Baking Powder: 2 teaspoons – This leavening agent gives the loaf its beautiful lift and light texture.
- Salt: ½ teaspoon – A small amount that enhances all the other flavors and balances the sweetness.
- Full-Fat Plain Greek Yogurt: 1 cup (240g) – This is the secret weapon for an incredibly moist and tender crumb with a subtle tang. Ensure it’s at room temperature.
- Granulated Sugar: 1 cup (200g) – For sweetness and to help create a tender texture.
- Large Eggs: 3 – They provide structure, richness, and leavening. Make sure they are at room temperature.
- Lemon Zest: From 2 large lemons (about 2 tablespoons) – This is where the most potent, aromatic lemon flavor comes from. Don’t skip it!
- Fresh Lemon Juice: 2 tablespoons – Adds another layer of bright, tangy lemon flavor.
- Unsalted Butter: ½ cup (113g), melted and cooled slightly – For richness, flavor, and a tender crumb.
- Vanilla Extract: 1 teaspoon – Complements the lemon and adds a lovely warmth and depth of flavor.
For the Lemon Glaze:
- Powdered Sugar: 1 cup (120g), sifted – Sifting prevents lumps and ensures a silky-smooth glaze.
- Fresh Lemon Juice: 2-3 tablespoons – Use as needed to achieve your desired consistency.
Step-by-Step Instructions for Baking a Flawless Lemon Loaf
Baking should be a relaxing and rewarding process. Follow these detailed steps, and you’ll be well on your way to a perfect, bakery-quality lemon loaf every single time.
Part 1: Preparation is Key
- Preheat and Prep the Pan: Adjust your oven rack to the middle position and preheat to 350°F (175°C). Grease a 9×5 inch loaf pan thoroughly with butter or non-stick baking spray. For guaranteed easy removal, line the pan with parchment paper, leaving an overhang on the two long sides to act as “handles.” This will allow you to lift the loaf out effortlessly once it’s cooled.
- Combine Dry Ingredients: In a medium bowl, whisk together the all-purpose flour, baking powder, and salt. Whisking not only combines the ingredients but also aerates them, which contributes to a lighter cake. Set this bowl aside.
Part 2: Mixing the Batter
- Infuse the Sugar with Lemon: In a large bowl, add the granulated sugar and the lemon zest. Using your fingertips, rub the zest into the sugar until the mixture is fragrant and resembles damp sand. This simple step releases the essential oils from the zest, infusing the entire loaf with an incredibly deep and vibrant lemon aroma and flavor.
- Whisk the Wet Ingredients: To the lemon-sugar mixture, add the room temperature Greek yogurt, the three room temperature eggs, the melted butter, the fresh lemon juice, and the vanilla extract. Whisk everything together until the mixture is smooth, homogenous, and well-combined.
- Combine Wet and Dry: Pour the dry ingredients from the medium bowl into the large bowl of wet ingredients. Using a rubber spatula, gently fold the ingredients together until just combined. It is crucial not to overmix the batter. A few small lumps are perfectly fine. Overmixing develops the gluten in the flour, which can lead to a tough, dense, and rubbery loaf instead of a tender one.
- Fill the Pan: Pour the finished batter into your prepared loaf pan and use the spatula to spread it into an even layer, making sure it reaches all the corners.
Part 3: Baking and Cooling
- Bake to Perfection: Place the loaf pan in the preheated oven. Bake for 50-60 minutes. Baking times can vary depending on your oven, so start checking for doneness around the 50-minute mark. The loaf is done when a wooden skewer or toothpick inserted into the center comes out clean or with a few moist crumbs attached (but no wet batter). The top should be a deep golden brown and spring back when gently pressed.
- Cool Down: Once baked, remove the loaf from the oven and let it cool in the pan on a wire rack for about 15-20 minutes. This allows the loaf to set up, making it easier to handle. After 20 minutes, use the parchment paper overhangs to carefully lift the loaf out of the pan and place it directly on the wire rack to cool completely. It’s important to let it cool completely before glazing, otherwise the glaze will melt and run right off.
Part 4: The Finishing Touch – The Glaze
- Mix the Glaze: While the loaf is cooling, prepare the simple lemon glaze. In a small bowl, whisk together the sifted powdered sugar and 2 tablespoons of fresh lemon juice. Whisk until smooth. If the glaze is too thick, add more lemon juice, a teaspoon at a time, until you reach a thick but pourable consistency. If it’s too thin, add a bit more powdered sugar.
- Glaze the Loaf: Once the lemon yogurt loaf is completely cool to the touch, place the wire rack over a baking sheet or a piece of parchment paper to catch any drips. Slowly pour the glaze over the top of the loaf, using a spoon or spatula to encourage it to drizzle down the sides. Let the glaze set for about 20-30 minutes before slicing and serving.
Why This Lemon Yogurt Loaf Recipe Works: The Science of a Perfect Slice
Ever wonder what makes a recipe truly great? It’s often the chemistry between the ingredients. This loaf isn’t just a random assortment of components; it’s a carefully balanced formula.
- The Magic of Yogurt: Greek yogurt is the undisputed star player for moisture. Its high-fat content adds richness, while its acidity works to tenderize the gluten strands in the flour. This chemical reaction results in a much softer, more delicate crumb than a cake made with milk or buttermilk. The tang of the yogurt also beautifully complements the bright notes of the lemon.
- Fat: Butter for Flavor, Yogurt for Texture: This recipe uses both butter and yogurt as its primary fats. The melted butter provides that classic, rich, buttery flavor that we all love in a pound cake. The yogurt, as mentioned, provides unparalleled moisture and a tenderizing effect. This dual-fat approach gives you the best of both worlds: superior flavor and a perfect, moist texture that lasts for days.
- Lemon Zest & Juice Synergy: Using both zest and juice is non-negotiable for a truly robust lemon flavor. The zest contains the lemon’s aromatic oils, which provide a fragrant, floral, and deep lemon essence. The juice provides the sharp, acidic tang that makes your taste buds tingle. Rubbing the zest into the sugar is a professional baker’s trick that maximizes the flavor extraction from those precious oils, ensuring every crumb is bursting with lemon.
Nutrition Facts: A Guideline
Please note that these nutritional values are an estimate and can vary based on the specific ingredients and brands used.
- Servings: This recipe makes one 9×5 inch loaf, which yields approximately 10-12 slices.
- Calories per Serving (approximate): 290-340 kcal per slice.
Preparation and Baking Time
A little planning goes a long way. Here’s a breakdown of the time you’ll need:
- Active Preparation Time: 20 minutes
- Baking Time: 50-60 minutes
- Cooling Time: Approximately 1 hour 30 minutes
- Total Time: Approximately 2 hours 50 minutes
Creative Ways to Serve Your Lemon Yogurt Loaf
While this loaf is absolutely divine on its own, it can also be the centerpiece of a beautiful presentation. Here are some ideas to elevate your serving game:
- The Classic Afternoon Tea:
- Serve thick slices on a tiered cake stand alongside a pot of Earl Grey or chamomile tea.
- Accompany with a small dish of clotted cream or mascarpone cheese for extra indulgence.
- A Bright and Cheery Breakfast:
- Lightly toast a slice and spread it with a thin layer of butter or a dollop of lemon curd.
- Serve alongside a bowl of fresh berries (raspberries, blueberries, or strawberries) and a dollop of Greek yogurt.
- An Elegant Dessert:
- Place a slice on a plate and dust lightly with powdered sugar.
- Add a scoop of high-quality vanilla bean ice cream or raspberry sorbet on the side.
- Garnish with a sprig of fresh mint and a few fresh raspberries for a pop of color.
- For a Brunch Buffet:
- Slice the entire loaf and arrange it beautifully on a platter.
- Garnish the platter with fresh lemon slices, candied lemon peel, and fresh mint leaves to make it a stunning centerpiece.
Pro-Baker’s Secrets: 5 Additional Tips for Success
- Room Temperature is a Rule, Not a Suggestion: This is the most common tip in baking for a reason. Cold eggs and yogurt don’t emulsify properly with the fats, which can result in a dense, greasy, or curdled-looking batter. Room temperature ingredients blend together seamlessly, creating a uniform structure and a lighter, more even crumb. To quickly bring eggs to room temperature, place them in a bowl of warm (not hot) water for 5-10 minutes.
- Master the Zest: When zesting your lemons, use a microplane grater for the best results. Be sure to only grate the yellow outer peel. The white layer underneath, called the pith, is very bitter and will impart an unpleasant taste to your loaf.
- The Doneness Test – Go Beyond the Toothpick: While a clean toothpick is a great indicator, you can also use your senses. The loaf should be a rich, golden brown. The edges should be pulling away slightly from the sides of the pan. And when you gently press on the center of the loaf, it should feel firm and spring back.
- For a “Soaker” Glaze: If you prefer a glaze that soaks into the cake rather than sits on top, poke the warm (not hot) loaf all over with a skewer. Then, pour the glaze over the top, allowing it to seep into the holes. This creates an intensely moist and lemony “drizzle cake” effect.
- Proper Storage for Lasting Freshness: This loaf stores exceptionally well due to its high moisture content. Store it in an airtight container at room temperature for up to 4 days. Storing it in the refrigerator can actually dry it out faster, so the countertop is best. For longer storage, wrap the unsliced, unglazed loaf tightly in two layers of plastic wrap and then a layer of aluminum foil. It can be frozen for up to 3 months. Thaw overnight at room temperature before glazing and serving.
Troubleshooting Common Lemon Loaf Pitfalls
Even seasoned bakers have off days. If your loaf didn’t turn out quite right, here are some common issues and how to fix them next time.
- Problem: My loaf is dry.
- Cause: This is almost always due to overbaking. Ovens can run hot, so an oven thermometer is a great investment. It could also be from over-measuring the flour. Always use the “spoon and level” method: spoon flour into your measuring cup until it’s overflowing, then level it off with the back of a knife.
- Solution: Start checking for doneness 5-10 minutes earlier than the recipe states.
- Problem: My loaf sank in the middle.
- Cause: This “crater effect” can be caused by a few things: underbaking (the center wasn’t set), opening the oven door too early or too often (the sudden temperature drop causes it to collapse), or using expired baking powder.
- Solution: Resist the urge to peek! Keep the oven door closed until you’re ready to do the toothpick test. Always check the expiration date on your leavening agents.
- Problem: My loaf has a gummy or dense texture.
- Cause: The number one culprit is overmixing the batter after adding the flour. This over-develops the gluten, resulting in a tough, chewy texture instead of a tender one.
- Solution: Fold the dry ingredients in with a spatula only until they are just combined. A few streaks of flour are okay.
Ingredient Variations and Dietary Swaps
Want to make this recipe your own? It’s very forgiving and adaptable.
- Citrus Swap: Feel free to substitute the lemon with other citrus fruits! Try a Lime Yogurt Loaf (using lime zest and juice) or an Orange Yogurt Loaf. A combination of lemon and orange is also delicious.
- Gluten-Free Version: For a gluten-free loaf, substitute the all-purpose flour with a high-quality 1-to-1 gluten-free baking flour blend that contains xanthan gum. The texture will be slightly different but still delicious.
- Yogurt Alternatives: If you don’t have Greek yogurt, you can substitute it with an equal amount of full-fat sour cream for a similarly rich and tangy result.
- Add-Ins: Fold in ¾ cup of fresh or frozen (don’t thaw) blueberries or raspberries into the batter for a fruity twist. Or, add ½ cup of poppy seeds for a classic Lemon Poppy Seed Loaf.
Your Lemon Loaf Questions, Answered: FAQ
1. Can I use regular yogurt instead of Greek yogurt?
You can, but the result will be slightly different. Greek yogurt is strained, making it much thicker and higher in fat than regular yogurt. This contributes significantly to the rich, dense, and moist texture of this loaf. If using regular yogurt, your batter will be thinner, and the final loaf may be slightly less rich. Full-fat is still recommended.
2. Can I make this recipe into muffins?
Absolutely! This recipe makes fantastic lemon yogurt muffins. Simply divide the batter evenly among 12 standard-sized muffin cups lined with paper liners, filling them about ¾ full. Bake at 350°F (175°C) for 20-25 minutes, or until a toothpick inserted into the center comes out clean. Let them cool slightly before drizzling with the glaze.
3. Why did my batter look curdled after I added the eggs?
This usually happens when your ingredients are at different temperatures, specifically when cold eggs and yogurt are added to the warm melted butter. The fat in the butter solidifies upon contact with the cold ingredients, creating a separated or curdled look. While it’s not ideal, it’s often salvageable. The batter will usually come back together once you add the dry ingredients. To prevent this, always ensure your eggs, yogurt, and melted butter are all at room temperature.
4. Can I use bottled lemon juice instead of fresh?
For the best, brightest flavor, fresh is always superior. Bottled lemon juice often has a dull, slightly metallic taste compared to the vibrant flavor of freshly squeezed juice. Since lemon is the star flavor, using fresh ingredients will make a noticeable difference in the final product. You also need fresh lemons for the zest, which is essential for the aroma.
5. My glaze is too thin/thick. How do I fix it?
The consistency of the glaze is easily adjustable. If it’s too thin and runny, simply whisk in more powdered sugar, a tablespoon at a time, until it thickens to your liking. If it’s too thick and paste-like, add more lemon juice (or even a tiny splash of milk or water), a teaspoon at a time, whisking well after each addition until it reaches a smooth, pourable consistency.

Lemon Yogurt Loaf recipe
Ingredients
For the Lemon Yogurt Loaf:
-
All-Purpose Flour: 1 ½ cups (190g) – The structural backbone of our loaf.
-
Baking Powder: 2 teaspoons – This leavening agent gives the loaf its beautiful lift and light texture.
-
Salt: ½ teaspoon – A small amount that enhances all the other flavors and balances the sweetness.
-
Full-Fat Plain Greek Yogurt: 1 cup (240g) – This is the secret weapon for an incredibly moist and tender crumb with a subtle tang. Ensure it’s at room temperature.
-
Granulated Sugar: 1 cup (200g) – For sweetness and to help create a tender texture.
-
Large Eggs: 3 – They provide structure, richness, and leavening. Make sure they are at room temperature.
-
Lemon Zest: From 2 large lemons (about 2 tablespoons) – This is where the most potent, aromatic lemon flavor comes from. Don’t skip it!
-
Fresh Lemon Juice: 2 tablespoons – Adds another layer of bright, tangy lemon flavor.
-
Unsalted Butter: ½ cup (113g), melted and cooled slightly – For richness, flavor, and a tender crumb.
-
Vanilla Extract: 1 teaspoon – Complements the lemon and adds a lovely warmth and depth of flavor.
For the Lemon Glaze:
-
Powdered Sugar: 1 cup (120g), sifted – Sifting prevents lumps and ensures a silky-smooth glaze.
-
Fresh Lemon Juice: 2-3 tablespoons – Use as needed to achieve your desired consistency.
Instructions
Part 1: Preparation is Key
-
Preheat and Prep the Pan: Adjust your oven rack to the middle position and preheat to 350°F (175°C). Grease a 9×5 inch loaf pan thoroughly with butter or non-stick baking spray. For guaranteed easy removal, line the pan with parchment paper, leaving an overhang on the two long sides to act as “handles.” This will allow you to lift the loaf out effortlessly once it’s cooled.
-
Combine Dry Ingredients: In a medium bowl, whisk together the all-purpose flour, baking powder, and salt. Whisking not only combines the ingredients but also aerates them, which contributes to a lighter cake. Set this bowl aside.
Part 2: Mixing the Batter
-
Infuse the Sugar with Lemon: In a large bowl, add the granulated sugar and the lemon zest. Using your fingertips, rub the zest into the sugar until the mixture is fragrant and resembles damp sand. This simple step releases the essential oils from the zest, infusing the entire loaf with an incredibly deep and vibrant lemon aroma and flavor.
-
Whisk the Wet Ingredients: To the lemon-sugar mixture, add the room temperature Greek yogurt, the three room temperature eggs, the melted butter, the fresh lemon juice, and the vanilla extract. Whisk everything together until the mixture is smooth, homogenous, and well-combined.
-
Combine Wet and Dry: Pour the dry ingredients from the medium bowl into the large bowl of wet ingredients. Using a rubber spatula, gently fold the ingredients together until just combined. It is crucial not to overmix the batter. A few small lumps are perfectly fine. Overmixing develops the gluten in the flour, which can lead to a tough, dense, and rubbery loaf instead of a tender one.
-
Fill the Pan: Pour the finished batter into your prepared loaf pan and use the spatula to spread it into an even layer, making sure it reaches all the corners.
Part 3: Baking and Cooling
-
Bake to Perfection: Place the loaf pan in the preheated oven. Bake for 50-60 minutes. Baking times can vary depending on your oven, so start checking for doneness around the 50-minute mark. The loaf is done when a wooden skewer or toothpick inserted into the center comes out clean or with a few moist crumbs attached (but no wet batter). The top should be a deep golden brown and spring back when gently pressed.
-
Cool Down: Once baked, remove the loaf from the oven and let it cool in the pan on a wire rack for about 15-20 minutes. This allows the loaf to set up, making it easier to handle. After 20 minutes, use the parchment paper overhangs to carefully lift the loaf out of the pan and place it directly on the wire rack to cool completely. It’s important to let it cool completely before glazing, otherwise the glaze will melt and run right off.
Part 4: The Finishing Touch – The Glaze
-
Mix the Glaze: While the loaf is cooling, prepare the simple lemon glaze. In a small bowl, whisk together the sifted powdered sugar and 2 tablespoons of fresh lemon juice. Whisk until smooth. If the glaze is too thick, add more lemon juice, a teaspoon at a time, until you reach a thick but pourable consistency. If it’s too thin, add a bit more powdered sugar.
-
Glaze the Loaf: Once the lemon yogurt loaf is completely cool to the touch, place the wire rack over a baking sheet or a piece of parchment paper to catch any drips. Slowly pour the glaze over the top of the loaf, using a spoon or spatula to encourage it to drizzle down the sides. Let the glaze set for about 20-30 minutes before slicing and serving.
Nutrition
- Serving Size: one normal portion
- Calories: 290-340 kcal


