

There’s a particular aroma that instantly transports me back to my childhood kitchen – the rich, sweet, and savory scent of Japanese curry simmering on the stove. It’s a fragrance that promises comfort, a culinary hug in a bowl that my family has cherished for generations. I remember my grandmother, her hands moving with a practiced grace, patiently caramelizing onions to unlock their deepest sweetness. She would always say that the secret to a memorable curry lies not just in the spice, but in the love and time you pour into it. This recipe is more than just a set of instructions; it’s a legacy of warmth and shared family meals, a taste of home that I am overjoyed to share with you. The beauty of this dish lies in its comforting simplicity and its remarkable ability to bring everyone to the table, their faces lit with anticipation. The first time I made this for my own family, watching my children’s eyes light up as they took their first bite, I understood the true power of this dish. It wasn’t just about feeding them; it was about passing down a tradition, creating new memories woven from the threads of the old. The rich, velvety sauce clinging to the tender chunks of chicken and perfectly cooked vegetables, served alongside a mound of steaming rice, is a symphony of textures and flavors that never fails to satisfy. Over the years, I’ve tweaked and personalized this recipe, and the version I’m sharing today is the one my own family adores – a perfectly balanced, deeply flavorful curry that I hope will become a beloved staple in your home as well. It’s the kind of meal that encourages second helpings and happy sighs, a testament to the enduring appeal of a well-made, home-cooked meal.
A Culinary Heirloom: The Ultimate Japanese Curry Recipe
Japanese curry, or kare raisu (カレーライス), is a national comfort food in Japan, a dish so popular it’s considered a national treasure. Its journey to Japanese kitchens is a fascinating tale of cultural exchange, having been introduced by the British during the Meiji era (1868-1912). However, the Japanese have truly made it their own, transforming it into a milder, sweeter, and thicker stew-like curry that bears little resemblance to its Indian origins. This recipe celebrates that unique evolution, offering a straightforward path to creating a rich and satisfying Japanese curry from scratch. The beauty of Japanese curry lies in its comforting heartiness and its incredible adaptability. It’s a dish that can be as simple or as complex as you want it to be, a canvas for your own culinary creativity. In this comprehensive guide, we will delve into every aspect of creating the perfect Japanese curry, from the foundational importance of caramelized onions to the subtle nuances of flavor-enhancing “secret” ingredients. Whether you’re a seasoned cook or a curious beginner, this recipe will empower you to create a truly exceptional pot of curry that will have your family and friends asking for more.
Ingredients
This recipe yields approximately 6-8 generous servings. The key to a fantastic curry is using quality ingredients, so where possible, opt for fresh and flavorful components.
- For the Curry Base:
- 2 tablespoons of a neutral oil like vegetable, canola, or grapeseed oil. You can also use unsalted butter for a richer flavor at the start.
- 1.5 lbs (about 680g) of protein, cut into 1-inch cubes. Boneless, skinless chicken thighs are a popular choice due to their flavor and tenderness. Other excellent options include beef chuck roast, pork shoulder, or for a vegetarian alternative, firm tofu or a medley of mushrooms like cremini and shiitake.
- 2 large yellow onions, peeled and thinly sliced. This might seem like a lot of onion, but they will cook down significantly and form the sweet backbone of your curry.
- 4-5 cloves of fresh garlic, minced. Don’t be tempted to use garlic powder here; fresh garlic provides a pungent depth that is essential.
- A 1-inch piece of fresh ginger, peeled and finely grated. Similar to garlic, fresh ginger offers a warmth and zest that is unmatched.
- The Vegetables:
- 2 large carrots, peeled and cut into rangiri style (rolling wedges). This Japanese cutting technique involves making diagonal cuts while rotating the vegetable, creating pieces with more surface area to absorb the curry’s flavor.
- 3 medium Yukon Gold potatoes, peeled and cut into 1.5-inch cubes. Yukon Golds are a great choice as they hold their shape well during cooking and have a creamy texture. Russet potatoes are also a good alternative.
- 1 medium apple, peeled, cored, and grated. A Fuji or Honeycrisp apple works wonderfully, adding a subtle sweetness and fruity note that balances the richness of the curry.
- The Liquid and Roux:
- 4 cups (32 oz) of low-sodium chicken or beef broth. Using broth instead of water adds a significant layer of flavor. For a vegetarian version, a robust vegetable broth is perfect.
- 1 package (around 8 oz or 230g) of Japanese curry roux. Popular brands include S&B Golden Curry, House Vermont Curry, and Java Curry. These come in varying spice levels, from mild to extra hot, so you can choose according to your preference.
- Flavor Enhancers (The “Secret” Ingredients):
- 1 tablespoon of soy sauce, preferably a Japanese variety like Kikkoman, for a boost of umami.
- 1 tablespoon of ketchup. This might sound unconventional, but it adds a touch of sweetness and acidity that brightens the overall flavor.
- 1 tablespoon of honey or mirin (Japanese sweet rice wine). This contributes to the characteristic sweetness of Japanese curry.
- 1 teaspoon of Worcestershire sauce for an added layer of savory complexity.
- Optional: a small square of dark chocolate (70% cocoa or higher) for richness and depth, or a teaspoon of instant coffee granules to enhance the savory notes.
- For Serving (Optional but Recommended):
- Freshly steamed Japanese short-grain rice (koshihikari or similar).
- Fukujinzuke (a mix of pickled vegetables, often including daikon, eggplant, and lotus root) for a crunchy and tangy garnish.
- Rakkyo (pickled Japanese scallions) for a sharp, sweet counterpoint.
- Tonkatsu (breaded and fried pork cutlet) to transform your dish into the beloved Katsu Curry.
- A soft-boiled or fried egg on top.
Instructions
Creating a delicious Japanese curry is a process of layering flavors. Follow these steps carefully for the best results.
- The Foundation of Flavor: Caramelizing the Onions: In a large, heavy-bottomed pot or a Dutch oven, heat the vegetable oil over medium-low heat. Add the thinly sliced onions and a pinch of salt. Cook slowly, stirring occasionally, until the onions are deeply golden brown and have a jam-like consistency. This is the most crucial step for a rich and flavorful curry and can take anywhere from 20 to 40 minutes. Do not rush this process. The patience you invest here will pay dividends in the final taste of your curry. The onions should be sweet and savory, without any bitterness. Once the onions have reached this stage, add the minced garlic and grated ginger and cook for another minute until they become fragrant, stirring constantly to prevent them from burning.
- Searing the Protein: Increase the heat to medium-high. Add your chosen protein (chicken, beef, or pork) to the pot. Sear the meat on all sides until it is lightly browned. This step helps to develop flavor and lock in the juices. You don’t need to cook the meat all the way through at this point, as it will continue to cook in the broth. Once browned, remove the meat from the pot and set it aside.
- Cooking the Vegetables and Building the Broth: Add the rangiri-cut carrots and cubed potatoes to the pot. Stir them for a few minutes to coat them in the residual flavors from the onions and meat. Pour in the chicken, beef, or vegetable broth, and use a wooden spoon to scrape up any browned bits (fond) from the bottom of the pot. These little bits are packed with flavor. Return the browned meat to the pot.
- Simmering to Tenderness: Bring the mixture to a boil, then immediately reduce the heat to a gentle simmer. Cover the pot and let it cook for about 15-20 minutes, or until the carrots and potatoes are tender when pierced with a fork. The simmering time may vary depending on the size of your vegetable chunks.
- Incorporating the Flavor Enhancers: Once the vegetables are tender, stir in the grated apple, soy sauce, ketchup, honey (or mirin), and Worcestershire sauce. If you’re using the optional dark chocolate or instant coffee, add them now as well. Allow these ingredients to simmer for a few minutes to meld with the other flavors.
- Creating the Velvety Curry Sauce: This is the magical transformation step. Turn off the heat completely before adding the curry roux. This is an important technique to prevent the roux from becoming lumpy. Break the curry roux blocks into smaller pieces and drop them into the hot broth. Let them sit for a couple of minutes to soften, and then begin to stir gently and continuously until the roux has completely dissolved into the broth, creating a smooth and uniform sauce.
- The Final Simmer and Thickening: Once the roux is fully incorporated, return the pot to a very low heat. Let the curry simmer gently, uncovered, for another 10 to 15 minutes. Stir frequently from the bottom to prevent the curry from sticking and burning as it thickens. The curry should develop a beautiful, glossy sheen and a thick, gravy-like consistency. If the curry becomes thicker than you’d like, you can stir in a little more broth or water until you reach your desired consistency.
- The Essential Resting Period: For the absolute best flavor, allow the curry to rest off the heat for at least 30 minutes before serving. An even better approach is to let it cool completely and refrigerate it for a few hours or even overnight. This resting period allows the flavors to meld and deepen, resulting in a much richer and more harmonious curry. Reheat it gently over low heat before serving.
Nutrition Facts
The nutritional information for this Japanese curry recipe can vary based on the specific brands of ingredients used (especially the curry roux), the type and amount of protein, and the serving size. The following is an estimation for one serving, assuming the recipe makes eight servings (approximately 1.5 cups of curry per serving, without rice).
- Servings: 6-8
- Calories per serving: Approximately 450-600 kcal
- Protein: 25-35g
- Fat: 20-30g (This can be higher if using fattier cuts of meat or more oil)
- Carbohydrates: 40-50g (Mainly from the potatoes, roux, and sweeteners)
- Sodium: The sodium content can be quite high, primarily from the curry roux and soy sauce. Using low-sodium broth helps to manage this.
It’s important to remember that serving the curry with a cup of steamed rice will add approximately 200-250 extra calories.
Preparation Time
- Prep time: 25 minutes (This includes chopping the vegetables and meat)
- Cook time: Approximately 1 hour to 1 hour 15 minutes (This includes the time for caramelizing the onions)
- Total time: Approximately 1 hour 30 minutes to 1 hour 40 minutes
How to Serve
Japanese curry is a wonderfully versatile dish that can be served in numerous delightful ways. Here are some of the most popular and delicious methods to enjoy your homemade curry:
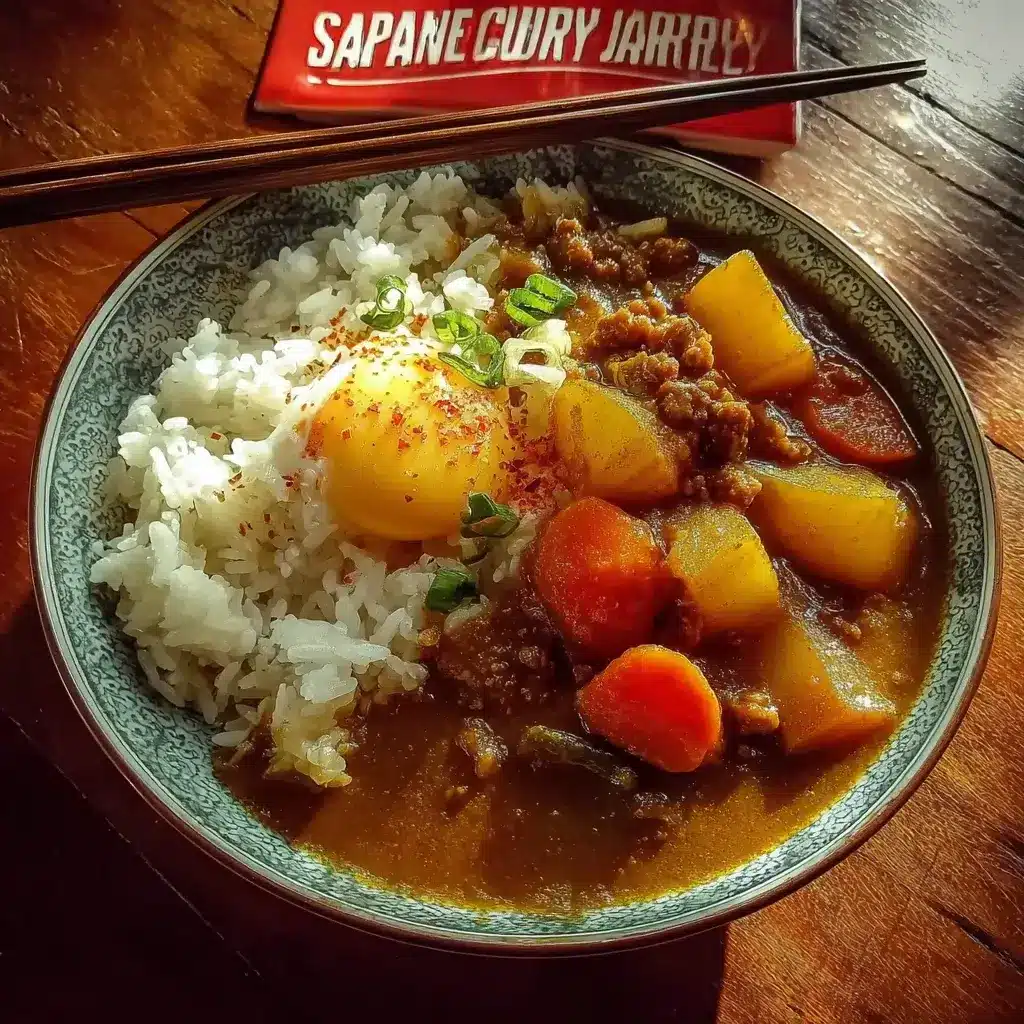
- The Quintessential Curry Rice (Karē Raisu): This is the most iconic and beloved way to serve Japanese curry.
- On a large, shallow plate, create a mound of hot, fluffy steamed Japanese short-grain rice on one side.
- Ladle a generous portion of the hot curry over the other half of the plate, allowing the rich sauce to cascade and pool beside the rice.
- A classic accompaniment is a vibrant red pickle called fukujinzuke. Place a small spoonful on the side of the plate or on top of the rice for a delightful crunch and tangy contrast.
- Another popular pickle is rakkyo, which are pickled Japanese scallions. Their sharp, sweet flavor cuts through the richness of the curry beautifully.
- The Indulgent Katsu Curry: This is a heartier and more decadent version, a true feast of a meal.
- Prepare a tonkatsu (a breaded and deep-fried pork cutlet) or a chicken katsu.
- Slice the crispy katsu into thick strips.
- Arrange the katsu slices over a bed of steamed rice.
- Generously smother the katsu and rice with the hot curry sauce.
- Comfort in a Bowl: Curry Udon: A comforting and soul-warming noodle soup variation.
- To adapt your curry, you will need to thin the sauce. In a separate pot, combine a portion of your curry with some dashi (Japanese soup stock) or vegetable broth and a splash of soy sauce and mirin to taste.
- Bring this curry broth to a simmer.
- Serve this rich and flavorful broth over a bowl of freshly boiled, thick and chewy udon noodles.
- Garnish with chopped scallions for a fresh finish.
- The Perfect Snack: Curry Bread (Karē Pan): A popular item in Japanese bakeries, this is a fantastic way to use up leftover curry.
- Use your cooled curry as a filling for a slightly sweet bread dough.
- The filled buns are then coated in panko breadcrumbs and deep-fried until golden brown and crispy, or baked for a healthier alternative. The result is a wonderfully savory and satisfying snack.
- A Creative Twist: Yaki Curry (Baked Curry): A specialty from the city of Mojiko in Japan.
- Place a serving of rice in an oven-safe dish.
- Pour the curry over the rice.
- Crack an egg in the center and top with a generous amount of shredded cheese, such as mozzarella or cheddar.
- Bake in a hot oven or under a broiler until the cheese is melted and bubbly and the egg is cooked to your liking.
Additional Tips
- The Power of the Roux Combination: For a more sophisticated and multi-dimensional flavor profile, don’t be afraid to mix different brands or heat levels of curry roux. A popular technique in Japan is to combine a block from a sweeter roux like Vermont Curry with a spicier one like Java Curry. This creates a beautifully balanced curry with both sweetness and a gentle kick.
- Unlocking Deeper Umami: To elevate your curry from great to unforgettable, consider adding a few “umami bombs.” A tablespoon of Worcestershire sauce is a classic addition. Other powerful flavor enhancers include a teaspoon of instant coffee granules (you won’t taste the coffee, but it will enrich the savory notes), a small piece of high-quality dark chocolate for depth and a velvety texture, or even a tablespoon of oyster sauce for a savory-sweet complexity.
- The Magic of an Overnight Rest: This is perhaps the most important tip for achieving the best-tasting curry. Like many stews and braises, Japanese curry undergoes a remarkable flavor transformation when allowed to rest. The ingredients have time to meld and harmonize, resulting in a much deeper and more integrated flavor. If you have the time, make your curry a day in advance. Let it cool completely, store it in the refrigerator overnight, and then gently reheat it the next day. The difference in taste is truly remarkable.
- Vegetable Variety for Texture and Nutrition: While the classic combination of onions, carrots, and potatoes is a fantastic base, feel free to get creative with your vegetables. For added sweetness and a creamy texture, try adding chunks of kabocha squash or sweet potato. Mushrooms, particularly shiitake or cremini, add a wonderful earthy depth. Green beans or peas can be added towards the end of cooking for a pop of color and freshness. Bell peppers also make a great addition.
- Freezing for Future Feasts: Japanese curry is an excellent dish to make in a large batch and freeze for later. It’s a lifesaver on busy weeknights. To freeze, allow the curry to cool completely, then portion it into freezer-safe containers or bags. It can be stored in the freezer for up to a month. It’s worth noting that the texture of potatoes can sometimes become slightly grainy after being frozen and reheated. If this is a concern, you can make the curry base without the potatoes, freeze it, and then add freshly boiled potatoes when you reheat it.
FAQ Section
Q1: Can I make Japanese curry without using the store-bought roux blocks?
A1: Absolutely! Making your own curry roux from scratch gives you complete control over the ingredients and allows you to customize the flavor to your exact liking. To do this, you’ll create a basic roux by melting about 4 tablespoons of unsalted butter in a saucepan over medium heat. Whisk in 4 tablespoons of all-purpose flour and cook for about 15-20 minutes, stirring constantly, until the roux turns a light brown color and has a nutty aroma. Then, you’ll add your spices. A good starting point is 2 tablespoons of a good quality curry powder and 1 tablespoon of garam masala. Whisk these into the roux and cook for another minute until fragrant. This homemade roux can then be dissolved into your broth in the same way as the store-bought blocks.
Q2: What is the main difference between Japanese curry and other types of curry like Indian or Thai?
A2: The primary differences lie in the flavor profile, consistency, and key ingredients. Japanese curry is generally much milder, sweeter, and thicker than its Indian and Thai counterparts. Its flavor is more savory and stew-like, often with fruity undertones from ingredients like grated apple. Indian curries are incredibly diverse but are typically characterized by a more complex blend of toasted spices, often including turmeric, cumin, coriander, and chili, and can range from creamy and mild to intensely spicy. Thai curries are distinguished by their use of fresh herbs and aromatics like lemongrass, galangal, and kaffir lime leaves, and often have a base of coconut milk, creating a balance of sweet, sour, salty, and spicy flavors.
Q3: How can I adjust the spiciness of my Japanese curry?
A3: The easiest way to control the spice level is by your choice of curry roux. Most brands offer mild, medium hot, and hot versions. If you’re sensitive to spice, start with a mild roux. You can always add a bit of heat later if you desire. To increase the spiciness, you can add a pinch of cayenne pepper, some shichimi togarashi (a Japanese seven-spice blend), or a dash of chili oil. If you’ve made your curry too spicy, you can try to balance it out by adding a bit more grated apple, honey, or even a dollop of plain yogurt or a splash of coconut milk to mellow the heat.
Q4: My curry is too thin. What’s the best way to thicken it?
A4: If your curry hasn’t reached the desired thick, gravy-like consistency, there are a few simple ways to fix it. The first method is to simply let it simmer gently with the lid off for a longer period. This will allow some of the excess liquid to evaporate and the sauce to reduce and thicken naturally. If you’re short on time, you can use a cornstarch slurry. In a small bowl, mix one tablespoon of cornstarch with two tablespoons of cold water until smooth. Slowly whisk this slurry into your simmering curry. Let it cook for another minute or two, and it will thicken up nicely. Be careful not to add too much at once, as it can make the curry gummy.
Q5: What are some common mistakes to avoid when making Japanese curry?
A5: One of the most common mistakes is rushing the caramelization of the onions. This step is fundamental to building a deep and sweet flavor base, so patience is key. Another pitfall is adding the curry roux to boiling liquid, which can cause it to clump. Always turn off the heat before dissolving the roux. Also, be sure to stir the curry frequently once the roux is added, especially towards the end of cooking, as the thickened sauce can easily stick to the bottom of the pot and burn. Finally, don’t underestimate the power of resting the curry. Serving it immediately is fine, but allowing it to rest for at least 30 minutes, or even overnight, will result in a much more flavorful and delicious final product.

Japanese Curry recipe
Ingredients
-
For the Curry Base:
-
2 tablespoons of a neutral oil like vegetable, canola, or grapeseed oil. You can also use unsalted butter for a richer flavor at the start.
-
1.5 lbs (about 680g) of protein, cut into 1-inch cubes. Boneless, skinless chicken thighs are a popular choice due to their flavor and tenderness. Other excellent options include beef chuck roast, pork shoulder, or for a vegetarian alternative, firm tofu or a medley of mushrooms like cremini and shiitake.
-
2 large yellow onions, peeled and thinly sliced. This might seem like a lot of onion, but they will cook down significantly and form the sweet backbone of your curry.
-
4-5 cloves of fresh garlic, minced. Don’t be tempted to use garlic powder here; fresh garlic provides a pungent depth that is essential.
-
A 1-inch piece of fresh ginger, peeled and finely grated. Similar to garlic, fresh ginger offers a warmth and zest that is unmatched.
-
-
The Vegetables:
-
2 large carrots, peeled and cut into rangiri style (rolling wedges). This Japanese cutting technique involves making diagonal cuts while rotating the vegetable, creating pieces with more surface area to absorb the curry’s flavor.
-
3 medium Yukon Gold potatoes, peeled and cut into 1.5-inch cubes. Yukon Golds are a great choice as they hold their shape well during cooking and have a creamy texture. Russet potatoes are also a good alternative.
-
1 medium apple, peeled, cored, and grated. A Fuji or Honeycrisp apple works wonderfully, adding a subtle sweetness and fruity note that balances the richness of the curry.
-
-
The Liquid and Roux:
-
4 cups (32 oz) of low-sodium chicken or beef broth. Using broth instead of water adds a significant layer of flavor. For a vegetarian version, a robust vegetable broth is perfect.
-
1 package (around 8 oz or 230g) of Japanese curry roux. Popular brands include S&B Golden Curry, House Vermont Curry, and Java Curry. These come in varying spice levels, from mild to extra hot, so you can choose according to your preference.
-
-
Flavor Enhancers (The “Secret” Ingredients):
-
1 tablespoon of soy sauce, preferably a Japanese variety like Kikkoman, for a boost of umami.
-
1 tablespoon of ketchup. This might sound unconventional, but it adds a touch of sweetness and acidity that brightens the overall flavor.
-
1 tablespoon of honey or mirin (Japanese sweet rice wine). This contributes to the characteristic sweetness of Japanese curry.
-
1 teaspoon of Worcestershire sauce for an added layer of savory complexity.
-
Optional: a small square of dark chocolate (70% cocoa or higher) for richness and depth, or a teaspoon of instant coffee granules to enhance the savory notes.
-
-
For Serving (Optional but Recommended):
-
Freshly steamed Japanese short-grain rice (koshihikari or similar).
-
Fukujinzuke (a mix of pickled vegetables, often including daikon, eggplant, and lotus root) for a crunchy and tangy garnish.
-
Rakkyo (pickled Japanese scallions) for a sharp, sweet counterpoint.
-
Tonkatsu (breaded and fried pork cutlet) to transform your dish into the beloved Katsu Curry.
-
A soft-boiled or fried egg on top.
-
Instructions
-
The Foundation of Flavor: Caramelizing the Onions: In a large, heavy-bottomed pot or a Dutch oven, heat the vegetable oil over medium-low heat. Add the thinly sliced onions and a pinch of salt. Cook slowly, stirring occasionally, until the onions are deeply golden brown and have a jam-like consistency. This is the most crucial step for a rich and flavorful curry and can take anywhere from 20 to 40 minutes. Do not rush this process. The patience you invest here will pay dividends in the final taste of your curry. The onions should be sweet and savory, without any bitterness. Once the onions have reached this stage, add the minced garlic and grated ginger and cook for another minute until they become fragrant, stirring constantly to prevent them from burning.
-
Searing the Protein: Increase the heat to medium-high. Add your chosen protein (chicken, beef, or pork) to the pot. Sear the meat on all sides until it is lightly browned. This step helps to develop flavor and lock in the juices. You don’t need to cook the meat all the way through at this point, as it will continue to cook in the broth. Once browned, remove the meat from the pot and set it aside.
-
Cooking the Vegetables and Building the Broth: Add the rangiri-cut carrots and cubed potatoes to the pot. Stir them for a few minutes to coat them in the residual flavors from the onions and meat. Pour in the chicken, beef, or vegetable broth, and use a wooden spoon to scrape up any browned bits (fond) from the bottom of the pot. These little bits are packed with flavor. Return the browned meat to the pot.
-
Simmering to Tenderness: Bring the mixture to a boil, then immediately reduce the heat to a gentle simmer. Cover the pot and let it cook for about 15-20 minutes, or until the carrots and potatoes are tender when pierced with a fork. The simmering time may vary depending on the size of your vegetable chunks.
-
Incorporating the Flavor Enhancers: Once the vegetables are tender, stir in the grated apple, soy sauce, ketchup, honey (or mirin), and Worcestershire sauce. If you’re using the optional dark chocolate or instant coffee, add them now as well. Allow these ingredients to simmer for a few minutes to meld with the other flavors.
-
Creating the Velvety Curry Sauce: This is the magical transformation step. Turn off the heat completely before adding the curry roux. This is an important technique to prevent the roux from becoming lumpy. Break the curry roux blocks into smaller pieces and drop them into the hot broth. Let them sit for a couple of minutes to soften, and then begin to stir gently and continuously until the roux has completely dissolved into the broth, creating a smooth and uniform sauce.
-
The Final Simmer and Thickening: Once the roux is fully incorporated, return the pot to a very low heat. Let the curry simmer gently, uncovered, for another 10 to 15 minutes. Stir frequently from the bottom to prevent the curry from sticking and burning as it thickens. The curry should develop a beautiful, glossy sheen and a thick, gravy-like consistency. If the curry becomes thicker than you’d like, you can stir in a little more broth or water until you reach your desired consistency.
-
The Essential Resting Period: For the absolute best flavor, allow the curry to rest off the heat for at least 30 minutes before serving. An even better approach is to let it cool completely and refrigerate it for a few hours or even overnight. This resting period allows the flavors to meld and deepen, resulting in a much richer and more harmonious curry. Reheat it gently over low heat before serving.
Nutrition
- Serving Size: one normal portion
- Calories: 450-600 kcal
- Fat: 20-30g
- Carbohydrates: 40-50g
- Protein: 25-35g


