
There are some desserts that are merely sweet treats, and then there are those that are pure, edible nostalgia. For me, Japanese Caramel Custard Pudding, or Purin as it’s affectionately known in Japan, falls firmly into the latter category. My first encounter with it wasn’t in a fancy restaurant, but from a chilled display case in a bustling Tokyo convenience store on a humid summer afternoon. The unassuming plastic cup held a secret: a perfectly pale, jiggly custard hiding a treasure of dark, liquid caramel at the bottom. The simple act of flipping it onto a plate and watching the amber sauce cascade down the sides felt like a small, personal magic show. The taste was a revelation—the custard was unbelievably silky, eggy, and not too sweet, providing the perfect canvas for the complex, bittersweet caramel. It was a moment of quiet perfection amidst the city’s chaos. Since then, I’ve made it my mission to recreate that magic in my own kitchen. This recipe is the culmination of that quest, a foolproof method to create a Purin so smooth and delicious, it transports my family and me right back to that Tokyo afternoon with every single spoonful. It has become our go-to dessert for celebrations, for comfort, and for when we just need a little bit of everyday magic.
The Soul of Japanese Purin: More Than Just a Dessert
Before we dive into the whisking and baking, it’s worth taking a moment to appreciate what makes Japanese Caramel Custard Pudding so special. While it bears a resemblance to the French Crème Caramel or the Spanish Flan, Purin has carved out its own distinct identity in the culinary world. It is a cornerstone of Japanese yōshoku cuisine—Western-style dishes adapted for the Japanese palate. You’ll find it everywhere, from high-end pastry shops and retro-style cafes (kissaten) to the humble shelves of every konbini (convenience store).
The defining characteristic of Purin is its texture. The ideal Japanese custard is incredibly smooth, delicate, and melts in your mouth with a signature “jiggle.” This is often achieved by using whole milk rather than heavy cream, resulting in a lighter, more refreshing dessert compared to its denser European cousins. The second hero of the dish is the caramel. A proper Purin caramel isn’t just sweet; it’s cooked to a deep amber, bordering on mahogany, which lends it a sophisticated, slightly bitter edge. This bittersweetness is the perfect counterpoint to the gentle, creamy custard, creating a balanced and deeply satisfying flavor profile that is never cloying. Mastering this dessert is about mastering technique and patience. It’s about the gentle heat of a water bath, the crucial step of straining the custard for silkiness, and the long, cool rest that allows the flavors to meld into perfection. This recipe will guide you through every one of those crucial details.
Complete Ingredients for Japanese Caramel Custard Pudding
The beauty of Purin lies in its simplicity. It requires only a handful of staple ingredients, which makes the quality of each one paramount. Using fresh, good-quality eggs and whole milk will make a world of difference. This recipe is designed for 6 standard (4-6 oz) ramekins.
For the Bittersweet Caramel Sauce:
- Granulated Sugar: ½ cup (100g)
- Water: 2 tablespoons
- Hot Water: 2 tablespoons (This is used to stop the caramelization process)
For the Silky Custard:
- Whole Milk: 2 cups (500ml). Do not substitute with low-fat milk; the fat content is essential for the rich, creamy texture.
- Granulated Sugar: ½ cup (100g)
- Large Eggs: 2 whole
- Large Egg Yolks: 2. The extra yolks add richness and contribute to the ultra-smooth, creamy consistency.
- Vanilla Extract: 1 ½ teaspoons. For an even more luxurious flavor, you can use one vanilla bean, split lengthwise with the seeds scraped into the milk.
Step-by-Step Instructions: Crafting the Perfect Purin
Follow these instructions carefully, paying close attention to the techniques for tempering and straining. This is where the magic of the silky-smooth texture is created.
Part 1: Making the Bittersweet Caramel Sauce
- Prepare Your Ramekins: Have your 6 ramekins ready and placed on a tray for easy handling.
- Combine Sugar and Water: In a small, heavy-bottomed saucepan, combine the ½ cup of sugar and 2 tablespoons of water. Use a saucepan with a light-colored interior if you have one, as it makes it easier to judge the color of the caramel.
- Heat the Mixture: Place the saucepan over medium heat. Let the sugar dissolve and the mixture begin to bubble without stirring it with a spoon. Stirring can cause the sugar to crystallize. Instead, gently swirl the pan occasionally to ensure even cooking.
- Watch for Color: Continue to cook, swirling the pan, until the syrup turns a deep, beautiful amber color, like dark honey or iced tea. This should take about 5-7 minutes. Be very watchful at this stage, as it can go from perfect to burnt in a matter of seconds. A little bitterness is desired, but a burnt, black color will ruin the taste.
- Stop the Cooking: As soon as the caramel reaches the desired color, immediately remove the pan from the heat. Carefully and slowly add the 2 tablespoons of hot water. Be extremely cautious, as the mixture will bubble up and splatter violently. Using hot water minimizes the shock and splattering. Swirl the pan to incorporate the water.
- Fill the Ramekins: Working quickly, divide the hot caramel sauce evenly among the 6 ramekins, tilting each one to coat the bottom. The caramel will harden almost instantly upon contact with the cool ceramic. Don’t worry, this is normal; it will re-liquefy during baking. Set the ramekins aside.
Part 2: Creating the Silky Custard
- Warm the Milk: In the same saucepan (no need to wash it), combine the 2 cups of whole milk and ½ cup of sugar. Place it over medium-low heat. Warm the milk, stirring gently, just until the sugar has completely dissolved and the milk is hot to the touch (steaming, but not boiling). If using a vanilla bean, add the pod and scraped seeds to the milk at this stage.
- Prepare the Eggs: In a separate medium-sized bowl, gently whisk together the 2 whole eggs and 2 egg yolks. Whisk just enough to break up the yolks and combine everything smoothly. Avoid over-whisking, as this incorporates excess air, which can create bubbles in your finished custard.
- Temper the Eggs: This is a critical step to prevent the eggs from scrambling. While whisking the eggs continuously with one hand, use the other hand to very slowly pour the hot milk mixture into the eggs in a thin, steady stream. This gradual process gently raises the temperature of the eggs without cooking them.
- Add Vanilla: Once all the milk has been incorporated, stir in the vanilla extract (if you didn’t use a vanilla bean).
- Strain for Silkiness: This is the non-negotiable secret to a flawless texture. Position a fine-mesh sieve over a clean bowl or a large liquid measuring cup. Pour the entire custard mixture through the sieve to catch any tiny bits of cooked egg or undissolved chalazae (the stringy white bits in eggs). For an even smoother result, repeat the straining process a second time.
- Fill the Ramekins: Skim off any foam or bubbles from the surface of the strained custard. Carefully pour the custard mixture into the prepared ramekins, filling them almost to the top over the hardened caramel layer.
Part 3: The Gentle Baking Process (Bain-Marie)
- Preheat and Prepare the Water Bath: Preheat your oven to 325°F (160°C). Arrange the filled ramekins in a large, deep baking dish or roasting pan, ensuring they don’t touch each other.
- Add Hot Water: Boil some water in a kettle. Carefully pour the hot water into the baking dish, around the ramekins, until the water level reaches about halfway up the sides of the ramekins. This water bath, or bain-marie, insulates the custard and ensures it bakes gently and evenly, preventing it from curdling.
- Bake the Custard: Carefully transfer the baking dish to the preheated oven. Bake for 40-50 minutes.
- Check for Doneness: The custards are done when the edges are set, but the center still has a distinct jiggle when you gently shake the pan. It should wobble like Jell-O, not slosh like a liquid. Be careful not to overbake, as this will lead to a rubbery texture.
- Cool Down: Carefully remove the baking dish from the oven. Let the ramekins cool in the water bath for about 30 minutes before removing them and placing them on a wire rack to cool completely to room temperature.
Part 4: Chilling and Serving
- Chill Thoroughly: Once at room temperature, cover each ramekin with plastic wrap. Transfer them to the refrigerator and chill for a minimum of 4 hours, though overnight is highly recommended for the best flavor and texture.
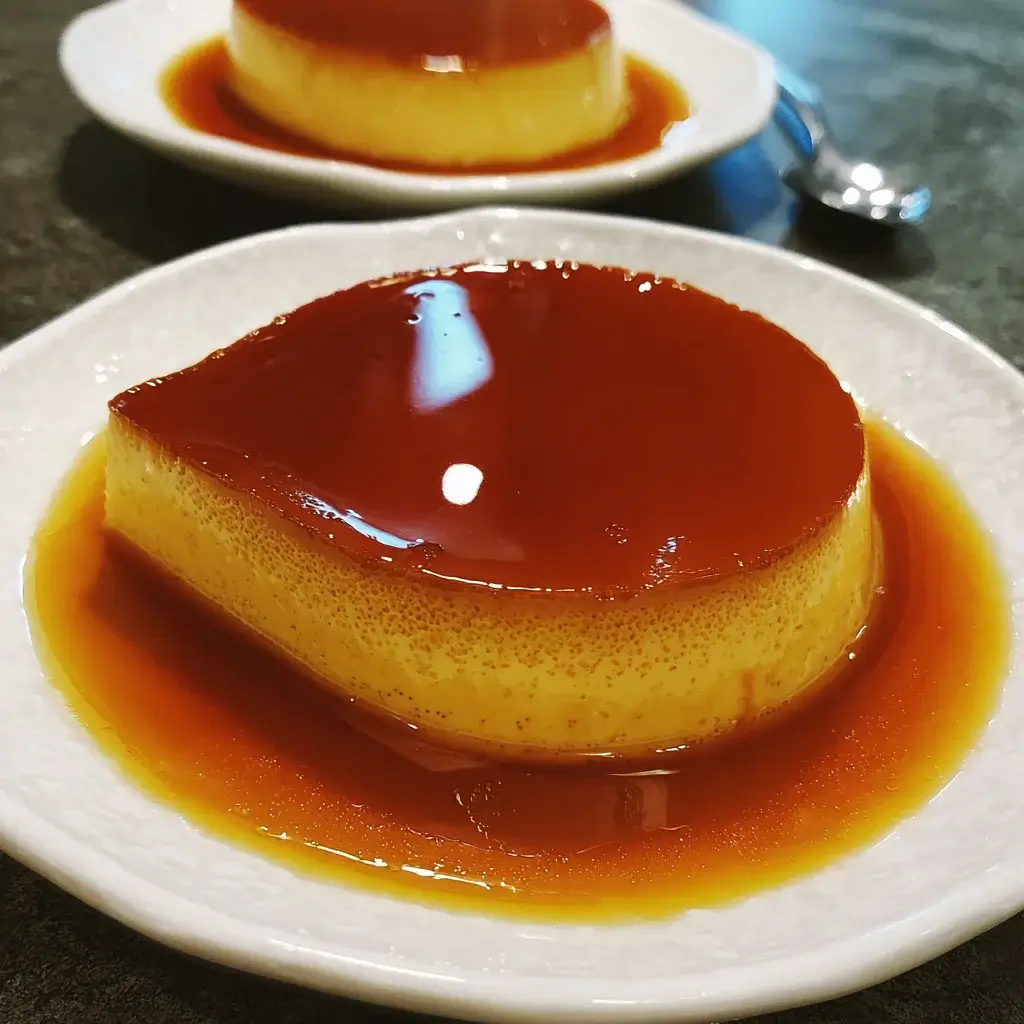
- Unmold and Serve: To serve, run a thin, sharp knife or a small offset spatula around the inside edge of a ramekin to loosen the custard. Place a serving plate with a slight lip (to catch the sauce) on top of the ramekin. In one swift, confident motion, invert the plate and ramekin together. Give it a gentle shake, and the pudding should release onto the plate, with the now-liquid caramel sauce cascading beautifully over the top.
Nutrition Facts
The following nutritional information is an approximation and can vary based on the specific ingredients used.
- Servings: 6
- Calories per serving (approximate): 280-320 kcal
Preparation Time
Patience is a key ingredient in this recipe, especially during the chilling phase.
- Active Prep Time: 20-25 minutes
- Baking Time: 40-50 minutes
- Cooling & Chilling Time: 4.5 hours to overnight
- Total Time: Approximately 5.5 hours (minimum)
How to Serve Japanese Purin
Serving Purin is a delightful ritual. While it’s perfect on its own, a few simple additions can enhance the experience.
- The Classic Presentation:
- Unmolded onto a small, elegant plate, allowing the bittersweet caramel sauce to pool beautifully around the base. This minimalist approach lets the dessert’s perfect texture and flavor shine.
- With a Touch of Cream:
- A dollop of lightly sweetened or, even better, unsweetened whipped cream on the side provides a lovely temperature and texture contrast.
- A quenelle of crème fraîche can add a sophisticated tangy note that balances the sweetness.
- Accompanied by Fresh Fruit:
- A few fresh berries, such as strawberries, raspberries, or blueberries, add a burst of color and a touch of acidity that cuts through the richness of the custard.
- A single, perfect maraschino cherry is a classic, retro garnish often seen in Japanese cafes.
- As a Plated Dessert:
- Serve the Purin alongside a crisp butter cookie or a delicate tuile for a crunchy element.
- For a Japanese-themed dessert platter, pair it with a small scoop of matcha ice cream or a slice of Japanese soufflé cheesecake.
- Beverage Pairings:
- The slightly bitter notes of a Japanese green tea like Sencha or the roasted flavor of Hojicha complement the dessert wonderfully.
- A cup of light-roast coffee or a simple black tea also makes for a perfect pairing.
Additional Tips for Silky Smooth Perfection
1. Master the Caramel Color
The goal is a deep amber, not a pale blonde or a burnt black. A pale caramel will be one-dimensionally sweet; a burnt one will be acrid. Swirl the pan instead of stirring to prevent crystallization and use a light-colored pan to accurately judge the color. Don’t be afraid to let it get dark—that’s where the signature bittersweet flavor comes from.
2. Strain for Ultimate Silkiness
This is the most important tip and cannot be skipped. Straining the custard mixture through a fine-mesh sieve at least once (twice is even better) is the absolute key to a smooth, homogenous, and velvety texture. It removes any potential lumps, bubbles, and the stringy chalazae from the eggs, which are the main culprits behind a grainy or imperfect custard.
3. Embrace the Low and Slow Bake
The combination of a low oven temperature (325°F / 160°C) and a bain-marie (water bath) is crucial. High heat will cause the eggs in the custard to curdle and separate, resulting in a rubbery, weeping, and hole-ridden texture. The gentle, humid heat of the water bath cooks the custard slowly and evenly, ensuring a delicate and flawless set.
4. Don’t Introduce Excess Air
When whisking your eggs and when combining them with the milk, do so gently. The goal is to combine, not to aerate. Vigorously whisking incorporates air, which creates tiny bubbles that can mar the surface of your Purin and give it a slightly spongy texture instead of a dense, creamy one. Skim any foam off the top before baking.
5. Patience During Chilling is Non-Negotiable
A warm or even room-temperature custard will not have fully set. Attempting to unmold it too early will result in a sad, soupy puddle. The minimum 4-hour chilling time in the refrigerator is essential for the custard to firm up completely so it holds its shape. Chilling overnight is even better, as it allows the flavors of the vanilla, egg, and caramel to meld and deepen.
Frequently Asked Questions (FAQ)
1. Q: Why did my finished pudding have small holes or a spongy texture?
A: This is almost always caused by one of two things: baking the custard at too high a temperature or over-whisking the mixture. If the oven is too hot, the water content in the custard turns to steam and creates pockets (holes). If you whisked too much air into the custard, those bubbles can also create an uneven, spongy texture. Remember to bake low and slow and to whisk gently.
2. Q: My caramel sauce seized up and became a hard candy disk in the ramekin. Did I do something wrong?
A: Not at all! This is completely normal and expected. The hot liquid caramel undergoes thermal shock when it hits the cool surface of the ramekin, causing it to harden instantly. During the gentle, moist baking process in the water bath, this hard caramel disk will slowly melt and dissolve back into a perfect, liquid sauce, ready to be released when you unmold the pudding.
3. Q: Can I make this recipe dairy-free or with a different kind of milk?
A: You can certainly experiment, but the results will differ. For a dairy-free version, full-fat oat milk is a good substitute as it has a creamy consistency. Full-fat soy milk can also work. Almond milk tends to be too thin and may result in a less creamy custard. Coconut milk will work beautifully from a texture standpoint but will impart a distinct coconut flavor to the final product.
4. Q: How can I be sure the pudding is perfectly baked and not under or overdone?
A: The “jiggle test” is your best friend. Gently shake the baking pan. The outer edge of the custards should be set and firm, but the very center (about the size of a quarter) should still have a gentle, gelatinous wobble. If the center sloshes like a liquid, it needs more time. If there is no jiggle at all, it’s likely overcooked and may be slightly rubbery. It will continue to set as it cools.
5. Q: Can I make one large Purin instead of individual ones?
A: Yes, you can make this in a single larger dish, like a 6-inch round cake pan or a small loaf pan. However, you will need to significantly increase the baking time. Start checking for doneness (using the jiggle test) around the 50-60 minute mark, but it could take up to 90 minutes depending on the size and material of your pan. The chilling time will also need to be longer to ensure the center is fully set before unmolding.

Japanese Caramel Custard Pudding recipe
Ingredients
For the Bittersweet Caramel Sauce:
-
Granulated Sugar: ½ cup (100g)
-
Water: 2 tablespoons
-
Hot Water: 2 tablespoons (This is used to stop the caramelization process)
For the Silky Custard:
-
Whole Milk: 2 cups (500ml). Do not substitute with low-fat milk; the fat content is essential for the rich, creamy texture.
-
Granulated Sugar: ½ cup (100g)
-
Large Eggs: 2 whole
-
Large Egg Yolks: 2. The extra yolks add richness and contribute to the ultra-smooth, creamy consistency.
-
Vanilla Extract: 1 ½ teaspoons. For an even more luxurious flavor, you can use one vanilla bean, split lengthwise with the seeds scraped into the milk.
Instructions
Part 1: Making the Bittersweet Caramel Sauce
-
Prepare Your Ramekins: Have your 6 ramekins ready and placed on a tray for easy handling.
-
Combine Sugar and Water: In a small, heavy-bottomed saucepan, combine the ½ cup of sugar and 2 tablespoons of water. Use a saucepan with a light-colored interior if you have one, as it makes it easier to judge the color of the caramel.
-
Heat the Mixture: Place the saucepan over medium heat. Let the sugar dissolve and the mixture begin to bubble without stirring it with a spoon. Stirring can cause the sugar to crystallize. Instead, gently swirl the pan occasionally to ensure even cooking.
-
Watch for Color: Continue to cook, swirling the pan, until the syrup turns a deep, beautiful amber color, like dark honey or iced tea. This should take about 5-7 minutes. Be very watchful at this stage, as it can go from perfect to burnt in a matter of seconds. A little bitterness is desired, but a burnt, black color will ruin the taste.
-
Stop the Cooking: As soon as the caramel reaches the desired color, immediately remove the pan from the heat. Carefully and slowly add the 2 tablespoons of hot water. Be extremely cautious, as the mixture will bubble up and splatter violently. Using hot water minimizes the shock and splattering. Swirl the pan to incorporate the water.
-
Fill the Ramekins: Working quickly, divide the hot caramel sauce evenly among the 6 ramekins, tilting each one to coat the bottom. The caramel will harden almost instantly upon contact with the cool ceramic. Don’t worry, this is normal; it will re-liquefy during baking. Set the ramekins aside.
Part 2: Creating the Silky Custard
-
Warm the Milk: In the same saucepan (no need to wash it), combine the 2 cups of whole milk and ½ cup of sugar. Place it over medium-low heat. Warm the milk, stirring gently, just until the sugar has completely dissolved and the milk is hot to the touch (steaming, but not boiling). If using a vanilla bean, add the pod and scraped seeds to the milk at this stage.
-
Prepare the Eggs: In a separate medium-sized bowl, gently whisk together the 2 whole eggs and 2 egg yolks. Whisk just enough to break up the yolks and combine everything smoothly. Avoid over-whisking, as this incorporates excess air, which can create bubbles in your finished custard.
-
Temper the Eggs: This is a critical step to prevent the eggs from scrambling. While whisking the eggs continuously with one hand, use the other hand to very slowly pour the hot milk mixture into the eggs in a thin, steady stream. This gradual process gently raises the temperature of the eggs without cooking them.
-
Add Vanilla: Once all the milk has been incorporated, stir in the vanilla extract (if you didn’t use a vanilla bean).
-
Strain for Silkiness: This is the non-negotiable secret to a flawless texture. Position a fine-mesh sieve over a clean bowl or a large liquid measuring cup. Pour the entire custard mixture through the sieve to catch any tiny bits of cooked egg or undissolved chalazae (the stringy white bits in eggs). For an even smoother result, repeat the straining process a second time.
-
Fill the Ramekins: Skim off any foam or bubbles from the surface of the strained custard. Carefully pour the custard mixture into the prepared ramekins, filling them almost to the top over the hardened caramel layer.
Part 3: The Gentle Baking Process (Bain-Marie)
-
Preheat and Prepare the Water Bath: Preheat your oven to 325°F (160°C). Arrange the filled ramekins in a large, deep baking dish or roasting pan, ensuring they don’t touch each other.
-
Add Hot Water: Boil some water in a kettle. Carefully pour the hot water into the baking dish, around the ramekins, until the water level reaches about halfway up the sides of the ramekins. This water bath, or bain-marie, insulates the custard and ensures it bakes gently and evenly, preventing it from curdling.
-
Bake the Custard: Carefully transfer the baking dish to the preheated oven. Bake for 40-50 minutes.
-
Check for Doneness: The custards are done when the edges are set, but the center still has a distinct jiggle when you gently shake the pan. It should wobble like Jell-O, not slosh like a liquid. Be careful not to overbake, as this will lead to a rubbery texture.
-
Cool Down: Carefully remove the baking dish from the oven. Let the ramekins cool in the water bath for about 30 minutes before removing them and placing them on a wire rack to cool completely to room temperature.
Part 4: Chilling and Serving
-
Chill Thoroughly: Once at room temperature, cover each ramekin with plastic wrap. Transfer them to the refrigerator and chill for a minimum of 4 hours, though overnight is highly recommended for the best flavor and texture.
-
Unmold and Serve: To serve, run a thin, sharp knife or a small offset spatula around the inside edge of a ramekin to loosen the custard. Place a serving plate with a slight lip (to catch the sauce) on top of the ramekin. In one swift, confident motion, invert the plate and ramekin together. Give it a gentle shake, and the pudding should release onto the plate, with the now-liquid caramel sauce cascading beautifully over the top.
Nutrition
- Serving Size: one normal portion
- Calories: 280-320 kcal