
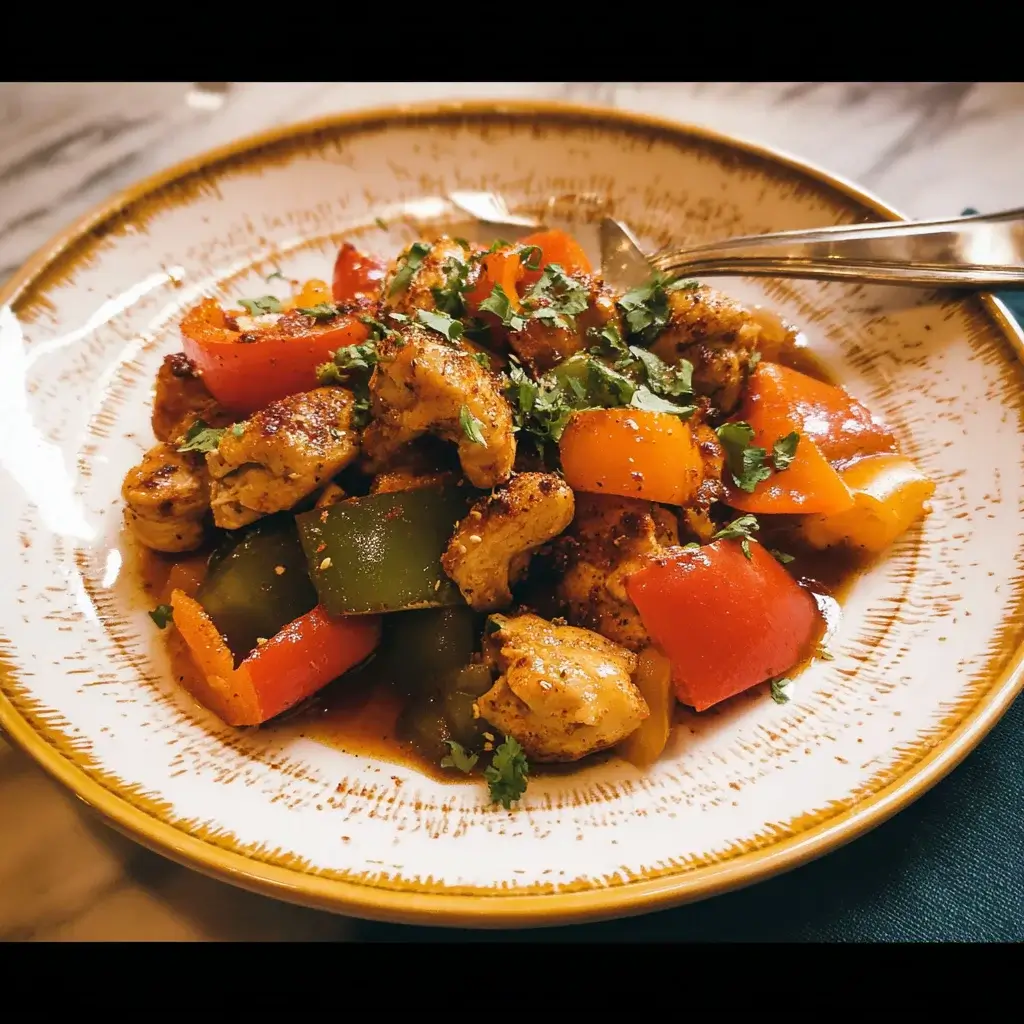

Before the Instant Pot entered my life, the idea of a one-pot meal that was both fast and deeply flavorful felt like a myth. I was a master of skillet dinners that dirtied every dish in a five-foot radius and slow-cooker meals that required foresight I simply didn’t have on a Tuesday morning. Then, everything changed. This Instant Pot Chicken and Peppers recipe was one of my first true pressure-cooking successes, and it felt like I had discovered a superpower. I remember the first time I made it, cautiously layering the ingredients and locking the lid, half-expecting a kitchen disaster. But in less than 30 minutes, the savory, garlicky aroma filled the house. When I opened the lid, I was greeted by a vibrant mosaic of tender chicken and perfectly cooked peppers in a rich, savory sauce. It wasn’t just fast; it was incredible. The chicken was impossibly juicy, and the peppers, which I feared would turn to mush, still had a pleasant, tender bite. My family, usually picky about mixed dishes, cleaned their plates without a single complaint. It was a weeknight dinner miracle. Now, this recipe is my secret weapon for busy days—a guaranteed crowd-pleaser that delivers slow-simmered flavor in a fraction of the time, all while leaving me with just one pot to clean.
The Ultimate Instant Pot Chicken and Peppers: Ingredients
The success of this dish lies in its simple, yet powerful, combination of ingredients. Each component is chosen not only for its individual flavor but for how it contributes to the final, harmonious sauce. Here is a detailed breakdown of everything you’ll need.
- For the Chicken and Vegetables:
- Boneless, Skinless Chicken Thighs (2 lbs / 900g, cut into 1-inch pieces): While you can use chicken breasts, thighs are the superior choice for pressure cooking. Their higher fat content ensures they remain incredibly tender, juicy, and flavorful, and they are virtually impossible to overcook under pressure. Cutting them into uniform 1-inch pieces ensures they cook quickly and evenly.
- Olive Oil (2 tablespoons): Used for searing the chicken and sautéing the aromatics. This initial step builds the first and most important layer of flavor.
- Bell Peppers (3 large, assorted colors): The co-star of the dish. Using a mix of colors—like red, yellow, and orange—not only makes the dish visually stunning but also adds a wonderful spectrum of sweetness. Red peppers are the sweetest, while yellow and orange are milder. Cut them into thicker strips (about 1-inch wide) so they hold their shape and don’t disintegrate during cooking.
- Yellow Onion (1 large, sliced): Forms the aromatic foundation of the sauce, providing a deep, savory sweetness as it softens.
- Garlic (5-6 cloves, minced): Essential for a robust, savory flavor. Freshly minced garlic provides a much better flavor than the pre-minced jarred variety.
- For the Savory Sauce:
- Low-Sodium Chicken Broth (1 cup): This is the primary liquid needed to bring the Instant Pot to pressure. It also infuses the entire dish with a rich, savory flavor. Using a low-sodium version is key to controlling the final saltiness of the sauce.
- Diced Tomatoes (1 can, 14.5 oz / 411g, undrained): These add body, a gentle acidity, and necessary liquid to the sauce. Fire-roasted diced tomatoes are an excellent choice here as they contribute an extra layer of smoky depth.
- Smoked Paprika (1 tablespoon): This is a critical ingredient for that signature smoky, slightly sweet flavor. It gives the dish a beautiful color and a complexity that regular paprika can’t match.
- Dried Oregano (1 teaspoon): Adds a classic, herbaceous, and slightly peppery note that pairs perfectly with the chicken and peppers.
- Ground Cumin (1 teaspoon): Provides a warm, earthy background note that complements the smokiness of the paprika.
- Salt (1 teaspoon): For seasoning the chicken and the sauce. Adjust to your taste at the end.
- Freshly Ground Black Pepper (1/2 teaspoon): Adds a touch of mild, pungent heat.
- For Finishing the Dish:
- Cornstarch (2 tablespoons): Used to create a slurry at the end to thicken the sauce into a luscious, velvety gravy that perfectly coats the chicken and peppers.
- Cold Water (3 tablespoons): To be mixed with the cornstarch to create the slurry. Using cold water is essential to prevent the cornstarch from clumping.
- Fresh Parsley (chopped, for garnish): A sprinkle of fresh parsley at the end adds a pop of vibrant color and a clean, fresh taste that brightens up the rich flavors of the dish.
Step-by-Step Instructions for Flawless Instant Pot Cooking
The Instant Pot simplifies cooking, but following the correct order of operations is crucial for building flavor and avoiding the dreaded “Burn” notice. These steps will guide you to a perfect result every time.
Stage 1: Building the Flavor Base (Sauté Mode)
- Prepare the Chicken: Cut the chicken thighs into uniform 1-inch cubes. Pat them thoroughly dry with paper towels. Season generously with 1 teaspoon of salt and ½ teaspoon of black pepper.
- Sear the Chicken: Set your Instant Pot to the Sauté function on the “More” or “High” setting. Add the 2 tablespoons of olive oil. Once the oil is hot and shimmering (the display should read “Hot”), carefully add half of the seasoned chicken to the pot in a single layer. Do not overcrowd the pot. Sear the chicken for 2-3 minutes per side, until it’s nicely browned. This browning process, known as the Maillard reaction, creates a massive amount of flavor. Remove the browned chicken to a clean plate and repeat with the remaining half.
- Sauté the Aromatics: Add the sliced onion to the now-empty pot. Sauté for 3-4 minutes, stirring occasionally, until the onion has softened and started to become translucent. Add the minced garlic and sauté for another minute until fragrant, stirring constantly to prevent it from burning.
Stage 2: Deglazing and Pressure Cooking
- Deglaze the Pot (The Most Important Step!): Press the Cancel button to turn off the Sauté function. Pour the 1 cup of chicken broth into the pot. Use a flat-edged wooden spoon or spatula to scrape up every single browned bit that is stuck to the bottom of the pot. This is called deglazing, and it is absolutely essential for two reasons: first, those browned bits are concentrated flavor, and second, failing to do this is the number one cause of the Instant Pot’s “Burn” error message.
- Layer the Ingredients: Return the seared chicken (and any juices from the plate) to the pot. Add the smoked paprika, dried oregano, and ground cumin. Pour the can of undrained diced tomatoes over the chicken, but do not stir. This layering technique, with the tomatoes on top, also helps prevent the burn notice. Finally, place the sliced bell peppers on the very top of everything.
- Pressure Cook: Secure the lid on the Instant Pot. Make sure the steam release valve is turned to the Sealing position. Select the Pressure Cook (or Manual) button and set the timer for 8 minutes at High Pressure.
- Release the Pressure: Once the 8-minute cooking cycle is complete, the Instant Pot will beep. Let the pressure release naturally for 5 minutes (this helps keep the chicken tender). After 5 minutes, carefully perform a Quick Release by turning the steam release valve to the Venting position. Use a long-handled spoon to avoid the hot steam.
Stage 3: Finishing the Sauce
- Prepare the Slurry: Once the pin has dropped and it’s safe to open the pot, carefully remove the lid. The sauce will appear thin at this point. In a small bowl, whisk together the 2 tablespoons of cornstarch and 3 tablespoons of cold water until a smooth, lump-free slurry is formed.
- Thicken the Sauce: Press the Cancel button, then select the Sauté function again, this time on the “Less” or “Low” setting. Once the liquid in the pot begins to gently bubble, slowly pour in the cornstarch slurry while stirring constantly.
- Simmer and Serve: Continue to stir the sauce as it simmers for 1-2 minutes. You will see it thicken into a beautiful, rich gravy. Press Cancel to turn off the heat. Taste the sauce and adjust with more salt and pepper if needed. Stir the chicken and peppers back into the thickened sauce.
- Garnish: Garnish generously with fresh chopped parsley before serving hot.
Nutrition Facts
This nutritional information is an approximation and can vary based on the specific ingredients you use.
- Servings: 6
- Calories per serving: Approximately 380-450 kcal
This dish is a fantastic source of lean protein from the chicken and is packed with vitamins A and C from the colorful bell peppers. The Instant Pot cooking method requires minimal oil, making it a healthy and satisfying meal.
Preparation Time
This recipe is a true weeknight wonder, delivering slow-cooked taste in record time.
- Prep Time: 15 minutes (chopping vegetables and chicken)
- Cook Time: 25 minutes (includes 10 minutes to come to pressure + 8 min cook time + 5 min natural release)
- Total Time: 40 minutes
How to Serve This Versatile Dish
This Instant Pot Chicken and Peppers is incredibly versatile and can be served in a variety of delicious ways to suit any preference or diet.
- Classic Comfort:
- Over Rice: Serve over a bed of fluffy white or brown rice to soak up every last drop of the savory sauce.
- With Mashed Potatoes: Spoon the chicken, peppers, and sauce over creamy mashed potatoes for the ultimate comfort food meal.
- Pasta and Grains:
- With Egg Noodles: The rich sauce is perfect tossed with wide, buttery egg noodles.
- Over Quinoa or Farro: For a healthier, heartier grain option, serve it with cooked quinoa or chewy farro.
- Low-Carb and Keto-Friendly Options:
- With Cauliflower Rice: Serve over a bed of steamed cauliflower rice for a fantastic low-carb meal.
- With Zucchini Noodles: Toss with sautéed zucchini noodles (zoodles).
- On its Own: It is hearty and delicious enough to be enjoyed as a standalone stew in a bowl.
- Fun and Creative Serving Ideas:
- As a Fajita Filling: Spoon the mixture into warm flour or corn tortillas and top with sour cream, avocado, or cilantro.
- On Crusty Bread: Serve in a shallow bowl with thick slices of crusty bread for dipping into the incredible sauce.
Additional Tips for Instant Pot Perfection
These five tips will help you master this recipe and get the most out of your pressure cooker.
- Don’t Skip the Sear: Searing the chicken is not just about cooking it; it’s about building flavor. The browned crust created during searing adds a deep, savory complexity to the final dish that you simply cannot get by just pressure cooking. Take the extra 5-7 minutes to do this step properly.
- Cut Your Peppers Thick: The high heat and moisture of a pressure cooker can obliterate delicate vegetables. To ensure your peppers don’t turn into a mushy mess, cut them into substantial, 1-inch thick strips or chunks. Placing them on the very top of the other ingredients also helps protect them from the most intense heat at the bottom of the pot.
- Master the Deglaze to Avoid the Burn Notice: The “Burn” notice is the most common issue for new Instant Pot users. It’s almost always caused by food sticking to the bottom of the pot. Be meticulous when you deglaze with the broth. Scrape firmly and ensure the bottom of the pot is completely smooth before you proceed to the pressure-cooking step.
- Layer Your Ingredients Strategically: For recipes containing thicker ingredients like tomatoes or sauces, layering is key. Keep the thin liquid (broth) at the bottom and layer the other ingredients on top without stirring. This ensures the sensors at the bottom of the pot detect sufficient thin liquid to generate steam, preventing the burn error.
- Always Use COLD Water for Your Slurry: When making a cornstarch slurry to thicken a sauce, you must mix the cornstarch with cold or room temperature liquid. If you mix cornstarch directly into the hot liquid in the Instant Pot, it will seize up instantly into unpleasant, gelatinous clumps that will not dissolve.
Frequently Asked Questions (FAQ)
Here are answers to some of the most common questions about making Chicken and Peppers in the Instant Pot.
1. Can I use frozen chicken thighs for this recipe?
Yes, you can! The Instant Pot is fantastic for cooking from frozen. You can skip the searing step. Place the frozen chicken pieces in the pot, add the other ingredients as directed, and increase the pressure cooking time to 12-15 minutes at High Pressure. The final texture won’t be quite as flavorful without the initial sear, but it’s a great option for a last-minute dinner.
2. Can I use chicken breasts instead of thighs?
You can, but you’ll need to make a small adjustment. Chicken breasts are much leaner and can dry out more easily. Cut them into larger 1.5-inch chunks and reduce the pressure-cooking time to 6 minutes, followed by a Quick Release. This will help keep them as juicy as possible.
3. I got the “Burn” notice on my Instant Pot. What did I do wrong?
This is a frustrating but common problem. The most likely cause is that you didn’t deglaze the pot thoroughly enough after searing the chicken and onions. Even a small amount of stuck-on food can prevent the pot from heating evenly and trigger the sensor. The second most likely cause is stirring the diced tomatoes into the bottom of the pot. Always layer them on top of the chicken and broth.
4. My sauce is too thin/watery. How can I fix it?
This is exactly what the cornstarch slurry is for! The pressure cooking process releases a lot of liquid from the chicken and vegetables. Using the Sauté function at the end to simmer the sauce while you stir in the cornstarch slurry is the perfect way to thicken it to your desired consistency. If you want it even thicker, you can make a little more slurry and add it in.
5. How should I store and reheat leftovers?
Leftovers are fantastic as the flavors continue to meld. Store them in an airtight container in the refrigerator for up to 4 days. You can reheat individual portions in the microwave until hot. For best results, reheat gently in a saucepan on the stove over medium-low heat, adding a splash of chicken broth if the sauce has become too thick.
Instant Pot Chicken and Peppers recipe
Ingredients
-
For the Chicken and Vegetables:
-
Boneless, Skinless Chicken Thighs (2 lbs / 900g, cut into 1-inch pieces): While you can use chicken breasts, thighs are the superior choice for pressure cooking. Their higher fat content ensures they remain incredibly tender, juicy, and flavorful, and they are virtually impossible to overcook under pressure. Cutting them into uniform 1-inch pieces ensures they cook quickly and evenly.
-
Olive Oil (2 tablespoons): Used for searing the chicken and sautéing the aromatics. This initial step builds the first and most important layer of flavor.
-
Bell Peppers (3 large, assorted colors): The co-star of the dish. Using a mix of colors—like red, yellow, and orange—not only makes the dish visually stunning but also adds a wonderful spectrum of sweetness. Red peppers are the sweetest, while yellow and orange are milder. Cut them into thicker strips (about 1-inch wide) so they hold their shape and don’t disintegrate during cooking.
-
Yellow Onion (1 large, sliced): Forms the aromatic foundation of the sauce, providing a deep, savory sweetness as it softens.
-
Garlic (5-6 cloves, minced): Essential for a robust, savory flavor. Freshly minced garlic provides a much better flavor than the pre-minced jarred variety.
-
-
For the Savory Sauce:
-
Low-Sodium Chicken Broth (1 cup): This is the primary liquid needed to bring the Instant Pot to pressure. It also infuses the entire dish with a rich, savory flavor. Using a low-sodium version is key to controlling the final saltiness of the sauce.
-
Diced Tomatoes (1 can, 14.5 oz / 411g, undrained): These add body, a gentle acidity, and necessary liquid to the sauce. Fire-roasted diced tomatoes are an excellent choice here as they contribute an extra layer of smoky depth.
-
Smoked Paprika (1 tablespoon): This is a critical ingredient for that signature smoky, slightly sweet flavor. It gives the dish a beautiful color and a complexity that regular paprika can’t match.
-
Dried Oregano (1 teaspoon): Adds a classic, herbaceous, and slightly peppery note that pairs perfectly with the chicken and peppers.
-
Ground Cumin (1 teaspoon): Provides a warm, earthy background note that complements the smokiness of the paprika.
-
Salt (1 teaspoon): For seasoning the chicken and the sauce. Adjust to your taste at the end.
-
Freshly Ground Black Pepper (1/2 teaspoon): Adds a touch of mild, pungent heat.
-
-
For Finishing the Dish:
-
Cornstarch (2 tablespoons): Used to create a slurry at the end to thicken the sauce into a luscious, velvety gravy that perfectly coats the chicken and peppers.
-
Cold Water (3 tablespoons): To be mixed with the cornstarch to create the slurry. Using cold water is essential to prevent the cornstarch from clumping.
-
Fresh Parsley (chopped, for garnish): A sprinkle of fresh parsley at the end adds a pop of vibrant color and a clean, fresh taste that brightens up the rich flavors of the dish.
-
Instructions
Stage 1: Building the Flavor Base (Sauté Mode)
-
Prepare the Chicken: Cut the chicken thighs into uniform 1-inch cubes. Pat them thoroughly dry with paper towels. Season generously with 1 teaspoon of salt and ½ teaspoon of black pepper.
-
Sear the Chicken: Set your Instant Pot to the Sauté function on the “More” or “High” setting. Add the 2 tablespoons of olive oil. Once the oil is hot and shimmering (the display should read “Hot”), carefully add half of the seasoned chicken to the pot in a single layer. Do not overcrowd the pot. Sear the chicken for 2-3 minutes per side, until it’s nicely browned. This browning process, known as the Maillard reaction, creates a massive amount of flavor. Remove the browned chicken to a clean plate and repeat with the remaining half.
-
Sauté the Aromatics: Add the sliced onion to the now-empty pot. Sauté for 3-4 minutes, stirring occasionally, until the onion has softened and started to become translucent. Add the minced garlic and sauté for another minute until fragrant, stirring constantly to prevent it from burning.
Stage 2: Deglazing and Pressure Cooking
-
Deglaze the Pot (The Most Important Step!): Press the Cancel button to turn off the Sauté function. Pour the 1 cup of chicken broth into the pot. Use a flat-edged wooden spoon or spatula to scrape up every single browned bit that is stuck to the bottom of the pot. This is called deglazing, and it is absolutely essential for two reasons: first, those browned bits are concentrated flavor, and second, failing to do this is the number one cause of the Instant Pot’s “Burn” error message.
-
Layer the Ingredients: Return the seared chicken (and any juices from the plate) to the pot. Add the smoked paprika, dried oregano, and ground cumin. Pour the can of undrained diced tomatoes over the chicken, but do not stir. This layering technique, with the tomatoes on top, also helps prevent the burn notice. Finally, place the sliced bell peppers on the very top of everything.
-
Pressure Cook: Secure the lid on the Instant Pot. Make sure the steam release valve is turned to the Sealing position. Select the Pressure Cook (or Manual) button and set the timer for 8 minutes at High Pressure.
-
Release the Pressure: Once the 8-minute cooking cycle is complete, the Instant Pot will beep. Let the pressure release naturally for 5 minutes (this helps keep the chicken tender). After 5 minutes, carefully perform a Quick Release by turning the steam release valve to the Venting position. Use a long-handled spoon to avoid the hot steam.
Stage 3: Finishing the Sauce
-
Prepare the Slurry: Once the pin has dropped and it’s safe to open the pot, carefully remove the lid. The sauce will appear thin at this point. In a small bowl, whisk together the 2 tablespoons of cornstarch and 3 tablespoons of cold water until a smooth, lump-free slurry is formed.
-
Thicken the Sauce: Press the Cancel button, then select the Sauté function again, this time on the “Less” or “Low” setting. Once the liquid in the pot begins to gently bubble, slowly pour in the cornstarch slurry while stirring constantly.
-
Simmer and Serve: Continue to stir the sauce as it simmers for 1-2 minutes. You will see it thicken into a beautiful, rich gravy. Press Cancel to turn off the heat. Taste the sauce and adjust with more salt and pepper if needed. Stir the chicken and peppers back into the thickened sauce.
-
Garnish: Garnish generously with fresh chopped parsley before serving hot.
Nutrition
- Serving Size: one normal portion
- Calories: 380-450


