
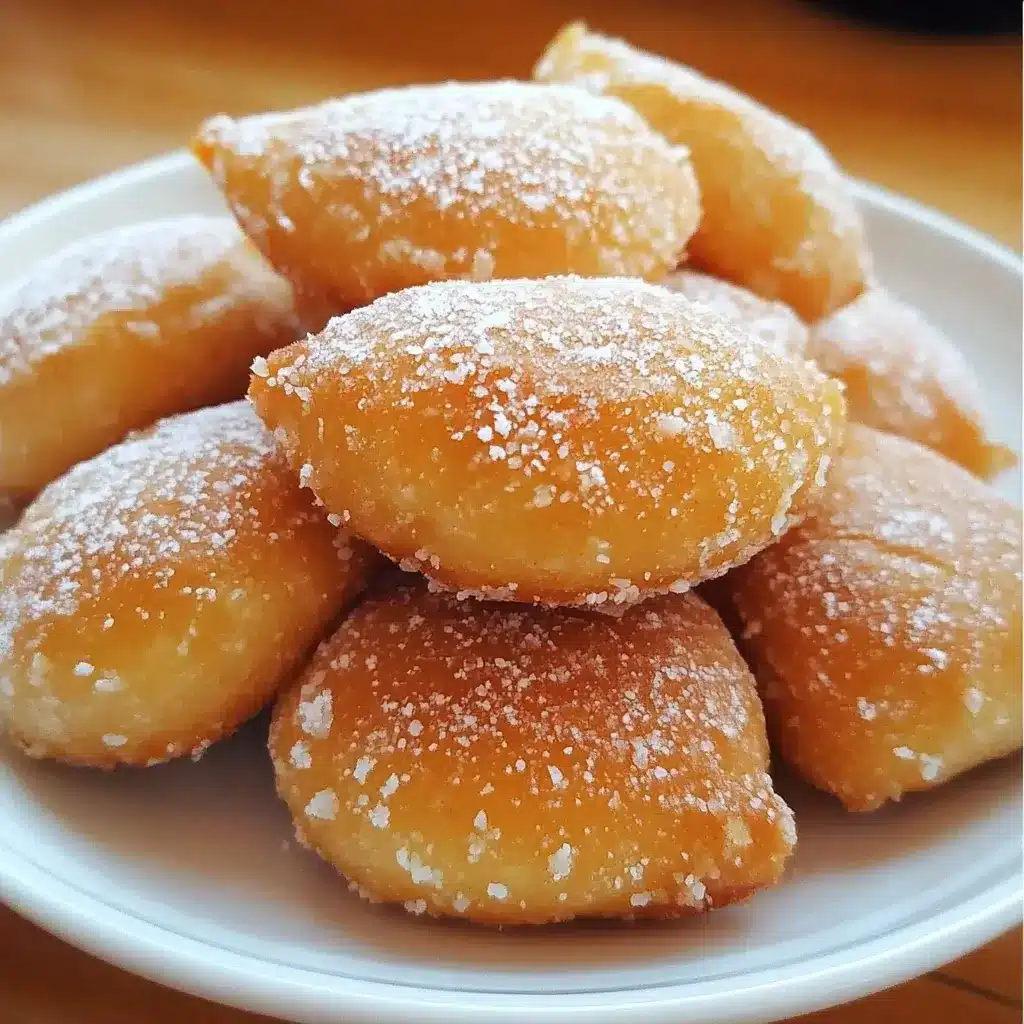

There’s a unique kind of magic associated with those golden, slightly irregular, sugar-dusted doughnuts often found glistening under the heat lamps at Chinese buffets or tucked into takeout bags. They’re not quite like Western doughnuts – often less intensely sweet, with a delightful chewiness beneath the crispy exterior. For years, they were a treat reserved for eating out. But discovering how simple and rewarding it is to make Homemade Chinese Doughnuts from scratch was a game-changer in my kitchen! The first time I fried up a batch, the aroma filled the house, instantly transporting us. My family gathered around, snatching them up almost faster than I could coat them in sugar. They were amazed that these familiar favourites could be recreated at home, tasting even fresher and more satisfying. This recipe captures that perfect balance – subtly sweet, wonderfully textured, and surprisingly easy to whip up for a weekend treat or special occasion.
Ingredients for Homemade Chinese Doughnuts
This recipe focuses on a simple yeast dough for that characteristic chewiness. Amounts can be adjusted slightly based on humidity and flour type.
- Flour: 3 ½ cups (approx. 420g) All-Purpose Flour, plus more for dusting. Bread flour can be substituted for an even chewier texture.
- Yeast: 2 ¼ teaspoons (7g) Instant Yeast or Active Dry Yeast (1 standard packet). If using Active Dry Yeast, you’ll need to proof it first (see instructions).
- Sugar: ¼ cup (50g) Granulated Sugar for the dough, plus about ½ cup (100g) for coating the finished doughnuts.
- Salt: ½ teaspoon Salt. Enhances flavour and controls yeast activity.
- Warm Water: 1 cup (240ml) Warm Water (about 105-115°F or 40-46°C). Use a thermometer if possible; too hot kills the yeast, too cold slows it down significantly. If using dairy, warm milk can be substituted for richer dough.
- Egg: 1 large Egg, lightly beaten (optional, adds richness and colour). For an egg-free version, you can omit it, potentially adding 1-2 extra tablespoons of water if the dough seems too dry.
- Fat (for dough): 2 tablespoons Vegetable Oil or melted unsalted Butter/Shortening (ensure dairy-free if needed). Adds tenderness.
- Oil for Frying: Approximately 4-6 cups (1-1.5 liters) Neutral Flavored Oil with a high smoke point, such as Canola, Vegetable, Peanut, or Corn Oil. The amount needed depends on the size and depth of your frying pot.
Step-by-Step Instructions
Follow these steps carefully for light, chewy, perfectly fried doughnuts:
- Prepare the Yeast (If using Active Dry Yeast): If using Active Dry Yeast, pour the warm water (105-115°F / 40-46°C) into a small bowl. Stir in 1 teaspoon of the sugar. Sprinkle the yeast over the top and let it sit undisturbed for 5-10 minutes until it becomes foamy and bubbly. If it doesn’t foam, the yeast may be inactive, and you’ll need fresh yeast. If using Instant Yeast, you can skip this step and add it directly to the dry ingredients.
- Combine Dry Ingredients: In a large bowl, or the bowl of a stand mixer fitted with the dough hook, whisk together the 3 ½ cups of all-purpose flour, the remaining ¼ cup of sugar (minus the 1 tsp used for proofing if applicable), and the ½ teaspoon of salt. If using Instant Yeast, whisk it in here too.
- Combine Wet Ingredients: In a separate medium bowl, whisk together the proofed yeast mixture (or the plain warm water if using instant yeast), the lightly beaten egg (if using), and the 2 tablespoons of vegetable oil (or melted butter/shortening).
- Mix the Dough: Pour the wet ingredients into the dry ingredients. Mix with a wooden spoon or the stand mixer on low speed until a shaggy dough begins to form.
- Knead the Dough:
- By Hand: Turn the dough out onto a lightly floured surface. Knead for 8-10 minutes, adding small amounts of flour only if necessary to prevent excessive sticking. The dough should become smooth, elastic, and pliable. It will still be slightly soft.
- By Stand Mixer: Knead with the dough hook on medium-low speed for 6-8 minutes, until the dough is smooth, elastic, and pulls away cleanly from the sides of the bowl. It should still be slightly tacky but manageable.
- First Rise (Bulk Fermentation): Lightly grease the mixing bowl (or a clean large bowl) with a little oil. Place the kneaded dough into the bowl, turning it once to coat the entire surface lightly with oil. Cover the bowl tightly with plastic wrap or a clean kitchen towel. Let the dough rise in a warm, draft-free place for about 1 to 1.5 hours, or until it has doubled in size. The exact time will depend on the ambient temperature.
- Shape the Doughnuts: Gently punch down the risen dough to release the trapped air. Turn it out onto a lightly floured surface. Roll the dough out with a rolling pin into a rectangle approximately ½ inch (about 1.25 cm) thick. Using a sharp knife or a pizza cutter, cut the dough into strips about 1 inch wide and 3-4 inches long. Alternatively, you can cut them into small squares or diamond shapes, or even use small biscuit cutters for rounds (though strips are more traditional for this style). You can gently twist the strips if desired.
- Second Rise (Proofing – Optional but Recommended): Place the shaped dough pieces onto a baking sheet lined with parchment paper, ensuring they aren’t touching. Cover them loosely with plastic wrap or a kitchen towel. Let them rest and puff up slightly for about 20-30 minutes. This step contributes to a lighter, airier texture, but can be skipped if you’re short on time (the doughnuts might be slightly denser).
- Heat the Frying Oil: While the doughnuts are proofing (or after shaping if skipping the second rise), pour the frying oil into a heavy-bottomed pot, Dutch oven, or deep skillet. You need at least 2-3 inches of oil depth. Heat the oil over medium heat until it reaches 350-360°F (175-180°C). Use a deep-fry or candy thermometer for accuracy. If you don’t have one, test by dropping a small scrap of dough into the oil; it should sizzle immediately and float to the surface, turning golden brown in about 60-90 seconds. Adjust the heat as needed to maintain this temperature range – oil that’s too cool results in greasy doughnuts, while oil that’s too hot burns the outside before the inside cooks.
- Fry the Doughnuts: Carefully place 3-5 dough pieces into the hot oil, being cautious not to overcrowd the pot (this lowers the oil temperature). Fry for about 1-2 minutes per side, or until they are puffed up and a beautiful golden brown. Use tongs, a slotted spoon, or a spider strainer to gently turn them over for even cooking.
- Drain the Doughnuts: Once golden brown on both sides, use the slotted spoon or spider strainer to remove the doughnuts from the hot oil, allowing excess oil to drip back into the pot for a moment. Transfer the cooked doughnuts to a wire rack set over paper towels or directly onto a plate lined with paper towels to drain further.
- Coat with Sugar: While the doughnuts are still warm (but not piping hot and dripping oil), place the remaining ½ cup of granulated sugar in a shallow dish or bowl. Roll each warm doughnut in the sugar, ensuring it’s evenly coated. The warmth helps the sugar adhere better.
- Serve: These Homemade Chinese Doughnuts are best enjoyed fresh and warm!
Nutrition Facts
- Servings: This recipe makes approximately 18-24 doughnuts, depending on the size and shape you cut them.
- Calories per Serving (Approximate): Around 150-250 calories per doughnut.
Disclaimer: Nutritional information is an estimate only. Actual values vary based on factors like the specific ingredients used (flour type, fat content), the exact size of the doughnuts, the amount of oil absorbed during frying (which depends heavily on oil temperature and frying time), and the amount of sugar coating applied. For precise data, use an online nutritional calculator with your specific inputs.
Preparation and Cooking Time
- Preparation Time: 25-35 minutes (includes mixing, kneading, and shaping).
- Rising Time: 1 hour 20 minutes to 2 hours (includes first rise and optional second rise).
- Cooking Time: 15-25 minutes (frying in batches).
- Total Time: Approximately 2 hours to 2 hours 45 minutes (largely dependent on rising times).
How to Serve Your Homemade Chinese Doughnuts
These doughnuts are delightful on their own, but here are ways to serve them:
- Classic Sugar Coating:
- Roll warm doughnuts in granulated sugar (most traditional).
- Dust cooled doughnuts with powdered sugar.
- Toss warm doughnuts in a mixture of granulated sugar and cinnamon.
- Delicious Dips & Drizzles:
- Serve with a small bowl of sweetened condensed milk for dipping (a popular pairing in some Asian contexts).
- Drizzle with honey or maple syrup.
- Offer chocolate sauce, caramel sauce, or fruit preserves (like strawberry or apricot jam) on the side.
- A simple glaze made from powdered sugar and a little milk or water can also be drizzled over cooled doughnuts.
- Beverage Pairings:
- Enjoy with a cup of hot tea, such as green tea, jasmine tea, or black tea.
- A glass of cold milk is a classic pairing for any doughnut.
- Serve alongside a cup of coffee.
- Serving Context:
- Perfect as a dessert after a homemade Chinese meal.
- A fun snack any time of day.
- A great addition to a brunch spread.
- While different from Youtiao (the unsweetened, savory fried dough sticks), some might enjoy these sweeter doughnuts alongside savory dishes like congee for a sweet and savory contrast, though less traditional.
Additional Tips for Perfect Doughnuts
- Maintain Consistent Oil Temperature: This is the single most crucial factor for successful deep frying. Use a thermometer! If the oil is too cool (below 350°F/175°C), the doughnuts will absorb too much oil and become greasy. If it’s too hot (above 375°F/190°C), the outside will burn before the inside cooks through. Adjust your stove’s heat frequently between batches to stay in the sweet spot (350-360°F / 175-180°C).
- Don’t Overcrowd the Pot: Frying too many doughnuts at once significantly lowers the oil temperature, leading to greasy results. Fry in small batches (3-5 pieces depending on pot size), allowing the oil temperature to recover slightly between batches if needed.
- Handle the Dough Gently After Rising: Once the dough has risen (especially after the second rise/proofing), handle the shaped pieces gently when transferring them to the hot oil. Deflating them too much will result in denser doughnuts.
- Coat While Warm, Not Wet: Roll the doughnuts in sugar when they are warm enough for the sugar to stick, but after they’ve drained for a moment on the wire rack or paper towels. If they are still dripping with oil, the sugar can become clumpy and greasy. If they cool completely, the sugar won’t adhere as well.
- Ensure Yeast is Active: If using Active Dry Yeast, always proof it first as described in Step 1. If it doesn’t get foamy, discard it and get fresh yeast. Even with Instant Yeast, check the expiration date. Using old or inactive yeast is a common reason for dough failing to rise, leading to heavy, dense doughnuts.
Frequently Asked Questions (FAQ)
Q1: What’s the difference between these Chinese Doughnuts and American doughnuts?
A: While both are fried dough, Homemade Chinese Doughnuts (like those from buffets) are typically less sweet in the dough itself, relying more on the sugar coating for sweetness. They often have a slightly chewier texture compared to the often very light, airy, or cakey texture of many Western doughnuts. Their shapes are also commonly simpler – strips, squares, or irregular puffs rather than rings or filled varieties.
Q2: Can I bake these doughnuts instead of frying them?
A: You can bake the shaped dough pieces (likely at around 375°F/190°C until golden), but the result will be very different. Baking produces a bread-like roll rather than a doughnut. You’ll miss the characteristic crispy exterior and tender, slightly moist interior achieved through deep frying. If you bake them, brushing with melted butter (or dairy-free alternative) before rolling in sugar can help mimic some richness.
Q3: How should I store leftover doughnuts, and can they be reheated?
A: These doughnuts are definitely best eaten fresh on the day they are made. However, if you have leftovers, store them in an airtight container at room temperature for up to 1-2 days. Do not refrigerate, as it can make them stale faster. To reheat, you can warm them briefly in a microwave (10-15 seconds) or, for better texture, in a toaster oven or conventional oven at around 300°F (150°C) for a few minutes until warmed through. The sugar coating might melt or change texture upon reheating.
Q4: My doughnuts came out heavy and dense. What went wrong?
A: Several factors can cause dense doughnuts:
* Inactive Yeast: Your yeast might have been old or killed by water that was too hot.
* Insufficient Rising: The dough may not have been allowed to rise long enough (either the first or second rise).
* Over-Kneading: While unlikely with typical home kneading times, extreme over-kneading can sometimes affect texture.
* Under-Proofing: Skipping or shortening the second rise can lead to denser results.
* Dough Too Dry: Not enough liquid can make the dough heavy.
* Oil Temperature Too Low: If fried at too low a temperature for too long, they might absorb oil and become heavy rather than puffing up quickly.
Q5: Can I make these doughnuts without yeast using baking powder instead?
A: Yes, you can make a “quick bread” version using baking powder (and possibly baking soda) as the leavening agent instead of yeast. This eliminates the rising times, making the process much faster. However, the texture and flavour will be different. Yeast doughnuts have a characteristic chewiness and slight “fermented” flavour complexity that baking powder doughnuts lack. Quick versions will be more cake-like or biscuit-like in texture. You would typically substitute about 1 tablespoon of baking powder for the yeast in a similar flour quantity, and skip the rising steps, proceeding directly to shaping and frying after mixing the dough.

Homemade Chinese Doughnuts recipe
Ingredients
- Flour: 3 ½ cups (approx. 420g) All-Purpose Flour, plus more for dusting. Bread flour can be substituted for an even chewier texture.
- Yeast: 2 ¼ teaspoons (7g) Instant Yeast or Active Dry Yeast (1 standard packet). If using Active Dry Yeast, you’ll need to proof it first (see instructions).
- Sugar: ¼ cup (50g) Granulated Sugar for the dough, plus about ½ cup (100g) for coating the finished doughnuts.
- Salt: ½ teaspoon Salt. Enhances flavour and controls yeast activity.
- Warm Water: 1 cup (240ml) Warm Water (about 105-115°F or 40-46°C). Use a thermometer if possible; too hot kills the yeast, too cold slows it down significantly. If using dairy, warm milk can be substituted for richer dough.
- Egg: 1 large Egg, lightly beaten (optional, adds richness and colour). For an egg-free version, you can omit it, potentially adding 1-2 extra tablespoons of water if the dough seems too dry.
- Fat (for dough): 2 tablespoons Vegetable Oil or melted unsalted Butter/Shortening (ensure dairy-free if needed). Adds tenderness.
- Oil for Frying: Approximately 4-6 cups (1-1.5 liters) Neutral Flavored Oil with a high smoke point, such as Canola, Vegetable, Peanut, or Corn Oil. The amount needed depends on the size and depth of your frying pot.
Instructions
- Prepare the Yeast (If using Active Dry Yeast): If using Active Dry Yeast, pour the warm water (105-115°F / 40-46°C) into a small bowl. Stir in 1 teaspoon of the sugar. Sprinkle the yeast over the top and let it sit undisturbed for 5-10 minutes until it becomes foamy and bubbly. If it doesn’t foam, the yeast may be inactive, and you’ll need fresh yeast. If using Instant Yeast, you can skip this step and add it directly to the dry ingredients.
- Combine Dry Ingredients: In a large bowl, or the bowl of a stand mixer fitted with the dough hook, whisk together the 3 ½ cups of all-purpose flour, the remaining ¼ cup of sugar (minus the 1 tsp used for proofing if applicable), and the ½ teaspoon of salt. If using Instant Yeast, whisk it in here too.
- Combine Wet Ingredients: In a separate medium bowl, whisk together the proofed yeast mixture (or the plain warm water if using instant yeast), the lightly beaten egg (if using), and the 2 tablespoons of vegetable oil (or melted butter/shortening).
- Mix the Dough: Pour the wet ingredients into the dry ingredients. Mix with a wooden spoon or the stand mixer on low speed until a shaggy dough begins to form.
- Knead the Dough:
- By Hand: Turn the dough out onto a lightly floured surface. Knead for 8-10 minutes, adding small amounts of flour only if necessary to prevent excessive sticking. The dough should become smooth, elastic, and pliable. It will still be slightly soft.
- By Stand Mixer: Knead with the dough hook on medium-low speed for 6-8 minutes, until the dough is smooth, elastic, and pulls away cleanly from the sides of the bowl. It should still be slightly tacky but manageable.
- First Rise (Bulk Fermentation): Lightly grease the mixing bowl (or a clean large bowl) with a little oil. Place the kneaded dough into the bowl, turning it once to coat the entire surface lightly with oil. Cover the bowl tightly with plastic wrap or a clean kitchen towel. Let the dough rise in a warm, draft-free place for about 1 to 1.5 hours, or until it has doubled in size. The exact time will depend on the ambient temperature.
- Shape the Doughnuts: Gently punch down the risen dough to release the trapped air. Turn it out onto a lightly floured surface. Roll the dough out with a rolling pin into a rectangle approximately ½ inch (about 1.25 cm) thick. Using a sharp knife or a pizza cutter, cut the dough into strips about 1 inch wide and 3-4 inches long. Alternatively, you can cut them into small squares or diamond shapes, or even use small biscuit cutters for rounds (though strips are more traditional for this style). You can gently twist the strips if desired.
- Second Rise (Proofing – Optional but Recommended): Place the shaped dough pieces onto a baking sheet lined with parchment paper, ensuring they aren’t touching. Cover them loosely with plastic wrap or a kitchen towel. Let them rest and puff up slightly for about 20-30 minutes. This step contributes to a lighter, airier texture, but can be skipped if you’re short on time (the doughnuts might be slightly denser).
- Heat the Frying Oil: While the doughnuts are proofing (or after shaping if skipping the second rise), pour the frying oil into a heavy-bottomed pot, Dutch oven, or deep skillet. You need at least 2-3 inches of oil depth. Heat the oil over medium heat until it reaches 350-360°F (175-180°C). Use a deep-fry or candy thermometer for accuracy. If you don’t have one, test by dropping a small scrap of dough into the oil; it should sizzle immediately and float to the surface, turning golden brown in about 60-90 seconds. Adjust the heat as needed to maintain this temperature range – oil that’s too cool results in greasy doughnuts, while oil that’s too hot burns the outside before the inside cooks.
- Fry the Doughnuts: Carefully place 3-5 dough pieces into the hot oil, being cautious not to overcrowd the pot (this lowers the oil temperature). Fry for about 1-2 minutes per side, or until they are puffed up and a beautiful golden brown. Use tongs, a slotted spoon, or a spider strainer to gently turn them over for even cooking.
- Drain the Doughnuts: Once golden brown on both sides, use the slotted spoon or spider strainer to remove the doughnuts from the hot oil, allowing excess oil to drip back into the pot for a moment. Transfer the cooked doughnuts to a wire rack set over paper towels or directly onto a plate lined with paper towels to drain further.
- Coat with Sugar: While the doughnuts are still warm (but not piping hot and dripping oil), place the remaining ½ cup of granulated sugar in a shallow dish or bowl. Roll each warm doughnut in the sugar, ensuring it’s evenly coated. The warmth helps the sugar adhere better.
- Serve: These Homemade Chinese Doughnuts are best enjoyed fresh and warm!
Nutrition
- Serving Size: one normal portion
- Calories: 150-250


