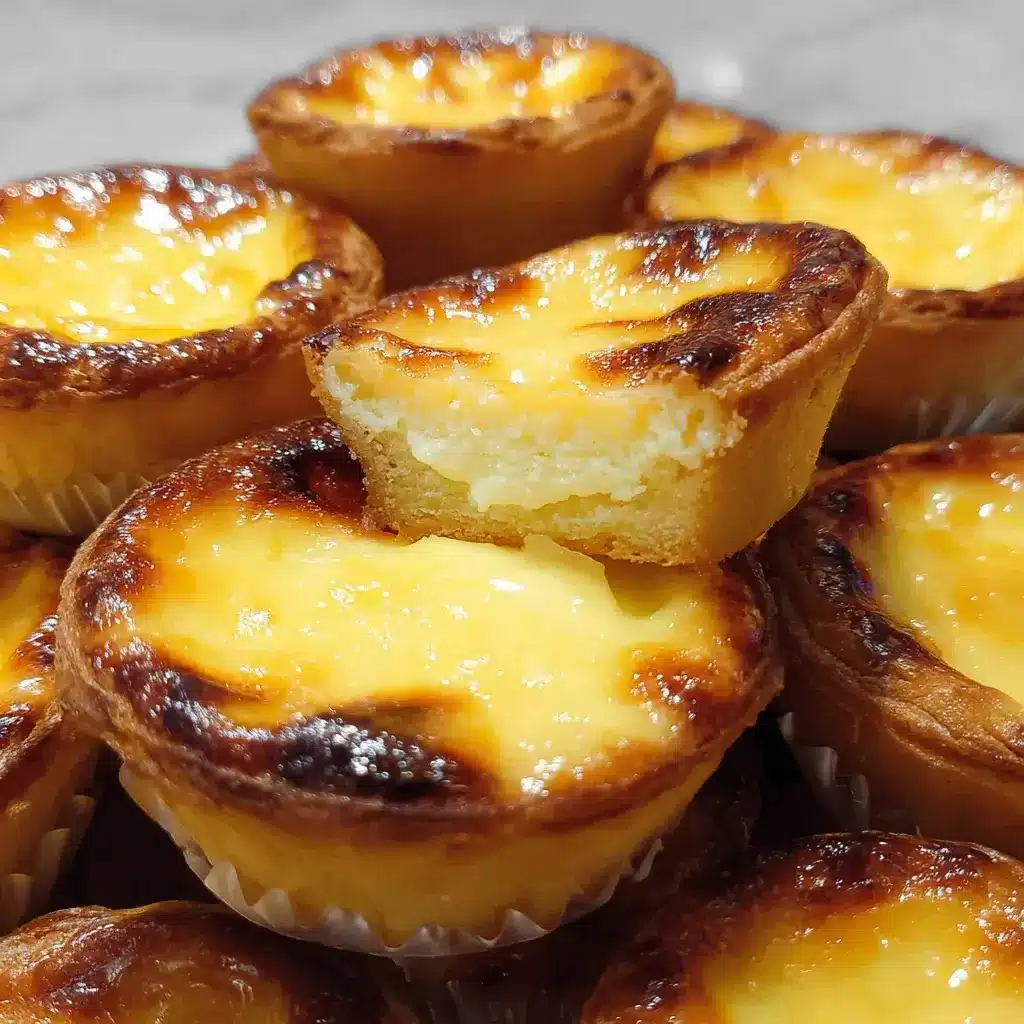

The first time I saw a Hokkaido Baked Cheese Tart, I was standing in a bustling mall in Asia, drawn in by a magnetic force field made of the most incredible buttery, cheesy aroma. The line was impossibly long, a testament to the treasure that awaited at the end of it. When I finally got my hands on one, it was still warm. The crust, a perfect golden cup, was crisp and crumbly. I took a bite, and the world seemed to slow down. A river of molten, creamy cheese filling—impossibly light yet unbelievably rich, tangy yet sweet—flowed out. It was a moment of pure, unadulterated dessert euphoria. Recreating that exact experience at home became an obsession. My kitchen saw countless attempts: crusts that were too soft, fillings that were too dense or too runny. But through trial, error, and a whole lot of cheese, I finally cracked the code. This recipe is the result of that quest. It delivers that signature crispy, twice-baked shell and the gloriously rich, multi-layered cheese filling that can be enjoyed molten from the oven, creamy at room temperature, or even frozen like a cheesecake ice cream bar. It’s a recipe that has made my home smell like that magical bakery, and it never fails to elicit gasps of delight from anyone lucky enough to try one.
The Essential Ingredients for Authentic Hokkaido Baked Cheese Tarts
Crafting these tarts is a tale of two components: the crisp, buttery shell and the complex, creamy filling. Using high-quality ingredients and precise measurements (a kitchen scale is highly recommended!) is the key to replicating that iconic bakery taste and texture.
For the Crispy, Buttery Tart Crust (Pâte Sablée)
This French-style shortcrust pastry is sturdy enough to hold the filling yet crumbles beautifully with each bite.
- Unsalted Butter: 120g (1/2 cup + 1 tbsp), cold and cubed – Cold butter is crucial for creating a flaky, tender crust.
- Powdered Sugar (Icing Sugar): 60g (1/2 cup), sifted – Powdered sugar contains cornstarch, which helps create a more tender, melt-in-your-mouth texture than granulated sugar.
- Large Egg: 1, beaten lightly – Acts as the binder for the dough.
- Cake Flour: 200g (1 2/3 cups) – Cake flour has a lower protein content, resulting in a finer, less tough crumb. If unavailable, you can substitute with all-purpose flour, but the texture will be slightly less delicate.
- Salt: 1/4 teaspoon – Balances the sweetness and enhances the buttery flavor.
For the Rich and Creamy Three-Cheese Filling
The magic of the filling lies in the blend of three different cheeses, each bringing a unique quality to the final product.
- Full-Fat Cream Cheese: 200g (about 7 oz), at room temperature – This provides the primary tangy, creamy base. Use block-style, not whipped.
- Mascarpone Cheese: 150g (about 5.3 oz), at room temperature – Adds a luxurious, milky sweetness and an incredibly smooth, rich texture.
- Parmesan Cheese: 30g (about 1/3 cup), finely grated – This is the secret weapon! It adds a salty, savory, umami depth that cuts through the richness and makes the flavor incredibly complex and addictive. Use a good quality block and grate it yourself.
- Granulated Sugar: 80g (a generous 1/3 cup) – Provides the necessary sweetness to balance the tang and saltiness.
- Large Egg Yolks: 2 – For richness, color, and a custardy texture.
- Whole Milk: 60ml (1/4 cup) – Thins the filling to the perfect consistency.
- Cornstarch: 1 tablespoon – A thickener that helps the filling set properly without being gummy.
- Lemon Juice: 1 teaspoon, fresh – Brightens up all the flavors and adds a subtle, fresh tang.
- Vanilla Extract: 1/2 teaspoon – Enhances the creamy, sweet notes.
For the Signature Golden-Brown Top
- Large Egg Yolk: 1, beaten with 1 teaspoon of water – This egg wash is essential for creating that beautiful, glossy, blistered, and golden-brown finish during the second bake.
Step-by-Step Instructions to Bakery-Perfect Cheese Tarts
This is a multi-step process involving a “double bake.” Be patient and follow the steps carefully for the best results.
Part 1: Making and Blind-Baking the Sweet Tart Crust
- Cream Butter and Sugar: In the bowl of a stand mixer fitted with the paddle attachment, or in a large bowl with an electric hand mixer, beat the cold, cubed butter and the sifted powdered sugar on medium speed until the mixture is pale, creamy, and fluffy.
- Add the Egg: Add the beaten egg in two additions, mixing well after each one until fully incorporated. Scrape down the sides of the bowl.
- Combine Dry Ingredients: Sift the cake flour and salt directly into the bowl. Mix on low speed until the dough just starts to come together into large crumbs. Do not overmix.
- Form and Chill: Turn the dough out onto a lightly floured surface and gently bring it together with your hands into a flat disc. Wrap it tightly in plastic wrap and chill in the refrigerator for at least 1 hour (or up to 2 days). Chilling is crucial for resting the gluten and making the dough easy to handle.
- Press into Molds: You will need 12 standard-sized (approx. 2.75-inch / 7cm diameter) metal tartlet molds. Lightly grease them. Divide the chilled dough into 12 equal portions. Working with one portion at a time, press the dough evenly into the bottom and up the sides of each mold. Use your thumb to create a neat, even edge that is flush with the top of the mold.
- Dock and Freeze: Use a fork to prick the bottom of each tart shell a few times. This prevents the crust from puffing up during baking. Place the tart molds on a baking sheet and transfer to the freezer for at least 30 minutes. Freezing the shells helps prevent them from shrinking during the bake.
- Blind Bake the Shells: Preheat your oven to 350°F (175°C). Place the frozen tart shells (still in their molds) on a baking sheet and bake for 15-20 minutes, or until the edges are lightly golden and the bottom looks dry and set. This is the first bake, known as “blind baking,” and it’s the secret to a crispy crust.
- Cool Completely: Remove the shells from the oven and let them cool completely in their molds on a wire rack.
Part 2: Creating the Luscious Three-Cheese Filling
- Beat the Cheeses: In a large bowl, using an electric mixer, beat the room-temperature cream cheese, mascarpone cheese, and finely grated Parmesan cheese on medium speed until completely smooth and free of lumps. This may take a couple of minutes. Scrape down the bowl frequently.
- Add Sugar: Add the granulated sugar and beat until it’s fully incorporated and the mixture is smooth and creamy.
- Incorporate Wet Ingredients: Add the 2 egg yolks, whole milk, fresh lemon juice, and vanilla extract. Mix on low speed until everything is just combined. Be careful not to overmix at this stage, as you don’t want to incorporate too much air.
- Add Cornstarch: Sift the cornstarch over the mixture and fold it in gently with a spatula until no dry spots remain. The final filling should be smooth, thick, and pourable, similar to a thick pancake batter.
Part 3: The Assembly and Signature Double-Bake
- Prepare for the Second Bake: Increase your oven temperature to 425°F (220°C) and position a rack in the upper third of the oven. A higher rack position helps the tops brown beautifully.
- Fill the Shells: Transfer the cheese filling to a piping bag (or use a small spoon). Fill each of the completely cooled, pre-baked tart shells to the brim. The filling will puff up slightly and then settle, so you can even mound it a tiny bit above the rim.
- Brush with Egg Wash: Prepare the egg wash by beating one egg yolk with one teaspoon of water. Using a pastry brush, gently and lightly brush the top of the cheese filling in each tart. This is the non-negotiable step for achieving that iconic, glossy, golden-brown top.
- The Second Bake: Place the filled tarts on a baking sheet and bake in the hot 425°F (220°C) oven for 8-12 minutes. Keep a close eye on them. They are done when the filling has puffed up and the tops are beautifully golden brown, with some darker blistered spots.
- Cool and Enjoy: Remove the tarts from the oven. Let them cool in their molds for about 10-15 minutes before very carefully removing them and placing them on a wire rack. They are extremely delicate when hot.
Nutrition Facts
- Servings: 12 individual tarts
- Calories Per Serving: Approximately 350-400 kcal
(Disclaimer: This is an estimate and will vary based on the specific brands of cheese, butter, and other ingredients used.)
Preparation Time
- Active Preparation Time: 45 minutes
- Dough Chilling & Freezing Time: 1 hour 30 minutes
- Baking Time: 25-30 minutes (total for both bakes)
- Cooling Time: 30 minutes
- Total Time: Approximately 3 hours 15 minutes
How to Serve Your Hokkaido Baked Cheese Tarts
One of the most magical things about these tarts is how their texture transforms based on temperature. Serve them one of these four ways for a completely different experience each time!
- Warm and Molten: This is the classic, fresh-from-the-bakery experience. Enjoy a tart about 15-20 minutes after it comes out of the oven. The crust will be at its crispiest, and the filling will be a luscious, molten river of cheese.
- Room Temperature and Creamy: After cooling for an hour or so, the filling sets into a texture that is incredibly soft, smooth, and mousse-like. The cheese flavors are more pronounced at this temperature.
- Chilled and Rich: Refrigerate the tarts for at least 2 hours. The filling will become firm, dense, and rich, very similar to a high-quality cheesecake. This is a wonderfully refreshing way to enjoy them on a warm day.
- Frozen and Unique: For a totally different treat, place the tarts in an airtight container in the freezer for a few hours. They become like a cheesecake ice cream bar—a surprisingly delicious and long-lasting dessert.
5 Essential Tips for Hokkaido Tart Success
- Respect the Dough Chilling Process: Do not rush or skip the chilling and freezing times for the tart dough. Chilling the disc of dough makes it manageable and prevents you from overworking it. Freezing the pressed shells before baking is the secret to preventing the buttery crust from slumping down the sides of the molds.
- The Double-Bake is Non-Negotiable: The only way to get a truly crisp, sturdy crust that stands up to the wet filling is to blind bake it first. This creates a moisture barrier and ensures you don’t end up with a dreaded “soggy bottom.”
- Room Temperature is Key for the Filling: Ensure your cream cheese and mascarpone are fully at room temperature. Cold cheese will result in a lumpy filling that is impossible to smooth out. Lumps in the filling will affect the final texture.
- Embrace the Egg Wash: The simple step of brushing the filling with an egg yolk wash is what transforms the tarts from pale and homemade-looking to glossy, golden-brown, professional masterpieces. Don’t skip it!
- Use High-Quality Cheeses: The flavor of these tarts comes directly from the cheese. Use a good quality, full-fat block cream cheese, real mascarpone, and a block of Parmesan that you grate yourself. The pre-shredded kind often contains anti-caking agents that can affect how it melts into the filling.
Your Hokkaido Baked Cheese Tart Questions, Answered!
1. Why was my tart filling runny, even after cooling?
This can happen for a few reasons. The most likely culprit is that they were underbaked. They need that hot, second bake to properly set the eggs and cornstarch. Another possibility is that the ingredient ratios were off—too much milk or not enough cornstarch can lead to a soupy filling. Always measure carefully.
2. Can I make these without individual tartlet molds?
While the individual molds provide the classic shape and perfect crust-to-filling ratio, you can adapt the recipe. You could make them in a standard muffin tin (the crust will be thicker) or as one large 9-inch tart. If making one large tart, you will need to extend both baking times significantly. The filling will also be more set and less molten in a large format.
3. My tart crusts shrunk during the blind bake. What did I do wrong?
Shrinkage is almost always caused by one of three things: the dough was over-worked (developing too much gluten), it wasn’t chilled for long enough, or you skipped the crucial step of freezing the shells right before they go into the oven. The colder the dough is when it hits the hot oven, the better it will hold its shape.
4. Can I prepare the components in advance?
Absolutely! This is a great recipe to break up over two days. You can make the tart dough and keep it well-wrapped in the fridge for up to 2 days. You can also press the dough into the molds, freeze them, and then store them in a freezer bag for up to a month. The cheese filling can be made up to 24 hours in advance and kept in an airtight container in the refrigerator.
5. How should I store leftover tarts?
Store any leftovers in an airtight container in the refrigerator. They will keep well for up to 4 days. The crust will soften slightly over time but will still be delicious. You can eat them cold from the fridge or refresh them in a 350°F (175°C) oven or an air fryer for 3-5 minutes to warm the filling and re-crisp the crust.

Hokkaido Baked Cheese Tarts recipe
Ingredients
For the Crispy, Buttery Tart Crust (Pâte Sablée)
This French-style shortcrust pastry is sturdy enough to hold the filling yet crumbles beautifully with each bite.
-
Unsalted Butter: 120g (1/2 cup + 1 tbsp), cold and cubed – Cold butter is crucial for creating a flaky, tender crust.
-
Powdered Sugar (Icing Sugar): 60g (1/2 cup), sifted – Powdered sugar contains cornstarch, which helps create a more tender, melt-in-your-mouth texture than granulated sugar.
-
Large Egg: 1, beaten lightly – Acts as the binder for the dough.
-
Cake Flour: 200g (1 2/3 cups) – Cake flour has a lower protein content, resulting in a finer, less tough crumb. If unavailable, you can substitute with all-purpose flour, but the texture will be slightly less delicate.
-
Salt: 1/4 teaspoon – Balances the sweetness and enhances the buttery flavor.
For the Rich and Creamy Three-Cheese Filling
The magic of the filling lies in the blend of three different cheeses, each bringing a unique quality to the final product.
-
Full-Fat Cream Cheese: 200g (about 7 oz), at room temperature – This provides the primary tangy, creamy base. Use block-style, not whipped.
-
Mascarpone Cheese: 150g (about 5.3 oz), at room temperature – Adds a luxurious, milky sweetness and an incredibly smooth, rich texture.
-
Parmesan Cheese: 30g (about 1/3 cup), finely grated – This is the secret weapon! It adds a salty, savory, umami depth that cuts through the richness and makes the flavor incredibly complex and addictive. Use a good quality block and grate it yourself.
-
Granulated Sugar: 80g (a generous 1/3 cup) – Provides the necessary sweetness to balance the tang and saltiness.
-
Large Egg Yolks: 2 – For richness, color, and a custardy texture.
-
Whole Milk: 60ml (1/4 cup) – Thins the filling to the perfect consistency.
-
Cornstarch: 1 tablespoon – A thickener that helps the filling set properly without being gummy.
-
Lemon Juice: 1 teaspoon, fresh – Brightens up all the flavors and adds a subtle, fresh tang.
-
Vanilla Extract: 1/2 teaspoon – Enhances the creamy, sweet notes.
For the Signature Golden-Brown Top
-
Large Egg Yolk: 1, beaten with 1 teaspoon of water – This egg wash is essential for creating that beautiful, glossy, blistered, and golden-brown finish during the second bake.
Instructions
Part 1: Making and Blind-Baking the Sweet Tart Crust
-
Cream Butter and Sugar: In the bowl of a stand mixer fitted with the paddle attachment, or in a large bowl with an electric hand mixer, beat the cold, cubed butter and the sifted powdered sugar on medium speed until the mixture is pale, creamy, and fluffy.
-
Add the Egg: Add the beaten egg in two additions, mixing well after each one until fully incorporated. Scrape down the sides of the bowl.
-
Combine Dry Ingredients: Sift the cake flour and salt directly into the bowl. Mix on low speed until the dough just starts to come together into large crumbs. Do not overmix.
-
Form and Chill: Turn the dough out onto a lightly floured surface and gently bring it together with your hands into a flat disc. Wrap it tightly in plastic wrap and chill in the refrigerator for at least 1 hour (or up to 2 days). Chilling is crucial for resting the gluten and making the dough easy to handle.
-
Press into Molds: You will need 12 standard-sized (approx. 2.75-inch / 7cm diameter) metal tartlet molds. Lightly grease them. Divide the chilled dough into 12 equal portions. Working with one portion at a time, press the dough evenly into the bottom and up the sides of each mold. Use your thumb to create a neat, even edge that is flush with the top of the mold.
-
Dock and Freeze: Use a fork to prick the bottom of each tart shell a few times. This prevents the crust from puffing up during baking. Place the tart molds on a baking sheet and transfer to the freezer for at least 30 minutes. Freezing the shells helps prevent them from shrinking during the bake.
-
Blind Bake the Shells: Preheat your oven to 350°F (175°C). Place the frozen tart shells (still in their molds) on a baking sheet and bake for 15-20 minutes, or until the edges are lightly golden and the bottom looks dry and set. This is the first bake, known as “blind baking,” and it’s the secret to a crispy crust.
-
Cool Completely: Remove the shells from the oven and let them cool completely in their molds on a wire rack.
Part 2: Creating the Luscious Three-Cheese Filling
-
Beat the Cheeses: In a large bowl, using an electric mixer, beat the room-temperature cream cheese, mascarpone cheese, and finely grated Parmesan cheese on medium speed until completely smooth and free of lumps. This may take a couple of minutes. Scrape down the bowl frequently.
-
Add Sugar: Add the granulated sugar and beat until it’s fully incorporated and the mixture is smooth and creamy.
-
Incorporate Wet Ingredients: Add the 2 egg yolks, whole milk, fresh lemon juice, and vanilla extract. Mix on low speed until everything is just combined. Be careful not to overmix at this stage, as you don’t want to incorporate too much air.
-
Add Cornstarch: Sift the cornstarch over the mixture and fold it in gently with a spatula until no dry spots remain. The final filling should be smooth, thick, and pourable, similar to a thick pancake batter.
Part 3: The Assembly and Signature Double-Bake
-
Prepare for the Second Bake: Increase your oven temperature to 425°F (220°C) and position a rack in the upper third of the oven. A higher rack position helps the tops brown beautifully.
-
Fill the Shells: Transfer the cheese filling to a piping bag (or use a small spoon). Fill each of the completely cooled, pre-baked tart shells to the brim. The filling will puff up slightly and then settle, so you can even mound it a tiny bit above the rim.
-
Brush with Egg Wash: Prepare the egg wash by beating one egg yolk with one teaspoon of water. Using a pastry brush, gently and lightly brush the top of the cheese filling in each tart. This is the non-negotiable step for achieving that iconic, glossy, golden-brown top.
-
The Second Bake: Place the filled tarts on a baking sheet and bake in the hot 425°F (220°C) oven for 8-12 minutes. Keep a close eye on them. They are done when the filling has puffed up and the tops are beautifully golden brown, with some darker blistered spots.
-
Cool and Enjoy: Remove the tarts from the oven. Let them cool in their molds for about 10-15 minutes before very carefully removing them and placing them on a wire rack. They are extremely delicate when hot
Nutrition
- Serving Size: one normal portion
- Calories: 350-400 kcal