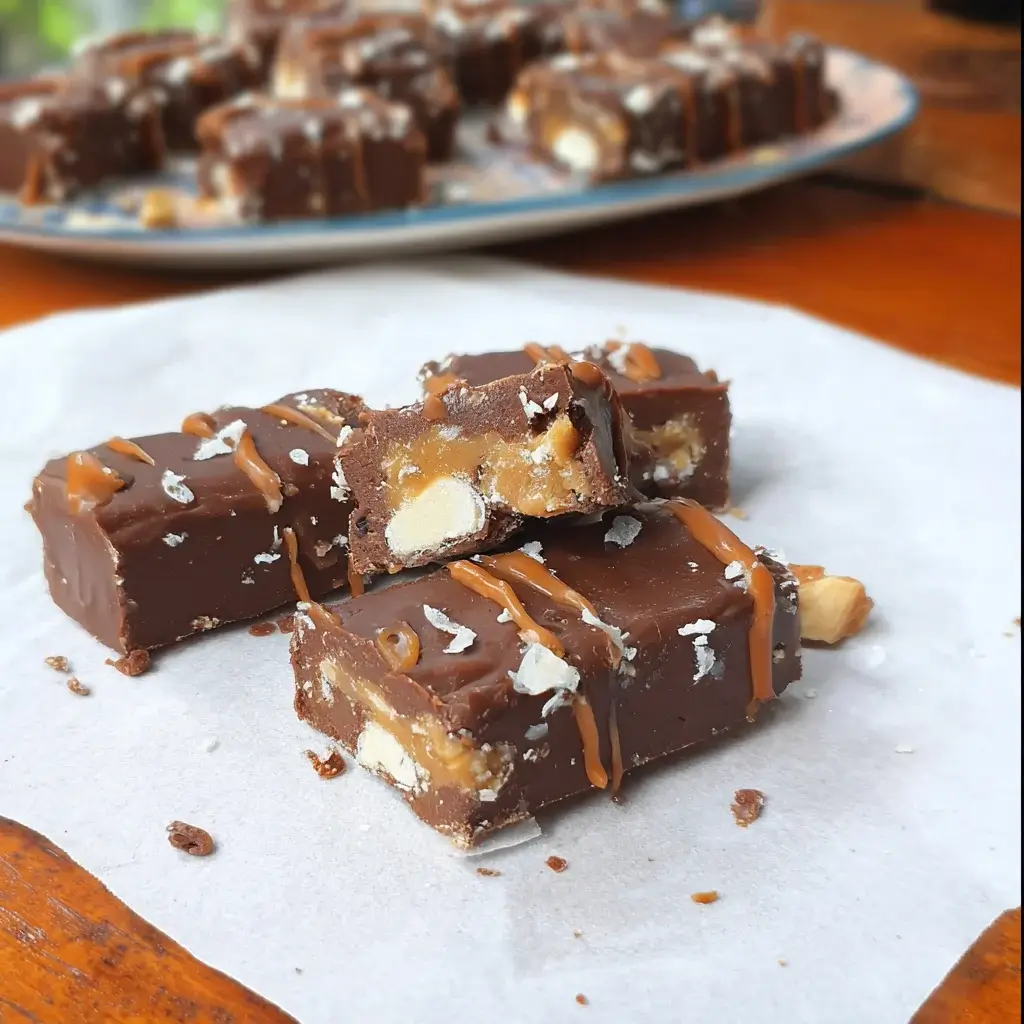

The Ultimate Healthy Homemade Snickers Bars (Vegan, Gluten-Free)
Prepare to have your mind blown by a dessert that redefines “healthy indulgence.” These homemade Snickers bars capture the iconic layers of the classic candy bar—a chewy nougat base, a rich and gooey caramel-peanut layer, and a crisp dark chocolate coating—using only whole, nutrient-dense ingredients. This no-bake recipe is naturally vegan, gluten-free, dairy-free, and refined sugar-free, making it the perfect treat for anyone looking to satisfy a sweet tooth without the subsequent sugar crash. It’s a game-changer for healthy snacking and dessert.
Why You Will Fall in Love with This Recipe
Before we dive into the layers, let’s talk about why this recipe will become a staple in your freezer.
- Incredibly Delicious: It genuinely tastes like an indulgent candy bar. The combination of textures and the sweet-salty flavor profile is deeply satisfying.
- No-Bake & Easy: While there are a few steps involving freezing, there is no oven required. The process is straightforward and perfect for any skill level.
- Made with Whole Foods: You can pronounce every single ingredient. We use dates for sweetness, nuts for creaminess, and dark chocolate for that rich finish.
- Completely Customizable: You can easily swap peanut butter for almond butter, use different nuts, or adjust the sweetness to your liking.
- Satisfies Cravings, the Healthy Way: This bar is packed with healthy fats, fiber, and protein, which helps keep you full and satisfied, unlike empty-calorie candy.
Deconstructing the Healthy Snickers: The Three Magic Layers
The secret to this recipe’s success lies in recreating the three distinct layers of a Snickers bar using clever, healthy swaps.
- The Chewy Nougat Base: Traditional nougat is made from whipped egg whites, sugar, and corn syrup. Our version creates a dense, chewy, and creamy base using soaked raw cashews, a touch of maple syrup for sweetness, and coconut flour to achieve that perfect firm-yet-chewy texture.
- The Gooey Peanut Caramel Layer: This is where the real magic happens. Instead of a caramel made from boiling sugar and cream, we create a luscious, gooey “date caramel.” Medjool dates, when blended, take on a remarkably caramel-like flavor and texture. We mix this with creamy peanut butter and whole peanuts for that classic salty, nutty crunch.
- The Crisp Chocolate Shell: We skip the waxy, overly sweet milk chocolate and opt for a high-quality dark chocolate (70% cacao or higher). We melt it with a little coconut oil, which helps the chocolate harden into a perfect, crisp shell that cracks beautifully when you take a bite.
Ingredients for Your Healthy Snickers Bars
Quality ingredients are key to the best flavor and texture. Here’s exactly what you’ll need, broken down by layer.
For the Chewy Nougat Layer:
- Raw Cashews: 1 ½ cups (225g). You must use raw, unsalted cashews, as roasted ones will not blend into a creamy base.
- Pure Maple Syrup: 3 tablespoons. Provides a clean, unrefined sweetness. You can also use agave nectar.
- Coconut Flour: 2 tablespoons. This is a crucial ingredient. It absorbs moisture and helps firm up the nougat layer to the perfect chewy consistency. Do not substitute with other flours.
- Full-Fat Coconut Milk (from a can): 2 tablespoons of the solid cream part. This adds richness and creaminess.
- Pure Vanilla Extract: 1 teaspoon. Enhances all the flavors.
- Pinch of Sea Salt: Balances the sweetness.
For the Peanut Date Caramel Layer:
- Medjool Dates: 1 ½ cups (about 12-15 large dates), pitted. Medjool dates are essential as they are large, soft, and have a rich caramel flavor. If your dates are dry, soak them in hot water for 10 minutes, then drain well.
- Natural Creamy Peanut Butter: ¼ cup (64g). Use a good quality natural peanut butter where the only ingredients are peanuts and salt.
- Coconut Oil: 1 tablespoon, melted. Helps the caramel firm up when chilled.
- Water: 1-2 tablespoons, as needed to help blend.
- Roasted Salted Peanuts: ½ cup (75g), for mixing into the caramel.
For the Dark Chocolate Coating:
- High-Quality Dark Chocolate: 9 ounces (255g), chips or a chopped bar. For the best flavor and health benefits, use a chocolate that is 70% cacao or higher.
- Coconut Oil: 1 tablespoon. This is the secret to a smooth, shiny, and perfectly snappy chocolate shell. It helps thin the chocolate for easy coating.
Step-by-Step Instructions to Candy Bar Perfection
Follow these steps carefully, paying close attention to the freezing times, which are essential for creating clean, distinct layers.
Part 1: Prepare the Equipment and Cashews
- Soak the Cashews: Place the 1 ½ cups of raw cashews in a bowl and cover them with boiling water. Let them soak for at least 1 hour (or in cold water for 4-6 hours). This step is non-negotiable; it softens the cashews so they can blend into a completely smooth and creamy nougat.
- Prepare the Pan: Line an 8×8 inch (20×20 cm) baking pan with parchment paper, leaving some overhang on the sides. This will act as a “sling,” allowing you to easily lift the entire bar out of the pan later.
Part 2: Create the Chewy Nougat Layer
- Drain the Cashews: Once soaked, drain the cashews thoroughly and discard the soaking water.
- Blend the Nougat: Place the drained cashews, maple syrup, coconut flour, solid coconut cream, vanilla extract, and a pinch of salt into a high-speed blender or a food processor.
- Process Until Smooth: Blend on high speed until the mixture is completely smooth and creamy. You may need to stop and scrape down the sides a few times to ensure there are no lumps. The final texture should be like a very thick, smooth paste.
- Press into Pan: Transfer the nougat mixture to your prepared pan. Use a spatula or your hands (lightly wet them to prevent sticking) to press the nougat into an even, flat layer across the bottom of the pan.
- First Freeze: Place the pan in the freezer for at least 30-45 minutes while you prepare the caramel layer. The nougat should be firm to the touch.
Part 3: Create the Gooey Peanut Date Caramel
- Blend the Caramel: Make sure your blender or food processor is clean. Add the pitted Medjool dates, peanut butter, and melted coconut oil.
- Process Until a Paste Forms: Blend on high until the dates break down and form a thick, sticky paste. It will likely form a ball in your processor; this is normal.
- Add Water to Smooth: With the processor running, add 1 tablespoon of water. Continue blending until the mixture becomes smooth and spreadable, like a very thick caramel. Add another tablespoon of water only if necessary to get it moving, but be careful not to add too much, or the caramel won’t set properly.
- Stir in Peanuts: Transfer the date caramel to a bowl. Add the ½ cup of roasted salted peanuts and stir with a spatula until they are evenly distributed throughout the caramel.
- Assemble the Second Layer: Remove the pan with the nougat layer from the freezer. Spoon the peanut caramel mixture over the top. Gently spread it into an even layer all the way to the edges.
- Second Freeze: Return the pan to the freezer for at least 1-2 hours, or until the caramel layer is very firm. This is crucial for clean cutting.
Part 4: Cut and Coat in Chocolate
- Cut the Bars: Once the caramel is firm, remove the pan from the freezer. Use the parchment paper overhangs to lift the entire block out onto a cutting board. Use a large, sharp knife to cut it into 12-16 rectangular bars. For the cleanest cuts, you can run the knife under hot water and wipe it dry between each cut.
- Final Freeze: Place the individual bars back on the parchment-lined tray (or a plate) and return them to the freezer for another 30 minutes. The bars must be frozen solid before dipping in chocolate to prevent them from falling apart.
- Melt the Chocolate: While the bars are in their final freeze, prepare the chocolate coating. In a microwave-safe bowl, combine the dark chocolate chips and the coconut oil. Microwave in 30-second intervals, stirring well between each, until the chocolate is fully melted and smooth. Alternatively, use a double boiler. Let the chocolate cool for a few minutes; if it’s too hot, it will melt the bars instantly.
- Dip the Bars: Working one at a time, take a frozen bar and dip it into the melted chocolate. The best method is to use two forks. Drop the bar in, use one fork to flip it over to coat completely, then use both forks to lift it out.
- Let Excess Drip Off: Hold the bar over the bowl and gently tap the fork on the edge to allow any excess chocolate to drip off. This creates a thin, even coating.
- Set the Chocolate: Place the chocolate-coated bar back onto the parchment-lined tray. The cold temperature of the bar will cause the chocolate shell to set very quickly. Repeat with all the remaining bars. You can drizzle any leftover chocolate over the tops for decoration.
- Final Chill: Place the finished bars back in the freezer for 10-15 minutes for the chocolate to set completely hard.
Nutrition Facts
These values are an approximation and will vary based on the specific brands and quantities used. They are meant to be a helpful guide.
- Servings: This recipe makes 12-16 bars.
- Calories per Serving: Approximately 250-300 kcal (based on 16 bars).
While these bars are made with healthy ingredients, they are energy-dense. They are a perfect pre-workout snack, healthy dessert, or afternoon pick-me-up, best enjoyed in moderation.
Preparation Time
This is a multi-step recipe, but the active time is quite short.
- Active Preparation Time: 30-40 minutes
- Inactive Soaking & Freezing Time: 3-4 hours (minimum)
- Total Time: Approximately 4 hours
How to Serve and Store Your Healthy Snickers
Proper storage is key to maintaining the perfect texture of these bars.
How to Serve:
- Straight from the Freezer: These bars are best enjoyed cold. The chocolate will be snappy, and the interior will be firm but chewy.
- Slightly Softened: For a gooier caramel experience, let a bar sit out at room temperature for 5-10 minutes before eating.
- As a Topping: Chop up a bar and sprinkle it over a bowl of nice cream, yogurt, or oatmeal for a decadent and healthy crunch.
- With Coffee or Tea: It makes the perfect companion to a hot beverage for a mid-afternoon treat.
How to Store:
- Freezer is a Must: These bars must be stored in the freezer. Because they are made with natural ingredients like coconut oil and dates, they will become very soft and lose their shape at room temperature.
- Airtight Container: Store the bars in an airtight container or a freezer-safe bag.
- Separate Layers: To prevent them from sticking together, you can place a small piece of parchment paper between the bars or lay them in a single layer.
- Longevity: Stored correctly, these Healthy Snickers Bars will keep in the freezer for up to 3 months.
Additional Tips for Snickers Bar Success
Follow these five expert tips to ensure your bars are perfect every time.
- Don’t Skip the Soak: Soaking the raw cashews is the most important step for the nougat layer. It breaks them down, removes phytic acid (which can inhibit nutrient absorption), and allows them to blend into a perfectly silky, lump-free base.
- Medjool Dates are a Must: For the caramel layer, use soft, plump Medjool dates. They are sweeter, larger, and have a much better gooey, caramel-like texture than other date varieties like Deglet Noor. If your dates feel a bit dry, a quick 10-minute soak in hot water will revive them.
- Embrace the Freeze: The freezing time between each layer is not optional. Freezing the nougat creates a solid base for spreading the caramel. Freezing the caramel layer solid allows for clean, sharp cuts. And freezing the individual bars before dipping ensures they hold their shape and helps the chocolate set instantly.
- The Parchment Paper Sling: Lining your pan with parchment paper that hangs over the sides is a simple trick that saves a lot of hassle. It allows you to lift the entire frozen block out in one piece for easy and clean cutting.
- The Two-Fork Dipping Method: When coating the bars in chocolate, using two forks is the cleanest and most efficient technique. It gives you control to flip the bar and lift it out without getting your fingers covered in chocolate, and it allows the excess to drip off for a professional-looking finish.
Frequently Asked Questions (FAQ)
1. Can I use a different nut butter or nut in this recipe?
Absolutely! This recipe is very versatile. You can easily substitute the peanut butter with creamy almond butter or even cashew butter for a slightly different flavor profile. You can also swap the roasted peanuts in the caramel layer for chopped roasted almonds to create a “Healthy Almond Joy” or “Healthy Almond Snickers” vibe.
2. Can I make this recipe nut-free?
Yes, with some careful substitutions. For a nut-free nougat, you can try using raw sunflower seeds (soaked just like the cashews). For the caramel layer, use tahini (sesame seed paste) or sunflower seed butter instead of peanut butter, and mix in sunflower seeds or pumpkin seeds instead of peanuts. The flavor will be different but still delicious.
3. My date caramel seems too thick or too thin. How can I fix it?
The consistency of date caramel depends heavily on the moisture content of your dates. If it’s too thick and won’t blend smoothly, add water one teaspoon at a time until it reaches a thick, spreadable consistency. If you’ve accidentally made it too thin, you can thicken it by adding a tablespoon of coconut flour or a few more dates.
4. Why are my bars falling apart or melting when I dip them in chocolate?
This is almost always because the bars were not frozen solid enough before dipping. They need to be rock hard. If you try to dip a bar that is even slightly soft, it will start to melt and crumble in the warm chocolate. Be patient and give them adequate time in the freezer before the final step.
5. How do these really compare to a store-bought Snickers bar?
While they hit all the same flavor and texture notes—chewy, crunchy, caramel, chocolate—they are not an exact replica, and that’s a good thing! The flavor is less intensely sweet and more complex. You can taste the rich notes of the dates and dark chocolate. The texture is denser and more satisfying. They are a “real food” version that tastes wonderfully indulgent while also nourishing your body.

Healthy Homemade Snickers Bars Recipe
Ingredients
For the Chewy Nougat Layer:
-
Raw Cashews: 1 ½ cups (225g). You must use raw, unsalted cashews, as roasted ones will not blend into a creamy base.
-
Pure Maple Syrup: 3 tablespoons. Provides a clean, unrefined sweetness. You can also use agave nectar.
-
Coconut Flour: 2 tablespoons. This is a crucial ingredient. It absorbs moisture and helps firm up the nougat layer to the perfect chewy consistency. Do not substitute with other flours.
-
Full-Fat Coconut Milk (from a can): 2 tablespoons of the solid cream part. This adds richness and creaminess.
-
Pure Vanilla Extract: 1 teaspoon. Enhances all the flavors.
-
Pinch of Sea Salt: Balances the sweetness.
For the Peanut Date Caramel Layer:
-
Medjool Dates: 1 ½ cups (about 12-15 large dates), pitted. Medjool dates are essential as they are large, soft, and have a rich caramel flavor. If your dates are dry, soak them in hot water for 10 minutes, then drain well.
-
Natural Creamy Peanut Butter: ¼ cup (64g). Use a good quality natural peanut butter where the only ingredients are peanuts and salt.
-
Coconut Oil: 1 tablespoon, melted. Helps the caramel firm up when chilled.
-
Water: 1-2 tablespoons, as needed to help blend.
-
Roasted Salted Peanuts: ½ cup (75g), for mixing into the caramel.
For the Dark Chocolate Coating:
-
High-Quality Dark Chocolate: 9 ounces (255g), chips or a chopped bar. For the best flavor and health benefits, use a chocolate that is 70% cacao or higher.
-
Coconut Oil: 1 tablespoon. This is the secret to a smooth, shiny, and perfectly snappy chocolate shell. It helps thin the chocolate for easy coating
Instructions
Part 1: Prepare the Equipment and Cashews
-
Soak the Cashews: Place the 1 ½ cups of raw cashews in a bowl and cover them with boiling water. Let them soak for at least 1 hour (or in cold water for 4-6 hours). This step is non-negotiable; it softens the cashews so they can blend into a completely smooth and creamy nougat.
-
Prepare the Pan: Line an 8×8 inch (20×20 cm) baking pan with parchment paper, leaving some overhang on the sides. This will act as a “sling,” allowing you to easily lift the entire bar out of the pan later.
Part 2: Create the Chewy Nougat Layer
-
Drain the Cashews: Once soaked, drain the cashews thoroughly and discard the soaking water.
-
Blend the Nougat: Place the drained cashews, maple syrup, coconut flour, solid coconut cream, vanilla extract, and a pinch of salt into a high-speed blender or a food processor.
-
Process Until Smooth: Blend on high speed until the mixture is completely smooth and creamy. You may need to stop and scrape down the sides a few times to ensure there are no lumps. The final texture should be like a very thick, smooth paste.
-
Press into Pan: Transfer the nougat mixture to your prepared pan. Use a spatula or your hands (lightly wet them to prevent sticking) to press the nougat into an even, flat layer across the bottom of the pan.
-
First Freeze: Place the pan in the freezer for at least 30-45 minutes while you prepare the caramel layer. The nougat should be firm to the touch.
Part 3: Create the Gooey Peanut Date Caramel
-
Blend the Caramel: Make sure your blender or food processor is clean. Add the pitted Medjool dates, peanut butter, and melted coconut oil.
-
Process Until a Paste Forms: Blend on high until the dates break down and form a thick, sticky paste. It will likely form a ball in your processor; this is normal.
-
Add Water to Smooth: With the processor running, add 1 tablespoon of water. Continue blending until the mixture becomes smooth and spreadable, like a very thick caramel. Add another tablespoon of water only if necessary to get it moving, but be careful not to add too much, or the caramel won’t set properly.
-
Stir in Peanuts: Transfer the date caramel to a bowl. Add the ½ cup of roasted salted peanuts and stir with a spatula until they are evenly distributed throughout the caramel.
-
Assemble the Second Layer: Remove the pan with the nougat layer from the freezer. Spoon the peanut caramel mixture over the top. Gently spread it into an even layer all the way to the edges.
-
Second Freeze: Return the pan to the freezer for at least 1-2 hours, or until the caramel layer is very firm. This is crucial for clean cutting.
Part 4: Cut and Coat in Chocolate
-
Cut the Bars: Once the caramel is firm, remove the pan from the freezer. Use the parchment paper overhangs to lift the entire block out onto a cutting board. Use a large, sharp knife to cut it into 12-16 rectangular bars. For the cleanest cuts, you can run the knife under hot water and wipe it dry between each cut.
-
Final Freeze: Place the individual bars back on the parchment-lined tray (or a plate) and return them to the freezer for another 30 minutes. The bars must be frozen solid before dipping in chocolate to prevent them from falling apart.
-
Melt the Chocolate: While the bars are in their final freeze, prepare the chocolate coating. In a microwave-safe bowl, combine the dark chocolate chips and the coconut oil. Microwave in 30-second intervals, stirring well between each, until the chocolate is fully melted and smooth. Alternatively, use a double boiler. Let the chocolate cool for a few minutes; if it’s too hot, it will melt the bars instantly.
-
Dip the Bars: Working one at a time, take a frozen bar and dip it into the melted chocolate. The best method is to use two forks. Drop the bar in, use one fork to flip it over to coat completely, then use both forks to lift it out.
-
Let Excess Drip Off: Hold the bar over the bowl and gently tap the fork on the edge to allow any excess chocolate to drip off. This creates a thin, even coating.
-
Set the Chocolate: Place the chocolate-coated bar back onto the parchment-lined tray. The cold temperature of the bar will cause the chocolate shell to set very quickly. Repeat with all the remaining bars. You can drizzle any leftover chocolate over the tops for decoration.
-
Final Chill: Place the finished bars back in the freezer for 10-15 minutes for the chocolate to set completely hard
Nutrition
- Serving Size: one normal portion
- Calories: 250-300 kcal