
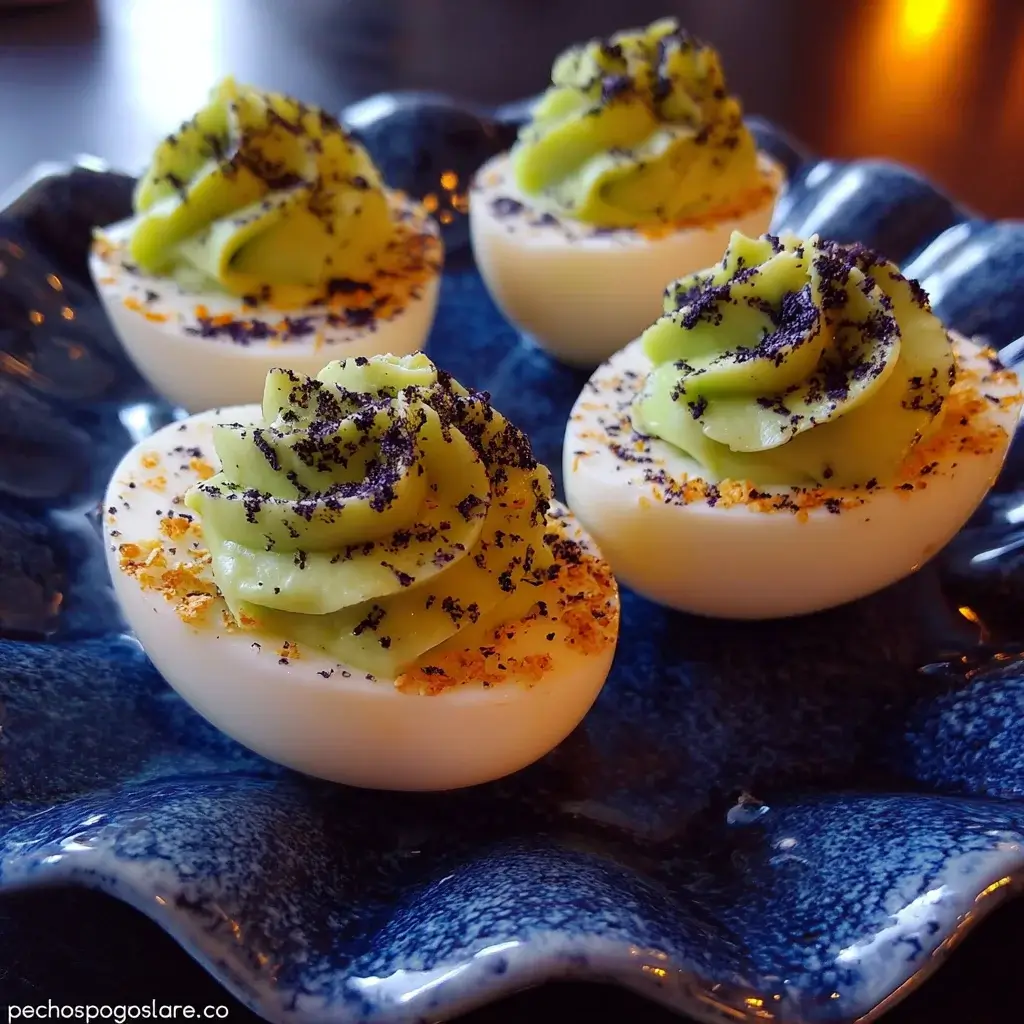

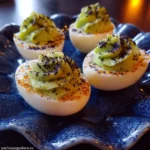
Of all the spooky, ghoulish, and downright creepy treats I make for our annual Halloween bash, these Halloween Deviled Eggs consistently steal the show. The first year I made them, I created a platter with a mix of spiderweb-cracked eggs and bloodshot-veined ones. My friends, who are used to my themed food, approached the plate with a mixture of fascination and hesitation. “Are they… okay to eat?” my sister asked, pointing a tentative finger at a particularly veiny-looking egg. I just smiled. The moment the first person took a bite, their face changed from suspicion to pure delight. “Oh my god, it’s just a perfect deviled egg!” was the verdict. And that’s the magic of this recipe. It takes a universally beloved, creamy, tangy, and savory classic and gives it a simple, high-impact costume. They look incredibly complex and spooky, but at their heart, they are the best kind of party food: easy, delicious, and guaranteed to disappear before the night is over.
Why This Halloween Deviled Egg Recipe is a Spooky Success
Before you start boiling, let’s dissect what makes this recipe the ultimate Halloween party appetizer. It’s more than just a novelty; it’s a thoughtfully crafted dish that delivers on both appearance and taste, making it a must-have for your spooky spread.
- Maximum Visual Impact, Minimum Effort: These eggs are true showstoppers. Whether you choose the intricate spiderweb design, the gruesome bloodshot eye effect, or the simple but classic olive spiders, they instantly elevate your food table from standard to spectacularly spooky. The best part? The techniques are surprisingly simple and require no special artistic skills.
- A Deliciously Classic Foundation: We don’t mess with perfection. The base of this recipe is a classic, crowd-pleasing deviled egg. The filling is rich, creamy, and perfectly balanced with the tang of mustard and a hint of vinegar. It’s the flavor everyone knows and loves, ensuring that even the most timid guests will come back for more once they try one.
- Incredibly Versatile for Any Theme: This isn’t a one-trick pony. We provide instructions for several different spooky designs, so you can pick your poison! Create a whole platter of spiderwebs, mix and match with bloodshot eyes, or add some cute olive spiders for a less gory, more family-friendly vibe. You can customize them to fit the exact level of “scary” you’re aiming for.
- The Perfect Make-Ahead Appetizer: Halloween party planning can be chaotic. These deviled eggs are a host’s best friend because much of the prep can be done in advance. You can boil the eggs and even make the filling a day ahead, leaving only the fun assembly and decoration for the day of the party.
Complete Ingredients List: Your Potion Components
Gather all your ingredients before you begin to ensure a smooth and successful creation process.
For the Classic Deviled Egg Base:
- Large Eggs: 12
- Mayonnaise: 1/2 cup (good quality, full-fat mayo works best)
- Dijon Mustard: 1 tablespoon
- White Vinegar or Pickle Juice: 1 teaspoon
- Salt: 1/4 teaspoon (or to taste)
- Black Pepper: 1/8 teaspoon (or to taste)
For the Halloween Decorations (Choose Your Style!):
- For Spiderweb Deviled Eggs:
- Black Gel Food Coloring: 1-2 teaspoons
- Water: 4 cups
- For Bloodshot Deviled Eggs:
- Red Gel Food Coloring: 1 teaspoon
- A fine-tipped, food-safe paintbrush
- For Black Olive Spiders:
- Large Black Olives: 6-8, pitted
- For Jack-O’-Lantern Deviled Eggs:
- Paprika: For sprinkling
- A tiny piece of chive or celery: For the “stem”
- Orange Gel Food Coloring: A few drops to color the yolk filling (optional)
Step-by-Step Instructions: Bringing Your Monsters to Life
Follow these detailed instructions, broken down into manageable parts, to create your creepy, crawly, and utterly delicious Halloween Deviled Eggs.
Part 1: The Perfect Hard-Boiled Eggs
The foundation of any great deviled egg is a perfectly cooked, easy-to-peel hard-boiled egg.
- Place and Cover: Gently place your 12 eggs in a single layer at the bottom of a large pot or saucepan. Add enough cold water to cover the eggs by at least one inch.
- Bring to a Boil: Place the pot on the stove over high heat and bring the water to a full, rolling boil.
- Cook (Off the Heat): As soon as the water reaches a rolling boil, turn off the heat completely, cover the pot with a tight-fitting lid, and let the eggs sit in the hot water for 12-14 minutes.
- Ice Bath: While the eggs are sitting, prepare a large bowl of ice water. Once the 12-14 minutes are up, use a slotted spoon to immediately transfer the hot eggs into the ice bath. Let them cool completely in the ice water for at least 10-15 minutes. This step stops the cooking process (preventing the dreaded green ring around the yolk) and makes the eggs much easier to peel.
Part 2: The Spooky Decorations (The Fun Part!)
This is where you give your eggs their Halloween costume. Complete this step after boiling but before you slice and fill them.
Method A: For Spiderweb Deviled Eggs
- Gently Crack: Take each cooled, hard-boiled egg and gently tap it all over on a hard surface, like a countertop. You want to create a network of fine cracks all over the shell, but do not peel it. The more cracks, the more intricate your web will be.
- Prepare the Dye: In a medium bowl, mix 4 cups of water with 1-2 teaspoons of black gel food coloring. Stir until the color is uniform.
- Soak the Eggs: Place the cracked eggs into the black water. Ensure they are fully submerged. Let them soak for at least 30 minutes, or up to 2 hours for a darker, more dramatic effect.
- Peel and Reveal: Remove the eggs from the dye bath, rinse them briefly under cool water, and carefully peel away the shells. You’ll be left with a stunning white egg white covered in a black spiderweb pattern.
Method B: For Black Olive Spiders (and others)
If you are making the Bloodshot, Olive Spider, or Jack-O’-Lantern eggs, simply peel your cooled hard-boiled eggs as normal and proceed to the next steps. The decorations for these styles are applied after the eggs are sliced and filled.
Part 3: Creating and Filling the Eggs
- Slice and Separate: Slice each egg in half lengthwise. Carefully scoop out the cooked yolks into a medium bowl. Arrange the egg white halves on a platter or serving tray.
- Mash the Yolks: Using a fork, mash the yolks until they are fine and crumbly. For an ultra-smooth filling, you can press the yolks through a fine-mesh sieve.
- Mix the Filling: Add the mayonnaise, Dijon mustard, vinegar (or pickle juice), salt, and pepper to the mashed yolks. Mix everything together until it is smooth and creamy. Taste and adjust seasoning if needed. For Jack-O’-Lantern eggs, this is when you would mix in a few drops of orange food coloring until you reach your desired pumpkin shade.
- Fill the Egg Whites: You can use a small spoon to neatly fill the egg white halves. For a more professional look, transfer the yolk filling to a piping bag fitted with a star tip (or simply a Ziploc bag with the corner snipped off) and pipe the filling into the whites.
Part 4: Final Decorative Touches
This is the final step where you add the finishing details.
- For Bloodshot Deviled Eggs: Dip your fine-tipped, food-safe paintbrush into the red gel food coloring. Carefully and lightly paint thin, wavy “vein” lines starting from the outside edge of the filled yolk and radiating outwards onto the egg white. Use a light touch for a more realistic effect.
- For Black Olive Spiders: To create one spider, you need one whole black olive. Slice the olive in half lengthwise. One half will be the spider’s “body.” Place it in the center of the yolk filling. Slice the other olive half into thin, curved slivers to be the “legs.” Arrange four legs on each side of the body.
- For Jack-O’-Lantern Deviled Eggs: Lightly sprinkle the orange-colored filling with paprika for color and flavor. Carefully insert a tiny sliver of chive or celery into the top of the filling to look like a pumpkin stem.
Nutrition Facts
- Servings: 24 deviled egg halves
- Calories per serving (1 deviled egg half): Approximately 70-90 kcal.
Disclaimer: The nutritional information provided is an estimate and can vary based on the specific ingredients and brands used.
Preparation and Cook Time Breakdown
- Egg Cooking and Cooling Time: 30 minutes
- Preparation and Filling Time: 20 minutes
- Decoration Time: 10-30 minutes (depending on the complexity of your chosen designs)
- Total Time: Approximately 1 hour to 1 hour 30 minutes
How to Serve Your Horrifying Hors d’Oeuvres
Presentation is key to making these spooky eggs the talk of the party.
- The Sinister Platter: Arrange your decorated deviled eggs on a dark or black platter. The contrast will make the colors and designs pop dramatically. Scatter some plastic spiders or fake cobwebs around the platter for extra flair.
- The Mad Scientist’s Lab: For a “specimen” look, arrange the eggs neatly on a clean white tray or a metal baking sheet. You can even place little hand-written labels in front of each style, like “Arachnid Ovum” or “Oculus Sanguis.”
- Part of a Spooky Spread: Don’t let them be lonely! Serve them alongside other themed Halloween appetizers like “Witch Finger” pretzel rods, a “Pumpkin” cheese ball with crackers, or a deep purple “Witches’ Brew” punch.
- Garnish for Effect: A final, light sprinkle of paprika or finely chopped chives over the finished eggs (especially the non-decorated ones) adds a touch of color and a professional finish.
Additional Tips for Perfect Halloween Deviled Eggs
Use these five insider tips to guarantee your spooky creations are flawless.
- Use Older Eggs for Easy Peeling: This is the number one secret to deviled egg success. Farm-fresh eggs are notoriously difficult to peel cleanly. Use eggs that are at least a week or two old. The air pocket inside the egg expands over time, making the shell pull away from the white much more easily after boiling.
- For an Ultra-Creamy, Lump-Free Filling: The secret weapon for a silky smooth filling is a fine-mesh sieve. After you scoop the yolks into a bowl, press them through the sieve using the back of a spoon. This breaks down any and all lumps, resulting in a perfectly velvety texture that’s impossible to achieve with just a fork.
- Gel Food Coloring is a Must: For the vibrant black of the spiderwebs and the blood-red of the veins, you must use gel food coloring. The liquid drops found in regular grocery stores are not concentrated enough; you’d have to use so much that it would water down your dye bath or make your “blood” runny. Gel color provides intense color with just a small amount.
- The Make-Ahead Master Plan: To save time on party day, you can do most of the work in advance. Boil, cool, and peel the eggs up to two days ahead. You can also prepare the yolk filling and store it in a separate airtight container in the fridge. Keep the egg white halves tightly wrapped. Assemble and decorate within a few hours of serving for the freshest look and taste.
- Safe and Easy Transport: Need to bring your creepy creations to a party? The best way to transport them without sliding and smearing is to use a designated deviled egg carrier. If you don’t have one, a standard muffin tin is a perfect substitute! Place one deviled egg half in each muffin cup to keep them secure and pristine during travel.
Frequently Asked Questions (FAQ)
Here are the answers to some common questions you might have.
1. Why did my egg yolks get a green ring around them?
That gray-green ring is a harmless chemical reaction between sulfur in the egg white and iron in the yolk. It’s caused by overcooking the eggs or not cooling them down quickly enough. Following the instructions to remove the pot from the heat and use an ice bath will prevent this from happening, leaving you with perfectly bright yellow yolks.
2. How long will these Halloween Deviled Eggs last?
Once assembled, deviled eggs are best eaten within a day. You can store them, covered, in the refrigerator for up to two days, but they will be at their peak freshness and appearance on the day they are made.
3. I don’t have a piping bag. What’s the best way to fill the eggs?
No problem! The easiest and cleanest alternative is a standard zip-top plastic bag (like a Ziploc bag). Spoon your yolk filling into the bag, press it down into one corner, and snip a small piece off the tip of that corner with scissors. You now have a disposable, homemade piping bag that works perfectly for filling your eggs neatly.
4. Can I make the filling with something other than mayonnaise?
Yes, you can. For a healthier or tangier alternative, you can substitute part or all of the mayonnaise with full-fat Greek yogurt or mashed avocado. Using avocado will give the filling a greenish tint, which can be another fun, spooky color for your Halloween theme! Just note that if you use avocado, they should be served immediately as it will brown over time.
5. Are the Spiderweb Deviled Eggs safe to eat? Does the food coloring have a taste?
They are 100% safe to eat. We use standard, edible food coloring. When using a quality gel food coloring, the amount needed is so small that it is completely tasteless. The spiderweb pattern only stains the very outer surface of the egg white, and you won’t taste anything other than a delicious deviled egg.
Halloween Deviled Eggs recipe
Ingredients
For the Classic Deviled Egg Base:
-
Large Eggs: 12
-
Mayonnaise: 1/2 cup (good quality, full-fat mayo works best)
-
Dijon Mustard: 1 tablespoon
-
White Vinegar or Pickle Juice: 1 teaspoon
-
Salt: 1/4 teaspoon (or to taste)
-
Black Pepper: 1/8 teaspoon (or to taste)
For the Halloween Decorations (Choose Your Style!):
-
For Spiderweb Deviled Eggs:
-
Black Gel Food Coloring: 1-2 teaspoons
-
Water: 4 cups
-
-
For Bloodshot Deviled Eggs:
-
Red Gel Food Coloring: 1 teaspoon
-
A fine-tipped, food-safe paintbrush
-
-
For Black Olive Spiders:
-
Large Black Olives: 6-8, pitted
-
-
For Jack-O’-Lantern Deviled Eggs:
-
Paprika: For sprinkling
-
A tiny piece of chive or celery: For the “stem”
-
Orange Gel Food Coloring: A few drops to color the yolk filling (optional)
-
Instructions
Part 1: The Perfect Hard-Boiled Eggs
The foundation of any great deviled egg is a perfectly cooked, easy-to-peel hard-boiled egg.
-
Place and Cover: Gently place your 12 eggs in a single layer at the bottom of a large pot or saucepan. Add enough cold water to cover the eggs by at least one inch.
-
Bring to a Boil: Place the pot on the stove over high heat and bring the water to a full, rolling boil.
-
Cook (Off the Heat): As soon as the water reaches a rolling boil, turn off the heat completely, cover the pot with a tight-fitting lid, and let the eggs sit in the hot water for 12-14 minutes.
-
Ice Bath: While the eggs are sitting, prepare a large bowl of ice water. Once the 12-14 minutes are up, use a slotted spoon to immediately transfer the hot eggs into the ice bath. Let them cool completely in the ice water for at least 10-15 minutes. This step stops the cooking process (preventing the dreaded green ring around the yolk) and makes the eggs much easier to peel.
Part 2: The Spooky Decorations (The Fun Part!)
This is where you give your eggs their Halloween costume. Complete this step after boiling but before you slice and fill them.
Method A: For Spiderweb Deviled Eggs
-
Gently Crack: Take each cooled, hard-boiled egg and gently tap it all over on a hard surface, like a countertop. You want to create a network of fine cracks all over the shell, but do not peel it. The more cracks, the more intricate your web will be.
-
Prepare the Dye: In a medium bowl, mix 4 cups of water with 1-2 teaspoons of black gel food coloring. Stir until the color is uniform.
-
Soak the Eggs: Place the cracked eggs into the black water. Ensure they are fully submerged. Let them soak for at least 30 minutes, or up to 2 hours for a darker, more dramatic effect.
-
Peel and Reveal: Remove the eggs from the dye bath, rinse them briefly under cool water, and carefully peel away the shells. You’ll be left with a stunning white egg white covered in a black spiderweb pattern.
Method B: For Black Olive Spiders (and others)
If you are making the Bloodshot, Olive Spider, or Jack-O’-Lantern eggs, simply peel your cooled hard-boiled eggs as normal and proceed to the next steps. The decorations for these styles are applied after the eggs are sliced and filled.
Part 3: Creating and Filling the Eggs
-
Slice and Separate: Slice each egg in half lengthwise. Carefully scoop out the cooked yolks into a medium bowl. Arrange the egg white halves on a platter or serving tray.
-
Mash the Yolks: Using a fork, mash the yolks until they are fine and crumbly. For an ultra-smooth filling, you can press the yolks through a fine-mesh sieve.
-
Mix the Filling: Add the mayonnaise, Dijon mustard, vinegar (or pickle juice), salt, and pepper to the mashed yolks. Mix everything together until it is smooth and creamy. Taste and adjust seasoning if needed. For Jack-O’-Lantern eggs, this is when you would mix in a few drops of orange food coloring until you reach your desired pumpkin shade.
-
Fill the Egg Whites: You can use a small spoon to neatly fill the egg white halves. For a more professional look, transfer the yolk filling to a piping bag fitted with a star tip (or simply a Ziploc bag with the corner snipped off) and pipe the filling into the whites.
Part 4: Final Decorative Touches
This is the final step where you add the finishing details.
-
For Bloodshot Deviled Eggs: Dip your fine-tipped, food-safe paintbrush into the red gel food coloring. Carefully and lightly paint thin, wavy “vein” lines starting from the outside edge of the filled yolk and radiating outwards onto the egg white. Use a light touch for a more realistic effect.
-
For Black Olive Spiders: To create one spider, you need one whole black olive. Slice the olive in half lengthwise. One half will be the spider’s “body.” Place it in the center of the yolk filling. Slice the other olive half into thin, curved slivers to be the “legs.” Arrange four legs on each side of the body.
-
For Jack-O’-Lantern Deviled Eggs: Lightly sprinkle the orange-colored filling with paprika for color and flavor. Carefully insert a tiny sliver of chive or celery into the top of the filling to look like a pumpkin stem.
Nutrition
- Serving Size: one normal portion
- Calories: 70-90 kcal


