
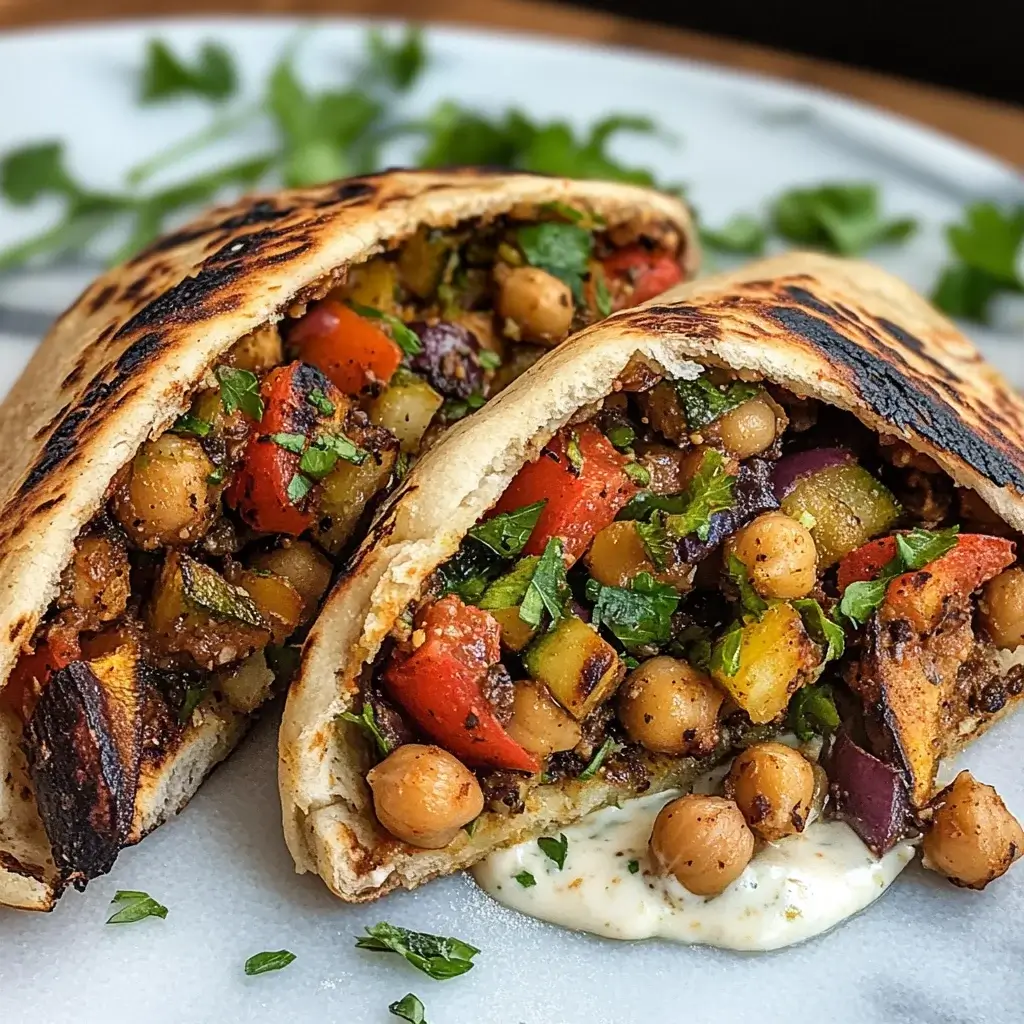

It’s funny how some of the best food discoveries happen almost by accident. I was planning a casual backyard barbecue, aiming for something a little lighter and fresher than the usual burgers and hot dogs. Browsing through my fridge, I had a can of chickpeas, a colorful array of summer vegetables from the farmer’s market, and a pack of pita bread. An idea sparked – why not grill everything and stuff it into pitas? And that’s how these Grilled Chickpea Veggie Pitas were born! Honestly, I wasn’t expecting a culinary revelation, but the first bite completely blew me away. The smoky char from the grill, the creamy, seasoned chickpeas, the burst of flavor from the perfectly grilled vegetables, all nestled in warm, soft pita bread – it was a symphony of textures and tastes. My guests raved about them, even the most dedicated meat-lovers were impressed. These aren’t your average veggie pitas; grilling transforms the humble chickpea and vegetables into something truly special. They are now a staple in our summer rotation, perfect for everything from casual lunches to easy weeknight dinners and even potlucks. Versatile, incredibly flavorful, and surprisingly easy to make, these Grilled Chickpea Veggie Pitas are a guaranteed crowd-pleaser that will have everyone asking for the recipe! Get ready to experience a vegetarian grilling sensation that’s bursting with Mediterranean sunshine!
Ingredients for Delicious Grilled Chickpea Veggie Pitas
The secret to truly outstanding Grilled Chickpea Veggie Pitas lies in the quality and combination of fresh, flavorful ingredients. Each component plays a crucial role in creating a balanced and satisfying pita sandwich. Let’s explore each ingredient, understand its purpose, and consider potential variations and substitutions to personalize this recipe to your taste.
- 1 (15-ounce) can Chickpeas, drained and rinsed: Chickpeas are the protein powerhouse of this vegetarian pita, providing a creamy, nutty base for the filling. Canned chickpeas are convenient and work perfectly. Be sure to drain and rinse them thoroughly to remove excess sodium and improve their texture. Rinsing also helps them absorb marinades and seasonings better. For an even smoother and creamier filling, you can remove the chickpea skins after rinsing, though this is optional. If you prefer to cook chickpeas from scratch, you’ll need about ½ cup of dried chickpeas, cooked until tender (yielding approximately 1 ½ cups cooked chickpeas). For a slightly different flavor profile, you could experiment with other beans like cannellini beans or Great Northern beans, but chickpeas are the classic and best-suited choice for this recipe.
- 1 Red Bell Pepper, cored, seeded, and quartered: Red bell pepper adds sweetness, vibrant color, and a slightly smoky flavor when grilled. Quartering the pepper makes it easy to grill and handle. You can also use other colors of bell peppers like yellow or orange for variety, or a combination of colors for a visually appealing pita. Bell peppers are a good source of vitamin C and add a satisfying crunch and sweetness to the pitas. If you prefer a milder flavor, you can use poblano peppers, though they will be less sweet. For a spicier kick, consider adding a jalapeño pepper, thinly sliced and grilled alongside the bell peppers.
- 1 Zucchini, sliced lengthwise into ½-inch thick planks: Zucchini adds a mild, slightly sweet flavor and a tender texture when grilled. Slicing it lengthwise into planks prevents it from falling through the grill grates and makes it easier to handle. Choose firm zucchini for grilling. You can also use yellow squash or summer squash as alternatives, or a combination of zucchini and squash for visual appeal and flavor variety. Zucchini is low in calories and adds moisture and subtle flavor to the pitas.
- 1 Red Onion, cut into ½-inch thick slices: Red onion provides a pungent, slightly sweet, and slightly spicy flavor that mellows beautifully when grilled. Slicing it into thick rounds or wedges prevents it from falling through the grill grates and allows it to caramelize nicely. You can also use yellow or white onions, though red onions offer a slightly sweeter and milder flavor when grilled. Red onion adds a nice bite and visual contrast to the other vegetables.
- 4 Pita Breads: Pita breads are the pockets that hold our delicious grilled chickpea and veggie filling. Choose good quality pita breads that are soft and pliable. You can use white pita bread, whole wheat pita bread for a healthier option, or even flavored pita breads like garlic or herb pita for added flavor. Look for pita breads that are not too thick and will easily open into pockets. Before grilling, you can lightly brush the pitas with olive oil for extra flavor and to help them crisp up slightly on the grill.
- 1/4 cup Olive Oil, plus more for brushing: Olive oil is essential for grilling the vegetables and chickpeas, preventing them from sticking to the grill grates and adding flavor. Extra virgin olive oil is preferred for its superior flavor and health benefits. You’ll use olive oil for tossing with the chickpeas and vegetables before grilling, and also for brushing the pita breads before grilling. For a richer flavor, you can use infused olive oils, such as garlic or herb-infused olive oil.
- 2 tablespoons Lemon Juice, freshly squeezed: Fresh lemon juice adds brightness, acidity, and a zesty flavor that balances the richness of the olive oil and chickpeas and enhances the overall flavor of the pitas. Freshly squeezed lemon juice is always preferred for its superior taste compared to bottled lemon juice. Lemon juice also helps to tenderize the chickpeas and vegetables slightly and adds a refreshing element to the dish.
- 2 cloves Garlic, minced: Minced garlic provides a pungent, aromatic base note that enhances the savory flavors of the chickpeas and vegetables. Freshly minced garlic is always best. You can adjust the amount of garlic to your preference – if you prefer a milder garlic flavor, use just one clove, or for a more pronounced garlic taste, use three. For a sweeter, roasted garlic flavor, you can roast a whole head of garlic and use a few cloves of roasted garlic paste in the marinade.
- 1 teaspoon Dried Oregano: Dried oregano adds a classic Mediterranean herb flavor that complements chickpeas and vegetables beautifully. Use good quality dried oregano. Fresh oregano can also be used – use about 1 tablespoon of fresh oregano leaves, chopped. Other Mediterranean herbs that would work well include thyme, rosemary, or marjoram, or a blend of Italian herbs.
- 1 teaspoon Ground Cumin: Ground cumin adds a warm, earthy, and slightly smoky flavor that enhances the savory notes of the chickpeas and vegetables. Use good quality ground cumin. For a more intense cumin flavor, you can lightly toast cumin seeds in a dry skillet and then grind them yourself before adding to the marinade. Cumin is a key spice in Mediterranean and Middle Eastern cuisine and pairs perfectly with chickpeas.
- 1/2 teaspoon Smoked Paprika: Smoked paprika adds a smoky, slightly sweet, and subtly spicy flavor that enhances the grilled character of the dish and adds depth to the chickpea and vegetable mixture. Use good quality smoked paprika. Regular paprika can be used as a substitute, but smoked paprika adds a unique smoky dimension that is highly recommended. For a spicier version, you can use hot smoked paprika or add a pinch of cayenne pepper.
- Salt and Black Pepper, to taste: Salt and pepper are essential for seasoning and enhancing the flavors of all the ingredients. Use sea salt or kosher salt for the best flavor. Freshly ground black pepper is also preferred. Be sure to season the chickpeas and vegetables generously before grilling, and taste and adjust seasoning as needed after grilling.
Optional Toppings and Fillings for Customization:
- Hummus: Creamy hummus adds extra chickpea flavor and creaminess to the pitas.
- Tzatziki Sauce: Cool and refreshing tzatziki sauce (yogurt-cucumber sauce) provides a tangy and creamy counterpoint to the grilled flavors. For a vegan option, use a vegan tzatziki sauce.
- Feta Cheese (crumbled): Crumbled feta cheese adds a salty, tangy, and briny flavor. For a vegan option, omit feta cheese or use a vegan feta alternative.
- Fresh Spinach or Arugula: Baby spinach or arugula adds fresh greens and a slightly peppery bite.
- Sliced Cucumber: Thinly sliced cucumber adds coolness and crunch.
- Tomato Slices: Sliced tomatoes add juicy sweetness and acidity.
- Kalamata Olives, halved: Kalamata olives add a salty, briny, and Mediterranean flavor.
- Banana Peppers or Pepperoncini: Pickled banana peppers or pepperoncini add a tangy and slightly spicy kick.
By using high-quality ingredients and understanding their roles, you’ll be well on your way to creating truly exceptional and flavorful Grilled Chickpea Veggie Pitas.
Instructions: Grilling Your Perfect Chickpea Veggie Pitas
Now that we have all our ingredients prepped, let’s get to the exciting part – grilling and assembling your delicious Grilled Chickpea Veggie Pitas! Follow these detailed, step-by-step instructions to ensure perfectly grilled vegetables, flavorful chickpeas, and satisfying pitas.
Step 1: Prepare the Chickpea and Vegetable Marinade
- Combine Marinade Ingredients: In a large bowl, whisk together the olive oil, lemon juice, minced garlic, dried oregano, ground cumin, smoked paprika, salt, and black pepper. Whisk until well combined and emulsified. This marinade will infuse the chickpeas and vegetables with flavor and help them grill beautifully.
- Add Chickpeas and Vegetables to Marinade: Add the drained and rinsed chickpeas, quartered red bell pepper, zucchini planks, and red onion slices to the bowl with the marinade.
- Toss to Coat: Toss everything together thoroughly to ensure the chickpeas and vegetables are evenly coated with the marinade.
Step 2: Marinate Chickpeas and Vegetables (Optional but Recommended)
- Marinate for at least 20 minutes (or up to 1 hour): For the best flavor, allow the chickpeas and vegetables to marinate at room temperature for at least 20 minutes, or up to 1 hour. Marinating allows the flavors to penetrate the chickpeas and vegetables, making them more flavorful and tender when grilled. If marinating for longer than 30 minutes, cover the bowl and refrigerate. Bring back to room temperature before grilling. If you are short on time, you can skip the marinating step and proceed directly to grilling, but marinating enhances the flavor significantly.
Step 3: Preheat Grill and Prepare Vegetables for Grilling
- Preheat Grill to Medium-High Heat: Preheat your grill to medium-high heat (around 375-450°F or 190-230°C). You want the grill hot enough to create nice grill marks and cook the vegetables through without burning them too quickly. If using a charcoal grill, wait until the coals are glowing red with a light coating of ash. If using a gas grill, preheat with all burners on medium-high.
- Prepare Grill Grates: Clean the grill grates thoroughly and lightly oil them with cooking oil or olive oil to prevent sticking. You can use a grill brush to clean the grates and then dip a paper towel in oil and use tongs to rub it over the hot grates.
- Thread Chickpeas onto Skewers (Optional but Recommended): To make grilling chickpeas easier and prevent them from falling through the grill grates, thread them onto metal or soaked bamboo skewers. Thread about 10-12 chickpeas onto each skewer. This will make them easier to flip and grill evenly. If you don’t have skewers, you can grill the chickpeas in a grill basket or directly on well-oiled grates, but be careful as they can roll around.
Step 4: Grill Chickpeas and Vegetables
- Grill Bell Peppers and Red Onion: Place the bell pepper quarters and red onion slices directly on the preheated grill grates. Grill for 4-5 minutes per side, or until tender-crisp and slightly charred, turning occasionally.
- Grill Zucchini: Place the zucchini planks on the grill grates. Grill for 3-4 minutes per side, or until tender-crisp and grill marks appear, turning once.
- Grill Chickpea Skewers (or Chickpeas): Place the chickpea skewers (or chickpeas in a grill basket or directly on grates) on the grill. Grill for 5-7 minutes, turning occasionally, until heated through and slightly charred. If grilling chickpeas directly on grates or in a basket, stir or toss them occasionally to ensure even cooking.
Step 5: Grill Pita Breads (Optional but Recommended)
- Lightly Brush Pita Breads with Olive Oil (Optional): Lightly brush both sides of the pita breads with olive oil. This is optional but recommended for extra flavor and to help them crisp up slightly on the grill.
- Grill Pita Breads: Place the pita breads on the grill grates. Grill for 1-2 minutes per side, or until warmed through, slightly toasted, and grill marks appear, flipping once. Watch them carefully as they can burn quickly. Grilling the pitas warms them and adds a nice smoky flavor and slightly crispy texture.
Step 6: Assemble Grilled Chickpea Veggie Pitas
- Remove Vegetables and Chickpeas from Grill: Remove the grilled bell peppers, red onion, zucchini, and chickpea skewers (or chickpeas) from the grill and set aside.
- Chop Grilled Vegetables: Roughly chop the grilled bell peppers, red onion, and zucchini into bite-sized pieces.
- Prepare Pita Pockets: Gently open each pita bread to create a pocket.
- Fill Pitas: Fill each pita pocket with a generous amount of the grilled chickpeas and chopped grilled vegetables.
- Add Toppings (Optional): Add your desired toppings and fillings, such as hummus, tzatziki sauce, crumbled feta cheese, fresh spinach or arugula, sliced cucumber, tomato slices, Kalamata olives, banana peppers, or pepperoncini.
- Serve Immediately: Serve the Grilled Chickpea Veggie Pitas immediately while they are warm and the pitas are soft and pliable.
Following these detailed instructions will guide you through each step of grilling and assembling these flavorful and satisfying Grilled Chickpea Veggie Pitas. Enjoy the smoky flavors and vibrant textures!
Nutrition Facts for Grilled Chickpea Veggie Pitas
Understanding the nutritional content of your meals can be helpful for making balanced dietary choices. Here’s a general overview of the nutrition facts for one Grilled Chickpea Veggie Pita. Please note that these are estimates and can vary based on specific ingredient brands, portion sizes, and optional toppings.
Servings: 4 pitas
Serving Size: One Grilled Chickpea Veggie Pita
Approximate Nutritional Values per Serving (based on 4 servings, estimations, without optional toppings):
- Calories: Approximately 400-450 calories
- Total Fat: 18-22g
- Saturated Fat: 2-3g
- Unsaturated Fat: 14-18g
- Cholesterol: 0mg
- Sodium: 500-600mg (can vary based on canned chickpea sodium and salt added)
- Total Carbohydrates: 50-60g
- Dietary Fiber: 10-12g
- Sugars: 8-10g
- Protein: 12-15g
Key Nutritional Highlights and Considerations:
- Good Source of Plant-Based Protein: Chickpeas are an excellent source of plant-based protein, contributing significantly to the protein content of these pitas.
- High in Fiber: Chickpeas and vegetables are rich in dietary fiber, which is beneficial for digestion, satiety, and blood sugar control.
- Source of Healthy Fats: Olive oil provides healthy monounsaturated fats, which are beneficial for heart health.
- Rich in Vitamins and Minerals: Vegetables like bell peppers, zucchini, and red onion are good sources of vitamins (like vitamin C and vitamin A), minerals, and antioxidants.
- Moderate Calorie Content: While not low-calorie, Grilled Chickpea Veggie Pitas offer a satisfying and nutrient-dense meal for a reasonable calorie count.
- Vegetarian and Vegan Friendly: This recipe is naturally vegetarian and vegan (depending on toppings chosen).
- Sodium Content: Sodium content can be moderate due to canned chickpeas and added salt. Rinsing chickpeas thoroughly and using low-sodium options where possible can help reduce sodium intake.
Important Considerations for a Healthier Approach:
- Whole Wheat Pita Bread: Use whole wheat pita bread instead of white pita bread to increase fiber content and complex carbohydrates.
- Control Olive Oil: While olive oil is healthy, it is calorie-dense. Use olive oil mindfully and avoid adding excessive amounts.
- Load Up on Vegetables: Increase the amount and variety of vegetables in the pitas to boost nutrient density and fiber. Add extra greens like spinach or arugula.
- Choose Healthy Toppings: Opt for healthier toppings like hummus, tzatziki sauce (in moderation), fresh vegetables, and herbs, and limit or reduce higher-fat or higher-sodium toppings like feta cheese or creamy dressings.
- Homemade Hummus and Tzatziki: Making your own hummus and tzatziki sauce allows you to control ingredients and sodium levels compared to store-bought versions.
- Portion Control: Be mindful of portion sizes, especially if adding calorie-dense toppings. One pita is a satisfying serving for most people.
Grilled Chickpea Veggie Pitas are a nutritious and delicious meal option that can easily be incorporated into a healthy eating plan. Their plant-based protein, high fiber content, and abundance of vitamins and minerals make them a wholesome and satisfying choice. For precise nutritional values, you can use online nutrition calculators and input the specific brands and quantities of ingredients you use, especially considering your chosen toppings.
Preparation Time for Grilled Chickpea Veggie Pitas
One of the appealing aspects of Grilled Chickpea Veggie Pitas is their relatively straightforward and manageable preparation time, making them a great option for weeknight dinners, weekend lunches, or casual gatherings. Here’s a breakdown of the estimated preparation and cooking times:
Prep Time: 20-25 minutes (plus optional marinating time)
This includes the time it takes to:
- Drain and rinse chickpeas.
- Chop vegetables (bell pepper, zucchini, red onion).
- Mince garlic.
- Prepare marinade (whisk ingredients together).
- Marinate chickpeas and vegetables (optional, 20 minutes to 1 hour).
- Prepare grill (preheat and clean grates).
- Thread chickpeas onto skewers (optional).
Cook Time: 15-20 minutes
This includes the grilling time for:
- Bell peppers and red onion (8-10 minutes total).
- Zucchini (6-8 minutes total).
- Chickpea skewers (or chickpeas, 5-7 minutes total).
- Pita breads (2-4 minutes total).
Total Active Time: 35-45 minutes (excluding marinating time)
From start to finish, with active preparation and grilling, you can have delicious Grilled Chickpea Veggie Pitas ready in approximately 35-45 minutes. If you include the marinating time, the total time from start to finish will be longer, but the active hands-on time remains relatively short.
Tips to Speed Up Preparation:
- Skip Marinating (for quicker prep): While marinating enhances flavor, you can skip the marinating step if you are short on time and proceed directly to grilling after tossing the chickpeas and vegetables in the marinade.
- Use Pre-Minced Garlic: Using pre-minced garlic (from a jar) is quicker than mincing fresh garlic cloves.
- Pre-Chopped Vegetables (if available): If you can find pre-chopped bell peppers or onions at the grocery store, this can save a few minutes of chopping time.
- Prepare Marinade and Chop Vegetables Ahead of Time: You can prepare the marinade and chop the vegetables a few hours in advance (or even a day before) and store them separately in the refrigerator. When ready to cook, simply toss the vegetables with the marinade and proceed with grilling.
- Grill Vegetables Simultaneously: Grill all the vegetables (bell peppers, zucchini, red onion, and chickpeas) at the same time on the grill to maximize efficiency.
The relatively short preparation and grilling time, combined with the flavorful and satisfying result, make Grilled Chickpea Veggie Pitas a fantastic option for a quick and healthy meal any day of the week.
How to Serve Grilled Chickpea Veggie Pitas
Grilled Chickpea Veggie Pitas are incredibly versatile and can be served in numerous ways, making them perfect for various occasions, from casual lunches to summer barbecues. Here are some delicious serving suggestions:
Serving Occasions:
- Lunch: A satisfying and flavorful lunch option, perfect for a quick midday meal or a packed lunch.
- Dinner: A light yet filling dinner, especially ideal for warmer weather. Serve as a vegetarian main course.
- Summer Barbecue/Cookout: A fantastic vegetarian option for barbecues and cookouts, offering a healthy and flavorful alternative to heavier grilled fare.
- Picnic: Easily portable and delicious at room temperature, making them perfect for picnics, outdoor concerts, or park outings.
- Potluck or Casual Gathering: A crowd-pleasing dish that is easy to transport and serve at potlucks, casual get-togethers, or buffet-style meals.
Serving Suggestions and Pairings:
- Side Salad: A simple green salad with a light vinaigrette or a Mediterranean-style salad with cucumbers, tomatoes, and olives provides a refreshing contrast to the grilled pitas.
- Greek Salad: A classic Greek salad with tomatoes, cucumbers, olives, feta cheese, and a Greek vinaigrette complements the Mediterranean flavors of the pitas.
- Tabouli Salad: A refreshing and herbaceous tabouli salad (parsley and bulgur salad) pairs well with the grilled pitas.
- Hummus and Veggie Platter: Serve alongside a platter of hummus with raw vegetables like carrots, celery, cucumber, and bell peppers for dipping.
- Tzatziki Sauce (as a side): Offer extra tzatziki sauce for dipping or drizzling on the side.
- Lemon Wedges: Serve with lemon wedges for squeezing fresh lemon juice over the pitas for added brightness.
- Grilled Halloumi Cheese (add to pita): For a non-vegan option, add grilled halloumi cheese slices to the pitas for extra protein and a salty, savory flavor.
- Grilled Chicken or Fish (for non-vegetarian option): For those who prefer to include meat, you can serve grilled chicken skewers or grilled fish alongside the pitas.
Garnishes and Toppings Bar Ideas:
- Hummus: Creamy hummus for spreading inside the pitas.
- Tzatziki Sauce: Cool and refreshing tzatziki sauce.
- Crumbled Feta Cheese: Salty and tangy crumbled feta.
- Fresh Spinach or Arugula: Baby spinach or arugula for fresh greens.
- Sliced Cucumber: Thinly sliced cucumber for coolness and crunch.
- Tomato Slices: Sliced tomatoes for juicy sweetness.
- Kalamata Olives, Halved: Salty and briny Kalamata olives.
- Banana Peppers or Pepperoncini: Pickled banana peppers or pepperoncini for a tangy kick.
- Fresh Herbs (Chopped Parsley, Mint): Chopped fresh parsley or mint for a fresh, herbaceous garnish.
- Pine Nuts or Toasted Sesame Seeds: For added texture and nutty flavor.
Serving Style:
- Individual Pitas: Serve each person a fully assembled Grilled Chickpea Veggie Pita as a main course.
- Pita Bar: Set up a “Pita Bar” with grilled vegetables, chickpeas, pita breads, and bowls of toppings and sauces, allowing everyone to customize their own pitas. This is great for parties and gatherings.
- Open-Faced Pitas: Serve the grilled chickpea and vegetable mixture over grilled pita halves for an open-faced presentation.
No matter how you choose to serve them, Grilled Chickpea Veggie Pitas are sure to be a hit. Their customizable nature and delicious, healthy flavors make them a winner for any occasion!
Additional Tips for Perfect Grilled Chickpea Veggie Pitas
To ensure your Grilled Chickpea Veggie Pitas are consistently delicious and a guaranteed success, here are five extra tips to keep in mind:
- Don’t Overcrowd the Grill: When grilling the vegetables and chickpeas, avoid overcrowding the grill grates. Overcrowding lowers the grill temperature and can cause the vegetables to steam instead of sear and char properly. Grill in batches if necessary to ensure everything gets nice grill marks and cooks evenly.
- Marinate for Maximum Flavor: While marinating is optional, it significantly enhances the flavor of the chickpeas and vegetables. Even a short 20-minute marinating time makes a noticeable difference. For the best flavor, marinate for at least 30 minutes to an hour. The marinade infuses the ingredients with flavor and also helps to tenderize them slightly before grilling.
- Control Heat and Watch for Burning: Grilling temperatures can vary, and different vegetables cook at different rates. Keep a close eye on the vegetables while grilling, and adjust the heat as needed to prevent burning. Bell peppers and red onions can withstand slightly higher heat, while zucchini cooks more quickly and can burn easily. Move vegetables to cooler parts of the grill if they are browning too quickly before they are cooked through.
- Warm Pita Bread Just Before Serving: Warm pita bread is much more pliable and enjoyable than cold pita bread. Grill the pitas briefly just before serving to warm them through and enhance their texture. Warm pitas are easier to open into pockets and hold the filling better. Don’t over-grill the pitas, as they can become too crispy and brittle.
- Customize Toppings and Sauces to Your Taste: Grilled Chickpea Veggie Pitas are highly customizable. Feel free to experiment with different toppings and sauces to create your perfect pita. Try different types of hummus, tzatziki variations (like dill or roasted red pepper tzatziki), different cheeses (like halloumi or goat cheese), or add other grilled or fresh vegetables that you enjoy. A drizzle of balsamic glaze or a sprinkle of red pepper flakes can also add extra flavor dimensions.
By keeping these tips in mind, you’ll be well-equipped to create consistently delicious, flavorful, and impressive Grilled Chickpea Veggie Pitas that will be a hit with everyone!
FAQ About Grilled Chickpea Veggie Pitas
Here are some frequently asked questions about making Grilled Chickpea Veggie Pitas, along with helpful answers to guide you to grilling success:
Q1: Can I make Grilled Chickpea Veggie Pitas ahead of time?
A1: Yes, you can prepare certain components of the Grilled Chickpea Veggie Pitas ahead of time to save time on the day of serving.
- Marinade and Vegetables: You can prepare the marinade and chop the vegetables and marinate them up to a day in advance. Store the marinated vegetables covered in the refrigerator.
- Grilled Vegetables and Chickpeas: Grilled vegetables and chickpeas can be grilled a few hours ahead of time and kept at room temperature or lightly warmed before assembling the pitas. They are best served warm or at room temperature, not cold.
- Pita Bread: Pita bread is best grilled just before serving to ensure it is warm and pliable.
Assemble the pitas just before serving to prevent the pitas from becoming soggy and to enjoy the best texture and flavor.
Q2: Can I bake the vegetables instead of grilling them?
A2: Yes, if you don’t have a grill or prefer to bake the vegetables, you can definitely bake them instead of grilling.
- Baking Instructions: Preheat your oven to 400°F (200°C). Toss the marinated chickpeas and vegetables on a baking sheet in a single layer. Roast for 20-25 minutes, or until the vegetables are tender-crisp and slightly browned, flipping halfway through.
While baking will not impart the same smoky char as grilling, it is a convenient and delicious alternative, especially during colder months or when grilling is not feasible.
Q3: Can I use different vegetables in these pitas?
A3: Absolutely! Grilled Chickpea Veggie Pitas are very versatile, and you can easily use different vegetables based on your preferences and what’s in season. Some other delicious vegetables to grill and include in your pitas are:
- Eggplant: Sliced eggplant, brushed with olive oil and grilled until tender.
- Asparagus: Grilled asparagus spears.
- Broccoli or Broccolini: Broccoli or broccolini florets, lightly tossed with olive oil and grilled.
- Carrots: Sliced or halved carrots, grilled until tender and slightly caramelized.
- Portobello Mushrooms: Grilled portobello mushroom caps, sliced or diced.
- Corn on the Cob (kernels removed): Grilled corn kernels, cut off the cob and added to the pita filling.
Feel free to mix and match your favorite grilled vegetables to create your own customized pita filling.
Q4: Can I make these pitas gluten-free?
A4: Yes, you can easily make Grilled Chickpea Veggie Pitas gluten-free by using gluten-free pita bread. Many brands offer gluten-free pita bread made from gluten-free flours. Ensure you purchase pita bread that is specifically labeled as gluten-free. The chickpea and vegetable filling is naturally gluten-free, so the only substitution needed is the pita bread itself.
Q5: What are some vegan topping options for these pitas?
A5: Grilled Chickpea Veggie Pitas are naturally vegan (without feta cheese topping), and there are many delicious vegan toppings you can use to enhance their flavor and texture:
- Hummus: Classic creamy chickpea hummus.
- Vegan Tzatziki Sauce: Vegan tzatziki sauce made with plant-based yogurt.
- Baba Ghanoush: Smoky eggplant dip.
- Tahini Sauce: Creamy tahini-lemon sauce.
- Avocado Slices or Guacamole: Creamy avocado or guacamole.
- Roasted Red Pepper Dip (Muhammara): Spicy and smoky roasted red pepper and walnut dip.
- Vegan Feta Cheese: Crumbled vegan feta cheese alternatives are available.
- Pickled Onions or Radishes: Pickled vegetables for a tangy crunch.
- Fresh Herbs (Parsley, Mint, Cilantro): Chopped fresh herbs for a fresh garnish.
With these diverse and flavorful vegan topping options, you can create a truly satisfying and delicious vegan version of Grilled Chickpea Veggie Pitas.
We hope these FAQs have answered your questions and inspired you to make your own fantastic Grilled Chickpea Veggie Pitas! Happy grilling and enjoy your flavorful and healthy pita creations!
Print
Grilled Chickpea Veggie Pitas recipe
Ingredients
-
- 1 (15-ounce) can Chickpeas, drained and rinsed: Chickpeas are the protein powerhouse of this vegetarian pita, providing a creamy, nutty base for the filling. Canned chickpeas are convenient and work perfectly. Be sure to drain and rinse them thoroughly to remove excess sodium and improve their texture. Rinsing also helps them absorb marinades and seasonings better. For an even smoother and creamier filling, you can remove the chickpea skins after rinsing, though this is optional. If you prefer to cook chickpeas from scratch, you’ll need about ½ cup of dried chickpeas, cooked until tender (yielding approximately 1 ½ cups cooked chickpeas). For a slightly different flavor profile, you could experiment with other beans like cannellini beans or Great Northern beans, but chickpeas are the classic and best-suited choice for this recipe.
-
- 1 Red Bell Pepper, cored, seeded, and quartered: Red bell pepper adds sweetness, vibrant color, and a slightly smoky flavor when grilled. Quartering the pepper makes it easy to grill and handle. You can also use other colors of bell peppers like yellow or orange for variety, or a combination of colors for a visually appealing pita. Bell peppers are a good source of vitamin C and add a satisfying crunch and sweetness to the pitas. If you prefer a milder flavor, you can use poblano peppers, though they will be less sweet. For a spicier kick, consider adding a jalapeño pepper, thinly sliced and grilled alongside the bell peppers.
-
- 1 Zucchini, sliced lengthwise into ½-inch thick planks: Zucchini adds a mild, slightly sweet flavor and a tender texture when grilled. Slicing it lengthwise into planks prevents it from falling through the grill grates and makes it easier to handle. Choose firm zucchini for grilling. You can also use yellow squash or summer squash as alternatives, or a combination of zucchini and squash for visual appeal and flavor variety. Zucchini is low in calories and adds moisture and subtle flavor to the pitas.
-
- 1 Red Onion, cut into ½-inch thick slices: Red onion provides a pungent, slightly sweet, and slightly spicy flavor that mellows beautifully when grilled. Slicing it into thick rounds or wedges prevents it from falling through the grill grates and allows it to caramelize nicely. You can also use yellow or white onions, though red onions offer a slightly sweeter and milder flavor when grilled. Red onion adds a nice bite and visual contrast to the other vegetables.
-
- 4 Pita Breads: Pita breads are the pockets that hold our delicious grilled chickpea and veggie filling. Choose good quality pita breads that are soft and pliable. You can use white pita bread, whole wheat pita bread for a healthier option, or even flavored pita breads like garlic or herb pita for added flavor. Look for pita breads that are not too thick and will easily open into pockets. Before grilling, you can lightly brush the pitas with olive oil for extra flavor and to help them crisp up slightly on the grill.
-
- 1/4 cup Olive Oil, plus more for brushing: Olive oil is essential for grilling the vegetables and chickpeas, preventing them from sticking to the grill grates and adding flavor. Extra virgin olive oil is preferred for its superior flavor and health benefits. You’ll use olive oil for tossing with the chickpeas and vegetables before grilling, and also for brushing the pita breads before grilling. For a richer flavor, you can use infused olive oils, such as garlic or herb-infused olive oil.
-
- 2 tablespoons Lemon Juice, freshly squeezed: Fresh lemon juice adds brightness, acidity, and a zesty flavor that balances the richness of the olive oil and chickpeas and enhances the overall flavor of the pitas. Freshly squeezed lemon juice is always preferred for its superior taste compared to bottled lemon juice. Lemon juice also helps to tenderize the chickpeas and vegetables slightly and adds a refreshing element to the dish.
-
- 2 cloves Garlic, minced: Minced garlic provides a pungent, aromatic base note that enhances the savory flavors of the chickpeas and vegetables. Freshly minced garlic is always best. You can adjust the amount of garlic to your preference – if you prefer a milder garlic flavor, use just one clove, or for a more pronounced garlic taste, use three. For a sweeter, roasted garlic flavor, you can roast a whole head of garlic and use a few cloves of roasted garlic paste in the marinade.
-
- 1 teaspoon Dried Oregano: Dried oregano adds a classic Mediterranean herb flavor that complements chickpeas and vegetables beautifully. Use good quality dried oregano. Fresh oregano can also be used – use about 1 tablespoon of fresh oregano leaves, chopped. Other Mediterranean herbs that would work well include thyme, rosemary, or marjoram, or a blend of Italian herbs.
-
- 1 teaspoon Ground Cumin: Ground cumin adds a warm, earthy, and slightly smoky flavor that enhances the savory notes of the chickpeas and vegetables. Use good quality ground cumin. For a more intense cumin flavor, you can lightly toast cumin seeds in a dry skillet and then grind them yourself before adding to the marinade. Cumin is a key spice in Mediterranean and Middle Eastern cuisine and pairs perfectly with chickpeas.
-
- 1/2 teaspoon Smoked Paprika: Smoked paprika adds a smoky, slightly sweet, and subtly spicy flavor that enhances the grilled character of the dish and adds depth to the chickpea and vegetable mixture. Use good quality smoked paprika. Regular paprika can be used as a substitute, but smoked paprika adds a unique smoky dimension that is highly recommended. For a spicier version, you can use hot smoked paprika or add a pinch of cayenne pepper.
-
- Salt and Black Pepper, to taste: Salt and pepper are essential for seasoning and enhancing the flavors of all the ingredients. Use sea salt or kosher salt for the best flavor. Freshly ground black pepper is also preferred. Be sure to season the chickpeas and vegetables generously before grilling, and taste and adjust seasoning as needed after grilling.
Instructions
Step 1: Prepare the Chickpea and Vegetable Marinade
-
- Combine Marinade Ingredients: In a large bowl, whisk together the olive oil, lemon juice, minced garlic, dried oregano, ground cumin, smoked paprika, salt, and black pepper. Whisk until well combined and emulsified. This marinade will infuse the chickpeas and vegetables with flavor and help them grill beautifully.
-
- Add Chickpeas and Vegetables to Marinade: Add the drained and rinsed chickpeas, quartered red bell pepper, zucchini planks, and red onion slices to the bowl with the marinade.
-
- Toss to Coat: Toss everything together thoroughly to ensure the chickpeas and vegetables are evenly coated with the marinade.
Step 2: Marinate Chickpeas and Vegetables (Optional but Recommended)
-
- Marinate for at least 20 minutes (or up to 1 hour): For the best flavor, allow the chickpeas and vegetables to marinate at room temperature for at least 20 minutes, or up to 1 hour. Marinating allows the flavors to penetrate the chickpeas and vegetables, making them more flavorful and tender when grilled. If marinating for longer than 30 minutes, cover the bowl and refrigerate. Bring back to room temperature before grilling. If you are short on time, you can skip the marinating step and proceed directly to grilling, but marinating enhances the flavor significantly.
Step 3: Preheat Grill and Prepare Vegetables for Grilling
-
- Preheat Grill to Medium-High Heat: Preheat your grill to medium-high heat (around 375-450°F or 190-230°C). You want the grill hot enough to create nice grill marks and cook the vegetables through without burning them too quickly. If using a charcoal grill, wait until the coals are glowing red with a light coating of ash. If using a gas grill, preheat with all burners on medium-high.
-
- Prepare Grill Grates: Clean the grill grates thoroughly and lightly oil them with cooking oil or olive oil to prevent sticking. You can use a grill brush to clean the grates and then dip a paper towel in oil and use tongs to rub it over the hot grates.
-
- Thread Chickpeas onto Skewers (Optional but Recommended): To make grilling chickpeas easier and prevent them from falling through the grill grates, thread them onto metal or soaked bamboo skewers. Thread about 10-12 chickpeas onto each skewer. This will make them easier to flip and grill evenly. If you don’t have skewers, you can grill the chickpeas in a grill basket or directly on well-oiled grates, but be careful as they can roll around.
Step 4: Grill Chickpeas and Vegetables
-
- Grill Bell Peppers and Red Onion: Place the bell pepper quarters and red onion slices directly on the preheated grill grates. Grill for 4-5 minutes per side, or until tender-crisp and slightly charred, turning occasionally.
-
- Grill Zucchini: Place the zucchini planks on the grill grates. Grill for 3-4 minutes per side, or until tender-crisp and grill marks appear, turning once.
-
- Grill Chickpea Skewers (or Chickpeas): Place the chickpea skewers (or chickpeas in a grill basket or directly on grates) on the grill. Grill for 5-7 minutes, turning occasionally, until heated through and slightly charred. If grilling chickpeas directly on grates or in a basket, stir or toss them occasionally to ensure even cooking.
Step 5: Grill Pita Breads (Optional but Recommended)
-
- Lightly Brush Pita Breads with Olive Oil (Optional): Lightly brush both sides of the pita breads with olive oil. This is optional but recommended for extra flavor and to help them crisp up slightly on the grill.
-
- Grill Pita Breads: Place the pita breads on the grill grates. Grill for 1-2 minutes per side, or until warmed through, slightly toasted, and grill marks appear, flipping once. Watch them carefully as they can burn quickly. Grilling the pitas warms them and adds a nice smoky flavor and slightly crispy texture.
Step 6: Assemble Grilled Chickpea Veggie Pitas
-
- Remove Vegetables and Chickpeas from Grill: Remove the grilled bell peppers, red onion, zucchini, and chickpea skewers (or chickpeas) from the grill and set aside.
-
- Chop Grilled Vegetables: Roughly chop the grilled bell peppers, red onion, and zucchini into bite-sized pieces.
-
- Prepare Pita Pockets: Gently open each pita bread to create a pocket.
-
- Fill Pitas: Fill each pita pocket with a generous amount of the grilled chickpeas and chopped grilled vegetables.
-
- Add Toppings (Optional): Add your desired toppings and fillings, such as hummus, tzatziki sauce, crumbled feta cheese, fresh spinach or arugula, sliced cucumber, tomato slices, Kalamata olives, banana peppers, or pepperoncini.
-
- Serve Immediately: Serve the Grilled Chickpea Veggie Pitas immediately while they are warm and the pitas are soft and pliable.
Nutrition
- Serving Size: one normal portion
- Calories: 400-450
- Sugar: 8-10g
- Sodium: 500-600mg
- Fat: 18-22g
- Saturated Fat: 2-3g
- Unsaturated Fat: 14-18g
- Carbohydrates: 50-60g
- Fiber: 10-12g
- Protein: 12-15g


