

There are some recipes that just feel like a small, brilliant discovery, and these Granola Berry Cups are one of them. For the longest time, I was stuck in a breakfast rut, cycling through the same old oatmeal, toast, and scrambled eggs. I craved something that was both genuinely healthy and exciting—something that felt like a treat without the post-sugar guilt. The first time I made these, I was honestly shocked at how simple they were. The process of pressing the warm, honey-scented granola into the muffin tin was so satisfying, and the aroma that filled my kitchen as they baked was absolutely heavenly. But the real magic happened when I served them. My family, who can be notoriously skeptical of my “healthy” experiments, was instantly captivated. The little cups looked like miniature desserts from a fancy bakery. Watching my kids carefully spoon creamy yogurt into the crunchy cups and top them with their favorite berries was a moment of pure joy. They’re now a staple in our home, perfect for busy weekday mornings, lazy weekend brunches, and even as a healthy after-school snack. This recipe isn’t just about making food; it’s about creating a beautiful, delicious, and wholesome experience that everyone will love.
What Are Granola Berry Cups?
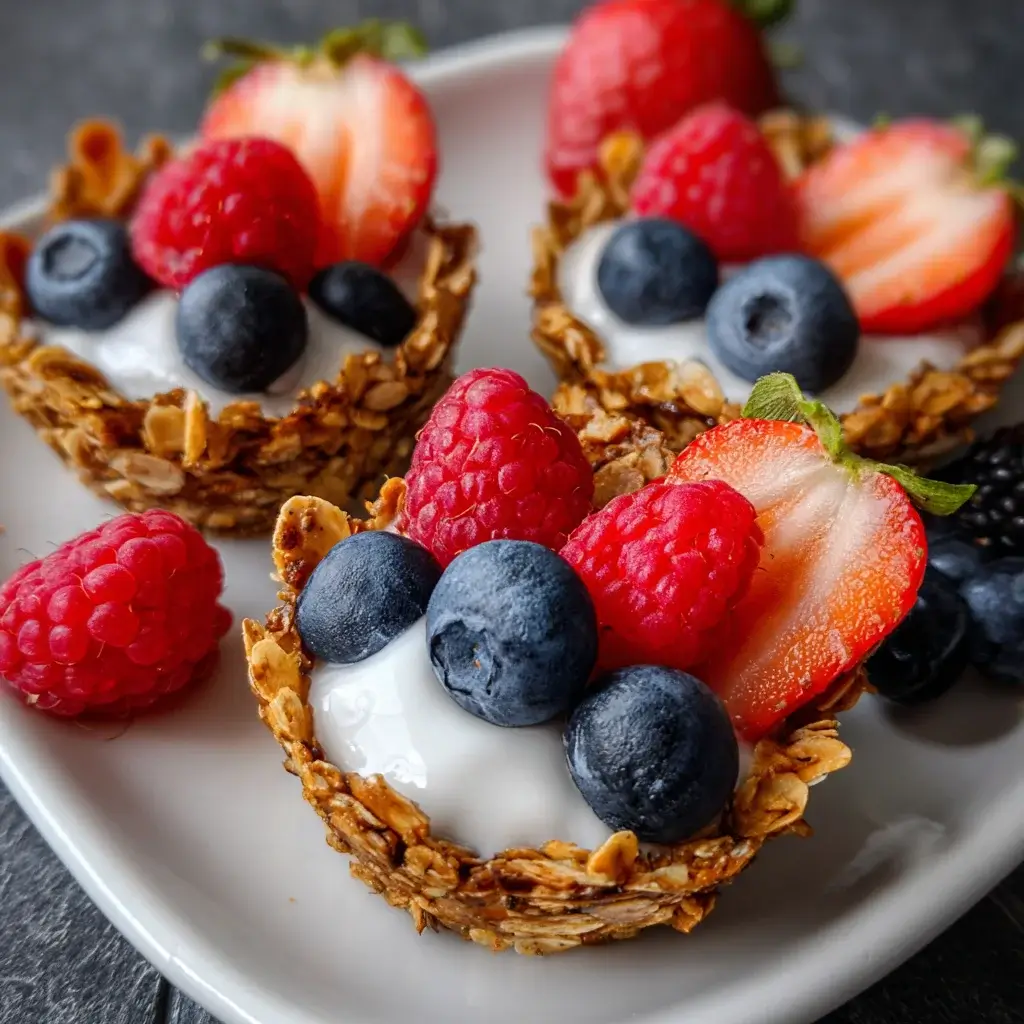
Before we dive into the recipe, let’s break down what makes these little creations so special. Granola Berry Cups are a genius culinary concept that combines the best elements of a granola bar, a yogurt parfait, and a fresh fruit tart into one perfect, single-serving portion. They are essentially edible bowls made from a baked granola mixture, which are then filled with a creamy component and topped with fresh fruit.
Here’s a closer look at the three core components:
- The Granola Cup: This is the foundation. It’s not just loose granola; it’s a carefully balanced mixture of rolled oats, nuts, seeds, and natural sweeteners like honey or maple syrup. This mixture is pressed into a muffin tin and baked until it becomes a firm, crunchy, and self-contained edible cup. It provides a satisfying crunch, wholesome fiber, and a nutty, toasty flavor that is simply irresistible.
- The Creamy Filling: Once the granola cups have cooled, they become the perfect vessel for a creamy filling. The classic choice is Greek yogurt, which provides a wonderful tangy contrast to the sweet granola and a fantastic boost of protein. However, this is where customization shines. You could also use regular yogurt, coconut yogurt for a dairy-free option, or even a light cream cheese filling for a more dessert-like treat.
- The Fresh Topping: The final touch is a generous topping of fresh berries. Blueberries, raspberries, sliced strawberries, and blackberries not only add a vibrant splash of color but also a burst of natural sweetness, tartness, and essential vitamins. The fresh fruit cuts through the richness of the other components, making the entire cup feel light and refreshing.
In essence, Granola Berry Cups are a masterclass in texture and flavor contrast: the crunchy cup, the smooth filling, and the juicy burst of fresh berries create a symphony in every bite. They are the perfect solution for anyone seeking a healthy, beautiful, and convenient breakfast or snack.
Why This Granola Berry Cup Recipe is a Must-Try
You’re going to fall in love with this recipe for so many reasons. It’s more than just a meal; it’s a versatile solution for modern, healthy living.
- Perfect for Meal Prep: This is a meal-prepper’s dream. You can bake a batch of the granola cups at the beginning of the week and store them in an airtight container. Each morning, it takes less than a minute to fill a cup with yogurt and berries for a lightning-fast, grab-and-go breakfast. It completely eliminates the morning rush dilemma.
- Incredibly Healthy and Wholesome: Packed with fiber from the oats, healthy fats from the nuts and seeds, and protein from the Greek yogurt, these cups are a nutritional powerhouse. They provide sustained energy to keep you full and focused for hours, unlike sugary cereals that lead to a crash.
- Completely Customizable: This recipe is a fantastic template that you can adapt to your specific tastes and dietary needs. Not a fan of almonds? Use pecans. Want to add more fiber? Mix in some chia seeds or ground flax. Need it to be vegan? Use maple syrup and coconut yogurt. The possibilities are endless.
- Visually Stunning: Let’s be honest, we eat with our eyes first. These Granola Berry Cups are simply gorgeous. Their vibrant colors and neat, single-serving presentation make them look like they came from a high-end café. They are perfect for impressing guests at a brunch or for making any regular morning feel a little more special.
- Kid-Approved and Fun: Kids adore these cups. The handheld size and the process of filling and topping their own “edible bowl” makes breakfast an exciting activity rather than a chore. It’s a fantastic way to get them to eat a protein-packed, fruit-filled meal without any fuss.
Complete Granola Berry Cup Ingredients
This recipe is designed to create granola cups that are sturdy enough to hold their shape but still have a pleasant, chewy-crisp texture.
For the Granola Cups (Makes 12 Cups):
- Old-Fashioned Rolled Oats: 2 cups (160g) – Do not use instant or quick-cook oats, as they will not provide the right texture.
- Slivered Almonds or Chopped Pecans: ½ cup (60g), roughly chopped
- Unsweetened Shredded Coconut: ¼ cup (20g)
- Ground Cinnamon: 1 teaspoon
- Salt: ¼ teaspoon
- Coconut Oil: ⅓ cup (75g), melted
- Honey or Pure Maple Syrup: ⅓ cup (110g)
- Vanilla Extract: 1 teaspoon
For the Filling and Topping:
- Plain or Vanilla Greek Yogurt: Approximately 2 cups (450g)
- Fresh Mixed Berries: 1 ½ cups, such as blueberries, raspberries, sliced strawberries, and blackberries.
- Fresh Mint Leaves: Optional, for garnish.
Instructions
Follow these detailed steps to create flawless Granola Berry Cups every time.
Part 1: Preparing and Forming the Granola Cups
- Preheat and Prepare: Preheat your oven to 350°F (175°C). Line a standard 12-cup muffin tin with paper or silicone liners. This step is crucial for easy removal, so don’t skip it!
- Combine Dry Ingredients: In a large mixing bowl, add the 2 cups of rolled oats, ½ cup of chopped nuts, ¼ cup of shredded coconut, 1 teaspoon of ground cinnamon, and ¼ teaspoon of salt. Stir everything together with a fork or spatula until it’s evenly combined.
- Melt Wet Ingredients: In a small saucepan over low heat, gently warm the ⅓ cup of coconut oil and ⅓ cup of honey or maple syrup. Stir continuously until the coconut oil is fully melted and the mixture is smooth and liquid. Do not let it boil. Alternatively, you can do this in a microwave-safe bowl in 20-second intervals. Once melted, remove from the heat and stir in the 1 teaspoon of vanilla extract.
- Combine Wet and Dry: Pour the warm, wet mixture over the dry oat mixture in the large bowl. Use a spatula to mix everything together thoroughly. Make sure every oat and nut is completely coated in the honey-coconut oil mixture. This sticky coating is what will bind your cups together.
- Form the Cups: Divide the granola mixture evenly among the 12 prepared muffin cups. An ice cream scoop or a ¼ cup measure can help with this. The mixture will come about halfway up each liner.
- Press Firmly: This is the most critical step for ensuring your cups don’t crumble. Use the bottom of a small glass, a spice jar, or your fingers to press the granola mixture down firmly into the bottom and up the sides of each muffin liner, creating a cup or nest shape. The more compacted the mixture is, the sturdier your final cups will be.
Part 2: Baking and Cooling
- Bake the Cups: Place the muffin tin in the preheated oven. Bake for 12-15 minutes, or until the edges are a beautiful golden brown and the mixture appears set. The smell will be incredible!
- Cool Completely (Crucial Step): Remove the muffin tin from the oven and place it on a wire cooling rack. Let the granola cups cool completely in the muffin tin. This can take at least 1 hour. Do not attempt to remove them while they are still warm, as they will be very fragile and will fall apart. As they cool, the honey and coconut oil will solidify, which is what gives the cups their firm structure.
- Chill (Optional but Recommended): For extra firm cups, you can place the muffin tin in the refrigerator for 30 minutes after they have cooled to room temperature. This will make them even easier to handle.
- Remove from Liners: Once completely cool and firm, carefully lift the granola cups out of the muffin tin. You can either serve them in their paper liners or gently peel the liner away before filling.
Part 3: Assembling and Serving
- Fill the Cups: Right before you are ready to serve, take your cooled granola cups and spoon about 1-2 tablespoons of Greek yogurt into the center of each one.
- Add Toppings: Top the yogurt with a generous amount of fresh mixed berries. Garnish with a fresh mint leaf for an extra touch of elegance, if desired.
- Serve Immediately: Serve the assembled Granola Berry Cups immediately to ensure the granola cup stays crunchy.
Nutrition Facts
- Servings: This recipe makes 12 Granola Berry Cups.
- Calories per serving (1 cup with yogurt and berries): Approximately 200-250 calories.
Disclaimer: The nutritional information provided is a rough estimate. Actual values will vary based on the specific ingredients used, such as the type of nuts, sweetener (honey vs. maple syrup), and the fat content of the yogurt.
Preparation time
- Preparation Time: 15 minutes
- Bake Time: 12-15 minutes
- Cooling Time: 1 hour (minimum)
- Total Time: Approximately 1 hour 30 minutes
How to Serve
These cups are incredibly versatile. Here are a few creative ways to serve them:
- The Perfect Brunch Buffet Star:
- Arrange the empty granola cups on a beautiful platter.
- Set up a “DIY Yogurt Cup Bar” with bowls of Greek yogurt, various fresh fruits (berries, kiwi, mango), a drizzle of honey, and extra toppings like chia seeds or a sprinkle of cinnamon.
- This allows guests to customize their cups and creates a fun, interactive food station.
- A Healthy and Elegant Dessert:
- For a dessert twist, fill the cups with a slightly sweetened cream cheese or mascarpone filling instead of yogurt.
- Top with berries and a drizzle of melted dark chocolate for a truly decadent but still relatively wholesome treat.
- The Ultimate On-the-Go Breakfast:
- For busy mornings, simply grab a pre-made granola cup, add a scoop of yogurt, and top with whatever fruit you have on hand. It’s a perfectly portioned, nutrient-dense breakfast you can eat on your way out the door.
- A Fun After-School Snack for Kids:
- Let your kids build their own snack. Give them an empty cup and let them choose their yogurt and fruit toppings. It’s a healthy snack that they will be excited to eat because they helped make it.
Additional tips
- Don’t Be Afraid to Press Firmly: I cannot stress this enough. The number one reason for crumbly cups is not compacting the granola mixture tightly enough. Use the back of a spoon or the bottom of a glass to really press it down and up the sides. This ensures a sturdy, well-formed cup.
- Customize Your Mix-Ins: The granola base is your canvas. Feel free to add 1-2 tablespoons of chia seeds, ground flaxseed, or hemp seeds for an extra boost of fiber and omega-3s. You can also swap the cinnamon for pumpkin pie spice in the fall for a seasonal twist.
- Storage is Key: Store the empty granola cups in an airtight container at room temperature for up to one week. Do not store them filled, as the yogurt will make the cups soggy within a few hours. This makes them perfect for meal prepping.
- Watch Them Closely While Baking: Ovens can vary, and the high sugar content from the honey/maple syrup means these can go from golden brown to burnt quite quickly. Keep an eye on them during the last few minutes of baking. You’re looking for lightly browned edges.
- For a Sweeter Treat: If you’re serving these as more of a dessert, you can fold a tablespoon of honey or maple syrup directly into the Greek yogurt before filling the cups. A vanilla bean-infused yogurt also works beautifully.
FAQ section
1. Can I make these granola cups no-bake?
While the baked version provides the best crunch and toasty flavor, you can make a no-bake version. To do this, you’ll want to use a binder that firms up when chilled. Replace the melted coconut oil with an equal amount of creamy peanut butter or almond butter. Mix everything as directed, press into the lined muffin tin, and then place the tin in the freezer for at least 1-2 hours, or until the cups are completely solid. Store these no-bake cups in the freezer and fill them just before serving.
2. How do I make this recipe vegan and gluten-free?
It’s very simple to adapt!
- For Vegan: Ensure you use pure maple syrup instead of honey. For the filling, use a plant-based yogurt, such as coconut, almond, or soy yogurt.
- For Gluten-Free: Make sure you purchase certified gluten-free rolled oats. While oats are naturally gluten-free, they are often processed in facilities with wheat, so cross-contamination is a risk unless they are certified. All other ingredients are typically naturally gluten-free, but always check labels to be sure.
3. My granola cups fell apart. What went wrong?
This is the most common issue and it’s usually due to one of three things:
- Not pressing the mixture firmly enough: The mixture needs to be very compact.
- Removing them from the tin while still warm: They are extremely fragile before they have cooled and set completely. Be patient!
- Incorrect wet-to-dry ingredient ratio: Make sure your measurements are accurate. Too little binder (honey/oil) will result in a dry, crumbly mixture.
4. Can I freeze the granola cups?
Yes! The baked, empty granola cups freeze beautifully. Once they are completely cool, place them in a freezer-safe bag or airtight container. They can be frozen for up to 3 months. To use, simply let them thaw at room temperature for about 30 minutes before filling and serving.
5. What are some other filling ideas besides Greek yogurt?
The possibilities are endless! You could try:
- Cottage Cheese: For an extra protein punch.
- Chocolate Avocado Mousse: For a rich and healthy dessert filling.
- Lemon Curd or Fruit Compote: For a sweet-tart filling.
- Chia Seed Pudding: For a fiber-packed, make-ahead filling option.
- Ice Cream or Sorbet: To turn them into miniature ice cream bowls for a summer treat.

Granola Berry Cups recipe
Ingredients
For the Granola Cups (Makes 12 Cups):
-
Old-Fashioned Rolled Oats: 2 cups (160g) – Do not use instant or quick-cook oats, as they will not provide the right texture.
-
Slivered Almonds or Chopped Pecans: ½ cup (60g), roughly chopped
-
Unsweetened Shredded Coconut: ¼ cup (20g)
-
Ground Cinnamon: 1 teaspoon
-
Salt: ¼ teaspoon
-
Coconut Oil: ⅓ cup (75g), melted
-
Honey or Pure Maple Syrup: ⅓ cup (110g)
-
Vanilla Extract: 1 teaspoon
For the Filling and Topping:
-
Plain or Vanilla Greek Yogurt: Approximately 2 cups (450g)
-
Fresh Mixed Berries: 1 ½ cups, such as blueberries, raspberries, sliced strawberries, and blackberries.
-
Fresh Mint Leaves: Optional, for garnish.
Instructions
Part 1: Preparing and Forming the Granola Cups
-
Preheat and Prepare: Preheat your oven to 350°F (175°C). Line a standard 12-cup muffin tin with paper or silicone liners. This step is crucial for easy removal, so don’t skip it!
-
Combine Dry Ingredients: In a large mixing bowl, add the 2 cups of rolled oats, ½ cup of chopped nuts, ¼ cup of shredded coconut, 1 teaspoon of ground cinnamon, and ¼ teaspoon of salt. Stir everything together with a fork or spatula until it’s evenly combined.
-
Melt Wet Ingredients: In a small saucepan over low heat, gently warm the ⅓ cup of coconut oil and ⅓ cup of honey or maple syrup. Stir continuously until the coconut oil is fully melted and the mixture is smooth and liquid. Do not let it boil. Alternatively, you can do this in a microwave-safe bowl in 20-second intervals. Once melted, remove from the heat and stir in the 1 teaspoon of vanilla extract.
-
Combine Wet and Dry: Pour the warm, wet mixture over the dry oat mixture in the large bowl. Use a spatula to mix everything together thoroughly. Make sure every oat and nut is completely coated in the honey-coconut oil mixture. This sticky coating is what will bind your cups together.
-
Form the Cups: Divide the granola mixture evenly among the 12 prepared muffin cups. An ice cream scoop or a ¼ cup measure can help with this. The mixture will come about halfway up each liner.
-
Press Firmly: This is the most critical step for ensuring your cups don’t crumble. Use the bottom of a small glass, a spice jar, or your fingers to press the granola mixture down firmly into the bottom and up the sides of each muffin liner, creating a cup or nest shape. The more compacted the mixture is, the sturdier your final cups will be.
Part 2: Baking and Cooling
-
Bake the Cups: Place the muffin tin in the preheated oven. Bake for 12-15 minutes, or until the edges are a beautiful golden brown and the mixture appears set. The smell will be incredible!
-
Cool Completely (Crucial Step): Remove the muffin tin from the oven and place it on a wire cooling rack. Let the granola cups cool completely in the muffin tin. This can take at least 1 hour. Do not attempt to remove them while they are still warm, as they will be very fragile and will fall apart. As they cool, the honey and coconut oil will solidify, which is what gives the cups their firm structure.
-
Chill (Optional but Recommended): For extra firm cups, you can place the muffin tin in the refrigerator for 30 minutes after they have cooled to room temperature. This will make them even easier to handle.
-
Remove from Liners: Once completely cool and firm, carefully lift the granola cups out of the muffin tin. You can either serve them in their paper liners or gently peel the liner away before filling.
Part 3: Assembling and Serving
-
Fill the Cups: Right before you are ready to serve, take your cooled granola cups and spoon about 1-2 tablespoons of Greek yogurt into the center of each one.
-
Add Toppings: Top the yogurt with a generous amount of fresh mixed berries. Garnish with a fresh mint leaf for an extra touch of elegance, if desired.
-
Serve Immediately: Serve the assembled Granola Berry Cups immediately to ensure the granola cup stays crunchy.
Nutrition
- Serving Size: one normal portion
- Calories: 200-250


