

Introduction
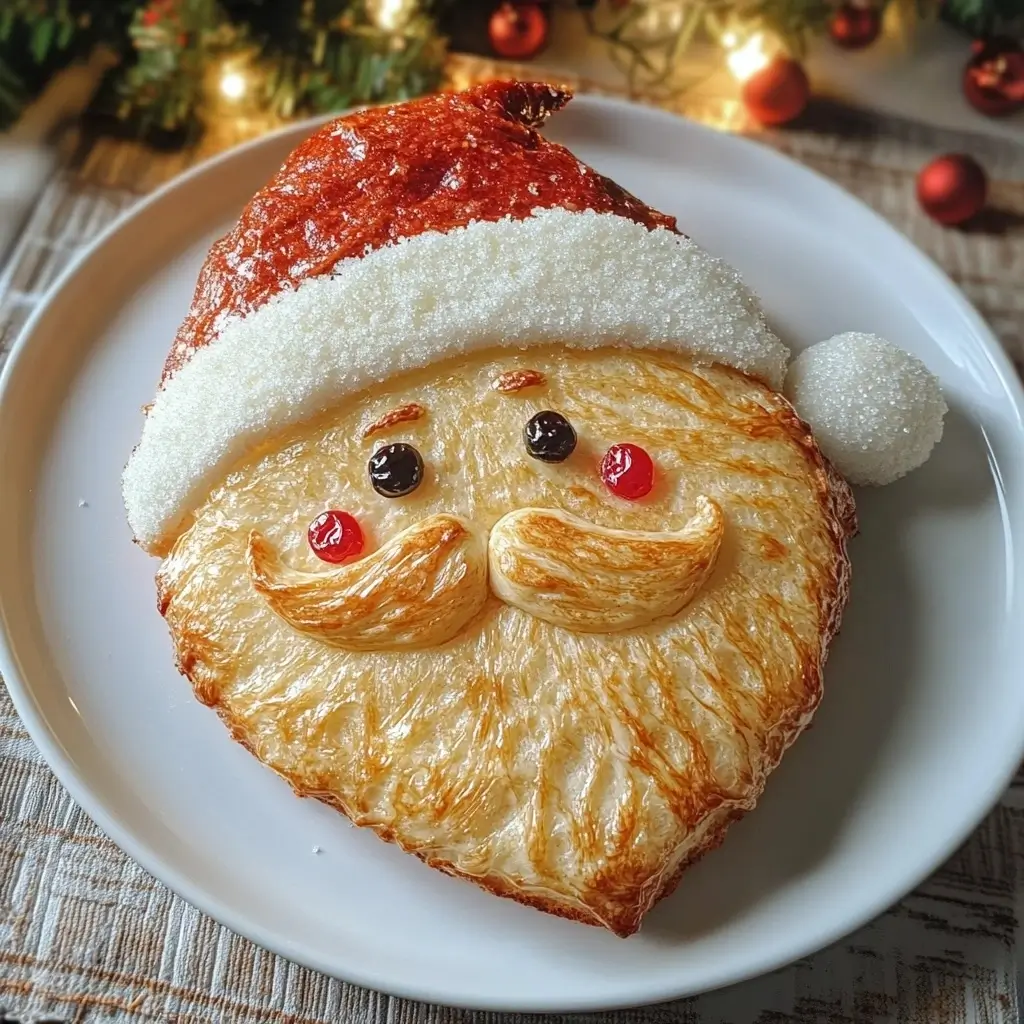
The holiday season brings with it an abundance of joy, laughter, and of course, deliciously festive food. Among the plethora of holiday treats, Golden Santa Bread stands out as a delightful centerpiece that not only tastes heavenly but also adds a whimsical touch to your holiday table. This uniquely shaped bread, resembling jolly old Saint Nick himself, is both a feast for the eyes and the palate. Whether you’re an experienced baker or a novice in the kitchen, this recipe is sure to become a cherished tradition in your festive celebrations.
Ingredients
To create this charming and tasty bread, you’ll need a handful of simple ingredients. Here’s what you’ll need to gather:
- 4 to 4.5 cups bread flour
- 1/2 cup sugar
- 2 packets (1/4 oz each) active dry yeast
- 1.5 tsp salt
- 1/2 cup milk (2% or any plant-based alternative)
- 1/4 cup warm water
- 1/4 cup cubed butter (or a dairy-free alternative)
- 2 large eggs (room temperature)
- 2 raisins (for decoration)
- 2 egg yolks
- 2-3 drops red food coloring
Instructions
Creating Golden Santa Bread is a fun and rewarding experience. Follow these step-by-step instructions to ensure your Santa Bread turns out perfect every time:
Step 1: Mix Dry Ingredients
In a large bowl, combine 2 cups of flour, sugar, yeast, and salt. This will serve as the foundational mixture for your dough.
Step 2: Heat Liquids
In a small saucepan, warm the milk, water, and butter to a temperature of 120-130°F. Be careful not to overheat, as this can affect the yeast’s activity.
Step 3: Combine
Pour the warm liquid mixture into the dry ingredients. Mix until moistened, then add the eggs. Beat the mixture until smooth. Gradually incorporate enough of the remaining flour to form a stiff dough.
Step 4: Knead
Turn the dough onto a floured surface and knead for 6-8 minutes until it becomes smooth and elastic. Once kneaded, place the dough in a greased bowl, cover it, and let it rise in a warm spot for about 1 hour, or until it has doubled in size.
Step 5: Shape
Preheat your oven to 350°F. Punch down the dough to release any air bubbles. Divide the dough into two parts: one larger for Santa’s head and hat, and one smaller for the details.
- Shape the larger piece into a triangle to form Santa’s head and hat.
- Use half of the smaller piece to create a beard, and the rest to craft a mustache, nose, eyebrows, and a hat trim.
Step 6: Decorate
Use a knife to texture the beard and mustache to resemble hair. Add raisins for eyes and shape a small piece of dough into the pompom for Santa’s hat.
Step 7: Brush with Egg Yolk
In small bowls, beat each egg yolk separately. Add red food coloring to one yolk and brush it onto the hat. Use the plain yolk to brush the rest of the dough, giving it a beautiful golden hue.
Step 8: Bake
Cover the bread loosely with foil and bake for 15 minutes. Then, uncover and bake for another 10-12 minutes until the bread is a lovely golden brown.
Step 9: Cool
Remove the bread from the oven and allow it to cool on a wire rack. This ensures that it sets properly and is ready to be served.
Nutrition Facts
While Golden Santa Bread is a treat, it’s also helpful to know what you’re consuming. Below are the approximate nutrition facts per serving (considering the bread is divided into 12 servings):
- Calories: 200 kcal
- Carbohydrates: 35g
- Protein: 5g
- Fat: 5g
- Saturated Fat: 3g
- Cholesterol: 50mg
- Sodium: 300mg
- Fiber: 1g
- Sugar: 5g
Keep in mind that these values can vary slightly based on the specific ingredients used and portion sizes.
How to Serve
Golden Santa Bread is as versatile as it is charming, making it a delightful addition to any holiday gathering or meal. Here are several creative and comprehensive ways to serve and enjoy this festive bread, ensuring that it not only complements your culinary offerings but also enhances the overall atmosphere of your celebration.
As a Table Centerpiece
Transform your dining experience by placing Golden Santa Bread at the center of your holiday table. Its eye-catching shape and rich golden hue create a stunning visual focal point that is sure to delight guests and spark conversation. To elevate its presentation, consider placing the bread on a decorative platter or cake stand, surrounded by seasonal decorations such as evergreen sprigs, pinecones, or small ornaments. This not only highlights the bread but also adds a touch of holiday spirit to your table. Encourage guests to admire its intricate design before slicing into it, making it a memorable part of your festive gathering.
With Sweet Spreads
The mild sweetness and rich texture of Golden Santa Bread make it an ideal canvas for a variety of sweet spreads. Enhance its flavor profile by pairing it with an assortment of spreads such as:
- Honey: Drizzle warm or whipped honey over slices for a touch of natural sweetness that complements the bread’s flavor.
- Fruit Jam: Offer a selection of jams, such as raspberry, apricot, or fig, for guests to spread on their bread. The contrast of sweet and tart flavors will elevate the tasting experience.
- Butter: Serve with high-quality butter, either salted or unsalted. For an extra festive touch, consider using compound butter infused with herbs or spices, like cinnamon or orange zest, to add a unique twist to each bite.
These combinations can turn each piece of Golden Santa Bread into a delightful treat that guests will love.
As Part of a Brunch
Golden Santa Bread can be a star player in your holiday brunch spread. Its sweet, comforting flavor pairs wonderfully with classic breakfast items. Here’s how to incorporate it into your brunch menu:
- Accompanying Dishes: Serve the bread alongside fluffy scrambled eggs, crispy bacon, or savory quiches for a balanced meal. The sweetness of the bread offers a delightful contrast to the savory flavors of traditional brunch items.
- Fruit Pairings: Include fresh fruit options such as berries, citrus segments, or sliced melons to add a refreshing element to the plate. The vibrant colors and natural sweetness of the fruit will complement the bread beautifully.
- Beverage Pairings: Consider serving Golden Santa Bread with warm beverages such as spiced cider, hot chocolate, or coffee. These drinks will not only enhance the flavors of the bread but also create a cozy atmosphere for your guests.
As a Snack
Golden Santa Bread can also be enjoyed as a light, festive snack throughout the holiday season. Its soft texture and delightful flavor make it a perfect option for casual snacking. Here are some ideas to make the most of this versatile bread:
- On Its Own: Simply slice a piece and enjoy it fresh from the oven or at room temperature. The bread is delicious in its own right, allowing its rich, buttery flavor to shine.
- With Cheese: Create a simple cheese platter by pairing slices of Golden Santa Bread with a selection of cheeses. Soft cheeses like brie or goat cheese can create a lovely contrast, while sharper cheeses like aged cheddar will add depth to the flavor experience.
- As a Toast: For a quick and easy snack, toast slices of the bread and top them with your favorite toppings, such as avocado, smoked salmon, or ricotta cheese drizzled with honey. This transforms a simple snack into a gourmet delight.
Incorporating Golden Santa Bread into your holiday festivities not only enhances your culinary offerings but also creates an inviting atmosphere for guests. Its versatility allows you to serve it in various ways, ensuring that every gathering feels special and memorable. Enjoy experimenting with these serving ideas to make the most of this charming seasonal bread!
Additional Tips
To ensure your Golden Santa Bread is a success, consider the following tips:
Consistency Matters
When it comes to bread making, achieving the right dough consistency is crucial. As you knead the dough, aim for a texture that is smooth and elastic. This indicates that the gluten, the protein that gives bread its structure, is developing correctly. To check the dough’s readiness, perform the “windowpane test”: take a small piece of dough and stretch it gently between your fingers. If it can stretch thin enough to let light through without tearing, you’ve achieved the desired gluten development. If the dough tears easily, continue kneading for a few more minutes until the proper elasticity is achieved. This step is essential because it will lead to a bread that rises well and has a delightful chewy texture.
Proper Rising
Proper dough rising, or fermentation, is critical to developing flavor and texture in your Golden Santa Bread. The dough should ideally double in size during its first rise, which typically takes about 1 to 2 hours, depending on the ambient temperature. If your kitchen is cool, consider placing the dough in a slightly warm area, such as an oven preheated to the lowest setting for a few minutes and then turned off, or simply cover it with a damp cloth to retain warmth. To test if the dough has risen sufficiently, gently poke it with your finger; if the indentation remains, it’s ready for the next step. If it springs back quickly, give it a bit more time to rise. Patience is key here, as an adequately risen dough will yield a light, airy bread.
Creative Decorations
Let your creativity shine through in the decoration of your Golden Santa Bread! While the traditional design is charming, you can add your unique twist. Use chocolate chips, dried fruits, or icing to create expressive features such as eyes, buttons, or even a whimsical smile for Santa. For the hat, consider using red icing or edible glitter to give it a festive flair. You can also incorporate nuts or seeds for added texture and flavor. Don’t be afraid to experiment with different colors and shapes—this is the perfect opportunity to make your Santa Bread truly one-of-a-kind and a centerpiece for your holiday table.
Storage
To keep your Golden Santa Bread fresh and delicious, proper storage is essential. If you have leftovers, place them in an airtight container at room temperature. This will help maintain the bread’s moisture and prevent it from drying out. If you anticipate not finishing the bread within a few days, consider freezing it. To freeze, wrap the bread tightly in plastic wrap or aluminum foil, and then place it in a freezer-safe bag. This will protect it from freezer burn and preserve its texture. When you’re ready to enjoy the bread again, simply thaw it at room temperature or warm it in the oven for a few minutes to revive its fresh-baked aroma and taste. With these storage tips, you can savor the delightful flavors of your Golden Santa Bread long after the holiday festivities have ended.
By following these detailed tips, you can elevate your Golden Santa Bread experience, ensuring that it is not only a visual delight but also a delicious treat that will impress your family and friends during the holiday season. Happy baking!
FAQs
Q: Can I use whole wheat flour instead of bread flour?
A: Yes, but keep in mind that whole wheat flour may result in a denser bread. You might want to use a mix of whole wheat and bread flour for a lighter texture.
Q: How can I make this recipe vegan?
A: Substitute the milk with a plant-based alternative, the butter with a dairy-free option, and the eggs with a flaxseed or chia seed mixture.
Q: Can I prepare the dough ahead of time?
A: Yes, you can prepare the dough a day in advance and let it rise slowly in the refrigerator. Bring it to room temperature before baking.
Q: What if I don’t have red food coloring?
A: You can use beet juice as a natural alternative for coloring the hat.
Conclusion
Golden Santa Bread is more than just a delightful treat; it’s a celebration of creativity and festivity that brings joy to any holiday gathering. With its charming appearance and delicious taste, this bread is sure to become a favorite in your home. Whether you’re sharing it with family or gifting it to friends, Golden Santa Bread is a testament to the warmth and joy of the holiday season. So gather your ingredients, don your apron, and bring a touch of magic to your kitchen with this enchanting recipe. Happy baking and happy holidays! 🎅✨
Print
Golden Santa Bread recipe🎅✨
Ingredients
- 4 to 4.5 cups bread flour
- 1/2 cup sugar
- 2 packets (1/4 oz each) active dry yeast
- 1.5 tsp salt
- 1/2 cup milk (2% or any plant-based alternative)
- 1/4 cup warm water
- 1/4 cup cubed butter (or a dairy-free alternative)
- 2 large eggs (room temperature)
- 2 raisins (for decoration)
- 2 egg yolks
- 2–3 drops red food coloring
Instructions
Step 1: Mix Dry Ingredients
In a large bowl, combine 2 cups of flour, sugar, yeast, and salt. This will serve as the foundational mixture for your dough.
Step 2: Heat Liquids
In a small saucepan, warm the milk, water, and butter to a temperature of 120-130°F. Be careful not to overheat, as this can affect the yeast’s activity.
Step 3: Combine
Pour the warm liquid mixture into the dry ingredients. Mix until moistened, then add the eggs. Beat the mixture until smooth. Gradually incorporate enough of the remaining flour to form a stiff dough.
Step 4: Knead
Turn the dough onto a floured surface and knead for 6-8 minutes until it becomes smooth and elastic. Once kneaded, place the dough in a greased bowl, cover it, and let it rise in a warm spot for about 1 hour, or until it has doubled in size.
Step 5: Shape
Preheat your oven to 350°F. Punch down the dough to release any air bubbles. Divide the dough into two parts: one larger for Santa’s head and hat, and one smaller for the details.
- Shape the larger piece into a triangle to form Santa’s head and hat.
- Use half of the smaller piece to create a beard, and the rest to craft a mustache, nose, eyebrows, and a hat trim.
Step 6: Decorate
Use a knife to texture the beard and mustache to resemble hair. Add raisins for eyes and shape a small piece of dough into the pompom for Santa’s hat.
Step 7: Brush with Egg Yolk
In small bowls, beat each egg yolk separately. Add red food coloring to one yolk and brush it onto the hat. Use the plain yolk to brush the rest of the dough, giving it a beautiful golden hue.
Step 8: Bake
Cover the bread loosely with foil and bake for 15 minutes. Then, uncover and bake for another 10-12 minutes until the bread is a lovely golden brown.
Step 9: Cool
Remove the bread from the oven and allow it to cool on a wire rack. This ensures that it sets properly and is ready to be served
Nutrition
- Serving Size: one normal portion
- Calories: 200 kcal
- Sugar: 5g
- Sodium: 300mg
- Fat: 5g
- Saturated Fat: 3g
- Carbohydrates: 35g
- Fiber: 1g
- Protein: 5g
- Cholesterol: 50mg


