

Are you a dessert enthusiast with a love for Italian cuisine but also mindful of gluten-free requirements? If so, you are in for a treat! This article provides a comprehensive guide to making a Gluten Free Tiramisu that is both delicious and easy to prepare. With creamy layers and a hint of coffee, this dessert is perfect for any occasion. Whether you are hosting a dinner party or simply enjoying a treat at home, this gluten-free version of the classic Italian dessert will surely impress.
Ingredients
Before diving into the preparation steps, gather the necessary ingredients. Here is what you will need to create this delightful gluten-free dessert:
- 1 cup brewed coffee, cooled
- 1/2 cup milk (dairy or non-dairy)
- 8 oz cream cheese, softened
- 1/2 cup powdered sugar
- 1 tsp vanilla extract
- Gluten-free ladyfinger cookies (or sponge cake)
- Unsweetened cocoa powder (for dusting)
With these ingredients at hand, you’re ready to embark on your culinary journey!
Instructions
Creating a Gluten Free Tiramisu is a straightforward process. Follow these simple steps, and you’ll have a delectable dessert ready in no time:
- Mix the Cream Cheese Mixture:
- In a medium-sized bowl, combine the softened cream cheese, powdered sugar, and vanilla extract.
- Use a hand mixer or a spatula to mix until the mixture is smooth and creamy.
- Prepare the Coffee Dip:
- Brew a cup of your favorite coffee and allow it to cool.
- Once cooled, pour it into a shallow dish for easy dipping.
- Layer the Cookies:
- Quickly dip each gluten-free ladyfinger cookie into the cooled coffee. Ensure they are soaked but not too soggy.
- Arrange the soaked cookies in a single layer at the bottom of your chosen dish.
- Add the Cream Cheese Mixture:
- Spread half of the cream cheese mixture evenly over the layer of cookies.
- Repeat the Layers:
- Add another layer of coffee-dipped cookies on top of the cream cheese mixture.
- Spread the remaining cream cheese mixture over the second layer of cookies.
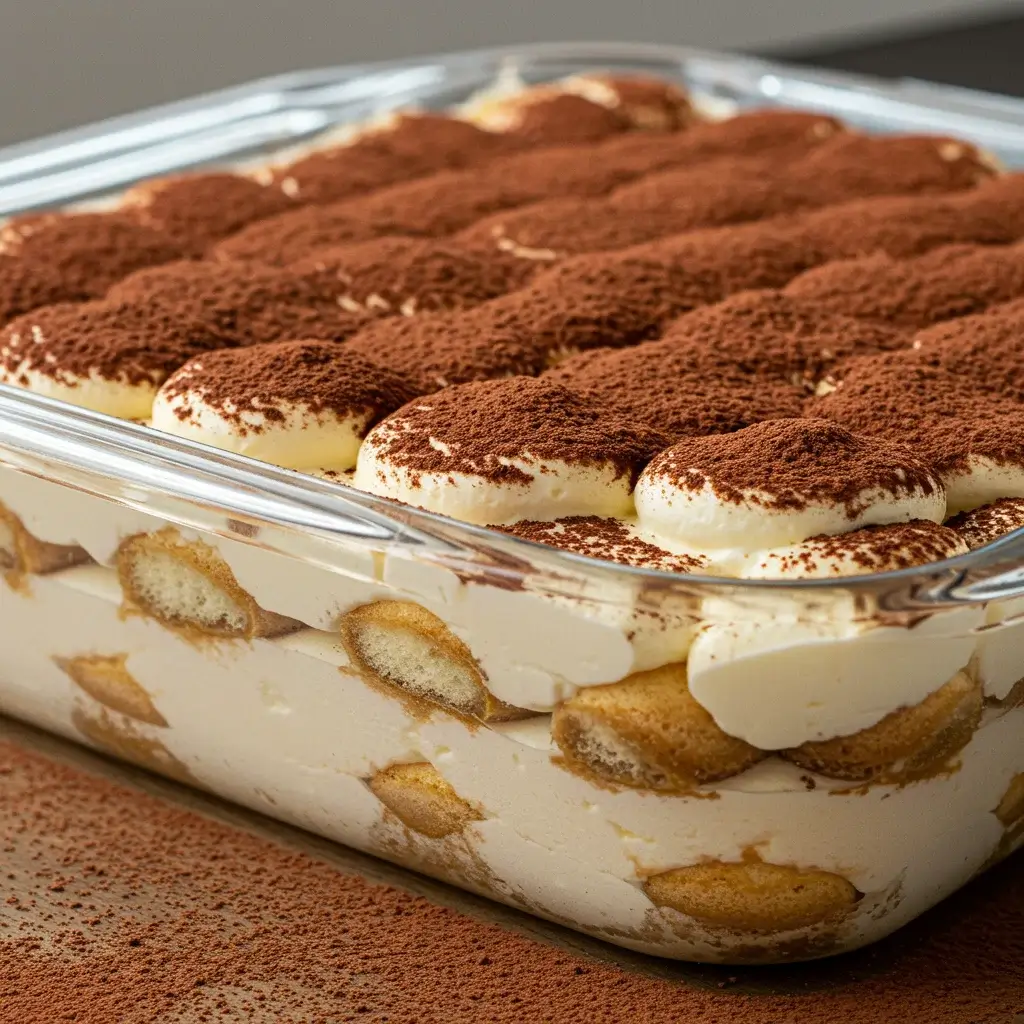
- Dust with Cocoa Powder:
- Generously dust the top of the tiramisu with unsweetened cocoa powder for a rich finish.
- Refrigerate:
- Cover the dish and refrigerate for at least 4 hours. This chill time allows the flavors to meld and results in a firmer texture.
Prep Time: 30 minutes
Chill Time: 4 hours
Total Time: 4 hours 30 minutes
Nutrition Facts
Understanding the nutritional content of your dessert can be crucial, especially for those mindful of their dietary intake. Here are the nutrition facts per serving for this Gluten Free Tiramisu:
- Calories: 250
- Protein: 5g
- Fat: 15g
- Carbs: 30g
- Fiber: 1g
How to Serve
Serving your Gluten-Free Tiramisu is as important as the meticulous process of making it. The way you present and serve your dessert can elevate the overall dining experience and impress your guests. Here are several comprehensive tips to enhance both the presentation and enjoyment of this classic Italian dessert:
Chilled to Perfection
Before serving, it’s crucial to ensure that your tiramisu is well-chilled. Ideally, you should refrigerate it for at least 4-6 hours, or overnight if possible. This chilling time allows the flavors to meld beautifully and the layers to set, resulting in a firmer, more cohesive texture. A cold tiramisu is not only refreshing but also enhances the dessert’s rich flavors. Consider taking it out of the fridge about 10-15 minutes before serving to allow it to soften slightly; this makes cutting and serving easier without compromising its integrity.
Garnish
A thoughtful garnish can elevate the visual appeal of your tiramisu. Here are some ideas to add that extra touch of elegance:
- Chocolate Shavings: Finely grated dark or white chocolate can add a delightful texture and rich flavor. Use a vegetable peeler to create delicate curls that you can sprinkle generously on top of the dessert just before serving.
- Fresh Berries: A handful of fresh raspberries or strawberries can introduce a pop of color and a refreshing tartness that beautifully contrasts the creamy layers of tiramisu.
- Mint Sprig: A sprig of fresh mint not only looks stunning but also adds a hint of freshness. Place it strategically on top of the dessert for a vibrant touch.
- Cocoa Powder: Dusting a light layer of cocoa powder right before serving can enhance the traditional aspect of tiramisu and provide a beautiful, rustic finish.
Plate Presentation
The way you present your tiramisu can significantly impact your guests’ perception. Here are some techniques to ensure a polished look:
- Use a Sharp Knife: When cutting the tiramisu, use a sharp knife to create clean, precise slices. This avoids a messy presentation and keeps the layers intact.
- Decorative Plates: Choose decorative plates that complement the colors and textures of the tiramisu. A white plate can create a beautiful contrast, allowing the dessert to stand out, while a colorful or patterned plate can add an artistic flair.
- Layering Effect: When plating, consider serving individual portions in clear glass cups or jars. This allows guests to see the beautiful layers of coffee-soaked ladyfingers, creamy mascarpone, and cocoa dusting, enhancing the overall visual appeal.
Pairing Suggestions
To enhance the flavors of your tiramisu, consider pairing it with complementary beverages. Here are some suggestions:
- Espresso: A rich, bold cup of espresso is a classic pairing for tiramisu. The bitterness of the coffee nicely balances the sweetness of the dessert and brings out its coffee flavors.
- Dessert Wine: A glass of dessert wine, such as Vin Santo or Moscato, can elevate the experience. The sweetness and fruity notes of these wines harmonize with the creamy texture of the tiramisu.
- Liqueurs: For an indulgent twist, consider serving a shot of coffee liqueur, such as Kahlúa or Tia Maria, on the side. Guests can pour it over their slice or sip it alongside the dessert for an extra layer of flavor.
- Herbal Teas: For a non-caffeinated option, herbal teas like chamomile or mint can provide a soothing contrast to the richness of the tiramisu.
Final Touches
Before serving, take a moment to check the overall presentation. Make sure there are no stray crumbs on the plate, and everything looks tidy. You might also want to provide small spoons or forks for easier serving and consumption. If you’re serving a large group, consider offering a few different garnishes or pairings on a side table, allowing guests to personalize their dessert experience.
By paying attention to these details, you can create a memorable serving experience that showcases your Gluten-Free Tiramisu in all its glory. Whether for a special occasion or a simple family dinner, these thoughtful touches will surely impress your guests and make your dessert the star of the evening. Enjoy the compliments that come your way!
Additional Tips
To help you achieve the best results in creating your dessert, consider these additional tips that will enhance your overall experience and outcome:
Choosing the Right Cookies
When selecting cookies for your dessert, it’s essential to ensure that the ladyfinger cookies or sponge cake you choose are certified gluten-free. This not only guarantees that no gluten is present in the ingredients but also minimizes the risk of cross-contamination, especially if you’re preparing the dessert for someone with celiac disease or gluten sensitivity. Look for brands that clearly label their products as gluten-free and check the ingredient list for any potential allergens. If you’re feeling adventurous, you can also try making your own gluten-free ladyfingers or sponge cake at home using alternative flours such as almond flour or a gluten-free flour blend, which can provide a fresher taste and customized texture.
Adjusting Sweetness
Sweetness is a personal preference, and adjusting the amount of powdered sugar in your recipe can significantly influence the final flavor profile. If you’re a fan of desserts that are less sweet, consider reducing the amount of powdered sugar by a quarter or even a half, tasting as you go to ensure you achieve your desired level of sweetness. Conversely, if you prefer a sweeter dessert, you can gradually increase the powdered sugar until it meets your taste. Keep in mind that the sweetness of the dessert can also be affected by other ingredients, such as fruit toppings or syrups, so consider the overall balance when making adjustments.
Vegan Option
For those looking to create a vegan-friendly version of your dessert, there are simple substitutions you can make to ensure that it remains delicious while adhering to a plant-based diet. Start by using non-dairy milk, such as almond, soy, or oat milk, in place of regular dairy milk. Additionally, you can swap out traditional cream cheese for a vegan cream cheese alternative, which is widely available in stores and often made from nuts or soy. These substitutions allow you to maintain the creamy texture and rich flavor of your dessert while accommodating dietary restrictions. Don’t forget to check other ingredients for dairy content, such as whipped toppings or additional flavorings, and opt for vegan-certified products.
Custom Flavors
Infusing your dessert with unique flavors can elevate it from ordinary to extraordinary. Experimenting with different flavorings opens up a world of possibilities. Consider adding a splash of coffee liqueur, which can impart a rich, aromatic depth to your dessert, making it particularly appealing to coffee lovers. Alternatively, a teaspoon of almond extract can add a delightful nuttiness that pairs beautifully with the sweetness of the dessert. For a fruity twist, try incorporating a hint of citrus zest, such as lemon or orange, to brighten the flavors. Always start with a small amount of any additional flavoring, as you can gradually increase it to suit your palate without overpowering the delicate balance of the original recipe.
By keeping these tips in mind, you can not only enhance the quality of your dessert but also personalize it to suit your taste and dietary needs. Happy baking!
FAQs
Q: Can I make this tiramisu ahead of time?
A: Absolutely! This tiramisu can be prepared a day in advance. In fact, allowing it to sit overnight can enhance the flavors.
Q: What can I use instead of cream cheese?
A: Mascarpone cheese is the traditional choice for tiramisu and can be used as an alternative to cream cheese.
Q: How long can I store leftover tiramisu?
A: Store any leftovers in an airtight container in the refrigerator for up to 3 days.
Q: Can I freeze tiramisu?
A: Yes, you can freeze tiramisu. Wrap it tightly in plastic wrap and foil before freezing. Thaw it in the refrigerator before serving.
Conclusion
Creating a Gluten Free Tiramisu is not only achievable but also incredibly rewarding. This exquisite dessert combines rich flavors, creamy textures, and the perfect hint of coffee, ensuring that it satisfies your sweet tooth while adhering to gluten-free dietary needs. The beauty of this gluten-free version lies in its ability to maintain the integrity of the classic tiramisu, offering the same indulgent experience without compromising on taste or texture.
Whether you’re a seasoned baker with years of experience or a novice in the kitchen trying your hand at a new recipe, this guide is designed to lead you through the process with ease and confidence. Each step has been carefully crafted to help you navigate the preparation of this delightful dessert, making it accessible for all skill levels. From selecting gluten-free ingredients to mastering the layering technique, you’ll find that making tiramisu is a fun and gratifying endeavor.
By following this guide, you can confidently prepare a dessert that will impress both family and friends. Imagine the smiles on their faces as you present a beautiful dish of gluten-free tiramisu, its layers of creamy mascarpone and rich coffee inviting them to indulge. This dessert not only serves as a treat but also as a conversation starter—perfect for gatherings, celebrations, or even a simple family dinner.
Gathering your ingredients is the first exciting step in this culinary journey. Make sure to choose high-quality gluten-free ladyfingers or sponge cake, as this is key to achieving the right texture and flavor balance. Additionally, using fresh espresso or strong brewed coffee will elevate the dessert, providing a robust flavor that complements the sweetness of the mascarpone filling. Don’t forget to consider the quality of your cocoa powder, as it will be dusted on top, adding a finishing touch that enhances both the look and taste of your tiramisu.
As you follow the steps, take your time to enjoy the process. Each layer you create brings you one step closer to a masterpiece that reflects your effort and creativity. The beauty of making tiramisu is not just in the final product, but also in the joy of baking and the anticipation of sharing it with others. Once you’ve assembled your tiramisu, allow it to chill in the refrigerator for a few hours (or overnight if possible) to let the flavors meld beautifully. This step is crucial, as it allows the dessert to set properly, ensuring that each bite is a harmonious blend of textures and tastes.
Indulging in your gluten-free tiramisu is the ultimate reward for your hard work. As you take that first spoonful, relish the creamy mascarpone, the delightful hint of coffee, and the slight bitterness of cocoa, all coming together in a symphony of flavors. Each bite transports you to the heart of Italy, where this beloved dessert originated.
In conclusion, making gluten-free tiramisu is not just about creating a dessert; it’s about embracing a culinary experience that brings people together. Enjoy your culinary creation and savor every bite of this delightful tiramisu! Celebrate your accomplishment, and don’t hesitate to share this recipe with others who may be looking for a delicious gluten-free option. After all, desserts are meant to be enjoyed, and with this gluten-free tiramisu, everyone can partake in the joy of a classic treat without restrictions. So, gather your loved ones, serve up your creation, and let the delightful flavors of your gluten-free tiramisu be the highlight of any occasion!
Print
Gluten Free Tiramisu recipe
Ingredients
- 1 cup brewed coffee, cooled
- 1/2 cup milk (dairy or non-dairy)
- 8 oz cream cheese, softened
- 1/2 cup powdered sugar
- 1 tsp vanilla extract
- Gluten-free ladyfinger cookies (or sponge cake)
- Unsweetened cocoa powder (for dusting)
Instructions
- Mix the Cream Cheese Mixture:
- In a medium-sized bowl, combine the softened cream cheese, powdered sugar, and vanilla extract.
- Use a hand mixer or a spatula to mix until the mixture is smooth and creamy.
- Prepare the Coffee Dip:
- Brew a cup of your favorite coffee and allow it to cool.
- Once cooled, pour it into a shallow dish for easy dipping.
- Layer the Cookies:
- Quickly dip each gluten-free ladyfinger cookie into the cooled coffee. Ensure they are soaked but not too soggy.
- Arrange the soaked cookies in a single layer at the bottom of your chosen dish.
- Add the Cream Cheese Mixture:
- Spread half of the cream cheese mixture evenly over the layer of cookies.
- Repeat the Layers:
- Add another layer of coffee-dipped cookies on top of the cream cheese mixture.
- Spread the remaining cream cheese mixture over the second layer of cookies.
- Dust with Cocoa Powder:
- Generously dust the top of the tiramisu with unsweetened cocoa powder for a rich finish.
- Refrigerate:
- Cover the dish and refrigerate for at least 4 hours. This chill time allows the flavors to meld and results in a firmer texture.
Nutrition
- Serving Size: one normal portion
- Calories: 250
- Fat: 15g
- Carbohydrates: 30g
- Fiber: 1g
- Protein: 5g


