

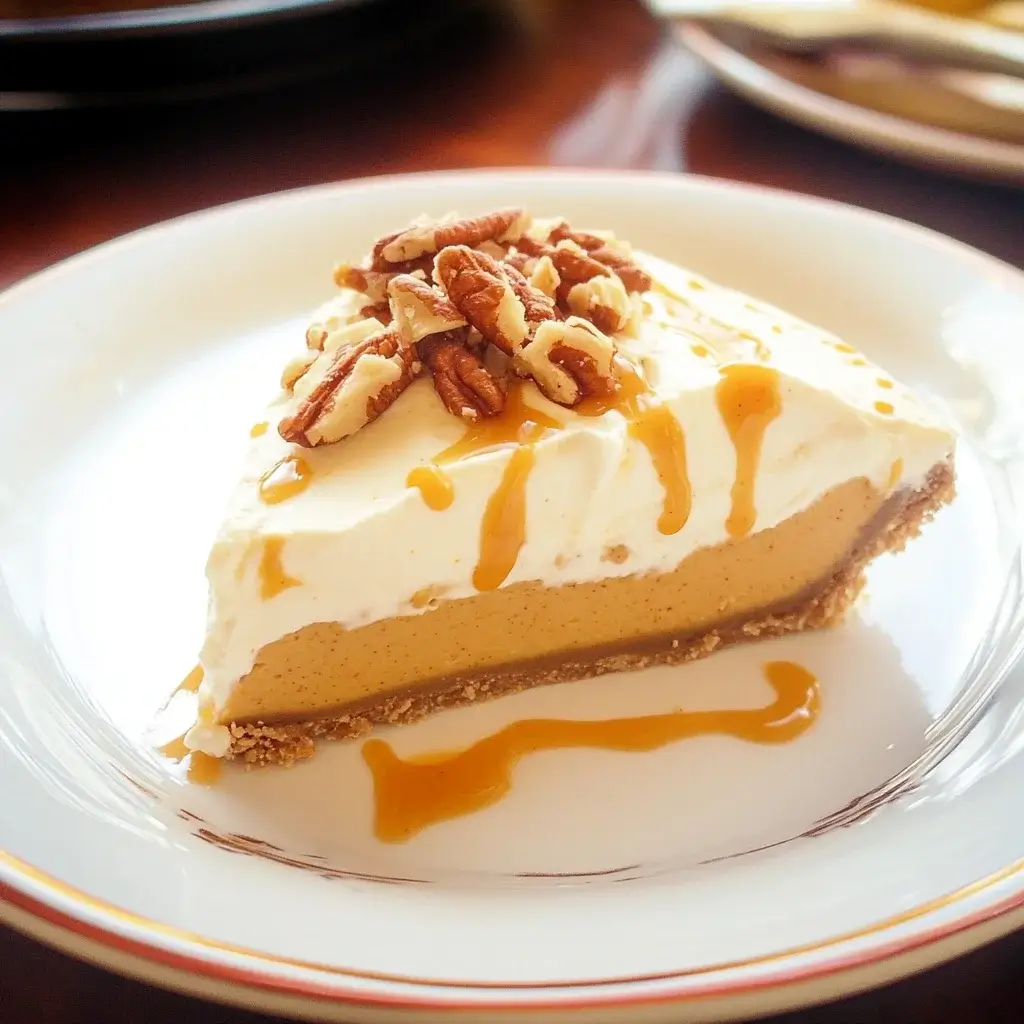

Fall is in the air, the leaves are turning golden, and my kitchen is perpetually filled with the warm, inviting aroma of pumpkin spice. This year, my youngest daughter announced she was going gluten-free, just in time for pumpkin pie season! Panic momentarily set in – Thanksgiving without pumpkin pie felt almost un-American. But then, inspiration struck: Pumpkin Mousse Pie! Lighter than traditional pie, intensely flavorful, and naturally adaptable to gluten-free crusts. After some recipe tweaking and taste-testing (a very enjoyable process!), I landed on this Gluten-Free Pumpkin Mousse Pie recipe. The result? Pure autumnal bliss! The mousse is incredibly light and airy, bursting with pumpkin and spice, and the gluten-free crust is perfectly crisp and buttery. My family, gluten-free and gluten-full alike, devoured it. Honestly, no one missed the traditional pie crust one bit. This pie is elegant enough for a holiday gathering, yet easy enough for a weeknight treat. If you’re looking for a show-stopping, gluten-free dessert that screams fall, look no further. Prepare to fall in love with this creamy, dreamy, and utterly delicious Gluten-Free Pumpkin Mousse Pie!
Ingredients: Gathering Your Gluten-Free Pumpkin Mousse Pie Essentials
Creating a truly exceptional Gluten-Free Pumpkin Mousse Pie starts with sourcing high-quality ingredients. This recipe focuses on maximizing flavor and achieving that perfect mousse texture while ensuring it’s entirely gluten-free. Here’s a detailed breakdown of everything you’ll need:
- For the Gluten-Free Crust:
- Gluten-Free Graham Cracker Crumbs: 1 ½ cups (about 6 ounces). These form the base of our no-bake crust. Ensure you purchase certified gluten-free graham crackers or graham cracker crumbs, as some brands may contain trace amounts of gluten. If you can’t find pre-made crumbs, you can easily make your own by pulsing gluten-free graham crackers in a food processor until finely ground. Alternatively, you can use gluten-free vanilla wafers, gluten-free gingersnaps, or even almond flour for a different flavor profile.
- Granulated Sugar: ¼ cup. Adds sweetness and helps bind the crust together.
- Melted Unsalted Butter: 6 tablespoons (3 ounces). The melted butter is crucial for holding the crust crumbs together and providing a rich, buttery flavor. Unsalted butter allows you to control the salt content of the crust. You can substitute with melted coconut oil for a dairy-free option, but butter provides a more traditional graham cracker crust flavor.
- Ground Cinnamon: ½ teaspoon. Enhances the warm spice notes of the pumpkin and complements the graham cracker flavor.
- For the Pumpkin Mousse Filling:
- Pumpkin Puree: 1 ½ cups (12 ounces). Use pure pumpkin puree, not pumpkin pie filling. Pumpkin pie filling is pre-sweetened and spiced, which will throw off the balance of this recipe. Canned pumpkin puree is perfectly fine and convenient. For the most intense pumpkin flavor, you can roast your own pumpkin and puree it, but canned pumpkin is a great time-saver and yields consistent results.
- Granulated Sugar: ¾ cup. Sweetens the mousse and balances the earthy pumpkin flavor. You can adjust the amount slightly depending on your sweetness preference.
- Packed Light Brown Sugar: ¼ cup. Adds a deeper molasses flavor and contributes to the overall richness of the mousse. Light brown sugar is preferred for its subtle molasses notes, but dark brown sugar can be used for a more intense flavor.
- Ground Cinnamon: 1 ½ teaspoons. A key spice in pumpkin pie spice blends, cinnamon provides warmth and classic pumpkin pie flavor.
- Ground Ginger: 1 teaspoon. Adds a spicy, zesty note that complements the cinnamon and nutmeg.
- Ground Nutmeg: ½ teaspoon. Nutmeg provides a warm, slightly nutty, and subtly sweet spice that is essential to pumpkin pie spice. Freshly grated nutmeg is ideal for the most potent flavor, but pre-ground nutmeg works well too.
- Ground Cloves: ¼ teaspoon. Cloves are a strong spice, so use them sparingly. They add a warm, pungent, and slightly sweet note that rounds out the spice blend.
- Salt: ¼ teaspoon. Enhances the sweetness and balances all the flavors in the mousse.
- Egg Yolks: 4 large. Egg yolks are crucial for richness, stability, and a smooth, creamy texture in the mousse. Use fresh, large egg yolks.
- Heavy Cream: 1 ½ cups, divided. Heavy cream is essential for the light and airy texture of the mousse. We use it both in the cooked custard base and whipped to fold into the mousse. Ensure it’s cold for proper whipping.
- Unflavored Gelatin Powder: 1 ½ teaspoons. Gelatin is the stabilizing agent that helps the mousse set properly and maintain its shape. Use unflavored gelatin powder. For a vegetarian/vegan option, you can try using agar-agar powder, but gelatin provides the most reliable and traditional mousse texture. If using agar-agar, follow package instructions for substitution, as it activates differently than gelatin.
- Water: 2 tablespoons. Used to bloom the gelatin, which is necessary for it to dissolve properly and work as a stabilizer.
- Vanilla Extract: 1 teaspoon. Enhances the overall flavor and sweetness of the mousse. Pure vanilla extract is preferred for the best flavor.
- Optional Garnishes:
- Whipped Cream: For a classic topping. You can use store-bought or homemade whipped cream.
- Cinnamon Sticks: For a decorative touch.
- Chocolate Shavings or Curls: Dark or milk chocolate shavings add a beautiful contrast and flavor dimension.
- Caramel Sauce: A drizzle of caramel sauce complements the pumpkin and spices beautifully.
- Pecan Pieces or Candied Pecans: For added texture and nutty flavor.
Ingredient Quality Matters:
While this recipe is relatively straightforward, using high-quality ingredients will significantly enhance the final flavor. Opt for fresh spices, pure vanilla extract, and good quality heavy cream and pumpkin puree. Pay close attention to the gluten-free certification of your graham crackers to ensure the pie is truly gluten-free for those with sensitivities or allergies.
Substitutions and Variations:
- Crust: As mentioned, gluten-free vanilla wafers, gingersnaps, or almond flour can be used for the crust. For a no-crust version, you can simply serve the mousse in individual glasses or ramekins.
- Spices: Adjust the spice ratios to your preference. You can add a pinch of ground cloves or allspice for a warmer spice profile. Pumpkin pie spice blend can be used, but ensure it’s gluten-free and adjust amounts accordingly as it’s pre-mixed.
- Sweeteners: You can experiment with using maple syrup or honey in place of some of the granulated sugar, but this may slightly alter the texture and sweetness.
- Dairy-Free Mousse: For a dairy-free version, you can experiment with full-fat coconut milk (refrigerated overnight and only using the thick cream part) in place of heavy cream, and vegan butter for the crust. However, this will significantly alter the texture and flavor and may require adjustments to stabilizers. Vegan mousse recipes often rely on avocado or cashew cream bases.
By gathering these carefully selected ingredients, you are well on your way to creating a truly decadent and satisfying Gluten-Free Pumpkin Mousse Pie that will impress everyone who tastes it!
Instructions: Step-by-Step Guide to Gluten-Free Pumpkin Mousse Pie Perfection
Now that you have all your ingredients ready, it’s time to embark on the delightful process of making your Gluten-Free Pumpkin Mousse Pie. This recipe is broken down into easy-to-follow steps for both the crust and the mousse, ensuring a smooth and successful baking experience.
Part 1: Crafting the Gluten-Free Graham Cracker Crust
- Prepare the Crumbs: If you are using gluten-free graham crackers, place them in a food processor and pulse until you have fine crumbs. Alternatively, if you are using pre-made gluten-free graham cracker crumbs, measure out 1 ½ cups.
- Combine Dry Ingredients: In a medium bowl, combine the gluten-free graham cracker crumbs, granulated sugar, and ground cinnamon. Whisk together to ensure even distribution.
- Add Melted Butter: Pour the melted unsalted butter over the crumb mixture. Stir with a fork until all the crumbs are evenly moistened and the mixture resembles damp sand.
- Press into Pie Plate: Press the crumb mixture firmly and evenly into the bottom and up the sides of a 9-inch pie plate. You can use the bottom of a measuring cup or your fingers to press it firmly and create a smooth, even crust.
- Chill the Crust: Place the prepared crust in the refrigerator to chill for at least 30 minutes, or while you prepare the mousse filling. Chilling helps the crust to firm up and hold its shape.
Part 2: Making the Luscious Pumpkin Mousse Filling
- Bloom the Gelatin: In a small bowl, sprinkle the unflavored gelatin powder over 2 tablespoons of cold water. Let it stand for 5-10 minutes to “bloom” or soften. This step is crucial for the gelatin to dissolve properly and work as a stabilizer.
- Combine Pumpkin, Sugars, and Spices: In a medium saucepan, combine the pumpkin puree, granulated sugar, light brown sugar, ground cinnamon, ground ginger, ground nutmeg, ground cloves, and salt. Whisk together until well combined.
- Cook the Pumpkin Mixture: Place the saucepan over medium heat and cook, stirring constantly, until the mixture is heated through and slightly simmering, about 5-7 minutes. This step helps to deepen the pumpkin flavor and dissolve the sugars. Be careful not to scorch the mixture.
- Temper the Egg Yolks: In a separate medium bowl, whisk the egg yolks lightly. Gradually whisk about ¼ cup of the hot pumpkin mixture into the egg yolks, whisking constantly to temper them and prevent them from scrambling. This step gently raises the temperature of the yolks before adding them to the hot mixture.
- Combine Egg Yolks and Pumpkin: Pour the tempered egg yolk mixture into the saucepan with the remaining pumpkin mixture. Whisk constantly and cook over low heat for 2-3 minutes, or until the mixture thickens slightly and coats the back of a spoon. Do not boil. Cooking the custard base gently ensures a smooth and creamy mousse.
- Dissolve Gelatin: Remove the saucepan from the heat. Add the bloomed gelatin to the hot pumpkin mixture and stir until the gelatin is completely dissolved and the mixture is smooth.
- Strain the Custard (Optional but Recommended): For an extra smooth mousse, strain the pumpkin custard mixture through a fine-mesh sieve into a clean bowl. This will remove any lumps or bits of spice and ensure a velvety texture.
- Cool the Custard: Cover the bowl of pumpkin custard with plastic wrap, pressing the plastic wrap directly onto the surface of the custard to prevent a skin from forming. Refrigerate until the custard is completely cooled and slightly thickened, about 1-2 hours. Cooling the custard is essential before whipping the cream to prevent the whipped cream from melting and deflating.
- Whip Heavy Cream (Part 1): In a large, chilled bowl, using an electric mixer or stand mixer fitted with the whisk attachment, whip 1 cup of cold heavy cream until stiff peaks form. Be careful not to overwhip.
- Fold in Whipped Cream: Gently fold about one-third of the whipped cream into the cooled pumpkin custard to lighten it. Then, gently fold in the remaining whipped cream in two additions, until the mousse is smooth and evenly combined. Be careful not to deflate the mousse; fold gently until just combined.
- Pour into Crust: Pour the prepared pumpkin mousse filling into the chilled gluten-free graham cracker crust, spreading it evenly.
- Chill to Set: Cover the pie with plastic wrap and refrigerate for at least 4-6 hours, or preferably overnight, to allow the mousse to set completely.
Part 3: Whipping Cream Topping (Optional)
- Whip Heavy Cream (Part 2 – for topping): In a chilled bowl, whip the remaining ½ cup of cold heavy cream with a tablespoon of powdered sugar (optional, for sweetness) and a splash of vanilla extract (optional) until soft peaks form.
- Decorate and Serve: Once the pie is fully set, you can decorate it with the whipped cream topping, using a piping bag for a decorative swirl or simply spooning it on. Garnish with cinnamon sticks, chocolate shavings, caramel sauce, or pecan pieces, if desired. Slice and serve chilled.
Tips for Success During Cooking:
- Chill Everything: Make sure your heavy cream, mixing bowl, and whisk attachment are all well-chilled for optimal whipping volume.
- Don’t Overcook Custard: Be careful not to boil the pumpkin custard mixture after adding the egg yolks, as this can cause the eggs to scramble. Cook over low heat and stir constantly.
- Cool Custard Completely: Ensure the pumpkin custard is fully cooled before folding in the whipped cream. If the custard is still warm, it will melt the whipped cream and result in a runny mousse.
- Fold Gently: When folding in the whipped cream, be gentle and avoid overmixing. Overmixing can deflate the mousse and make it less airy.
- Patience is Key: Allow ample chilling time for both the crust and the mousse to set properly. This will ensure the pie is firm and holds its shape when sliced.
By following these detailed instructions and tips, you’ll be well on your way to creating a stunning and utterly delicious Gluten-Free Pumpkin Mousse Pie that is sure to be the star of any fall gathering!
Nutrition Facts: A Glance at the Gluten-Free Pumpkin Mousse Pie Profile
Understanding the nutritional content of your desserts can help you make informed choices and enjoy them as part of a balanced diet. Here’s a general overview of the nutrition facts for a serving of this Gluten-Free Pumpkin Mousse Pie recipe. Please remember that these are estimates and can vary based on specific ingredient brands, portion sizes, and garnishes.
Servings: This recipe typically yields 8 servings, assuming a standard pie slice size.
Approximate Nutrition Facts Per Serving (based on 8 servings, without optional toppings):
- Calories: 350-450 calories
- Total Fat: 20-30g
- Saturated Fat: 12-18g
- Trans Fat: 0g
- Unsaturated Fat: Varies
- Cholesterol: 120-150mg
- Sodium: 150-250mg (can vary depending on butter and graham crackers)
- Total Carbohydrates: 35-45g
- Dietary Fiber: 1-2g
- Sugars: 25-35g
- Protein: 5-7g
Key Nutritional Components and Considerations:
- Calories and Fat: This mousse pie is moderately calorie-dense and relatively high in fat, primarily due to the butter in the crust and the heavy cream and egg yolks in the mousse. These ingredients contribute to the rich flavor and creamy texture that make mousse pies so indulgent.
- Saturated Fat: The saturated fat content comes mainly from the butter and heavy cream. As with any dessert containing these ingredients, moderation is key, especially for those watching their saturated fat intake.
- Cholesterol: The egg yolks contribute to the cholesterol content.
- Sodium: Sodium levels are relatively moderate but can vary depending on the salt content of the butter and graham crackers used.
- Carbohydrates and Sugars: The carbohydrates and sugars come from the graham cracker crust and the added sugars in the mousse. While pumpkin puree itself contains some natural sugars and carbohydrates, the added sugars contribute significantly to the total carbohydrate and sugar content.
- Protein: The protein content is moderate, primarily from the egg yolks and dairy.
- Vitamins and Minerals: Pumpkin puree is a good source of Vitamin A, Vitamin C, and potassium. Egg yolks provide some vitamins and minerals as well. However, desserts are generally not considered primary sources of vitamins and minerals.
Ways to Make it Slightly Healthier (Lower Calorie/Fat Options – with caveats):
- Reduce Sugar: You can slightly reduce the amount of granulated and brown sugar used in the mousse, but this may affect the texture and sweetness. Experiment cautiously.
- Lighter Crust: Explore alternative gluten-free crust options that might be lower in fat and calories, such as an almond flour crust made with less butter, or a date-nut crust (though these will significantly change the flavor profile).
- Portion Control: The most effective way to manage calorie and fat intake is to be mindful of portion sizes. Enjoy a smaller slice of pie.
- Focus on Quality Ingredients: While not directly reducing calories, using high-quality ingredients can enhance the flavor and satisfaction, potentially making a smaller portion more enjoyable.
Important Note: These nutrition facts are estimates. For more precise nutritional information, you can use online nutrition calculators and input the specific brands and quantities of ingredients you use. Keep in mind that while this is a gluten-free dessert option, it is still an indulgent treat. Enjoy it in moderation as part of a balanced dietary approach.
Preparation Time: From Start to Set in a Reasonable Timeframe
While making a Gluten-Free Pumpkin Mousse Pie requires some chilling time, the active preparation time is quite manageable, making it a feasible dessert to create even on a busy schedule. Here’s a breakdown of the estimated preparation and chilling times:
- Prep Time: 30-40 minutes
- This includes:
- Making the gluten-free graham cracker crust (10-15 minutes)
- Preparing the pumpkin mousse filling (20-25 minutes)
- Whipping cream (5 minutes)
- Folding mousse and pouring into crust (5 minutes)
- This includes:
- Chill Time (Crust): 30 minutes (minimum)
- Chill Time (Mousse): 4-6 hours (minimum, ideally overnight)
- Total Time (Active + Chill): Approximately 5 hours – overnight (mostly inactive chill time)
Factors Affecting Preparation Time:
- Graham Cracker Crumbs: Using pre-made gluten-free graham cracker crumbs saves time compared to making your own.
- Kitchen Equipment: Using a food processor for crumbs and a stand mixer or electric hand mixer for whipping cream will speed up those steps.
- Cooling Time: The cooling time for the pumpkin custard is crucial. Allowing sufficient time in the refrigerator will ensure proper thickening before folding in the whipped cream.
Tips to Speed Up Preparation (Where Possible):
- Make Crust Ahead: The gluten-free graham cracker crust can be made a day or two in advance and stored tightly wrapped in the refrigerator.
- Prepare Custard in Advance: The pumpkin custard base can also be made a day ahead and stored in the refrigerator. This breaks down the preparation into more manageable steps.
- Work Efficiently: Having all your ingredients measured out and your equipment ready before you begin (mise en place) will streamline the process.
Make-Ahead Options & Time Management:
- Crust and Custard Ahead: As mentioned, both the crust and the pumpkin custard can be made 1-2 days in advance. This is highly recommended for easier time management, especially if you are preparing for a holiday or gathering.
- Assemble Pie Day Before: You can assemble the entire pie (pour mousse into crust) the day before you plan to serve it. This allows for ample chilling time and makes your serving day less hectic.
- Whipped Cream Fresh: While the pie itself can be made ahead, it’s best to whip the topping cream shortly before serving for the freshest texture. However, whipped cream can also be made a few hours in advance and stored in the refrigerator.
While the total time includes significant chill time, the active hands-on preparation for this Gluten-Free Pumpkin Mousse Pie is relatively short and can be easily broken down into stages. This makes it a wonderful make-ahead dessert option, perfect for stress-free entertaining and enjoying the flavors of fall!
How to Serve: Presenting Your Gluten-Free Pumpkin Mousse Pie with Flair
Your Gluten-Free Pumpkin Mousse Pie is a beautiful dessert ready to be showcased! Here are some delightful ways to serve and present it, enhancing both its visual appeal and flavor experience:
Toppings and Garnishes (Beyond Basic Whipped Cream):
- Whipped Cream (Variety): Offer different flavored whipped creams!
- Classic Vanilla Whipped Cream: A timeless choice.
- Cinnamon Whipped Cream: Enhance the spice notes with cinnamon in your whipped cream.
- Maple Whipped Cream: Add a touch of maple syrup for a fall-inspired twist.
- Ginger Whipped Cream: Incorporate ground ginger for a zesty kick.
- Chocolate Accents:
- Chocolate Shavings or Curls: Dark, milk, or white chocolate shavings add elegance and flavor contrast.
- Chocolate Sauce Drizzle: A drizzle of dark chocolate sauce is decadent.
- Cocoa Powder Dusting: A light dusting of unsweetened cocoa powder adds a sophisticated touch.
- Caramel Delights:
- Caramel Sauce Drizzle: Homemade or store-bought caramel sauce complements pumpkin beautifully.
- Salted Caramel Sauce: The salty-sweet combination is irresistible.
- Caramelized Sugar Shards: For a dramatic presentation, create caramelized sugar shards to garnish.
- Nutty Crunch:
- Pecan Pieces or Halves: Toasted pecans or candied pecans add texture and nutty flavor.
- Walnut Pieces: Toasted walnuts offer a slightly different nutty profile.
- Pistachios (Chopped): Chopped pistachios add color and a unique nutty flavor.
- Spice & Herb Infusions:
- Cinnamon Sticks: Classic and decorative.
- Star Anise: Adds a beautiful shape and subtle licorice note (use sparingly as it’s strong).
- Fresh Mint Sprigs: A pop of green and freshness.
- Candied Ginger: Adds a spicy-sweet bite.
- Fruit Pairings (Seasonal):
- Cranberry Sauce: A dollop of cranberry sauce provides a tart and festive contrast.
- Apple Slices (Caramelized or Fresh): Apple slices complement pumpkin flavors.
- Pear Slices (Poached or Fresh): Pears offer a delicate sweetness.
- Orange Zest: Fresh orange zest brightens the flavors.
Serving Suggestions & Pairings:
- Dessert Course: Serve as the grand finale to a Thanksgiving or fall dinner party.
- Afternoon Treat: Enjoy a slice with a cup of coffee or tea for a cozy afternoon indulgence.
- Holiday Gatherings: Perfect for potlucks, holiday buffets, and family celebrations.
- Beverage Pairings:
- Coffee: Classic coffee, latte, or cappuccino.
- Tea: Black tea, chai tea, or spiced herbal teas.
- Spiced Cider: Warm or chilled apple cider, spiced with cinnamon and cloves.
- Dessert Wine: A sweet dessert wine or sherry.
- Milk or Dairy-Free Milk: A simple glass of milk or almond milk.
- Complementary Desserts (for a dessert table):
- Gluten-Free Apple Crisp or Crumble: Another fall fruit dessert.
- Pecan Pie (Gluten-Free Crust Option): For nut pie lovers.
- Gingerbread Cookies (Gluten-Free): Spiced cookies for dipping in coffee or alongside the pie.
Presentation Tips:
- Pie Plate Matters: Use a decorative pie plate or tart pan to enhance the visual appeal.
- Whipped Cream Piping: Use a piping bag and tips to create elegant whipped cream designs.
- Garnish Artfully: Arrange garnishes thoughtfully, creating visual interest and balance. Don’t overcrowd the pie.
- Dust with Spice: A light dusting of cinnamon or nutmeg over the top adds a finishing touch.
- Slice Neatly: Use a sharp knife dipped in warm water for clean slices. Wipe the knife between slices.
- Individual Servings: For a more elegant presentation, consider serving the mousse in individual glasses or ramekins instead of a pie crust.
By considering these serving and presentation ideas, you can transform your Gluten-Free Pumpkin Mousse Pie from a delicious dessert into a truly memorable and visually stunning culinary creation!
Additional Tips: Mastering Your Gluten-Free Pumpkin Mousse Pie
To ensure your Gluten-Free Pumpkin Mousse Pie is consistently perfect and truly impressive, here are five additional tips to help you master this recipe:
- Ensure Gluten-Free Certification (Crucial for Celiac & Sensitivities): Double-check that all ingredients you use are certified gluten-free, especially the graham crackers or crumbs, vanilla extract (some contain gluten-based alcohol), and any pre-made toppings. For individuals with Celiac disease or severe gluten sensitivities, even trace amounts of gluten can be problematic. Read labels carefully and choose brands that explicitly state “gluten-free” and ideally are certified by a reputable organization.
- Taste and Adjust Spices (Personalize Your Flavor): Pumpkin pie spice blends can vary, and personal spice preferences differ. Before assembling the mousse, taste the cooked pumpkin custard. If you prefer a stronger cinnamon flavor, add a bit more cinnamon. If you like more ginger spice, add a pinch more ginger. You can even add a pinch of allspice or cardamom for a more complex spice profile. Start with small additions and taste again until you achieve your desired spice balance. This is your chance to truly personalize the flavor of your pie.
- Don’t Overwhip Heavy Cream (Maintain Lightness): Overwhipping heavy cream can result in a grainy or buttery texture, which is not desirable for mousse. Whip the cream until stiff peaks just form. This means when you lift the whisk, the peaks hold their shape but are still soft and slightly bend at the tip. Be attentive and stop whipping as soon as you reach this stage. Overwhipped cream will be harder to fold into the custard and can make the mousse denser.
- Properly Bloom Gelatin (Essential for Setting): Blooming the gelatin correctly is crucial for the mousse to set properly. Ensure you sprinkle the gelatin powder over cold water and let it sit undisturbed for the full 5-10 minutes. The gelatin should become softened and slightly thickened. When you add it to the hot pumpkin custard, stir until it’s completely dissolved and no granules remain. Undissolved gelatin can result in a grainy texture or prevent the mousse from setting firmly.
- Make it Even More Festive (Holiday Touches): To elevate this pie for special occasions like Thanksgiving or fall holidays, consider these festive touches:
- Gingerbread Crust Variation: Use gluten-free gingerbread cookies for the crust instead of graham crackers for a spicier, holiday-themed crust.
- Cranberry Swirl: Before chilling the mousse, swirl in a ribbon of homemade or high-quality cranberry sauce for a beautiful visual effect and tart flavor contrast.
- Maple Pecan Topping: Top the pie with a layer of toasted pecans tossed in maple syrup for a crunchy, sweet, and nutty topping.
- Spice Infused Whipped Cream: Infuse your whipped cream with warm spices like cinnamon, nutmeg, or cardamom for an extra layer of flavor.
- Edible Glitter or Gold Dust: For a truly glamorous presentation, lightly dust the pie with edible gold dust or glitter for a festive sparkle.
By incorporating these mastering tips, you’ll be equipped to create a flawless and truly exceptional Gluten-Free Pumpkin Mousse Pie every time, impressing your family and friends with your baking prowess!
FAQ: Your Gluten-Free Pumpkin Mousse Pie Questions Answered
Baking, especially gluten-free baking, can sometimes bring up questions! Here are answers to some frequently asked questions about making Gluten-Free Pumpkin Mousse Pie to help you troubleshoot and bake with confidence:
Q1: My gluten-free graham cracker crust is crumbly and won’t hold together. What did I do wrong?
A1: A crumbly crust usually indicates insufficient moisture or binding agent. Here are common causes and solutions:
- Not enough butter: Ensure you used the correct amount of melted butter (6 tablespoons or 3 ounces). Double-check your measurements.
- Crumbs too dry: Gluten-free crumbs can sometimes be drier than traditional graham cracker crumbs. If your mixture seems too dry even with the butter, you can add a tablespoon or two more of melted butter, a teaspoon of water, or even a touch of maple syrup to help bind it.
- Not pressing firmly enough: Press the crumb mixture very firmly into the pie plate. Use the bottom of a measuring cup or your fingers to compact it tightly against the bottom and sides of the pan.
- Chilling insufficiently: Chilling the crust is essential for it to firm up. Ensure you chill it for at least 30 minutes before adding the mousse. Longer chilling is even better.
Q2: My pumpkin mousse is not setting up, it’s still runny after chilling. Why?
A2: A mousse that doesn’t set is usually due to issues with the gelatin:
- Gelatin not bloomed or dissolved properly: Ensure you bloomed the gelatin in cold water for the recommended time (5-10 minutes). When adding it to the hot pumpkin custard, stir vigorously until you are absolutely sure it’s completely dissolved. Undissolved granules will prevent proper setting.
- Not enough gelatin: Double-check that you used the correct amount of gelatin (1 ½ teaspoons). Too little gelatin will result in a soft or runny mousse.
- Custard not cooled enough before whipping cream: If the pumpkin custard was still warm when you folded in the whipped cream, it could have melted the whipped cream and prevented the mousse from setting properly. Make sure the custard is completely cooled and slightly thickened before adding the whipped cream.
- Incorrect chilling time: While 4-6 hours is usually sufficient, very humid environments or a slightly warmer refrigerator might require longer chilling time. If your mousse is still very soft after 6 hours, give it more time, preferably overnight.
Q3: Can I make this pie dairy-free or vegan?
A3: Making this pie dairy-free or vegan requires significant substitutions and adjustments, and the texture and flavor will be different from the traditional version. Here are considerations:
- Dairy-Free:
- Butter: Substitute vegan butter for the crust.
- Heavy Cream: Full-fat coconut cream (refrigerated and using only the thick cream) is the closest dairy-free substitute for texture, but it will impart a coconut flavor. Vegan heavy whipping creams are also available but can be less stable.
- Vegan (Dairy-Free & Egg-Free):
- Egg Yolks: This is the trickiest substitution. Vegan mousse recipes often rely on avocado, cashew cream, or silken tofu for richness and texture, but these will significantly change the flavor profile and require a different recipe approach. Aquafaba (chickpea brine) can be whipped like egg whites, but is less common in mousse and may not provide the same richness as yolks.
- Gelatin: Substitute agar-agar powder for gelatin. Agar-agar is a vegan gelling agent made from seaweed. Follow package instructions for substitution ratios and activation, as it behaves differently than gelatin.
- Butter & Heavy Cream: Use vegan butter and coconut cream as described above for dairy-free.
- Crust: Ensure your graham crackers are vegan (some contain honey). Many vegan gluten-free cookies can be used for a crust.
Q4: Can I make this mousse without gelatin?
A4: While gelatin is the traditional stabilizer for mousse, you might be able to achieve a softer, less firm mousse without it, but it will be less stable and more prone to melting.
- No-Bake “Mousse” Style Pie (Softer Set): If you omit gelatin, the pie will be more of a very creamy pumpkin pie filling than a firm mousse. It will need to be kept very cold and may not slice as cleanly. The texture will be more like a very thick whipped cream.
- Agar-Agar (Vegan Alternative): If you want a vegan alternative to gelatin, agar-agar is the most common choice and will provide a firmer set than omitting a stabilizer entirely.
Q5: How long will this Gluten-Free Pumpkin Mousse Pie last?
A5: Properly stored, Gluten-Free Pumpkin Mousse Pie will last:
- Refrigerator: 3-4 days, covered tightly in the refrigerator. The texture may slightly change over time, becoming a bit denser.
- Freezer (Not Recommended for Best Texture): Freezing dairy-based mousse pies is generally not recommended as it can alter the texture, making it grainy or icy upon thawing. If you must freeze it, freeze it without toppings, wrap it very tightly, and thaw it slowly in the refrigerator. The texture may not be as smooth as fresh.
By addressing these frequently asked questions, you should feel more confident in tackling any challenges that might arise while making your delicious Gluten-Free Pumpkin Mousse Pie. Happy baking and enjoy!
Print
Gluten-Free Pumpkin Mousse Pie recipe
Ingredients
- For the Gluten-Free Crust:
- Gluten-Free Graham Cracker Crumbs: 1 ½ cups (about 6 ounces). These form the base of our no-bake crust. Ensure you purchase certified gluten-free graham crackers or graham cracker crumbs, as some brands may contain trace amounts of gluten. If you can’t find pre-made crumbs, you can easily make your own by pulsing gluten-free graham crackers in a food processor until finely ground. Alternatively, you can use gluten-free vanilla wafers, gluten-free gingersnaps, or even almond flour for a different flavor profile.
- Granulated Sugar: ¼ cup. Adds sweetness and helps bind the crust together.
- Melted Unsalted Butter: 6 tablespoons (3 ounces). The melted butter is crucial for holding the crust crumbs together and providing a rich, buttery flavor. Unsalted butter allows you to control the salt content of the crust. You can substitute with melted coconut oil for a dairy-free option, but butter provides a more traditional graham cracker crust flavor.
- Ground Cinnamon: ½ teaspoon. Enhances the warm spice notes of the pumpkin and complements the graham cracker flavor.
- For the Pumpkin Mousse Filling:
- Pumpkin Puree: 1 ½ cups (12 ounces). Use pure pumpkin puree, not pumpkin pie filling. Pumpkin pie filling is pre-sweetened and spiced, which will throw off the balance of this recipe. Canned pumpkin puree is perfectly fine and convenient. For the most intense pumpkin flavor, you can roast your own pumpkin and puree it, but canned pumpkin is a great time-saver and yields consistent results.
- Granulated Sugar: ¾ cup. Sweetens the mousse and balances the earthy pumpkin flavor. You can adjust the amount slightly depending on your sweetness preference.
- Packed Light Brown Sugar: ¼ cup. Adds a deeper molasses flavor and contributes to the overall richness of the mousse. Light brown sugar is preferred for its subtle molasses notes, but dark brown sugar can be used for a more intense flavor.
- Ground Cinnamon: 1 ½ teaspoons. A key spice in pumpkin pie spice blends, cinnamon provides warmth and classic pumpkin pie flavor.
- Ground Ginger: 1 teaspoon. Adds a spicy, zesty note that complements the cinnamon and nutmeg.
- Ground Nutmeg: ½ teaspoon. Nutmeg provides a warm, slightly nutty, and subtly sweet spice that is essential to pumpkin pie spice. Freshly grated nutmeg is ideal for the most potent flavor, but pre-ground nutmeg works well too.
- Ground Cloves: ¼ teaspoon. Cloves are a strong spice, so use them sparingly. They add a warm, pungent, and slightly sweet note that rounds out the spice blend.
- Salt: ¼ teaspoon. Enhances the sweetness and balances all the flavors in the mousse.
- Egg Yolks: 4 large. Egg yolks are crucial for richness, stability, and a smooth, creamy texture in the mousse. Use fresh, large egg yolks.
- Heavy Cream: 1 ½ cups, divided. Heavy cream is essential for the light and airy texture of the mousse. We use it both in the cooked custard base and whipped to fold into the mousse. Ensure it’s cold for proper whipping.
- Unflavored Gelatin Powder: 1 ½ teaspoons. Gelatin is the stabilizing agent that helps the mousse set properly and maintain its shape. Use unflavored gelatin powder. For a vegetarian/vegan option, you can try using agar-agar powder, but gelatin provides the most reliable and traditional mousse texture. If using agar-agar, follow package instructions for substitution, as it activates differently than gelatin.
- Water: 2 tablespoons. Used to bloom the gelatin, which is necessary for it to dissolve properly and work as a stabilizer.
- Vanilla Extract: 1 teaspoon. Enhances the overall flavor and sweetness of the mousse. Pure vanilla extract is preferred for the best flavor.
- Optional Garnishes:
- Whipped Cream: For a classic topping. You can use store-bought or homemade whipped cream.
- Cinnamon Sticks: For a decorative touch.
- Chocolate Shavings or Curls: Dark or milk chocolate shavings add a beautiful contrast and flavor dimension.
- Caramel Sauce: A drizzle of caramel sauce complements the pumpkin and spices beautifully.
- Pecan Pieces or Candied Pecans: For added texture and nutty flavor.
Instructions
Part 1: Crafting the Gluten-Free Graham Cracker Crust
- Prepare the Crumbs: If you are using gluten-free graham crackers, place them in a food processor and pulse until you have fine crumbs. Alternatively, if you are using pre-made gluten-free graham cracker crumbs, measure out 1 ½ cups.
- Combine Dry Ingredients: In a medium bowl, combine the gluten-free graham cracker crumbs, granulated sugar, and ground cinnamon. Whisk together to ensure even distribution.
- Add Melted Butter: Pour the melted unsalted butter over the crumb mixture. Stir with a fork until all the crumbs are evenly moistened and the mixture resembles damp sand.
- Press into Pie Plate: Press the crumb mixture firmly and evenly into the bottom and up the sides of a 9-inch pie plate. You can use the bottom of a measuring cup or your fingers to press it firmly and create a smooth, even crust.
- Chill the Crust: Place the prepared crust in the refrigerator to chill for at least 30 minutes, or while you prepare the mousse filling. Chilling helps the crust to firm up and hold its shape.
Part 2: Making the Luscious Pumpkin Mousse Filling
- Bloom the Gelatin: In a small bowl, sprinkle the unflavored gelatin powder over 2 tablespoons of cold water. Let it stand for 5-10 minutes to “bloom” or soften. This step is crucial for the gelatin to dissolve properly and work as a stabilizer.
- Combine Pumpkin, Sugars, and Spices: In a medium saucepan, combine the pumpkin puree, granulated sugar, light brown sugar, ground cinnamon, ground ginger, ground nutmeg, ground cloves, and salt. Whisk together until well combined.
- Cook the Pumpkin Mixture: Place the saucepan over medium heat and cook, stirring constantly, until the mixture is heated through and slightly simmering, about 5-7 minutes. This step helps to deepen the pumpkin flavor and dissolve the sugars. Be careful not to scorch the mixture.
- Temper the Egg Yolks: In a separate medium bowl, whisk the egg yolks lightly. Gradually whisk about ¼ cup of the hot pumpkin mixture into the egg yolks, whisking constantly to temper them and prevent them from scrambling. This step gently raises the temperature of the yolks before adding them to the hot mixture.
- Combine Egg Yolks and Pumpkin: Pour the tempered egg yolk mixture into the saucepan with the remaining pumpkin mixture. Whisk constantly and cook over low heat for 2-3 minutes, or until the mixture thickens slightly and coats the back of a spoon. Do not boil. Cooking the custard base gently ensures a smooth and creamy mousse.
- Dissolve Gelatin: Remove the saucepan from the heat. Add the bloomed gelatin to the hot pumpkin mixture and stir until the gelatin is completely dissolved and the mixture is smooth.
- Strain the Custard (Optional but Recommended): For an extra smooth mousse, strain the pumpkin custard mixture through a fine-mesh sieve into a clean bowl. This will remove any lumps or bits of spice and ensure a velvety texture.
- Cool the Custard: Cover the bowl of pumpkin custard with plastic wrap, pressing the plastic wrap directly onto the surface of the custard to prevent a skin from forming. Refrigerate until the custard is completely cooled and slightly thickened, about 1-2 hours. Cooling the custard is essential before whipping the cream to prevent the whipped cream from melting and deflating.
- Whip Heavy Cream (Part 1): In a large, chilled bowl, using an electric mixer or stand mixer fitted with the whisk attachment, whip 1 cup of cold heavy cream until stiff peaks form. Be careful not to overwhip.
- Fold in Whipped Cream: Gently fold about one-third of the whipped cream into the cooled pumpkin custard to lighten it. Then, gently fold in the remaining whipped cream in two additions, until the mousse is smooth and evenly combined. Be careful not to deflate the mousse; fold gently until just combined.
- Pour into Crust: Pour the prepared pumpkin mousse filling into the chilled gluten-free graham cracker crust, spreading it evenly.
- Chill to Set: Cover the pie with plastic wrap and refrigerate for at least 4-6 hours, or preferably overnight, to allow the mousse to set completely.
Part 3: Whipping Cream Topping (Optional)
- Whip Heavy Cream (Part 2 – for topping): In a chilled bowl, whip the remaining ½ cup of cold heavy cream with a tablespoon of powdered sugar (optional, for sweetness) and a splash of vanilla extract (optional) until soft peaks form.
- Decorate and Serve: Once the pie is fully set, you can decorate it with the whipped cream topping, using a piping bag for a decorative swirl or simply spooning it on. Garnish with cinnamon sticks, chocolate shavings, caramel sauce, or pecan pieces, if desired. Slice and serve chilled.
Nutrition
- Serving Size: one normal portion
- Calories: 350-450
- Sugar: 25-35g
- Sodium: 150-250mg
- Fat: 20-30g
- Saturated Fat: 12-18g
- Carbohydrates: 35-45g
- Fiber: 1-2g
- Protein: 5-7g
- Cholesterol: 120-150mg


