
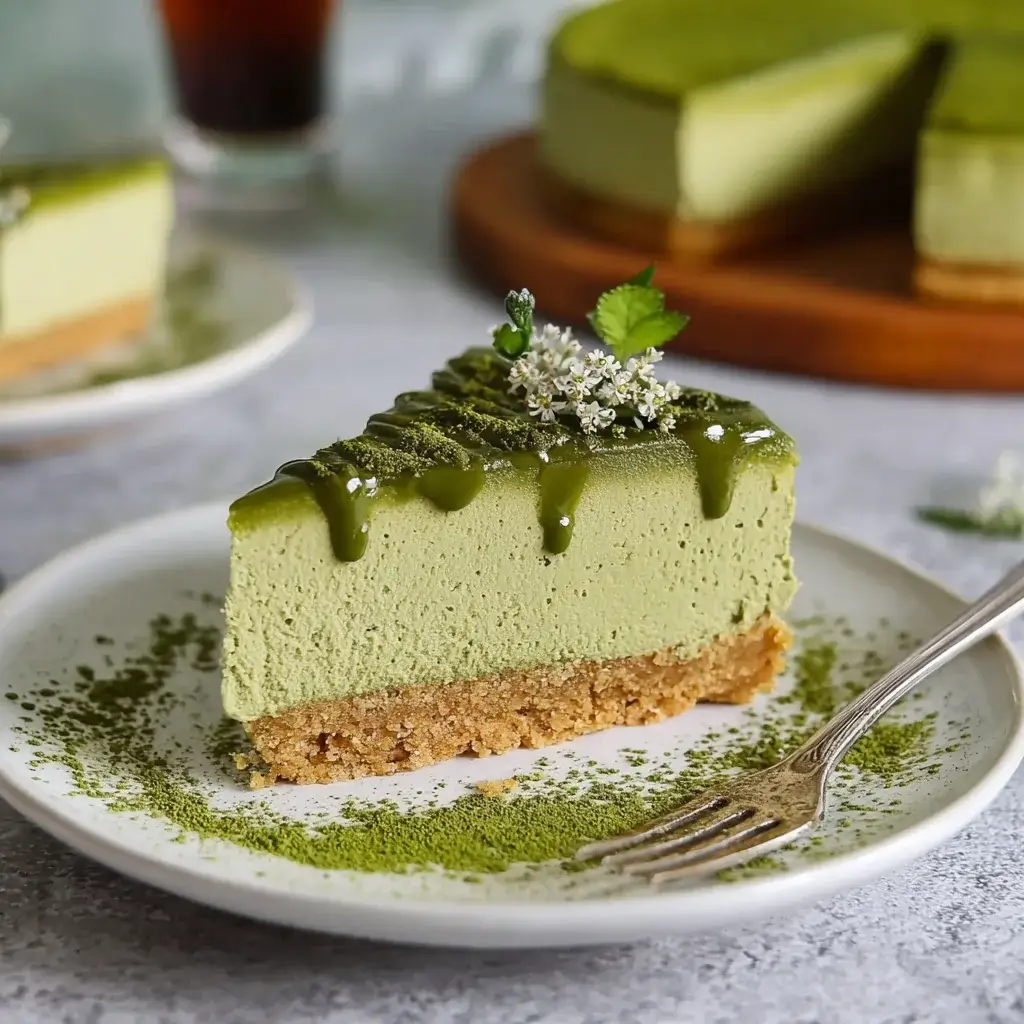

There are some desserts that are merely sweet, and then there are those that are an entire experience. This Gluten-Free Matcha Green Tea Cheesecake falls firmly into the latter category. I first created it for a close friend’s birthday, a woman with a sophisticated palate who adores the complex, earthy notes of Japanese matcha and also happens to be gluten-intolerant. I was determined to create something spectacular, a dessert that wouldn’t feel like a compromise. I wanted a showstopper. The result was nothing short of breathtaking. The moment you slice into its perfectly smooth, vibrant green surface, you know you’re in for a treat. The texture is sublime—impossibly creamy, dense yet light, melting on the tongue in a wave of velvety richness. The flavor is a masterful balancing act: the distinct, slightly grassy, and pleasantly bitter notes of high-quality matcha are perfectly tempered by the tangy sweetness of the classic cheesecake filling. All of this elegance rests upon a buttery, nutty crust made from toasted almonds and pecans, providing a delightful textural contrast and a flavor foundation that is worlds away from a standard crumb crust. When I served it, a hush fell over the table. My friend took her first bite, closed her eyes, and smiled. “This,” she said, “is the best cheesecake I have ever had.” No one even mentioned that it was gluten-free; they were too busy asking for a second slice.
Complete with the Ingredients Amount
Creating a cheesecake of this caliber requires precision and high-quality ingredients. Each component is chosen to contribute to the final harmony of flavors and textures. The nut-based crust provides a sturdy, flavorful foundation, while the filling relies on full-fat dairy and premium matcha for its signature creaminess and vibrant taste.
For the Gluten-Free Almond-Pecan Crust:
- Blanched Almond Flour: 1 ½ cups
- Pecan Halves: ½ cup, finely ground
- Granulated Sugar or Coconut Sugar: 3 tablespoons
- Salt: ¼ teaspoon
- Unsalted Butter: 6 tablespoons, melted (for a vegan option, use melted coconut oil)
For the Matcha Cheesecake Filling:
- Full-Fat Block Cream Cheese: 32 ounces (four 8-ounce packages), at room temperature
- Granulated Sugar: 1 ¼ cups
- High-Quality Ceremonial Grade Matcha Powder: 3 tablespoons, sifted
- Large Eggs: 4, at room temperature
- Full-Fat Sour Cream: 1 cup, at room temperature
- Heavy Cream: ¼ cup, at room temperature
- Pure Vanilla Extract: 2 teaspoons
- Fresh Lemon Juice: 1 tablespoon
For Optional Garnish:
- Heavy Whipping Cream: 1 cup, chilled
- Powdered Sugar: 2 tablespoons
- Fresh Raspberries or Strawberries
- Additional Matcha Powder for dusting
- White Chocolate Shavings
Ingredient Notes & Potential Substitutions
- Matcha Powder: The quality of your matcha is paramount. Ceremonial grade matcha will provide a brilliant green color and a smooth, nuanced flavor with minimal bitterness. Culinary grade matcha can be used, but it may result in a more muted color and a slightly more astringent taste.
- Cream Cheese: Use full-fat, block-style cream cheese only. The kind sold in tubs is whipped and contains more water, which will result in a soupy, unset filling.
- Room Temperature Ingredients: This is not a suggestion; it is a rule for perfect cheesecake. Setting out your cream cheese, eggs, and sour cream 2-3 hours before you begin will ensure a smooth, lump-free batter and significantly reduce the risk of cracks.
- Nut Crust: If you don’t have pecans, you can use all almond flour (2 cups total) or substitute with finely ground walnuts or hazelnuts.
Instructions
Making a cheesecake is a process of patience and care. Follow these detailed steps closely, particularly regarding ingredient temperature and the cooling process, to achieve a flawless, bakery-quality result.
Step 1: Prepare the Gluten-Free Crust
- Preheat and Prep: Position a rack in the middle of your oven and preheat to 350°F (175°C). Lightly grease the bottom and sides of a 9-inch springform pan.
- Combine Crust Ingredients: If your pecans are not already ground, pulse them in a food processor until they form a fine, sandy meal. In a medium bowl, combine the almond flour, ground pecans, sugar, and salt. Whisk to combine.
- Add Butter: Pour the melted butter over the dry ingredients and stir with a fork until the mixture is evenly moistened and resembles wet sand.
- Form and Par-Bake the Crust: Press the crumb mixture firmly and evenly into the bottom and about one inch up the sides of the prepared springform pan. Use the flat bottom of a measuring cup to get a tight, even layer. Place the pan on a baking sheet and bake for 10-12 minutes, until the crust is lightly golden and fragrant.
- Cool the Crust: Remove the pan from the oven and place it on a wire rack to cool completely while you prepare the filling. Reduce the oven temperature to 325°F (160°C).
Step 2: Make the Matcha Cheesecake Filling
- Beat the Cream Cheese: In the bowl of a stand mixer fitted with the paddle attachment, or in a large bowl with a hand mixer, beat the room temperature cream cheese on medium-low speed until it is completely smooth and creamy, with no lumps. This should take about 2-3 minutes. Scrape down the sides and bottom of the bowl frequently.
- Add Sugar and Matcha: Add the granulated sugar and sifted matcha powder to the cream cheese. Continue to beat on low speed until just combined, scraping the bowl again to ensure everything is incorporated. Sifting the matcha is crucial to prevent green clumps in your final product.
- Incorporate Eggs: With the mixer on low speed, add the room temperature eggs one at a time, mixing until the yolk just disappears before adding the next. Do not overbeat after adding the eggs; this incorporates too much air, which is a primary cause of cheesecake cracking.
- Add Final Wet Ingredients: In a separate small bowl, whisk together the room temperature sour cream, heavy cream, vanilla extract, and lemon juice. With the mixer still on low speed, slowly pour this mixture into the batter and mix until just combined and the batter is smooth.
- Final Scrape and Tap: Remove the bowl from the mixer. Use a silicone spatula to give the batter one final, gentle fold from the bottom up to ensure it is uniformly mixed. Tap the bowl on the counter a few times to release any large air bubbles.
Step 3: Assemble and Bake with a Water Bath
- Prepare the Water Bath: A water bath (bain-marie) is the secret to a creamy, crack-free cheesecake. Tear off two large sheets of heavy-duty aluminum foil. Place the cooled springform pan in the center and carefully wrap the foil up the sides of the pan, creating a watertight seal. This prevents any water from seeping into the crust.
- Fill the Pan: Pour the matcha cheesecake batter over the cooled crust in the springform pan and spread it into an even layer with your spatula.
- Set Up the Bath: Place the foil-wrapped pan into a large roasting pan. Bring a kettle or pot of water to a boil. Carefully place the roasting pan onto the oven rack. Pour the hot water into the roasting pan until it comes about one inch up the sides of the springform pan.
- Bake: Bake at 325°F (160°C) for 65-75 minutes.
Step 4: Cool the Cheesecake Slowly (The Most Important Step)
- Check for Doneness: The cheesecake is done when the outer edges (about 2-3 inches) are set, but the very center still has a slight wobble or jiggle when you gently nudge the pan. Do not over-bake.
- Slow Oven Cool: Turn the oven off completely, but do not open the oven door. Let the cheesecake sit in the cooling oven for 1 hour.
- Counter Cool: After 1 hour, carefully remove the cheesecake from the water bath, unwrap the foil, and place the pan on a wire rack to cool to room temperature, about 2-3 hours.
- Chill: Once at room temperature, run a thin knife around the edge of the cheesecake to loosen it from the pan (this also helps prevent cracking as it settles). Cover the pan loosely with plastic wrap and transfer it to the refrigerator to chill for at least 6 hours, but preferably overnight. This long chill time is essential for the cheesecake to fully set and for the flavors to meld and deepen.
Nutrition Facts
Please note that these nutritional values are an estimate and will vary based on the specific brands of ingredients used. This calculation is based on the cheesecake being cut into 12 generous slices.
- Servings: 12 slices
- Calories Per Serving: Approximately 550-600 kcal
A Quick Nutritional Breakdown
This is a rich, decadent dessert, high in fat and sugar, as a proper cheesecake should be. The almond and pecan crust provides healthy fats and a bit of fiber. The real nutritional star is the matcha powder, which is packed with antioxidants, particularly EGCG (epigallocatechin gallate), known for its health benefits. While this is certainly a treat, it’s one made from whole, high-quality ingredients.
Preparation Time
Cheesecake is a labor of love that requires significant passive time for cooling and chilling. Plan accordingly for the best results.
- Prep Time: 30 minutes (for making the crust and filling)
- Cook Time: 75 minutes
- Cooling & Chilling Time: 1 hour in oven + 2-3 hours on counter + 6-8 hours in refrigerator (minimum)
- Total Time: Approximately 10-12 hours (mostly hands-off)
How to Serve
Serving this elegant cheesecake is an opportunity to add your own creative touch. The vibrant green color is a beautiful canvas for a variety of garnishes and pairings.
Garnishing Options:
- Classic Whipped Cream: Just before serving, whip chilled heavy cream with powdered sugar until soft peaks form. Pipe rosettes around the edge of the cheesecake or simply add a generous dollop to each slice.
- Fresh Berries: The tartness and bright red color of fresh raspberries or sliced strawberries provide a stunning visual and flavor contrast to the earthy matcha. Arrange them in the center or on each individual slice.
- Matcha Dusting: For a simple, minimalist, and dramatic look, place a doily or stencil on the surface of the chilled cheesecake and use a fine-mesh sieve to dust it with more matcha powder. Carefully remove the stencil for a beautiful pattern.
- White Chocolate Accents: The creamy sweetness of white chocolate is a perfect partner for matcha. Drizzle melted white chocolate over the top or use a vegetable peeler to create delicate white chocolate shavings.
Beverage Pairings:
- Tea: The most natural pairing is, of course, tea. Serve with a hot cup of Japanese sencha, hojicha (roasted green tea), or even another bowl of unsweetened matcha.
- Coffee: A simple black coffee or an Americano will cut through the richness of the cheesecake beautifully.
- Wine: For a celebratory occasion, a glass of brut Prosecco or a dry sparkling rosé offers a lovely effervescence that cleanses the palate between bites.
Additional Tips (5 Tips)
These five key tips are the difference between a good cheesecake and a truly flawless one.
- Invest in High-Quality Matcha: The flavor of your entire dessert rests on this one ingredient. Ceremonial grade matcha powder offers the most vibrant green color and the smoothest, least bitter flavor profile. It’s an investment that pays off in every single bite.
- Room Temperature is Everything: We can’t stress this enough. Cold cream cheese will create a lumpy batter no matter how much you beat it. Cold eggs can cause the fat in the batter to curdle. Taking the time to let your dairy and eggs sit on the counter for 2-3 hours is the single most important step for a silky-smooth texture.
- Don’t Over-mix the Batter: The number one cause of cracked cheesecakes is incorporating too much air into the batter, especially after the eggs are added. Mix on low speed and stop as soon as each ingredient is combined. Over-mixing creates a light, soufflé-like texture that will rise rapidly in the oven and then collapse and crack as it cools.
- Master the “Jiggle Test”: Learning to recognize when a cheesecake is perfectly baked is a crucial skill. The entire surface should not be firm. You are looking for the edges to be set and slightly puffed, while the very center (a 2 to 3-inch circle) should still wobble like Jell-O when you gently nudge the pan. This wobbly center will continue to cook and set from the residual heat during the cooling process.
- Patience During Cooling is a Virtue: The slow, gradual cooling process is your best defense against cracks. The dramatic temperature change from a hot oven to a cool kitchen is a shock to the cheesecake’s delicate structure. The sequence of cooling in the turned-off oven, then on the counter, and finally chilling for hours in the fridge is a non-negotiable process for a perfect, dense, and creamy final product.
FAQ section (5 Q/A)
Here are answers to some of the most common questions you might have while making this gluten-free matcha cheesecake.
1. My cheesecake cracked! What did I do wrong?
Cracks are the nemesis of many bakers, but they are usually preventable. The most common culprits are: 1) Over-mixing the batter, especially after adding the eggs. 2) The ingredients (cream cheese, eggs, sour cream) were too cold, creating a lumpy batter that cooked unevenly. 3) You skipped the water bath, which leads to overly aggressive, uneven heating. 4) The cheesecake was cooled too quickly. Following the instructions for room temperature ingredients, low-speed mixing, using a water bath, and the gradual cooling process will give you the best chance at a flawless surface.
2. Can I make this cheesecake with a different gluten-free crust?
Absolutely. While the almond-pecan crust is delicious, you can easily substitute it. A crust made from gluten-free graham cracker crumbs, gluten-free shortbread cookies, or even a blend of gluten-free rolled oats and nuts would work wonderfully. Simply crush your chosen cookie/oat, mix with sugar and melted butter, and proceed with the par-baking step.
3. How far in advance can I make this cheesecake?
This is the perfect make-ahead dessert! In fact, the flavor and texture are even better on the second day. You can bake the cheesecake up to 3 days in advance. Let it chill completely in the refrigerator as directed, keeping it covered. Wait to add any garnishes like whipped cream or fresh berries until just before serving to keep them fresh.
4. Can I freeze this matcha cheesecake?
Yes, this cheesecake freezes beautifully. First, ensure it is thoroughly chilled overnight in the refrigerator. You can freeze it whole or in individual slices. For a whole cheesecake, place it on a cardboard round, wrap it tightly in a layer of plastic wrap, and then a layer of heavy-duty aluminum foil. For slices, wrap each slice individually in plastic wrap. It can be frozen for up to 2 months. To thaw, transfer it to the refrigerator (still wrapped) and let it thaw overnight.
5. The matcha flavor seems too strong/not strong enough. Can I adjust it?
Of course. Taste is subjective. The 3 tablespoons listed in the recipe provide a distinct but balanced matcha flavor. If you are a true matcha aficionado and want a more intense, earthy flavor, you can increase the amount to 4 tablespoons. If you are new to matcha or prefer a subtler hint, you can reduce it to 2 tablespoons. Just be sure to adjust the amount before baking, and always sift the powder for a smooth consistency.

Gluten free Matcha Green Tea Cheesecake recipe
Ingredients
For the Gluten-Free Almond-Pecan Crust:
-
Blanched Almond Flour: 1 ½ cups
-
Pecan Halves: ½ cup, finely ground
-
Granulated Sugar or Coconut Sugar: 3 tablespoons
-
Salt: ¼ teaspoon
-
Unsalted Butter: 6 tablespoons, melted (for a vegan option, use melted coconut oil)
For the Matcha Cheesecake Filling:
-
Full-Fat Block Cream Cheese: 32 ounces (four 8-ounce packages), at room temperature
-
Granulated Sugar: 1 ¼ cups
-
High-Quality Ceremonial Grade Matcha Powder: 3 tablespoons, sifted
-
Large Eggs: 4, at room temperature
-
Full-Fat Sour Cream: 1 cup, at room temperature
-
Heavy Cream: ¼ cup, at room temperature
-
Pure Vanilla Extract: 2 teaspoons
-
Fresh Lemon Juice: 1 tablespoon
For Optional Garnish:
-
Heavy Whipping Cream: 1 cup, chilled
-
Powdered Sugar: 2 tablespoons
-
Fresh Raspberries or Strawberries
-
Additional Matcha Powder for dusting
-
White Chocolate Shavings
Ingredient Notes & Potential Substitutions
-
Matcha Powder: The quality of your matcha is paramount. Ceremonial grade matcha will provide a brilliant green color and a smooth, nuanced flavor with minimal bitterness. Culinary grade matcha can be used, but it may result in a more muted color and a slightly more astringent taste.
-
Cream Cheese: Use full-fat, block-style cream cheese only. The kind sold in tubs is whipped and contains more water, which will result in a soupy, unset filling.
-
Room Temperature Ingredients: This is not a suggestion; it is a rule for perfect cheesecake. Setting out your cream cheese, eggs, and sour cream 2-3 hours before you begin will ensure a smooth, lump-free batter and significantly reduce the risk of cracks.
-
Nut Crust: If you don’t have pecans, you can use all almond flour (2 cups total) or substitute with finely ground walnuts or hazelnuts.
Instructions
Step 1: Prepare the Gluten-Free Crust
-
Preheat and Prep: Position a rack in the middle of your oven and preheat to 350°F (175°C). Lightly grease the bottom and sides of a 9-inch springform pan.
-
Combine Crust Ingredients: If your pecans are not already ground, pulse them in a food processor until they form a fine, sandy meal. In a medium bowl, combine the almond flour, ground pecans, sugar, and salt. Whisk to combine.
-
Add Butter: Pour the melted butter over the dry ingredients and stir with a fork until the mixture is evenly moistened and resembles wet sand.
-
Form and Par-Bake the Crust: Press the crumb mixture firmly and evenly into the bottom and about one inch up the sides of the prepared springform pan. Use the flat bottom of a measuring cup to get a tight, even layer. Place the pan on a baking sheet and bake for 10-12 minutes, until the crust is lightly golden and fragrant.
-
Cool the Crust: Remove the pan from the oven and place it on a wire rack to cool completely while you prepare the filling. Reduce the oven temperature to 325°F (160°C).
Step 2: Make the Matcha Cheesecake Filling
-
Beat the Cream Cheese: In the bowl of a stand mixer fitted with the paddle attachment, or in a large bowl with a hand mixer, beat the room temperature cream cheese on medium-low speed until it is completely smooth and creamy, with no lumps. This should take about 2-3 minutes. Scrape down the sides and bottom of the bowl frequently.
-
Add Sugar and Matcha: Add the granulated sugar and sifted matcha powder to the cream cheese. Continue to beat on low speed until just combined, scraping the bowl again to ensure everything is incorporated. Sifting the matcha is crucial to prevent green clumps in your final product.
-
Incorporate Eggs: With the mixer on low speed, add the room temperature eggs one at a time, mixing until the yolk just disappears before adding the next. Do not overbeat after adding the eggs; this incorporates too much air, which is a primary cause of cheesecake cracking.
-
Add Final Wet Ingredients: In a separate small bowl, whisk together the room temperature sour cream, heavy cream, vanilla extract, and lemon juice. With the mixer still on low speed, slowly pour this mixture into the batter and mix until just combined and the batter is smooth.
-
Final Scrape and Tap: Remove the bowl from the mixer. Use a silicone spatula to give the batter one final, gentle fold from the bottom up to ensure it is uniformly mixed. Tap the bowl on the counter a few times to release any large air bubbles.
Step 3: Assemble and Bake with a Water Bath
-
Prepare the Water Bath: A water bath (bain-marie) is the secret to a creamy, crack-free cheesecake. Tear off two large sheets of heavy-duty aluminum foil. Place the cooled springform pan in the center and carefully wrap the foil up the sides of the pan, creating a watertight seal. This prevents any water from seeping into the crust.
-
Fill the Pan: Pour the matcha cheesecake batter over the cooled crust in the springform pan and spread it into an even layer with your spatula.
-
Set Up the Bath: Place the foil-wrapped pan into a large roasting pan. Bring a kettle or pot of water to a boil. Carefully place the roasting pan onto the oven rack. Pour the hot water into the roasting pan until it comes about one inch up the sides of the springform pan.
-
Bake: Bake at 325°F (160°C) for 65-75 minutes.
Step 4: Cool the Cheesecake Slowly (The Most Important Step)
-
Check for Doneness: The cheesecake is done when the outer edges (about 2-3 inches) are set, but the very center still has a slight wobble or jiggle when you gently nudge the pan. Do not over-bake.
-
Slow Oven Cool: Turn the oven off completely, but do not open the oven door. Let the cheesecake sit in the cooling oven for 1 hour.
-
Counter Cool: After 1 hour, carefully remove the cheesecake from the water bath, unwrap the foil, and place the pan on a wire rack to cool to room temperature, about 2-3 hours.
-
Chill: Once at room temperature, run a thin knife around the edge of the cheesecake to loosen it from the pan (this also helps prevent cracking as it settles). Cover the pan loosely with plastic wrap and transfer it to the refrigerator to chill for at least 6 hours, but preferably overnight. This long chill time is essential for the cheesecake to fully set and for the flavors to meld and deepen.
Nutrition
- Serving Size: one normal portion
- Calories: 550-600 kcal


