

There are moments in life that call for immediate, unadulterated joy, and often, that joy takes the form of cake. For my family, navigating the world of gluten-free baking has been a journey of trial, error, and a few too many dense, crumbly disappointments. I remember one particularly gloomy Tuesday evening when my youngest, who has to eat gluten-free, was feeling down. A full-blown baking project was out of the question, but their craving for something sweet and celebratory was palpable. On a whim, I decided to tackle the ultimate single-serving treat: a mug cake. After a few tweaks to my standard recipe, this Gluten-Free Funfetti Mug Cake was born. The moment I pulled that vibrant, sprinkle-studded cake from the microwave, their eyes lit up. It was fluffy, it was moist, and it tasted like a miniature birthday party. It wasn’t just a dessert; it was a five-minute solution to a bad day, a tiny beacon of happiness in a ceramic mug. It has since become our go-to emergency celebration cake, our “just because” treat, and a recipe I’m genuinely proud to share.
The Ultimate Gluten-Free Funfetti Mug Cake: A Celebration in a Cup
In the world of quick desserts, the mug cake reigns supreme. It’s the answer to the sudden, late-night sweet tooth, the perfect portion-controlled indulgence, and a delightful activity for a solo evening. However, for those on a gluten-free diet, the quest for a good mug cake can be fraught with peril. The results are often too dense, gummy, dry, or possess that distinct, slightly off-putting aftertaste that many gluten-free baked goods can have. This is precisely why this Gluten-Free Funfetti Mug Cake recipe is such a revelation.
This isn’t just another recipe; it’s a meticulously tested formula designed to conquer the common pitfalls of gluten-free microwave baking. The result is a cake that is astonishingly light, perfectly moist, and infused with the classic, nostalgic flavor of vanilla and a joyful explosion of colorful sprinkles. It’s a recipe that delivers the celebratory essence of a full-sized funfetti cake, conveniently scaled down into a single, satisfying serving that’s ready in under five minutes. It’s proof that you don’t need gluten, a lot of time, or a special occasion to enjoy a truly fantastic piece of cake. This recipe puts a personal-sized party right at your fingertips, whenever the mood strikes.
The Science of a Perfect Gluten-Free Mug Cake: Your Ingredients List
The magic of this recipe lies in the synergy of its simple ingredients. Each component is chosen for a specific purpose, working together to create a texture and flavor that rivals its gluten-filled counterparts. Understanding the role of each ingredient will not only help you execute the recipe perfectly but also empower you to make smart substitutions if needed.
- Gluten-Free All-Purpose Flour Blend (with xanthan gum): 4 Tablespoons
- Granulated White Sugar: 2 Tablespoons
- Baking Powder: 1/2 Teaspoon
- Fine Sea Salt: 1 Pinch (about 1/8 teaspoon)
- Milk of Choice (dairy or non-dairy): 3 Tablespoons
- Neutral Oil (like canola, vegetable, or melted coconut oil) or Melted Unsalted Butter: 1 Tablespoon
- Pure Vanilla Extract: 1/2 Teaspoon
- Gluten-Free Rainbow Sprinkles (Jimmies): 1 Tablespoon, plus more for topping
A Deeper Dive into the Ingredients
Gluten-Free All-Purpose Flour: This is the cornerstone of the recipe, and the type you use is critical. For the best results, you must use a high-quality “1-to-1” or “measure-for-measure” gluten-free flour blend. These blends are expertly crafted combinations of various gluten-free flours (like white rice flour, brown rice flour, potato starch, and tapioca starch) and, most importantly, they already contain xanthan gum. Xanthan gum is a food additive that acts as a binder and thickener, mimicking the elastic properties of gluten. It is non-negotiable for achieving a light, cakey structure and preventing a crumbly mess. Using a single-ingredient flour like only almond or coconut flour will not work with these proportions, as they absorb liquid very differently.
Granulated White Sugar: This provides the classic, clean sweetness that we associate with birthday cake. While you could experiment with other sweeteners like coconut sugar or maple syrup, granulated sugar dissolves perfectly and helps create the light, tender crumb we’re aiming for. It also contributes to the moisture of the final product.
Baking Powder: This is our leavening agent. When baking powder gets wet and then heated, it releases carbon dioxide gas, creating tiny air bubbles throughout the batter. These bubbles are what make the cake rise in the microwave, transforming the dense batter into a fluffy, airy dessert. Ensure your baking powder is fresh, as old baking powder loses its potency and will result in a flat, dense cake.
Fine Sea Salt: A tiny pinch of salt might seem insignificant, but it plays a huge role in flavor chemistry. Salt is a flavor enhancer. It doesn’t make the cake salty; instead, it balances the sweetness of the sugar and brings out the warm, rich notes of the vanilla. It makes the overall flavor profile more complex and delicious.
Milk of Choice: This provides the primary source of moisture in the cake. The beauty of this recipe is its versatility. You can use regular dairy milk (whole milk will provide the richest result) or any plant-based alternative. Almond milk, soy milk, and oat milk all work wonderfully here, making it incredibly easy to adapt this recipe to be dairy-free.
Oil or Melted Butter: This is the fat component, and it’s essential for a moist, tender cake. A neutral oil like canola or avocado oil will yield the moistest possible cake, as oil is 100% fat and remains liquid at room temperature. Melted butter, on the other hand, contributes a richer, more decadent flavor. The choice is yours and depends entirely on your flavor preference. For a dairy-free version, oil or a vegan butter substitute is the perfect choice.
Pure Vanilla Extract: This is the soul of the “cake batter” flavor. Use pure vanilla extract rather than imitation vanilla for the best, most authentic taste. It infuses the cake with a warm, aromatic quality that is the signature of any good vanilla cake.
Gluten-Free Rainbow Sprinkles: This is the “fun” in funfetti! It’s crucial to use the right kind of sprinkles, which are often called “jimmies” (the long, skinny ones). Avoid the tiny, round balls (nonpareils), as their color tends to bleed excessively into the batter, turning your cake a murky grey color. Most importantly, always double-check the label to ensure your sprinkles are certified gluten-free, as some brands are processed on shared equipment and can pose a risk of cross-contamination.
Step-by-Step Instructions for Your 5-Minute Dessert Masterpiece
The beauty of a mug cake lies in its simplicity. With just a mug, a fork, and a microwave, you are moments away from a warm, decadent treat. Follow these steps carefully for foolproof results every time.
Step 1: Choose Your Vessel and Prepare the Dry Ingredients
Select a standard-sized, microwave-safe mug, ideally one that holds about 10 to 12 ounces. A larger mug gives the cake plenty of room to rise without overflowing. Into the mug, add your dry ingredients: the 4 tablespoons of gluten-free all-purpose flour, 2 tablespoons of granulated sugar, 1/2 teaspoon of baking powder, and the pinch of salt. Take a fork or a small whisk and stir these ingredients together thoroughly. This step is more important than it seems; you want to ensure the baking powder and salt are evenly distributed throughout the flour to guarantee an even rise and consistent flavor.
Step 2: Introduce the Wet Ingredients
Now, pour the wet ingredients directly into the mug on top of the dry mixture. Add the 3 tablespoons of milk, 1 tablespoon of oil or melted butter, and 1/2 teaspoon of vanilla extract.
Step 3: Mix to Combine (But Don’t Overdo It!)
Using the same fork, begin to stir the wet and dry ingredients together. Mix until the batter is smooth and there are no more dry streaks of flour at the bottom of the mug. The most crucial tip here is not to overmix. As soon as the batter comes together, stop stirring. Overmixing can lead to a tough, rubbery texture, even without gluten. We want to keep the batter as light and airy as possible.
Step 4: Fold in the Funfetti
Gently pour in the 1 tablespoon of rainbow sprinkles. Use your fork to gently fold them into the batter with just two or three stirs. You don’t want to mix them vigorously, as this can cause their colors to streak. The goal is to have distinct pops of color throughout the cake.
Step 5: The Microwave Magic
Wipe any batter drips from the rim of the mug for a clean presentation. Place the mug in the center of your microwave. Microwave power varies significantly between models, so cooking time is key. Cook on high for 60 to 90 seconds. A good starting point for a standard 1000-watt microwave is 75 seconds.
The cake is done when the top looks set and is springy to the touch. If you insert a toothpick into the center, it should come out clean or with a few moist crumbs attached. If the center is still wet after 75 seconds, microwave in additional 10-15 second intervals until it’s cooked through. Be very careful not to overcook, as this is the number one cause of a dry, tough mug cake.
Step 6: Cool and Garnish
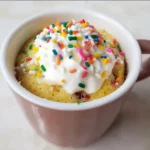
Carefully remove the mug from the microwave—it will be very hot! Let the cake rest for 1-2 minutes. This allows the cake to finish cooking with the residual heat and helps the structure to set. After it has cooled slightly, you can top it with your favorite frosting, a dusting of powdered sugar, or an extra shower of colorful sprinkles before diving in.
Understanding the Nutrition Facts
While this mug cake is an indulgence, it’s helpful to have a general idea of its nutritional content. Please note that these values are an approximation and can vary significantly based on the specific brands of ingredients you use, such as the type of gluten-free flour, the choice of milk (dairy vs. plant-based), and whether you use oil or butter.
- Servings: 1 mug cake
- Calories Per Serving: Approximately 380-450 kcal (without frosting)
The majority of the calories come from the carbohydrates in the flour and sugar, and the fat from the oil or butter. Adding frosting, whipped cream, or ice cream will increase the calorie count accordingly. This recipe is designed as a single-serving treat, perfect for satisfying a craving without the temptation of a full-sized cake.
Quick and Easy: Total Preparation and Cook Time
This recipe is the epitome of instant gratification. The timeline from craving to consumption is remarkably short, making it one of the fastest homemade desserts you can possibly make.
- Preparation Time: 3 minutes
- Cook Time: 1-2 minutes
- Total Time: Under 5 minutes
In less time than it takes to preheat a conventional oven, you can have a warm, fluffy, and completely delicious gluten-free cake ready to eat. This makes it the ultimate solution for busy weeknights, an impromptu dessert for one, or a fun and quick baking project with kids.
How to Serve Your Gluten-Free Funfetti Mug Cake
While this cake is delicious on its own, the right toppings can elevate it from a simple treat to a truly decadent dessert experience. Here are some wonderful ways to serve your creation:
- Classic Vanilla Frosting: The most traditional and celebratory option. You can use a store-bought gluten-free vanilla frosting or whip up a quick single-serving version by mixing a few tablespoons of powdered sugar with a teaspoon of milk and a tiny drop of vanilla extract until you reach a spreadable consistency. Top with more sprinkles for the full birthday cake effect.
- A Simple Glaze: For a lighter touch of sweetness, a simple glaze is perfect. Whisk together 3-4 tablespoons of powdered sugar with 1-2 teaspoons of milk. Drizzle this thin icing over the warm cake and let it set slightly.
- A Dollop of Whipped Cream: The light, airy texture of whipped cream beautifully complements the fluffy cake. You can use canned whipped cream for ultimate convenience or whip a small amount of heavy cream (or coconut cream for a dairy-free option) with a touch of sugar.
- With a Scoop of Ice Cream: For the ultimate indulgence, serve the warm mug cake with a scoop of your favorite gluten-free vanilla bean ice cream. The contrast between the warm, soft cake and the cold, melting ice cream is absolutely divine.
- Fresh Berries: To add a touch of freshness and a bit of tartness to cut through the sweetness, top the cake with a few fresh raspberries, sliced strawberries, or blueberries. The pop of natural fruit flavor is a wonderful addition.
- Inverted onto a Plate: For a slightly fancier presentation, you can gently run a knife around the edge of the cooled cake and invert it onto a small plate. This shows off the beautiful, sprinkle-flecked sides of the cake and provides a better canvas for decorating.
Pro-Level Tips for the Best Mug Cake Ever
Achieve mug cake mastery with these five essential tips that address the most common issues and ensure a perfect result every single time.
- Don’t Overmix the Batter: This is the golden rule of almost all baking, but it’s especially critical for mug cakes. Once the flour is hydrated and the ingredients are just combined, stop mixing. Over-agitating the batter develops the starches and proteins, which can lead to a dense, tough, and unpleasantly chewy texture. A few small lumps are perfectly fine.
- Know Your Microwave’s Power: Microwaves are not created equal. A 1200-watt microwave will cook the cake much faster than a 700-watt one. The first time you make this recipe, err on the side of caution. Start with the minimum recommended time (e.g., 60 seconds) and check for doneness. Add 15-second bursts until it’s cooked. Once you find the perfect timing for your specific microwave, make a note of it for next time.
- The Flour Blend is Non-Negotiable: Re-emphasizing this point is crucial for success. You must use a gluten-free flour blend that is designed as a 1-to-1 replacement for regular flour and contains xanthan gum. If your blend does not contain it, you will need to add about 1/8 teaspoon of xanthan gum yourself. Attempting this recipe with just a single flour like coconut, almond, or oat flour will result in a textural failure, as the liquid absorption rates are completely different.
- Grease the Mug for Easy Release: While you can mix and bake directly in the mug without greasing, taking a moment to lightly grease the inside with butter or cooking spray is a great idea. It ensures the cake won’t stick to the sides and allows you to easily invert it onto a plate if you desire a more elegant presentation.
- Let It Rest for a Minute: It’s tempting to dig in the second the microwave dings, but patience pays off. Allowing the mug cake to rest for 60-90 seconds after cooking is vital. This brief period allows the cake to set up fully, firming the crumb and making it less likely to be gummy. It also prevents you from burning your mouth on the molten-hot center.
Gluten-Free Funfetti Mug Cake: Your Questions Answered (FAQ)
Here are answers to some of the most frequently asked questions about making this gluten-free funfetti mug cake.
Q1: Can I make this recipe dairy-free and/or vegan?
A: Absolutely! This recipe is incredibly easy to adapt. To make it dairy-free, simply use your favorite plant-based milk (almond, soy, or oat milk work great) and use a neutral oil or a dairy-free butter substitute instead of regular butter. To make it fully vegan, make the same dairy-free substitutions and also ensure your granulated sugar is vegan (some white sugars are processed with bone char) and that your sprinkles are vegan (some use confectioner’s glaze, which is derived from insects).
Q2: My mug cake turned out rubbery and tough. What went wrong?
A: A rubbery texture in a mug cake is almost always caused by one of two things: overmixing the batter or overcooking the cake. When you mix the batter, stop as soon as the ingredients are combined. When you cook it, start with a shorter time and add small increments until it’s just done. Microwaves cook from the outside in, and it’s very easy to blast the cake for too long, which steams the proteins and starches into a tough, rubbery state.
Q3: Can I bake this in a conventional oven instead of a microwave?
A: Yes, you can, but it changes the “instant” nature of the recipe. To bake it in the oven, prepare the batter in an oven-safe ramekin or large muffin cup. Preheat your oven to 350°F (175°C) and bake for about 15-20 minutes, or until a toothpick inserted into the center comes out clean. The texture will be slightly different—more like a traditional cupcake—but still delicious.
Q4: I don’t have a gluten-free flour blend with xanthan gum. Can I still make this?
A: Xanthan gum is the key to giving this gluten-free cake structure and preventing it from being a crumbly mess. If your gluten-free flour blend does not already contain it, you must add it separately. For this single-serving recipe, a very small amount—about 1/8 of a teaspoon—whisked thoroughly into your dry ingredients should be sufficient to provide the necessary binding power.
Q5: Can I prepare the dry mix in advance for even faster prep?
A: Yes, and this is a fantastic idea for meal prep or creating “dessert kits.” You can measure the dry ingredients (flour, sugar, baking powder, salt) into small airtight containers or resealable bags. When a craving strikes, simply dump the contents of one bag into a mug, add the wet ingredients, stir, and microwave. It turns a 5-minute recipe into a 2-minute recipe! You can even tape a little note with the wet ingredient measurements to the bag.
Gluten-Free Funfetti Mug Cake recipe
Ingredients
-
Gluten-Free All-Purpose Flour Blend (with xanthan gum): 4 Tablespoons
-
Granulated White Sugar: 2 Tablespoons
-
Baking Powder: 1/2 Teaspoon
-
Fine Sea Salt: 1 Pinch (about 1/8 teaspoon)
-
Milk of Choice (dairy or non-dairy): 3 Tablespoons
-
Neutral Oil (like canola, vegetable, or melted coconut oil) or Melted Unsalted Butter: 1 Tablespoon
-
Pure Vanilla Extract: 1/2 Teaspoon
-
Gluten-Free Rainbow Sprinkles (Jimmies): 1 Tablespoon, plus more for topping
Instructions
Step 1: Choose Your Vessel and Prepare the Dry Ingredients
Select a standard-sized, microwave-safe mug, ideally one that holds about 10 to 12 ounces. A larger mug gives the cake plenty of room to rise without overflowing. Into the mug, add your dry ingredients: the 4 tablespoons of gluten-free all-purpose flour, 2 tablespoons of granulated sugar, 1/2 teaspoon of baking powder, and the pinch of salt. Take a fork or a small whisk and stir these ingredients together thoroughly. This step is more important than it seems; you want to ensure the baking powder and salt are evenly distributed throughout the flour to guarantee an even rise and consistent flavor.
Step 2: Introduce the Wet Ingredients
Now, pour the wet ingredients directly into the mug on top of the dry mixture. Add the 3 tablespoons of milk, 1 tablespoon of oil or melted butter, and 1/2 teaspoon of vanilla extract.
Step 3: Mix to Combine (But Don’t Overdo It!)
Using the same fork, begin to stir the wet and dry ingredients together. Mix until the batter is smooth and there are no more dry streaks of flour at the bottom of the mug. The most crucial tip here is not to overmix. As soon as the batter comes together, stop stirring. Overmixing can lead to a tough, rubbery texture, even without gluten. We want to keep the batter as light and airy as possible.
Step 4: Fold in the Funfetti
Gently pour in the 1 tablespoon of rainbow sprinkles. Use your fork to gently fold them into the batter with just two or three stirs. You don’t want to mix them vigorously, as this can cause their colors to streak. The goal is to have distinct pops of color throughout the cake.
Step 5: The Microwave Magic
Wipe any batter drips from the rim of the mug for a clean presentation. Place the mug in the center of your microwave. Microwave power varies significantly between models, so cooking time is key. Cook on high for 60 to 90 seconds. A good starting point for a standard 1000-watt microwave is 75 seconds.
The cake is done when the top looks set and is springy to the touch. If you insert a toothpick into the center, it should come out clean or with a few moist crumbs attached. If the center is still wet after 75 seconds, microwave in additional 10-15 second intervals until it’s cooked through. Be very careful not to overcook, as this is the number one cause of a dry, tough mug cake.
Step 6: Cool and Garnish
Carefully remove the mug from the microwave—it will be very hot! Let the cake rest for 1-2 minutes. This allows the cake to finish cooking with the residual heat and helps the structure to set. After it has cooled slightly, you can top it with your favorite frosting, a dusting of powdered sugar, or an extra shower of colorful sprinkles before diving in.
Nutrition
- Serving Size: one normal portion
- Calories: 380-450 kcal


