
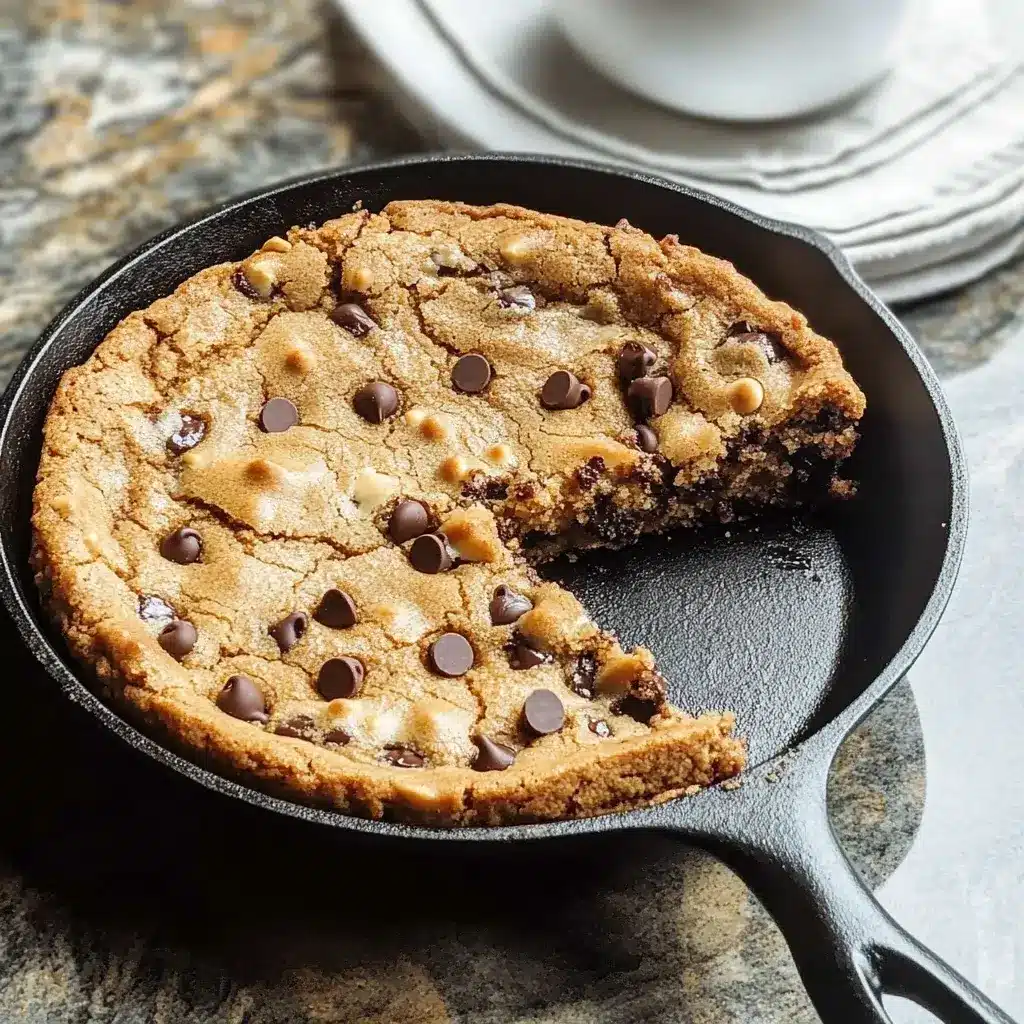

My best friend Sarah has a daughter, Lily, who was recently diagnosed with both gluten and dairy intolerances. Birthday parties, playdates, even simple family dinners suddenly became minefields of dietary restrictions. Sarah, a fantastic baker, was determined to not let Lily miss out on the joy of delicious treats, especially the quintessential chocolate chip cookie. After countless experiments, she landed on this Gluten-Free Dairy-Free Chocolate Chip Skillet Cookie recipe, and let me tell you, it’s pure magic. I was skeptical at first – gluten-free AND dairy-free? Could it really be as good as the real deal? One bite, still warm from the oven, and all my doubts vanished. This skillet cookie is incredible. The edges are perfectly crisp and caramelized, giving way to a soft, gooey, and intensely chocolatey center. The texture is phenomenal – no dryness, no grittiness, just pure cookie bliss. Even my gluten-and-dairy-loving family devoured it, declaring it one of the best cookies they’d ever had. Lily, of course, was ecstatic. Finally, a chocolate chip cookie she could enjoy without any tummy troubles! This recipe isn’t just a great alternative; it’s a genuinely delicious dessert in its own right. Whether you have dietary restrictions or not, you absolutely have to try this Gluten-Free Dairy-Free Chocolate Chip Skillet Cookie. It’s easy to make, incredibly satisfying, and guaranteed to become a new family favorite. Get ready for warm, gooey cookie perfection that everyone can enjoy!
Ingredients for Gluten-Free Dairy-Free Chocolate Chip Skillet Cookie: The Foundation of Deliciousness
Creating a truly exceptional gluten-free and dairy-free chocolate chip skillet cookie relies on carefully selected ingredients that work together to mimic the texture and flavor of traditional cookies, while catering to dietary needs. Here’s a detailed breakdown of each ingredient and why it’s crucial for this recipe:
Dry Ingredients:
- 1 ½ cups Gluten-Free All-Purpose Flour Blend: This is the cornerstone of our gluten-free cookie. It’s essential to use a high-quality gluten-free all-purpose flour blend that is designed for baking. Not all blends are created equal. Look for blends that contain a mix of rice flours (brown and white), tapioca starch, and potato starch. These blends tend to provide the best texture in baked goods, mimicking the structure of wheat flour. Avoid single-flour substitutes like almond flour or coconut flour for this recipe, as they will result in a very different texture and may not hold the skillet cookie together as well. If your blend doesn’t contain xanthan gum, you may need to add ½ teaspoon of xanthan gum separately to help bind the ingredients and provide structure. Check the label of your gluten-free flour blend – many pre-made blends already include xanthan gum.
- ¾ cup Packed Light Brown Sugar: Brown sugar is essential for the characteristic chewiness and moisture of chocolate chip cookies. Light brown sugar is preferred as it provides a slightly more delicate sweetness and molasses flavor compared to dark brown sugar. The molasses in brown sugar also contributes to the cookie’s soft texture and helps with browning. Make sure to pack the brown sugar firmly when measuring to ensure you use the correct amount.
- ½ cup Granulated Sugar: Granulated sugar adds sweetness and crispness to the edges of the skillet cookie. It works in tandem with the brown sugar to create a balanced sweetness and texture profile. Regular white granulated sugar is perfect for this recipe.
- 1 teaspoon Baking Soda: Baking soda is the leavening agent that helps the cookie rise and become light and airy. It reacts with the acidity in the brown sugar and any other acidic ingredients to create carbon dioxide, which gives the cookie its lift. Ensure your baking soda is fresh for optimal leavening power. You can test its freshness by dropping a small amount into vinegar; it should fizz vigorously.
- 1 teaspoon Salt: Salt is a crucial flavor enhancer in baking. It balances the sweetness of the sugars and enhances the flavors of the chocolate and vanilla. Table salt, sea salt, or kosher salt will all work well. If using kosher salt, you may need to use slightly more as it is less dense than table salt.
Wet Ingredients:
- ½ cup Refined Coconut Oil, Melted and Slightly Cooled: Refined coconut oil is our dairy-free fat source and a key ingredient for achieving the perfect texture. Refined coconut oil is crucial because it has a neutral flavor, unlike unrefined (virgin) coconut oil, which has a distinct coconut taste that might not be desired in a classic chocolate chip cookie. Melt the coconut oil gently in the microwave or in a saucepan over low heat. Allow it to cool slightly before adding it to the other ingredients. If it’s too hot, it could cook the eggs slightly. Melted coconut oil contributes to a chewy texture and a slightly fudgy center. You can substitute with melted vegan butter sticks for a richer, butter-like flavor.
- 2 Large Eggs: Eggs provide structure, richness, and moisture to the cookie. They help bind the ingredients together and contribute to the chewy texture. Use large eggs at room temperature for best results. Room temperature eggs emulsify more easily and incorporate better into the batter. For a vegan version, you can try using flax eggs or a commercial egg replacer, but be aware that the texture might be slightly different.
- 2 teaspoons Vanilla Extract: Vanilla extract enhances the overall flavor profile of the cookie, adding warmth and depth. Pure vanilla extract is recommended for the best flavor. Avoid imitation vanilla extract, which can have a artificial taste. You can also use vanilla bean paste for an even more intense vanilla flavor, using about 1 tablespoon of vanilla bean paste in place of the extract.
Chocolate Chips:
- 1 ½ cups Dairy-Free Chocolate Chips: Chocolate chips are, of course, essential for a chocolate chip cookie! Make sure to use dairy-free chocolate chips to keep this recipe truly dairy-free. Many brands now offer excellent dairy-free chocolate chips, including semi-sweet, dark, and milk chocolate alternatives. Brands like Enjoy Life, Nestle Toll House Simply Delicious (check labels to confirm dairy-free), and Hu Kitchen are good options. You can use semi-sweet or dark chocolate chips depending on your preference. For a more intense chocolate flavor, use dark chocolate chips or even chop up a dairy-free dark chocolate bar. You can also use a mix of different types of dairy-free chocolate chips for added complexity.
Equipment:
- 10-inch Cast Iron Skillet: A 10-inch cast iron skillet is ideal for this recipe. Cast iron skillets distribute heat evenly and retain heat well, resulting in a perfectly baked skillet cookie with crispy edges and a gooey center. If you don’t have a 10-inch skillet, you can use a 9-inch skillet, but the cookie will be slightly thicker and may require a few extra minutes of baking time. You can also use an oven-safe skillet of a similar size made from other materials, but cast iron is highly recommended for its superior heat distribution and browning capabilities.
By using these carefully chosen ingredients, paying attention to quality and specific types (like refined coconut oil and gluten-free all-purpose blend), you’ll be well on your way to creating a truly delicious and satisfying Gluten-Free Dairy-Free Chocolate Chip Skillet Cookie that rivals any traditional version.
Instructions: Baking Your Gluten-Free Dairy-Free Skillet Cookie to Perfection
Follow these step-by-step instructions to bake a perfect Gluten-Free Dairy-Free Chocolate Chip Skillet Cookie every time. Attention to detail at each stage will ensure a delicious and successful outcome.
Step 1: Preheat Oven and Prepare Skillet
- Preheat Oven to 350°F (175°C): Preheat your oven to 350°F (175°C). This is the optimal temperature for baking cookies, allowing them to bake through evenly without burning the edges. Make sure your oven is properly preheated before placing the skillet in.
- Lightly Grease a 10-inch Cast Iron Skillet: Take your 10-inch cast iron skillet and lightly grease the bottom and sides with a little bit of refined coconut oil or dairy-free butter. This will prevent the cookie from sticking to the skillet and make it easier to remove slices once baked. You can use your fingers, a paper towel, or a pastry brush to spread the grease evenly. Set the prepared skillet aside.
Step 2: Combine Dry Ingredients
- Whisk Dry Ingredients in a Medium Bowl: In a medium-sized mixing bowl, whisk together the gluten-free all-purpose flour blend, baking soda, and salt. Whisking helps to aerate the flour and ensure that the baking soda and salt are evenly distributed throughout the mixture. This prevents clumps and ensures consistent leavening and flavor in the final cookie. Set the bowl of dry ingredients aside.
Step 3: Cream Sugars and Melted Coconut Oil
- In a Large Bowl, Combine Melted Coconut Oil and Sugars: In a large mixing bowl, add the melted and slightly cooled refined coconut oil, packed light brown sugar, and granulated sugar.
- Cream Together Until Smooth: Use an electric mixer (hand mixer or stand mixer) or a whisk to cream together the coconut oil and sugars until the mixture is smooth and well combined. Creaming helps to incorporate air into the mixture, which contributes to the cookie’s texture. If using a whisk, make sure to whisk vigorously until the mixture is smooth and no longer grainy.
Step 4: Add Eggs and Vanilla Extract
- Add Eggs One at a Time, Mixing Well After Each Addition: Add the eggs one at a time to the sugar and coconut oil mixture. Mix well after each egg is added until fully incorporated. This ensures that each egg is properly emulsified into the batter, contributing to a smooth and cohesive dough.
- Stir in Vanilla Extract: Add the vanilla extract to the mixture and stir until just combined. Don’t overmix at this stage; just ensure the vanilla is evenly distributed throughout the wet ingredients.
Step 5: Gradually Add Dry Ingredients to Wet Ingredients
- Gradually Add Dry Ingredients to Wet Ingredients: Gradually add the dry ingredients (from the medium bowl) to the wet ingredients (in the large bowl). Add about one-third of the dry ingredients at a time, mixing on low speed with an electric mixer or gently folding with a spatula until just combined. Repeat this process until all the dry ingredients are incorporated.
- Mix Until Just Combined: Mix until the dry ingredients are just incorporated into the wet ingredients. Be careful not to overmix the dough. Overmixing can develop the gluten (even in gluten-free flour blends, overmixing can lead to a tougher texture) and result in a tougher, less tender cookie. Mix only until no streaks of flour remain.
Step 6: Stir in Dairy-Free Chocolate Chips
- Fold in Dairy-Free Chocolate Chips: Add the dairy-free chocolate chips to the cookie dough. Use a spatula to gently fold them in until they are evenly distributed throughout the dough. Folding ensures that the chocolate chips are incorporated without overmixing the dough.
Step 7: Press Dough into Skillet
- Press Dough Evenly into Prepared Skillet: Transfer the cookie dough to the prepared 10-inch cast iron skillet. Use your hands or a spatula to press the dough evenly into the bottom of the skillet, spreading it to the edges. Aim for an even thickness for consistent baking. You can create slight indentations or swirls on the surface of the dough if desired for a rustic look.
Step 8: Bake the Skillet Cookie
- Bake in Preheated Oven for 20-25 Minutes: Place the skillet with the cookie dough in the preheated oven and bake for 20-25 minutes, or until the edges are golden brown and the center is just set but still slightly gooey. Baking time can vary slightly depending on your oven and the thickness of the cookie dough.
- Check for Doneness: To check for doneness, the edges should be nicely golden brown and the center should be set but still slightly soft to the touch. A toothpick inserted into the center might come out with moist crumbs, but not wet batter. The center will continue to set as it cools. Avoid overbaking, as this will result in a dry cookie.
Step 9: Cool and Serve
- Let Cool Slightly in Skillet Before Slicing: Remove the skillet from the oven and let the skillet cookie cool slightly in the skillet for about 10-15 minutes before slicing and serving. This allows the cookie to set up a bit and makes it easier to slice. The cookie will be very soft and gooey when hot, but will firm up slightly as it cools.
- Slice and Serve Warm: Slice the skillet cookie into wedges directly in the skillet and serve warm. The warm, gooey center and slightly crispy edges are best enjoyed fresh from the oven. You can serve it plain or with your favorite dairy-free ice cream or toppings (see serving suggestions below).
By following these detailed instructions, paying attention to mixing techniques and baking time, you’ll create a perfectly baked Gluten-Free Dairy-Free Chocolate Chip Skillet Cookie with a delightful texture and irresistible flavor that everyone will love. Enjoy the process and the incredible results!
Nutrition Facts: A Treat to Indulge in Moderation
Understanding the nutritional content of your treats is helpful for making informed choices. Here’s an approximate nutritional breakdown for a serving of Gluten-Free Dairy-Free Chocolate Chip Skillet Cookie. Please remember these are estimates and can vary based on specific ingredient brands and portion sizes.
Servings: Approximately 8 servings (large wedges)
Serving Size: 1 wedge (approximately 1/8th of the 10-inch skillet cookie)
Approximate Nutrition Information per Serving:
- Calories: 350-400 calories
- Total Fat: 20-25g
- Saturated Fat: 10-15g (primarily from coconut oil and chocolate chips)
- Unsaturated Fat: 5-10g
- Cholesterol: 50-60mg
- Sodium: 200-250mg
- Total Carbohydrates: 40-45g
- Dietary Fiber: 1-2g
- Sugars: 25-30g (from added sugars and chocolate chips)
- Protein: 3-4g
Important Notes:
- Estimates Only: These are general estimates. Actual nutritional values can vary based on the specific brands of ingredients used (especially gluten-free flour blends and dairy-free chocolate chips) and precise portion sizes. For the most accurate information, use a nutrition calculator with the specific brands you use.
- Treat in Moderation: Like all cookies and desserts, this skillet cookie is best enjoyed as an occasional treat as part of a balanced diet. It is higher in calories, fat, and sugar.
- Gluten-Free and Dairy-Free: This recipe is specifically designed to be gluten-free and dairy-free, making it suitable for individuals with gluten sensitivities, celiac disease, or dairy allergies/intolerances.
- Coconut Oil Fat Content: Coconut oil is high in saturated fat. While some studies suggest that not all saturated fats are equally detrimental, it’s still important to consume saturated fats in moderation as part of a healthy diet.
- Sugar Content: The sugar content is relatively high, as is typical for chocolate chip cookies. Be mindful of portion sizes and overall sugar intake.
Customization for Potential Adjustments:
While this recipe is designed to be delicious and indulgent, here are a few potential adjustments if you are looking to modify the nutritional profile slightly:
- Reduce Sugar: You could slightly reduce the amount of granulated sugar or brown sugar, but this might affect the texture and sweetness of the cookie.
- Use Dark Chocolate Chips: Dark chocolate chips generally have less sugar than semi-sweet chocolate chips and may offer some antioxidant benefits (depending on the cocoa percentage).
- Increase Fiber: Adding a tablespoon or two of flaxseed meal (flax egg) might slightly increase the fiber content.
Overall:
Gluten-Free Dairy-Free Chocolate Chip Skillet Cookie is a delicious and satisfying treat that caters to specific dietary needs. It’s important to be aware of the approximate nutritional content and enjoy it in moderation as part of a balanced eating plan.
Preparation Time: Quick Dessert Gratification
One of the best things about a skillet cookie is its speed and ease of preparation. This Gluten-Free Dairy-Free Chocolate Chip Skillet Cookie is no exception. Here’s a breakdown of the preparation time:
Prep Time: 15 minutes
- Measuring ingredients: 8 minutes
- Melting coconut oil: 2 minutes
- Mixing dry ingredients: 2 minutes
- Mixing wet ingredients and combining: 3 minutes
Cook Time: 20-25 minutes
- Baking in the oven: 20-25 minutes
Total Time: 35-40 minutes
Cooling Time: 10-15 minutes (recommended before slicing)
Total Time (Including Cooling): Approximately 45-55 minutes from start to serving
Make-Ahead Tips:
While the skillet cookie is best enjoyed fresh and warm, you can do some prep work ahead of time to speed up the process:
- Measure Dry Ingredients: You can measure out the gluten-free flour blend, baking soda, and salt and combine them in a bowl in advance.
- Melt Coconut Oil: Melt the coconut oil ahead of time and store it at room temperature.
- Combine Sugars: You can measure out the brown sugar and granulated sugar in advance.
However, it’s generally recommended to mix the wet and dry ingredients and bake the skillet cookie relatively close to serving time for the best texture and freshness. The dough is best baked immediately after mixing for optimal results.
Quick Dessert Solution:
Compared to making individual cookies, a skillet cookie is a much faster way to bake a warm and satisfying dessert. With just about 15 minutes of active prep time and 20-25 minutes of baking, you can have a delicious Gluten-Free Dairy-Free Chocolate Chip Skillet Cookie ready to enjoy in under an hour. This makes it a perfect option for weeknight desserts, last-minute gatherings, or when you simply crave a warm, gooey cookie without a lot of fuss.
How to Serve Gluten-Free Dairy-Free Chocolate Chip Skillet Cookie: Serving Suggestions for Every Occasion
The beauty of a skillet cookie is its versatility in serving. It’s delicious on its own, but also lends itself to a variety of accompaniments and presentations. Here are some ideas for how to serve your Gluten-Free Dairy-Free Chocolate Chip Skillet Cookie:
Classic Warm Dessert:
- Warm and Plain: Simply slice into wedges and serve warm straight from the skillet. The warm, gooey texture and rich chocolate flavor are perfect on their own.
- With Dairy-Free Ice Cream: The quintessential pairing! Top warm slices with scoops of your favorite dairy-free ice cream. Vanilla, chocolate, salted caramel, or even coconut-based ice creams all work wonderfully. The contrast of warm cookie and cold ice cream is irresistible.
- With Dairy-Free Whipped Cream: A dollop of dairy-free whipped cream (coconut whipped cream or store-bought vegan whipped cream) adds a light and airy sweetness.
Elevated Dessert Options:
- Drizzled with Dairy-Free Chocolate Sauce: Enhance the chocolate intensity with a drizzle of homemade or store-bought dairy-free chocolate sauce.
- Caramel Sauce: A drizzle of dairy-free caramel sauce adds a rich, buttery sweetness that complements the chocolate.
- Sprinkled with Sea Salt: A sprinkle of flaky sea salt on top of the warm cookie enhances the sweetness and chocolate flavor, creating a sophisticated sweet-and-salty contrast.
- Fresh Berries: Serve with fresh berries like raspberries, strawberries, or blueberries for a touch of freshness and acidity that balances the richness of the cookie.
- Chopped Nuts: Sprinkle with chopped toasted nuts like pecans, walnuts, or almonds for added crunch and flavor.
Fun and Festive Servings:
- Cookie Sundae Bar: Set up a skillet cookie sundae bar with various dairy-free ice cream flavors, sauces, toppings (nuts, sprinkles, berries, etc.), and let everyone customize their own cookie sundae. Perfect for parties and gatherings.
- Individual Skillet Cookie Cups: For individual servings, you can bake the dough in smaller oven-safe ramekins or mini cast iron skillets to create individual skillet cookie cups. Adjust baking time accordingly (reduce time for smaller portions).
- S’mores Skillet Cookie: Top the warm skillet cookie with dairy-free marshmallows and broil briefly until marshmallows are toasted and gooey for a fun s’mores-inspired dessert.
Serving Temperature and Presentation:
- Serve Warm: Skillet cookie is best served warm, ideally within a few hours of baking. Reheating is possible, but it’s most delicious fresh.
- Serve in Skillet: Presenting the skillet cookie directly in the cast iron skillet adds to its rustic charm and keeps it warm for longer. Place the skillet on a heat-safe surface for serving.
- Slice into Wedges: Slice the cookie into wedges directly in the skillet for easy serving.
- Garnish: Garnish with fresh mint sprigs, a dusting of powdered sugar (dairy-free), or extra chocolate chips for visual appeal.
No matter how you choose to serve it, Gluten-Free Dairy-Free Chocolate Chip Skillet Cookie is a crowd-pleasing dessert that’s sure to be a hit. Its warm, gooey texture and customizable toppings make it a perfect treat for any occasion.
Additional Tips for Gluten-Free Dairy-Free Skillet Cookie Success
Baking gluten-free and dairy-free can sometimes present unique challenges. Here are five essential tips to ensure your Gluten-Free Dairy-Free Chocolate Chip Skillet Cookie turns out perfectly every time:
- Use a High-Quality Gluten-Free Flour Blend: The Foundation for Texture: The type of gluten-free flour blend you use is paramount for the texture of your skillet cookie. As mentioned earlier, opt for a reputable gluten-free all-purpose blend designed for baking. Look for blends containing a mix of rice flours, tapioca starch, and potato starch. These blends are formulated to mimic the baking properties of wheat flour and will provide the best texture in your cookie. Avoid cheaper, single-flour substitutes or blends that are primarily bean-based, as they can result in a dry, gritty, or dense cookie. Investing in a good quality blend will make a significant difference in the final outcome.
- Don’t Overmix the Dough: Maintain Tenderness: Overmixing is a common mistake in baking, and it’s especially important to avoid when making gluten-free baked goods. Overmixing gluten-free dough can develop a slightly gummy or tough texture, even without gluten. Mix the wet and dry ingredients together only until just combined. Once you add the dry ingredients, mix on low speed or fold gently with a spatula until no streaks of flour remain. Stop mixing as soon as the dough comes together. Overmixing can also lead to a flatter cookie.
- Slightly Underbake for Gooey Center: Achieve Perfect Texture: Skillet cookies are known for their gooey centers and slightly crispy edges. To achieve this perfect texture, it’s better to slightly underbake the cookie. Bake for the recommended time (20-25 minutes) or until the edges are golden brown and the center is just set but still appears slightly soft. The center will continue to set up as it cools in the skillet. Resist the urge to bake until the center is completely firm, as this will likely result in an overbaked and drier cookie. Err on the side of slightly gooey for the best skillet cookie experience.
- Let it Cool Slightly in the Skillet: Allow Setting and Easy Slicing: After removing the skillet cookie from the oven, let it cool in the skillet for at least 10-15 minutes before slicing. This cooling period is crucial for two reasons: First, it allows the cookie to set up slightly and firm up in the center, making it easier to slice into wedges without it falling apart. Second, it prevents burning your mouth on a molten hot cookie! The cookie will still be wonderfully warm and gooey after this brief cooling period, but it will be much more manageable to slice and serve.
- Experiment with Dairy-Free Chocolate Chip Varieties: Customize Flavor: Dairy-free chocolate chips have come a long way, and there are now many delicious varieties available. Don’t be afraid to experiment with different types of dairy-free chocolate chips to customize the flavor of your skillet cookie. Try semi-sweet, dark, milk chocolate alternatives, or even white dairy-free chocolate chips. You can also use a mix of different types for added complexity. For a richer chocolate flavor, consider using chopped dairy-free dark chocolate bars instead of chips. Exploring different chocolate options will allow you to tailor the cookie to your personal taste preferences and create unique flavor combinations.
By keeping these five tips in mind – focusing on flour quality, avoiding overmixing, slightly underbaking, allowing for cooling, and experimenting with chocolate – you’ll be well-equipped to bake a consistently delicious and perfectly textured Gluten-Free Dairy-Free Chocolate Chip Skillet Cookie that will impress everyone, regardless of dietary needs.
FAQ: Answering Your Questions About Gluten-Free Dairy-Free Skillet Cookies
Have questions about making Gluten-Free Dairy-Free Chocolate Chip Skillet Cookie? We’ve compiled answers to some frequently asked questions to help you bake with confidence:
Q1: Can I make this skillet cookie vegan/egg-free?
A: Yes, you can attempt to make this skillet cookie vegan by using egg replacers. Flax eggs or commercial egg replacers designed for baking can be used as substitutes for the eggs. To make flax eggs, mix 1 tablespoon of flaxseed meal with 3 tablespoons of water per egg, let it sit for 5-10 minutes to thicken. However, be aware that substituting eggs can slightly alter the texture of the cookie, potentially making it a bit denser or chewier. Vegan butter sticks can also be substituted for the refined coconut oil for a richer flavor.
Q2: Can I use a different type of oil instead of coconut oil?
A: Yes, you can substitute refined coconut oil with other neutral-flavored oils that are solid at room temperature or melted vegan butter sticks. Good alternatives include:
- Melted Vegan Butter Sticks: These will provide a richer, butter-like flavor and texture, closer to traditional cookies.
- Vegetable Shortening: A neutral-flavored vegetable shortening can also be used, but it may result in a slightly less flavorful cookie compared to coconut oil or vegan butter.
- Canola Oil or Avocado Oil: While not solid at room temperature, these neutral oils can be used in a pinch, but the texture of the cookie might be slightly less chewy and more cake-like. Coconut oil and vegan butter sticks are generally preferred for the best texture and flavor in this recipe.
Q3: My skillet cookie is too crumbly/dry. What went wrong?
A: A crumbly or dry skillet cookie can be caused by several factors:
- Overmeasuring Flour: Too much gluten-free flour can result in a dry cookie. Always measure flour accurately using the spoon and level method (spoon flour into measuring cup and level off) or use a kitchen scale.
- Overbaking: Baking the cookie for too long will dry it out. Be sure to check for doneness at the recommended time and slightly underbake for a gooey center.
- Incorrect Gluten-Free Flour Blend: Using a blend that is too starchy or doesn’t have the right balance of flours and starches can also lead to dryness. Use a high-quality gluten-free all-purpose blend designed for baking.
- Not Enough Fat: If you reduced the amount of coconut oil or used a lower-fat substitute, it can result in a drier cookie.
Q4: Can I add nuts or other mix-ins to the skillet cookie?
A: Yes, you can definitely add nuts or other mix-ins to customize your skillet cookie! Good additions include:
- Chopped Nuts: Walnuts, pecans, almonds, or macadamia nuts (ensure they are gluten-free and dairy-free if needed).
- Dried Fruit: Chopped cranberries, raisins, or dried cherries (check for gluten-free and dairy-free if needed).
- Dairy-Free Peanut Butter Chips or Butterscotch Chips: For different flavor variations.
- Shredded Coconut (unsweetened): Adds texture and a subtle coconut flavor.
- Espresso Powder: A teaspoon of espresso powder enhances the chocolate flavor.
Add about ½ to 1 cup of mix-ins to the dough along with the chocolate chips, folding them in gently.
Q5: How do I store leftover skillet cookie?
A: Leftover Gluten-Free Dairy-Free Chocolate Chip Skillet Cookie can be stored at room temperature in an airtight container for 2-3 days. It’s best to store it once it has completely cooled. To reheat, you can warm individual slices in the microwave for a few seconds until slightly warmed through, or warm the entire skillet in a low oven (around 300°F/150°C) for a few minutes until heated through. The cookie is best enjoyed fresh, but leftovers are still delicious.
We hope these FAQs have addressed your questions and provided you with helpful tips for baking your own perfect Gluten-Free Dairy-Free Chocolate Chip Skillet Cookie. Happy baking and enjoy this delicious treat!
Print
Gluten Free Dairy Free Chocolate Chip Skillet Cookie recipe
Ingredients
-
- 1 ½ cups Gluten-Free All-Purpose Flour Blend: This is the cornerstone of our gluten-free cookie. It’s essential to use a high-quality gluten-free all-purpose flour blend that is designed for baking. Not all blends are created equal. Look for blends that contain a mix of rice flours (brown and white), tapioca starch, and potato starch. These blends tend to provide the best texture in baked goods, mimicking the structure of wheat flour. Avoid single-flour substitutes like almond flour or coconut flour for this recipe, as they will result in a very different texture and may not hold the skillet cookie together as well. If your blend doesn’t contain xanthan gum, you may need to add ½ teaspoon of xanthan gum separately to help bind the ingredients and provide structure. Check the label of your gluten-free flour blend – many pre-made blends already include xanthan gum.
-
- ¾ cup Packed Light Brown Sugar: Brown sugar is essential for the characteristic chewiness and moisture of chocolate chip cookies. Light brown sugar is preferred as it provides a slightly more delicate sweetness and molasses flavor compared to dark brown sugar. The molasses in brown sugar also contributes to the cookie’s soft texture and helps with browning. Make sure to pack the brown sugar firmly when measuring to ensure you use the correct amount.
-
- ½ cup Granulated Sugar: Granulated sugar adds sweetness and crispness to the edges of the skillet cookie. It works in tandem with the brown sugar to create a balanced sweetness and texture profile. Regular white granulated sugar is perfect for this recipe.
-
- 1 teaspoon Baking Soda: Baking soda is the leavening agent that helps the cookie rise and become light and airy. It reacts with the acidity in the brown sugar and any other acidic ingredients to create carbon dioxide, which gives the cookie its lift. Ensure your baking soda is fresh for optimal leavening power. You can test its freshness by dropping a small amount into vinegar; it should fizz vigorously.
-
- 1 teaspoon Salt: Salt is a crucial flavor enhancer in baking. It balances the sweetness of the sugars and enhances the flavors of the chocolate and vanilla. Table salt, sea salt, or kosher salt will all work well. If using kosher salt, you may need to use slightly more as it is less dense than table salt.
Wet Ingredients:
-
- ½ cup Refined Coconut Oil, Melted and Slightly Cooled: Refined coconut oil is our dairy-free fat source and a key ingredient for achieving the perfect texture. Refined coconut oil is crucial because it has a neutral flavor, unlike unrefined (virgin) coconut oil, which has a distinct coconut taste that might not be desired in a classic chocolate chip cookie. Melt the coconut oil gently in the microwave or in a saucepan over low heat. Allow it to cool slightly before adding it to the other ingredients. If it’s too hot, it could cook the eggs slightly. Melted coconut oil contributes to a chewy texture and a slightly fudgy center. You can substitute with melted vegan butter sticks for a richer, butter-like flavor.
-
- 2 Large Eggs: Eggs provide structure, richness, and moisture to the cookie. They help bind the ingredients together and contribute to the chewy texture. Use large eggs at room temperature for best results. Room temperature eggs emulsify more easily and incorporate better into the batter. For a vegan version, you can try using flax eggs or a commercial egg replacer, but be aware that the texture might be slightly different.
-
- 2 teaspoons Vanilla Extract: Vanilla extract enhances the overall flavor profile of the cookie, adding warmth and depth. Pure vanilla extract is recommended for the best flavor. Avoid imitation vanilla extract, which can have a artificial taste. You can also use vanilla bean paste for an even more intense vanilla flavor, using about 1 tablespoon of vanilla bean paste in place of the extract.
Chocolate Chips:
-
- 1 ½ cups Dairy-Free Chocolate Chips: Chocolate chips are, of course, essential for a chocolate chip cookie! Make sure to use dairy-free chocolate chips to keep this recipe truly dairy-free. Many brands now offer excellent dairy-free chocolate chips, including semi-sweet, dark, and milk chocolate alternatives. Brands like Enjoy Life, Nestle Toll House Simply Delicious (check labels to confirm dairy-free), and Hu Kitchen are good options. You can use semi-sweet or dark chocolate chips depending on your preference. For a more intense chocolate flavor, use dark chocolate chips or even chop up a dairy-free dark chocolate bar. You can also use a mix of different types of dairy-free chocolate chips for added complexity.
Equipment:
-
- 10-inch Cast Iron Skillet: A 10-inch cast iron skillet is ideal for this recipe. Cast iron skillets distribute heat evenly and retain heat well, resulting in a perfectly baked skillet cookie with crispy edges and a gooey center. If you don’t have a 10-inch skillet, you can use a 9-inch skillet, but the cookie will be slightly thicker and may require a few extra minutes of baking time. You can also use an oven-safe skillet of a similar size made from other materials, but cast iron is highly recommended for its superior heat distribution and browning capabilities.
By using these carefully chosen ingredients, paying attention to quality and specific types (like refined coconut oil and gluten-free all-purpose blend), you’ll be well on your way to creating a truly delicious and satisfying Gluten-Free Dairy-Free Chocolate Chip Skillet Cookie that rivals any traditional version.
Instructions
Step 1: Preheat Oven and Prepare Skillet
-
- Preheat Oven to 350°F (175°C): Preheat your oven to 350°F (175°C). This is the optimal temperature for baking cookies, allowing them to bake through evenly without burning the edges. Make sure your oven is properly preheated before placing the skillet in.
-
- Lightly Grease a 10-inch Cast Iron Skillet: Take your 10-inch cast iron skillet and lightly grease the bottom and sides with a little bit of refined coconut oil or dairy-free butter. This will prevent the cookie from sticking to the skillet and make it easier to remove slices once baked. You can use your fingers, a paper towel, or a pastry brush to spread the grease evenly. Set the prepared skillet aside.
Step 2: Combine Dry Ingredients
-
- Whisk Dry Ingredients in a Medium Bowl: In a medium-sized mixing bowl, whisk together the gluten-free all-purpose flour blend, baking soda, and salt. Whisking helps to aerate the flour and ensure that the baking soda and salt are evenly distributed throughout the mixture. This prevents clumps and ensures consistent leavening and flavor in the final cookie. Set the bowl of dry ingredients aside.
Step 3: Cream Sugars and Melted Coconut Oil
-
- In a Large Bowl, Combine Melted Coconut Oil and Sugars: In a large mixing bowl, add the melted and slightly cooled refined coconut oil, packed light brown sugar, and granulated sugar.
-
- Cream Together Until Smooth: Use an electric mixer (hand mixer or stand mixer) or a whisk to cream together the coconut oil and sugars until the mixture is smooth and well combined. Creaming helps to incorporate air into the mixture, which contributes to the cookie’s texture. If using a whisk, make sure to whisk vigorously until the mixture is smooth and no longer grainy.
Step 4: Add Eggs and Vanilla Extract
-
- Add Eggs One at a Time, Mixing Well After Each Addition: Add the eggs one at a time to the sugar and coconut oil mixture. Mix well after each egg is added until fully incorporated. This ensures that each egg is properly emulsified into the batter, contributing to a smooth and cohesive dough.
-
- Stir in Vanilla Extract: Add the vanilla extract to the mixture and stir until just combined. Don’t overmix at this stage; just ensure the vanilla is evenly distributed throughout the wet ingredients.
Step 5: Gradually Add Dry Ingredients to Wet Ingredients
-
- Gradually Add Dry Ingredients to Wet Ingredients: Gradually add the dry ingredients (from the medium bowl) to the wet ingredients (in the large bowl). Add about one-third of the dry ingredients at a time, mixing on low speed with an electric mixer or gently folding with a spatula until just combined. Repeat this process until all the dry ingredients are incorporated.
-
- Mix Until Just Combined: Mix until the dry ingredients are just incorporated into the wet ingredients. Be careful not to overmix the dough. Overmixing can develop the gluten (even in gluten-free flour blends, overmixing can lead to a tougher texture) and result in a tougher, less tender cookie. Mix only until no streaks of flour remain.
Step 6: Stir in Dairy-Free Chocolate Chips
-
- Fold in Dairy-Free Chocolate Chips: Add the dairy-free chocolate chips to the cookie dough. Use a spatula to gently fold them in until they are evenly distributed throughout the dough. Folding ensures that the chocolate chips are incorporated without overmixing the dough.
Step 7: Press Dough into Skillet
-
- Press Dough Evenly into Prepared Skillet: Transfer the cookie dough to the prepared 10-inch cast iron skillet. Use your hands or a spatula to press the dough evenly into the bottom of the skillet, spreading it to the edges. Aim for an even thickness for consistent baking. You can create slight indentations or swirls on the surface of the dough if desired for a rustic look.
Step 8: Bake the Skillet Cookie
-
- Bake in Preheated Oven for 20-25 Minutes: Place the skillet with the cookie dough in the preheated oven and bake for 20-25 minutes, or until the edges are golden brown and the center is just set but still slightly gooey. Baking time can vary slightly depending on your oven and the thickness of the cookie dough.
-
- Check for Doneness: To check for doneness, the edges should be nicely golden brown and the center should be set but still slightly soft to the touch. A toothpick inserted into the center might come out with moist crumbs, but not wet batter. The center will continue to set as it cools. Avoid overbaking, as this will result in a dry cookie.
Step 9: Cool and Serve
-
- Let Cool Slightly in Skillet Before Slicing: Remove the skillet from the oven and let the skillet cookie cool slightly in the skillet for about 10-15 minutes before slicing and serving. This allows the cookie to set up a bit and makes it easier to slice. The cookie will be very soft and gooey when hot, but will firm up slightly as it cools.
-
- Slice and Serve Warm: Slice the skillet cookie into wedges directly in the skillet and serve warm. The warm, gooey center and slightly crispy edges are best enjoyed fresh from the oven. You can serve it plain or with your favorite dairy-free ice cream or toppings (see serving suggestions below).
By following these detailed instructions, paying attention to mixing t
Nutrition
- Serving Size: one normal portion
- Calories: 350-400 calories
- Sugar: 25-30g
- Sodium: 200-250mg
- Fat: 20-25g
- Carbohydrates: 40-45g
- Fiber: 1-2g
- Protein: 3-4g
- Cholesterol: 50-60mg


