


Let me tell you, the first time these Gluten-Free Caramel Brownie Cookies came out of my oven, the aroma alone was enough to make my knees weak. I’d been on a quest for the ultimate gluten-free treat that didn’t taste gluten-free, something that combined the fudgy, intense chocolate experience of a brownie with the satisfying chew of a cookie, and then, just to take it over the top, a luscious swirl of gooey caramel. My family, especially my gluten-sensitive daughter, can be tough critics, but one bite into these decadent morsels and their eyes lit up. The rich, dark chocolate, the pockets of melted chocolate chips, the slightly crisp edges giving way to a chewy, brownie-like center, all punctuated by that heavenly, sticky caramel – it was pure bliss. They’ve since become a frequently requested bake, perfect for special occasions, or just when we need a serious chocolate-caramel fix. They are, without a doubt, one of my proudest gluten-free creations.
What Exactly Are Gluten-Free Caramel Brownie Cookies?
Gluten-Free Caramel Brownie Cookies are the ultimate hybrid dessert, a magical fusion that captures the best qualities of three beloved treats: the rich, intense chocolate flavor and fudgy texture of a classic brownie; the convenient, shareable, and slightly chewy form of a cookie; and the sweet, gooey, buttery allure of caramel. All of this is achieved without any gluten-containing flours, making them a dream come true for those with celiac disease, gluten sensitivity, or anyone choosing to follow a gluten-free lifestyle.
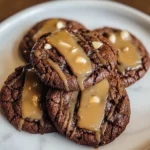
At their core, these cookies start with a deeply chocolatey batter, often using a combination of melted chocolate and cocoa powder for maximum flavor depth, much like a traditional brownie recipe. High-quality gluten-free flour blends are used in place of wheat flour, carefully balanced to mimic the texture and structure wheat flour provides. The dough is typically rich and dense. What sets them apart is the incorporation of caramel – this can be achieved by swirling caramel sauce into the cookie dough before baking, pressing soft caramel candies into the center of each cookie, or even drizzling melted caramel over the baked and cooled cookies. The result is a multi-layered taste experience: an initial hit of intense chocolate, followed by the delightful chewiness of a cookie, and then the surprise of luscious, sweet caramel that melts in your mouth. They are often finished with a sprinkle of flaky sea salt to enhance the chocolate and caramel flavors further.
Why You’ll Fall in Love with This Gluten-Free Caramel Brownie Cookies Recipe
Prepare to be utterly smitten by this Gluten-Free Caramel Brownie Cookies recipe, and here’s exactly why it will become your new obsession:
- Intensely Chocolatey & Fudgy: This isn’t just a chocolate cookie; it’s a brownie in cookie form. Expect a deep, rich chocolate flavor and a wonderfully fudgy, moist interior that will satisfy even the most ardent chocoholic.
- Gooey Caramel Perfection: The pockets or swirls of luscious caramel throughout each cookie add an irresistible layer of sweetness and a delightful textural contrast. It’s the heavenly marriage of chocolate and caramel.
- Surprisingly Gluten-Free: These cookies are so decadent and satisfying, you’d never guess they’re gluten-free. They’re proof that gluten-free baking can be just as delicious (if not more so!) than traditional baking.
- Perfect Texture Combination: You get the slightly crisp edges of a cookie giving way to a soft, chewy, brownie-like center. It’s a textural masterpiece.
- Crowd-Pleasing Elegance: While relatively easy to make, these cookies look and taste incredibly gourmet, making them perfect for impressing guests, gifting, or simply treating yourself.
- Customizable Caramel: Whether you prefer soft caramel candies tucked inside or a beautiful caramel swirl on top, you can adapt the caramel element to your liking.
- Satisfies All Cravings: Got a craving for brownies? Cookies? Caramel? This recipe hits all the right notes in one perfect bite.
- Relatively Simple to Make: Despite their impressive results, the process is straightforward, especially if you use store-bought caramels.
- Flaky Sea Salt Finish: The optional sprinkle of flaky sea salt elevates the chocolate and caramel flavors, adding a sophisticated touch that balances the sweetness.
- A True Treat: These are not your everyday cookies; they are an indulgence, a special treat that feels luxurious and deeply satisfying.
Get ready to experience a gluten-free cookie that will redefine your expectations and leave you reaching for “just one more.”
Gluten-Free Caramel Brownie Cookies: The Complete Recipe
This recipe is designed to deliver maximum fudgy, chocolatey, caramelly goodness, all while being completely gluten-free.
Yields: Approximately 18-24 cookies
Prep time: 25 minutes
Bake time: 12-15 minutes per batch
Chill time (for dough, optional but recommended): 30 minutes
Ingredients:
- For the Brownie Cookies:
- 1 cup (227g or 2 sticks) unsalted butter, cut into pieces
- 4 ounces (113g) unsweetened baking chocolate, chopped
- 2 ounces (57g) semi-sweet or bittersweet chocolate, chopped (can use chocolate chips)
- 1 ½ cups (300g) granulated sugar
- ½ cup (100g) packed light brown sugar
- 4 large eggs, at room temperature
- 1 tablespoon pure vanilla extract
- 1 cup (120-140g, depending on blend) high-quality all-purpose gluten-free flour blend (with xanthan gum included; if not, add 1 teaspoon xanthan gum)
- ½ cup (45g) unsweetened Dutch-process cocoa powder (sifted for best results)
- ½ teaspoon baking powder
- ½ teaspoon salt
- 1 ½ cups (255g) semi-sweet or bittersweet chocolate chips or chunks
- For the Caramel Element:
- Approx. 20-25 soft caramel candies (like Werther’s Original Soft Caramels or similar), unwrapped
- Alternatively: ½ cup thick caramel sauce (store-bought or homemade)
- For Finishing (Optional):
- Flaky sea salt (like Maldon)
Equipment:
- Large saucepan or heatproof bowl for melting chocolate and butter
- Electric mixer (stand mixer with paddle attachment or hand mixer)
- Large mixing bowl
- Whisk
- Spatula
- Baking sheets lined with parchment paper
- Cookie scoop (optional, for uniform cookies)
Instructions: Crafting Your Perfect Gluten-Free Caramel Brownie Cookies
Follow these steps for decadent, chewy, and utterly irresistible cookies:
Step 1: Prepare the Caramels & Melt Chocolate
- Caramels: If using soft caramel candies, you have a couple of options:
- Option A (Stuffing): Cut each caramel candy in half. You’ll press these into the cookie dough.
- Option B (Melting for Swirl – more advanced): If you want to melt them for a swirl, place unwrapped caramels in a small, microwave-safe bowl with 1-2 teaspoons of heavy cream or water. Microwave in 15-20 second intervals, stirring in between, until melted and smooth. Keep warm. (Note: Thick caramel sauce is easier for swirling).
- Melt Chocolate & Butter: In a medium saucepan over low heat (or in a heatproof bowl set over a pan of simmering water – a double boiler), melt the unsalted butter, unsweetened baking chocolate, and the 2 ounces of semi-sweet/bittersweet chocolate. Stir frequently until completely melted and smooth. Remove from heat and let it cool slightly for about 5-10 minutes. You don’t want it hot enough to cook the eggs.
Step 2: Combine Wet Ingredients
- Pour the slightly cooled melted chocolate mixture into the bowl of your stand mixer (or a large mixing bowl if using a hand mixer).
- Add the granulated sugar and light brown sugar. Beat on medium speed until well combined.
- Add the room temperature eggs one at a time, beating well after each addition until the mixture is glossy and smooth.
- Beat in the vanilla extract.
Step 3: Combine Dry Ingredients
- In a separate medium bowl, whisk together the gluten-free flour blend, sifted Dutch-process cocoa powder, baking powder, and salt.
Step 4: Combine Wet and Dry Ingredients
- Gradually add the dry ingredient mixture to the wet ingredient mixture in the mixer bowl. Mix on low speed until just combined. Be careful not to overmix at this stage; mix only until no dry streaks remain. Overmixing can lead to tougher cookies.
- Using a spatula, fold in the 1 ½ cups of chocolate chips or chunks. The dough will be thick and sticky, similar to a brownie batter.
Step 5: Chill Dough (Optional but Recommended)
- Cover the bowl with plastic wrap and refrigerate the dough for at least 30 minutes, or up to 2 hours. Chilling helps the dough firm up, making it easier to handle and preventing the cookies from spreading too much during baking. This step also allows the flavors to meld.
Step 6: Preheat Oven and Prepare Baking Sheets
- Preheat your oven to 350°F (175°C). Line two large baking sheets with parchment paper.
Step 7: Scoop and Add Caramel
- Using a medium cookie scoop (about 1.5-2 tablespoons) or two spoons, drop rounded portions of dough onto the prepared baking sheets, spacing them about 2 inches apart.
- If using halved caramel candies: Gently press a caramel half (or two, if small) into the center of each dough ball, then lightly pinch the dough around it to mostly enclose the caramel. It’s okay if a little peeks out.
- If using caramel sauce/melted caramels for swirling: Drop the cookie dough onto the sheets. Then, drizzle or spoon a small amount (about ½ – 1 teaspoon) of the thick caramel sauce or melted caramel mixture onto each cookie. Use a toothpick or the tip of a knife to gently swirl the caramel into the top of the dough. Don’t over-swirl, or it will just mix in.
Step 8: Bake
- Bake for 12-15 minutes. The edges should be set and slightly crinkly, and the centers should still look a little soft and fudgy (they will continue to set as they cool). For truly fudgy cookies, err on the side of slightly underbaking.
- If you want those characteristic brownie crinkle tops, some bakers find that gently tapping the baking sheet on the counter once or twice midway through baking can help.
Step 9: Cool and Finish
- Remove the baking sheets from the oven. If desired, while the cookies are still hot, sprinkle a little flaky sea salt over each one. This is highly recommended as it enhances the chocolate and caramel flavors beautifully.
- Let the cookies cool on the baking sheets for 5-10 minutes. They will be very soft when they first come out. This resting time helps them firm up enough to be transferred.
- Carefully transfer the cookies to a wire rack to cool completely. The caramel may be very hot, so handle with care.
Enjoy your incredibly decadent Gluten-Free Caramel Brownie Cookies!
Nutrition Facts
- Servings: Approximately 18-24 cookies (depending on size)
- Calories per serving (approximate): 250-350 calories per cookie
Please note: Nutritional information is an estimate and can vary significantly based on specific brands of ingredients used (especially gluten-free flour blends and chocolate), the exact size of the cookies, and the type/amount of caramel used. These are indulgent treats, best enjoyed in moderation as part of a balanced diet.
These cookies are:
- Gluten-Free (ensure all individual ingredients, like chocolate chips and caramels, are certified gluten-free if needed for celiac disease).
- Likely to be higher in sugar and fat due to the nature of brownies, cookies, and caramel – they are a treat!
- A good source of deliciousness and happiness!
For more precise nutritional information, you would need to use a recipe nutrition calculator and input your specific ingredients and quantities.
Preparation Time
Understanding the time commitment helps you plan your baking adventure:
- Active Preparation Time: Approximately 25-30 minutes. This includes melting chocolate, mixing ingredients, preparing caramels, and scooping dough.
- Dough Chilling Time (Optional but Recommended): 30 minutes to 2 hours. This helps with handling and improves texture.
- Baking Time: 12-15 minutes per batch. If you bake in multiple batches, this will extend the overall time.
- Cooling Time: At least 20-30 minutes on the wire rack for them to set properly before enjoying or storing. Caramel will be very hot initially.
Total Time (including optional chilling and one batch baking): Approximately 1.5 to 3 hours, depending on chilling duration.
Time-Saving Tip: You can make the cookie dough a day in advance, cover it well, and refrigerate. Let it sit at room temperature for about 15-20 minutes before scooping if it’s too firm. Unwrapped caramels can also be prepped ahead.
How to Serve Gluten-Free Caramel Brownie Cookies
These decadent cookies are a treat in themselves, but here are some delightful ways to serve and enjoy them:
- Simply As Is:
- Let them cool completely (or enjoy slightly warm if you can’t resist and don’t mind a messier caramel experience!). Their rich flavor and complex texture need no accompaniment.
- With a Glass of Milk:
- The classic pairing! A cold glass of regular milk, almond milk, oat milk, or your favorite plant-based milk perfectly complements the rich chocolate and sweet caramel.
- Alongside Coffee or Tea:
- A warm cup of coffee or tea makes these cookies an ideal afternoon pick-me-up or a delightful end to a casual meal.
- As a Dessert Garnish (Crumble Power!):
- Crumble a cookie over a scoop of vanilla bean or coffee-flavored ice cream for an extra-decadent dessert.
- Use crumbles to top a chocolate mousse or pudding.
- Warm with Ice Cream (The Ultimate Indulgence):
- Gently warm a cookie in the microwave for just 10-15 seconds (careful, caramel gets very hot!).
- Serve immediately with a scoop of high-quality vanilla bean ice cream. A drizzle of extra caramel or chocolate sauce wouldn’t hurt either!
- On a Cookie Platter:
- Their rich, dark appearance makes them a stunning addition to any holiday or special occasion cookie platter. They stand out beautifully among lighter-colored cookies.
- Gift Giving:
- Package them in a pretty box or cellophane bag tied with a ribbon for a thoughtful and delicious homemade gift. Friends and family (especially those who are gluten-free) will adore them.
- Important Note on Temperature:
- If the caramel was stuffed inside, be cautious when biting into a warm cookie, as the caramel can be extremely hot. It’s often best to let them cool to a manageable temperature or fully before indulging.
No matter how you choose to serve them, these Gluten-Free Caramel Brownie Cookies are sure to be a hit!
Additional Tips for the Best Gluten-Free Caramel Brownie Cookies
- Choose Your Gluten-Free Flour Blend Wisely:
- Use a high-quality “cup-for-cup” or “measure-for-measure” all-purpose gluten-free flour blend that already contains xanthan gum. Brands like Bob’s Red Mill 1-to-1 Baking Flour, King Arthur Gluten-Free Measure for Measure Flour, or Cup4Cup often yield good results. If your blend doesn’t have xanthan gum, you’ll need to add it (typically 1 teaspoon for this amount of flour) as it’s crucial for structure and texture in gluten-free baking.
- Don’t Overbake – Embrace the Fudginess!
- The key to a true brownie-like texture is to avoid overbaking. Pull the cookies from the oven when the edges are set and the centers still look slightly underdone and fudgy. They will continue to cook and firm up as they cool on the baking sheet. Overbaking will result in drier, more cake-like cookies.
- Quality Chocolate Makes a Difference:
- Since chocolate is the star flavor, using good quality baking chocolate and cocoa powder will significantly impact the final taste. Dutch-process cocoa powder provides a darker color and smoother, less acidic chocolate flavor than natural cocoa powder. For the chocolate chips/chunks, use a brand you enjoy eating on its own.
- Room Temperature Eggs are Key:
- Using room temperature eggs helps them incorporate more fully into the batter, creating a smoother, more emulsified mixture. This contributes to a better overall texture in the final cookies. To quickly bring eggs to room temperature, place them in a bowl of warm (not hot) water for 5-10 minutes.
- Handle Caramel with Care (and Creativity):
- If stuffing with caramel candies, ensure they are mostly enclosed by the dough to prevent too much leakage and burning on the baking sheet (though some ooze is desirable!). If using caramel sauce, choose a thick sauce; thin sauces might just absorb into the cookie. If your caramel sauce is too thin, you can try to thicken it by simmering it gently on the stove. Don’t be afraid to experiment with different types of soft caramels or even salted caramel for an extra flavor dimension.
FAQ: Your Gluten-Free Caramel Brownie Cookies Questions Answered
Q1: Can I use a different type of chocolate for these cookies?
A: Yes, you can customize the chocolate to your preference. The recipe calls for unsweetened baking chocolate (for intense brownie flavor) and semi-sweet/bittersweet (for balance and chips). You could use all semi-sweet for a slightly less intense but sweeter cookie, or incorporate milk chocolate chips if you prefer, though this will make the cookies sweeter overall. For the richest flavor, stick to darker chocolates in the base.
Q2: My caramel keeps melting out of the cookies and burning. What can I do?
A: This can happen if the caramel isn’t well enclosed or if it’s a particularly runny type.
* Enclose Better: Make sure the dough is pinched well around the caramel pieces.
* Chill Dough: Chilled dough spreads less, potentially keeping the caramel contained better.
* Use Firmer Caramels: Some soft caramels hold their shape better during baking.
* Freeze Caramel Pieces: Briefly freezing the caramel pieces before pressing them into the dough can help them melt more slowly.
* Alternative: Consider swirling a thick caramel sauce on top of the dough just before baking, or drizzling melted caramel over the cooled cookies to avoid this issue altogether.
Q3: How should I store these Gluten-Free Caramel Brownie Cookies?
A: Store the completely cooled cookies in an airtight container at room temperature for up to 3-4 days. If the caramel is very gooey, you might want to place parchment paper between layers to prevent sticking. For longer storage, you can freeze them for up to 2-3 months. Thaw at room temperature.
Q4: Can I make these cookies dairy-free as well?
A: Yes, with some careful substitutions, you can make them dairy-free:
* Butter: Replace the unsalted butter with a good quality dairy-free baking stick (like Miyoko’s Kitchen Cultured Vegan Butter or Earth Balance Vegan Buttery Sticks) in the same amount.
* Chocolate: Ensure all your chocolate (baking chocolate, chocolate chips) is dairy-free. Many dark and semi-sweet chocolates are naturally dairy-free, but always check labels.
* Caramel: This is the trickiest part. You’ll need to find or make a dairy-free caramel. Look for vegan caramel candies or make a homemade caramel sauce using coconut cream and vegan butter.
The texture might be slightly different, but they should still be delicious.
Q5: Why are my gluten-free cookies dry or crumbly?
A: Dryness or crumbliness in gluten-free baking can be due to several factors:
* Flour Blend: Not all GF flour blends are created equal. Some are drier than others. Ensure you’re using a reputable blend.
* Measuring Flour: Make sure you’re measuring your gluten-free flour correctly. The “scoop and level” method is generally best: fluff the flour, lightly spoon it into your measuring cup, then level off the excess with a straight edge. Avoid packing it down.
* Overbaking: This is a common culprit. Gluten-free baked goods can dry out quickly if overbaked.
* Not Enough Fat or Moisture: This recipe is quite rich, but ensure accurate measurements.
* Missing Xanthan Gum: If your flour blend doesn’t contain it and you forget to add it, the cookies will lack structure and can be crumbly.
Gluten Free Caramel Brownie Cookies recipe
Ingredients
-
- For the Brownie Cookies:
-
- 1 cup (227g or 2 sticks) unsalted butter, cut into pieces
-
- 4 ounces (113g) unsweetened baking chocolate, chopped
-
- 2 ounces (57g) semi-sweet or bittersweet chocolate, chopped (can use chocolate chips)
-
- 1 ½ cups (300g) granulated sugar
-
- ½ cup (100g) packed light brown sugar
-
- 4 large eggs, at room temperature
-
- 1 tablespoon pure vanilla extract
-
- 1 cup (120-140g, depending on blend) high-quality all-purpose gluten-free flour blend (with xanthan gum included; if not, add 1 teaspoon xanthan gum)
-
- ½ cup (45g) unsweetened Dutch-process cocoa powder (sifted for best results)
-
- ½ teaspoon baking powder
-
- ½ teaspoon salt
-
- 1 ½ cups (255g) semi-sweet or bittersweet chocolate chips or chunks
-
- For the Brownie Cookies:
-
- For the Caramel Element:
-
- Approx. 20-25 soft caramel candies (like Werther’s Original Soft Caramels or similar), unwrapped
-
- Alternatively: ½ cup thick caramel sauce (store-bought or homemade)
-
- For the Caramel Element:
-
- For Finishing (Optional):
-
- Flaky sea salt (like Maldon)
-
- For Finishing (Optional):
Instructions
Step 1: Prepare the Caramels & Melt Chocolate
-
- Caramels: If using soft caramel candies, you have a couple of options:
-
- Option A (Stuffing): Cut each caramel candy in half. You’ll press these into the cookie dough.
-
- Option B (Melting for Swirl – more advanced): If you want to melt them for a swirl, place unwrapped caramels in a small, microwave-safe bowl with 1-2 teaspoons of heavy cream or water. Microwave in 15-20 second intervals, stirring in between, until melted and smooth. Keep warm. (Note: Thick caramel sauce is easier for swirling).
-
- Caramels: If using soft caramel candies, you have a couple of options:
-
- Melt Chocolate & Butter: In a medium saucepan over low heat (or in a heatproof bowl set over a pan of simmering water – a double boiler), melt the unsalted butter, unsweetened baking chocolate, and the 2 ounces of semi-sweet/bittersweet chocolate. Stir frequently until completely melted and smooth. Remove from heat and let it cool slightly for about 5-10 minutes. You don’t want it hot enough to cook the eggs.
Step 2: Combine Wet Ingredients
-
- Pour the slightly cooled melted chocolate mixture into the bowl of your stand mixer (or a large mixing bowl if using a hand mixer).
-
- Add the granulated sugar and light brown sugar. Beat on medium speed until well combined.
-
- Add the room temperature eggs one at a time, beating well after each addition until the mixture is glossy and smooth.
-
- Beat in the vanilla extract.
Step 3: Combine Dry Ingredients
-
- In a separate medium bowl, whisk together the gluten-free flour blend, sifted Dutch-process cocoa powder, baking powder, and salt.
Step 4: Combine Wet and Dry Ingredients
-
- Gradually add the dry ingredient mixture to the wet ingredient mixture in the mixer bowl. Mix on low speed until just combined. Be careful not to overmix at this stage; mix only until no dry streaks remain. Overmixing can lead to tougher cookies.
-
- Using a spatula, fold in the 1 ½ cups of chocolate chips or chunks. The dough will be thick and sticky, similar to a brownie batter.
Step 5: Chill Dough (Optional but Recommended)
-
- Cover the bowl with plastic wrap and refrigerate the dough for at least 30 minutes, or up to 2 hours. Chilling helps the dough firm up, making it easier to handle and preventing the cookies from spreading too much during baking. This step also allows the flavors to meld.
Step 6: Preheat Oven and Prepare Baking Sheets
-
- Preheat your oven to 350°F (175°C). Line two large baking sheets with parchment paper.
Step 7: Scoop and Add Caramel
-
- Using a medium cookie scoop (about 1.5-2 tablespoons) or two spoons, drop rounded portions of dough onto the prepared baking sheets, spacing them about 2 inches apart.
-
- If using halved caramel candies: Gently press a caramel half (or two, if small) into the center of each dough ball, then lightly pinch the dough around it to mostly enclose the caramel. It’s okay if a little peeks out.
-
- If using caramel sauce/melted caramels for swirling: Drop the cookie dough onto the sheets. Then, drizzle or spoon a small amount (about ½ – 1 teaspoon) of the thick caramel sauce or melted caramel mixture onto each cookie. Use a toothpick or the tip of a knife to gently swirl the caramel into the top of the dough. Don’t over-swirl, or it will just mix in.
Step 8: Bake
-
- Bake for 12-15 minutes. The edges should be set and slightly crinkly, and the centers should still look a little soft and fudgy (they will continue to set as they cool). For truly fudgy cookies, err on the side of slightly underbaking.
-
- If you want those characteristic brownie crinkle tops, some bakers find that gently tapping the baking sheet on the counter once or twice midway through baking can help.
Step 9: Cool and Finish
-
- Remove the baking sheets from the oven. If desired, while the cookies are still hot, sprinkle a little flaky sea salt over each one. This is highly recommended as it enhances the chocolate and caramel flavors beautifully.
-
- Let the cookies cool on the baking sheets for 5-10 minutes. They will be very soft when they first come out. This resting time helps them firm up enough to be transferred.
-
- Carefully transfer the cookies to a wire rack to cool completely. The caramel may be very hot, so handle with care.
Nutrition
- Serving Size: one normal portion
- Calories: 250-350


